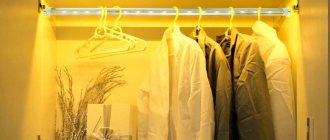
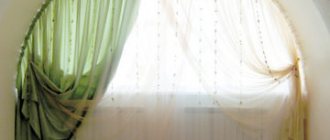
Sliding wardrobe with translucent doors and internal lighting in the interior of the room
Over the years, sliding wardrobes have confirmed the convenience and rationality of their use and have taken their rightful place in almost every apartment. However, the depths of closets where clothes are folded or hung often require additional lighting in order to find the right thing, or, conversely, without disturbing the peace of the household, to highlight only one shelf or section. The most convenient way to do this is to use backlighting. In this case, it is necessary to clearly understand the purpose for which it is installed.
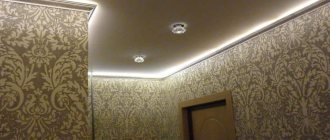
Black and white wardrobe with a figured side shelf and top lighting
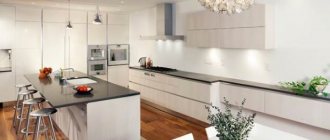
Light wardrobe with additional lighting in the interior of the dining-living room
Backlight selection
Types of spotlights
Incandescent lamps are absolutely not suitable for lighting in a furniture cabinet. The efficiency of such light bulbs is extremely low; a large percentage of energy is spent on thermal radiation. This leads to an increased fire hazard, fading of the fabric, as well as damage to the material from which the furniture is made.
To illuminate the interior of the cabinet, the following types of spotlights are recommended:
Halogen lamps
They have rather low productivity and service life. The advantages include low cost and power supply from a low-voltage network.
Fluorescent lamps
Their performance characteristics are better than those of halogen ones, but there is a significant drawback - the release of mercury vapor in the gas mixture.
LED strips
They already have a number of small LEDs built into them. They come in a variety of colors, which is a plus for mood lighting.
LED bulbs
Ten times more powerful than halogen. Service life - up to 30 thousand hours. The disadvantages include the high cost.
LED backlight
Let's talk more about LED backlighting. It is divided into separate LED spotlights and LED strips, including RGB - capable of changing their color depending on the mode selected on the control panel. Tapes are much more convenient from both a decorative and operational point of view.
They are quite flexible and easy to install by hand. However, there are also difficulties. Firstly, for the LED strip you need to buy an additional power supply separately. Secondly, the tape either must initially be equipped with protection against dirt, or in addition to it you will have to buy a protective corner that prevents contamination. If these measures are not followed, the tape will quickly fail. And the complete set is quite expensive.
Cabinet lighting from Ikea
The innovative lighting system from Ikea stands out. NORFFLI LED lighting is equipped with a sensor, thanks to which the light turns on when the cabinet door is opened and turns off when it is closed. A micro switch allows you to change the automatic mode to normal - then the light is on constantly or completely off.
Benefits of installing closet lighting
Cabinet lighting performs two functions at once: practical and decorative. Therefore, backlit products have significant advantages:
- illumination of the filling and contents of the cabinet allows you to quickly find the things you need in it;
- lighting in the area in front of the mirror increases the usability of the furniture;
- lighting elements allow you to diversify the design of furniture and make the interior of the room interesting and unique.
<
>
The lighting can be installed in any type of cabinet: traditional, wardrobe, kitchen furniture, bathroom cabinets and even shoe racks.
Preparation for installation
Technical requirements
When installing the lighting yourself, you must comply with the requirements to ensure comfortable and safe use of the equipment.
Lighting for a furniture cabinet must comply with the following standards:
- the degree of illumination for the hallway is not lower than 50 Lux, for the dressing room - not lower than 75 Lux, for the kitchen - not lower than 150 Lux;
- since there is a possibility of direct contact during operation of the backlight, a reduced voltage should be used to power it;
- wires must be connected to the lighting system in one of the following ways: crimping, soldering, terminal connection;
- if the backlight is powered from a standard network with a voltage of 220 V, the network must be protected by an RCD, which will ensure that the lighting is turned off if the insulation is broken;
- The lighting should not be too bright and comfortable enough for the eyes.
Cabinet lighting controls
When choosing a backlight, pay attention to the control method.
It could be:
- control system using a switch. This is the easiest way. In order to turn on the lighting you must use the button. But turning the light on and off manually all the time is not always convenient, especially if the cabinet is used frequently;
- automatic control: the light turns on automatically when any of the doors is opened or at the moment when a person approaches the cabinet, and turns off when closed. This method is implemented using motion sensors.
To control the characteristics of the backlight - its brightness, intensity and color, a special controller or remote control is used.
Choosing a mounting location
What kind of LED lighting would you install in your closet?
ExternalInternal
The installation result directly depends on the correct choice of location for installing the lighting system. It is important to consider the type of room (hallway, kitchen, wardrobe, bedroom), type of furniture (dressing room or kitchen). Also, depending on the location of the devices, cabinet lighting is divided into internal and external.
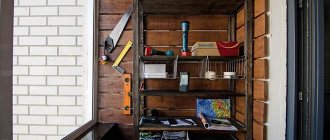
External lighting
External lighting is provided by embedding lamps in furniture elements. Soffits can be placed on the doors and open shelves of the cabinet, as well as on the protruding canopy above the doors (if there is one). Soffits can be built not only into cabinet elements, but also on the surface above and below it.
Before installation, you need to check how this lighting will affect the appearance of the furniture. In the wrong place, open lighting can ruin the overall impression of the cabinet design.
Interior lighting
There are several principles from which to proceed when choosing the location of the backlight:
- On the top surface of the cabinet in the middle. Suitable for large internal compartments.
- On the front edge of the shelves. Used for multi-tiered cabinet sections. Such equipment will ensure uniform illumination of all shelves.
- On the rear top edge of the shelves. Suitable for small compartments, as it provides sufficient lighting and visually expands the space.
- On the side walls. Suitable for both low and high sections.
Expert opinion
Korzhavin Daniil Dmitrievich
Designer of stylish home furniture
The lighting should be located so that doors and drawers do not touch lamps, switches or wires. In addition, the lighting system should not interfere with the free use of the interior space of the cabinet.
What to especially pay attention to when choosing lamps and fixtures
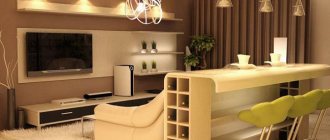
Sliding wardrobe with built-in lighting in the interior of the room
When choosing lighting fixtures, you need to take into account a number of features that will help you choose the “right” one, exactly the one that will decorate your apartment.
- It is important to take into account the characteristics of the room where they will be installed. If the interior is already decorated, then fixtures and lamps are selected taking into account the existing design so that they fit organically into it.
- Do not forget to take into account the area and illumination of the room: for small rooms, luxurious huge chandeliers or cascades of lamps hanging from the ceiling are unacceptable: they will visually make the room even smaller. A modest small lamp will look just as ridiculous in a huge room with high ceilings.
- Particular attention should be paid to the selection of lamps:
- their power;
- energy saving opportunities;
- brightness;
- color scheme.
- It is important to determine the price of the purchased product by establishing a certain “price corridor” within which the choice of lighting device will take place.
A variety of furniture lamps and fixtures for every taste for any interior
When choosing a lamp or lamp, you should proceed from the possibilities of the family budget, rationality, quality and aesthetics.
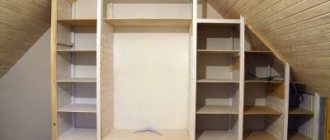
Convenient lighting of internal shelves using LED technology
Inventory
To install a lighting system, you must first draw up a power supply diagram for the devices. Batteries, lamps and switches should be marked on it. It is most convenient to make a drawing on the cabinet diagram that comes with it. The next step is to transfer the markings to the cabinet frame, marking the places where the wires will be laid and where the lighting fixtures will be installed.
To carry out installation work, the following basic equipment is required:
- LED strips or individual spotlights;
- cables (the determining factor is power consumption);
- 12 V power supply;
- controller (when connecting a color RGB strip);
- light box (for completing closed LED strips);
- flux, solder and terminal connectors (for making electrical connections);
- switch or control panel (for manual control of the backlight);
- motion sensor (to create “smart” lighting with automated on/off).
Also during installation you will need the following tools:
- drill with attachments;
- screwdriver or screwdriver;
- construction stapler;
- stationery knife;
- soldering iron;
- pliers;
- wire cutters;
- scissors.
Types of lighting: pros and cons of options
Halogen lamps for furniture
Battery-powered LED light with motion sensor for closet
Not all lamps are suitable for interior lighting of furniture. For ease of use, preference is given to two types of lamps: overhead and built-in. At the same time, halogen and LED lighting fixtures have become the most popular.
| Type of lighting | pros | Minuses |
| Halogen | Increased light output. Evenly distributed light that maintains brightness throughout the entire life of the lighting fixture. Compact design. High degree of security. | They get very hot and are a fire hazard. Strength is low. React to voltage changes. The service life is relatively short. |
| Luminescent | They don't heat up. High light output. Long service life. Brightness that does not blind the eyes. Various color composition. | Limited power with significant size. Difficulty connecting. Dependence on external temperature. |
| LED | Slight heating. Energy saving. Durability. Fire and environmental safety. | Relatively expensive. They do not provide scattered light. Requires expensive switching power supplies. |
| LED Strip Light | Any configuration is possible. Easy to install. High reliability. Operates on low voltage Safe. | Poor color rendering ability. The need to connect power supplies. |
Installation step by step
After all the preparations, you can begin installing the lighting. We will analyze cases with individual spotlights and LED strips separately, since each type of lighting has its own characteristics. If you purchased a ready-made lighting system, for example NORFFLI, installation is carried out according to the instructions included with the product.
Installation of individual spotlights
The entire installation consists of the following steps:
- Carefully drill holes at the installation points. To avoid damaging the chipboard, advance the crown slowly and without jerking. Before doing this, fix the center with a drill.
- Mount the switch on the cabinet as high as is comfortable for you. If there are children in the house, it is necessary to place the switch at a height inaccessible to them.
- Strip about 1 - 2 cm of the cable on both sides to connect the equipment.
- The wires must be inserted into the terminal blocks of each lamp, as well as the switch, and then secure them. You also need to connect a converter if you have a step-down power supply. If there are no pads, you can solder the wires with a soldering iron.
- The next step is to turn off the mains voltage and connect the lighting to the apartment circuit.
- Insulate all connections. Upon completion of work, make sure that the cable is intact around the perimeter.
- Check the functionality of the lighting equipment.
LED strip installation
The tape is much easier to install.
However, installation is not carried out in one stage. If you want to integrate an LED strip into a cabinet, here is a step-by-step action plan:
- Cut the piece of tape to the length you need (there are special marks on the strip for this).
- A plastic strip is needed under the tape. You can attach it by gluing it to liquid nails or double-sided tape.
- Drill a hole in the cabinet wall for the cable.
- From the input, route the wires to the location where the tape is installed. For this purpose, it is best to choose a corner of the cabinet. Install cable ducts that will hide the wire.
- Stick the LED strip on, then connect it to the cables and switch.
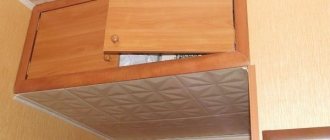
Installation locations of lamps in the closet
It is important to decide on the location where the lighting will be located. There are many options for its installation, depending on the purpose of the installation:
- on the doors. Such lighting performs more of a decorative function than a practical one. It can be used not only in a new cabinet - installing lighting on the doors of old furniture can significantly refresh it. As a rule, an LED strip is installed along the contour of the door;
- on the shelves of the closet. Lamps on the shelves illuminate their contents. These can be lamps of any type, except halogen ones - they get very hot and can damage things stored on the shelf;
- on the tramp rod. This solution allows you to illuminate the most spacious and deep compartment of the cabinet. It is made in the form of one long fluorescent lamp or LED strip;
- on the cabinet cornice - the protruding upper part of the product. This is a universal option, in which both the space in front of the cabinet and its internal contents are moderately illuminated. Traditionally, cornice lighting is done using several spotlights;
- in the lower base of the cabinet - used to illuminate the lower compartments, such lighting is especially relevant for shoe racks.
Illumination installed along the inner contour of the cabinet is gaining popularity - it allows you to illuminate almost the entire depth of the furniture.
Some tips
Three main tips when installing LED lighting in a cabinet:
- We recommend insulating exposed contacts with electrical tape or heat shrink tubing, otherwise there is a risk of fire.
- Do not confuse the plus and minus tapes. They are signed.
- Choose high quality materials.[/info-box] Trusted companies: OSRAM, CREE, GENILED, SVETECO, JOLIET TECHNOLOGY.
What you will need
Installing lighting in a cabinet is simple, but there are a number of important nuances.
First, let's prepare the minimal materials:
- LED strips (take only with adhesive surface).
- Connector or connectors (or soldering iron with solder for contacts).
- Controller with remote control (or dimmer for single-color LED strip).
- Plug with cord.
- Aluminum strip (for heat dissipation).
Working with glass
To make your own LED strip lighting, you must first build glass shelves. Of course, you can always buy ready-made products, but they will not always fit your room in size or style. The solution to this situation would be to manufacture products to order. But it will be quite expensive than if you did everything yourself. Therefore, it is best to make a shelf with your own hands so that you are satisfied with everything. To work with glass you need the following set of tools:
- oil glass cutter It must be of good quality;
- ruler;
- sander It is better to use a tape type device. In this case, the grain size for the working skin should correspond to the value of 120 units. Making an incision
Before you start working with glass, if you have not encountered such manipulations before, it is better to practice. This is due to the fact that the cut must be made the first time. If you run the tool over the cut again, you can easily scratch the glass.
After the cut has been made, the glass should simply be broken along the intended line. In addition to the correct cut, the stage of processing the sections is also important. It will give the glass a decorative and beautiful look.
Note! Processing of cuts is necessary for the further safe use of glass products in the house. If you do not do this, you can very easily cut yourself on the sharp edge.
Grinding the cut
So, glass processing involves the following steps:
- incision;
- breaking glass into pieces along the cut line;
- grinding the cut using a grinding machine;
- If you don’t have a grinding machine, you can process the cut yourself. But this one will take much longer;
- During grinding, it is necessary to wet the surface being treated with water. This must be done to prevent microscopic pieces of glass, which are very harmful to human health, from spreading in the air.
Perform the manipulations described above for all the glass, and you will get beautiful shelves that will need to be attached to the permanent location.