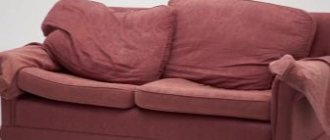
Modern sofas are full of sophistication and are of amazing quality. They may not even have additional fittings that are necessary for human convenience. Designers exclude it from projects to make them original. An example would be armrests for a sofa. In this case, you need to think about how to make them yourself. They will also need to be done if there is an old piece of furniture in the house on which they have become unusable quite a long time ago.
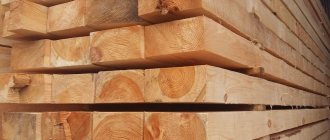
The main material for the production of armrests is wood.
It’s worth talking in more detail about how to make armrests for a sofa with your own hands. There are many of them. First, you need to decide on a specific model in order to make armrests for the sofa that will fit perfectly into the interior.
Assembling the sofa armrest
Let's start with the usual parts - elbows.
Dimensions of the armrest: length – 900mm, width – 200mm, height – 550mm (600mm with legs). If you want to make an armrest with a shelf, then first take a look at this project. But please note that there are other dimensions and they need to be changed.
We assemble the armrest in accordance with the drawings. In the drawings, I did not label the dimensions of the parts so as not to clutter them up. Our list is small, it is difficult to confuse the details.
List of parts for the 1st(!) armrest. All dimensions are in millimeters.
- Chipboard : 160Х875 – 2 pieces
- 480Х875 – 1 piece
- 300Х775 – 1 piece
- 160Х510 – 2 pieces
- 875 – 2pcs
- 510Х880 – 1 piece
- 900Х200 – 1 piece
We take from the list the largest chipboard part and the two longest beams. The arrows in the drawing show the directions for tightening the screws. Please note that the screw rotates from the chipboard into the timber, and not the other way around. I recommend using 4X45 screws. You need to create a hole for the screw using a 3mm drill. If you use wood screws, then drilling will not be necessary. The step of attaching the chipboard to the beam (the distance between the screws) is at least 20 cm. Thus, screw four screws into each block in the upper figure in the direction of the arrow.
We screw two screws into the end of the beam. Since the screw is screwed into the end much easier, you only need to drill a hole for it to one-half the length, or with the narrowest drill.
The next step is to nail the fiberboard. We use 2X25 nails in increments of 10-15cm. If you are a fan of creating something that lasts forever, you can use wood glue in addition to nails. Don't forget to nail the fiberboard to the central beam (it is shown by the arrow).
To make it clearer for you, in this drawing I have labeled the sides of the elbowrest. We screw the chipboard overlay well, aligning it with the back and bottom edges. We use 35mm screws. Because We have a block running along the bottom edge; we screw it to it with longer screws.
The armrest is assembled, all that remains is to cover it with foam rubber. Everything here should be clear from the drawings. Before gluing the foam rubber, slightly smooth out the sharp corners and edges on the upper part of the armrest with a plane or a rough file. Please note that we do not glue foam rubber to the back wall of the armrest; you can simply glue a layer of batting there. I leave the choice of glue for foam rubber up to you. I myself use Tapicer glue, it is a professional glue and, as far as I understand, it is not sold in containers of less than 15 kg. If you can get hold of this kind of glue or its analogues somewhere, that’s great. Previously, almost everyone used glue88 for foam rubber. There are also special spray adhesives in cans. You can buy Titan glue at a hardware store; it is used for gluing ceiling tiles. I tested different adhesives for their ability to bond foam. You can read about it here: kley_dlja_porolona.html
For the sofa you need to make two similar (mirror) armrests. All! The elbows are ready for upholstery.
You can leave your reviews and questions in the Guest Book
Elbows for the sofa: making your own
Modern sofas are full of sophistication and classy quality. They may not even have additional fittings that are needed for human convenience. Designers exclude it from projects to make them unique. An example would be armrests for a sofa. In this case, you need to think about how to make them without the help of others. It will also be necessary to create them in this case, if the house has an old piece of furniture on which they have already fallen into disrepair for quite some time.
The main material for the production of elbows is wood.
It’s worth talking most carefully about how to make armrests for a sofa with your own hands. There are many of them. First, you should decide on a specific model in order to make armrests for the sofa that will perfectly fit into the interior.
What is a sofa armrest pad?
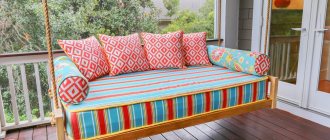
Armrest pads are portable tables in the form of shelves that fit onto the armrest of a chair or sofa. This allows you to create a surface for glasses, cups, glasses and plates, as well as other small items that need to be kept at hand.
These accessories fit perfectly into the interior, and most importantly, significantly increase the level of comfort.
These devices are especially popular for living rooms that have a home theater, as they allow quick access to drinks and snacks. The pads can be equipped with pockets in which it is convenient to store small things like a book or remote control, so as not to waste time looking for them. The product can also be equipped with a small table lamp, creating a cozy place for reading or writing.
One of the advantages of sofa covers and tables is that they protect furniture surfaces from all kinds of dirt, accidentally spilled drinks and dropped snacks.
Choosing the type of elbow pads and material for them
The modern construction and furniture market provides a large number of different materials that allow even the most daring ideas to be realized. Obviously, traditional options are always in fashion. This can be said about elbows, which are made of wood. This particular material has long been considered the main one in furniture production. Sofa armrests are no exception. The tree may not necessarily be used in its own specific form. You can use derivatives from it.
Tools and materials
Tools for assembling sofa armrests: screwdriver, hammer, measuring tools.
Let’s look at how to make armrests for a sofa with your own hands from wood, so when choosing a material you definitely need to purchase the following:
- wood blocks;
- boards;
- varnish;
- screws and screwdriver;
- measuring tool.
All this can be purchased without any special problems at any hardware store. Now you can actually start working.
Schemes and drawings for self-production
Before you start making the lining, you should draw up a diagram of the future product. It is necessary to indicate all the elements, their sizes, locations, order and methods of connection. In general, the scheme will include:
- a board equal in width to the armrest;
- a board equal in height to the armrest;
- a board specifying the height of the additional pocket (if available);
- a board that defines the width of the pocket and serves as its bottom;
- a board limiting the pocket on the second side.
A very comfortable wooden sofa table - a shelf that easily fits on the armrest of a sofa/chair.
Note! It is convenient to calculate the size of the board based on the contents that you plan to store, for example, a laptop. In this case, you need to add five centimeters to the width of the laptop.
DIY armrests for a sofa: individuality
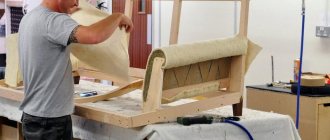
So, wooden elbows are made using a fairly standard technology. Obviously, work must begin with preparing the material for the upcoming manipulations with it. If there are old armrests, then they need to be dismantled. A screwdriver is also used for this. Screws can be removed using any method, but it must be gentle. The main thing is not to destroy the sofa system itself. This is the only way to perfectly install the latest elbow rests.
Scheme of the elbow with dimensions.
After dismantling is completed, you can begin measuring work. It is very important not to make mistakes in order to get truly high-quality furniture elements. You can use a ruler and pencil to measure. If the dimensions are impressive, then you can use a tape measure. To get the most accurate dimensions, you can use old elbows that were previously dismantled.
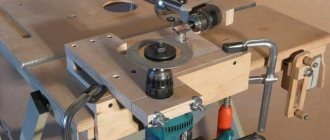
When all the preparatory work is completed, you can begin sawing the material. For these purposes, it is best to use an electronic jigsaw. But it cannot be used all the time, because the thickness of the boards is not the same everywhere. In some cases you will have to use the rest of your equipment. It could be a regular saw. Next, it is imperative to polish all the details. For this purpose, grinding machines of various classes are used.
You can also use a grinder on which a grinding wheel will be placed. You can use sandpaper for the final step.
Cutting the boards is done using jigsaws.
Now you can move on to the main step of the work - assembling the finished product. This can only be done after all the holes in the wood have been made in advance. To do this, take a drill with a drill of the appropriate diameter and drill it. This measure is necessary because preliminary making of holes will help to avoid unexpected destruction of the material during the assembly process.
By the way, you can proceed to them further.
All elements are connected into a single whole using screws.
It is important to use special plastic linings. They will perfectly hide all the imperfections of the material, as well as traces of work. They can be purchased at almost all furniture stores.
Assembly process
Varnish is applied to wooden surfaces in 2 layers.
Assembly is extremely fast. All pre-prepared holes are adjusted to each other, and then assembly takes place using self-tapping screws. The main thing is that all structural elements are firmly installed in place. This is the only opportunity to get a truly high-quality connection. After the assembly is completed, you can begin to coat the material with varnish.
Related article: Lighting for a private home - 100 photo examples of the ideal combination
The surface should be made as smooth as possible for this procedure. The varnish is applied in two layers. The first one must be pre-dried before the other one is laid on it. You can apply the varnish using a paint brush. If desired, the armrests can be additionally decorated with painting or wood carvings. This can bring the interior of almost any room to life as much as possible.
Everything should look as neat and natural as possible. If you can do this, then the job is done perfectly.
Summarizing
So, the work is done, which means we can sum up its results. The process of creating armrests for a sofa takes a limited amount of time. Everything can be done in a short time. Naturally, you can go to a furniture store and buy the latest sofa, but this requires a lot of money. You can simply remove the old elbow rests and install the newest ones in their space. This will significantly transform the interior of any room.
When working with wood, it is very important that the dry part is used. It does not have to have too much humidity, because this will cause it to swell and then dry out. The entire system may be damaged. The varnish can also be applied with a roller, but you should do it as carefully as possible, because the armrests are already installed on the sofa.
If they were not installed previously, you can even use a spray gun. By the way, it is not at all necessary to coat the surface with varnish. You can also use paint.
Decoration
You can decorate the finished case with the following things:
- frills;
- bows;
- ribbons;
- stripes;
- applique.
It is appropriate to decorate the armrests with a decorative cord. And to focus attention on the lower part of the product, it is optimal to use a wide braid.
Covers can be used not only to preserve the newness of purchased furniture, but also to enhance old ones.
{Instructions}
1. First you need to decide on the width and height of the future elbow. Also take into account the width of the sofa armrest so that the shelf-armrest sits tightly and does not dangle. In my case it is 250 mm and 80 mm.
Dimensions of all parts in mm:
- 250x120x25 - counter on the sofa side
- 250x130x25 - table top
- 250x220x25 - long stand
- 250x120x25 - lower tabletop
- 250x100x25 - rack from the outside
Make the width of the upper and lower tabletops taking into account the width of bottles, mugs, and glasses.
2. File all the elements according to dimensions in pt 1.
3. Next, all elements must be fastened to dowels using transfer centers. If they are not there, you can simply use dowels with the color of one of the sides.
The accuracy of the alignment of parts during assembly will depend on the accuracy of the markings. Even if you make a mistake by a fraction of a mm, it will be noticeable.
4. We assemble the entire system on dowels without using glue for now. If all the elements fit perfectly, we glue them together; if not, we need to make new holes for dowels in problem areas.
5. Sand all the elements with an eccentric sander using paper with a grain size of 150-180. The smallest abrasive should not be used, because the oil will not adhere well to a perfectly polished surface.
6. Before gluing, all internal joints must be protected with masking tape or similar material to prevent the glue from being squeezed out onto the surface of the wood. Otherwise, you will have to re-grind in inaccessible places.
We glue all the elements together using clamps and leave the glue to set for 10-20 minutes. Remove the masking tape.
7. After 2-3 hours (but better the next day), remove the clamps, remove excess glue and sand the countertop and other open elements again. 8. Remove dust from the surface of the shelf and cover with oil. After 12-24 hours you can wax and polish.
Types of pads and stands
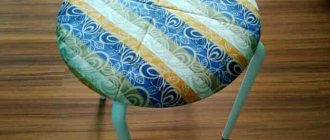
Simple cup cover
The most common option is a simple rigid table. It is not distinguished by its original form and is rarely decorated, being a minimalist frame. For this reason, such models are the most durable and stable. This is also the best option for drinks and food, since the surface is not only practical, but also solid, which allows you to reliably protect the upholstery.
The products are removable, which makes it possible to change their location or remove them altogether when the sofa will be used as a sleeping place.
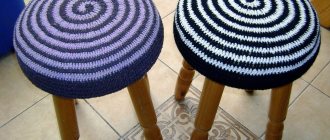
Wooden armrest pad
Wood is the most popular material for making overlays. Particular attention should be paid to products made according to the mat principle. They look like a set of movably connected boards that protect the upholstery and do not spoil the appearance of the sofa.
An abundance of interesting design solutions will allow the buyer to choose exactly what he needs.
Note! When choosing such a model, you should carefully consider the width of the armrest, since it determines the size of the space that can be used as a stand.
Mats are well suited for soft rounded armrests, decorating them and protecting them from dust. At the same time, for sofas with elegant armrests, this model is not optimal, since it hides most of them.
Among the pads for armrests, it is especially worth highlighting those made of wood, which are made according to the mat principle.
It should be taken into account that particles of food and drinks easily pass between the boards of the lining, so you should not use the product as a table for eating. The advantages of the models include a wide range of colors and styles, as well as low cost. Such products are compact and take up little space when stored.
A set of planks can be movably connected, resulting in an excellent solution that will not spoil the overall appearance of the sofa.
Side table
A side table on the armrest of a sofa is a more compact alternative to a coffee or coffee table and allows you to more rationally organize space in a small apartment. It is used as a tray, a stand for gadgets or a place for creativity and writing. Some models have the ability to adjust the height of the table, which is especially convenient when working on a laptop.
Stand tables stand out for their space-saving benefits.
A tray on spacers can be considered a type of side table. It fits onto an armrest of any width and allows you to keep a book or a cup of tea at hand. To avoid spilling drinks on furniture, trays are equipped with high sides.
It is important to take into account the shape and size of the armrests, the materials of the sofa upholstery and the dimensions of the purchased addition.
Textile organizer pockets
Textile covers are part of folding tables. They have a hard surface, often with sides, and a pair of folding textile pockets, usually sectional. Such tables are convenient not only for usual use, but also for needlewomen who can place all the details of their work in an armrest organizer.
The presence of compartments and sections in their design will allow you to place magazines, newspapers, writing utensils and a TV remote control there.
Note! This type of tray organizer is the easiest to make yourself. The product can be sewn from pieces of fabric, resulting in an overlay using the patchwork technique.
Fans of various gadgets will find models with holders for phones and a place for charging.
Overhead stand with shelf
Overlays often have various pockets and shelves that increase the functionality of the product. This type of product also includes curved tables, which will be optimal in an Italian-style living room due to their unusual shape. They are made in such a way that there is a miniature shelf on each bend.
In essence, such an overlay is a small shelf on which you can place quite a lot of things.
{Instructions}
1. First you need to decide on the width and height of the future elbow. Also take into account the width of the sofa armrest so that the shelf-armrest sits tightly and does not dangle. In my case it is 250 mm and 80 mm.
Dimensions of all parts in mm:
- 250x120x25 - counter on the sofa side
- 250x130x25 - table top
- 250x220x25 - long stand
- 250x120x25 - lower tabletop
- 250x100x25 - rack from the outside
Make the width of the upper and lower tabletops taking into account the width of bottles, mugs, and glasses.
2. File all the elements according to dimensions in pt 1.
3. Next, all elements must be fastened to dowels using transfer centers. If they are not there, you can simply use dowels with the color of one of the sides.
The accuracy of the alignment of parts during assembly will depend on the accuracy of the markings. Even if you make a mistake by a fraction of a mm, it will be noticeable.
4. We assemble the entire system on dowels without using glue for now. If all the elements fit perfectly, we glue them together; if not, we need to make new holes for dowels in problem areas.
5. Sand all the elements with an eccentric sander using paper with a grain size of 150-180. The smallest abrasive should not be used, because the oil will not adhere well to a perfectly polished surface.
6. Before gluing, all internal joints must be protected with masking tape or similar material to prevent the glue from being squeezed out onto the surface of the wood. Otherwise, you will have to re-grind in inaccessible places.
We glue all the elements together using clamps and leave the glue to set for 10-20 minutes. Remove the masking tape.
7. After 2-3 hours (but better the next day), remove the clamps, remove excess glue and sand the countertop and other open elements again. 8. Remove dust from the surface of the shelf and cover with oil. After 12-24 hours you can wax and polish.
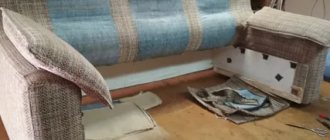
The reupholstering process: step-by-step instructions
All work is divided into stages. First you need to disassemble the furniture. We remove all pillows, cushions, and decorations. Then, using the necessary tools, we separate the back and sides of the sofa.
Disassembly with removal of individual components in the form of pillows, sides, poufs.
We dismantle the seat and separate the furniture from the base. The parts needed for fastening need to be placed in some container; they may be needed.
Cost of materials and labor costs
The total cost of materials for making an oak shelf armrest with your own hands will average from 1000 to 1500 rubles.
- oak wood (furniture panel 20-25 mm wide) - 800 rub.
- grinding wheels, oil, wax, dowels and small items - 200 rubles.
It will take very little time to prepare, but you will enjoy using this shelf:
- marking and cutting - 30 minutes;
- marking for dowels, connecting to dowels - 90 minutes;
- polishing (2 times) - 30 minutes;
- fitting and {gluing} parts - 60 minutes;
- oil and wax coating - 30 minutes.
Thus, making an armrest for a sofa from solid wood with your own hands will take an average of 4 to 6 hours. Yes, this is not enough, you will have to spend almost the entire day off, but perfectly made furniture with your own hands is worth it