Electric planers, which have been on the market since the mid-20th century, have become indispensable for craftsmen processing lumber. Their popularity is due to the presence of a number of advantages compared to conventional hand planes. When using power tools, the labor intensity of the process is reduced, labor productivity increases, and the quality of workpiece processing is improved. In addition to planing, specialists perform quarter cutting, chamfering and other operations using tools. To achieve a high-quality result, you need to know how to operate an electric planer correctly and follow safety rules.
Safety rules when working with an electric planer
An electric planer is a device that requires safety precautions when working with it. The main damaging (traumatic) factors are:
- a tool drum rotating at high speed with knives located on it;
- electric current flowing through the device.
To safely work with an Interskol electric planer or any other model, you must follow the following rules.
- The workplace must be kept clean and well lit.
- Do not use power tools in areas where there is a significant risk of fire
or explosion due to the presence of flammable liquids, dust or gas. - Do not allow unauthorized persons or children near the operating tool, and it must be stored in a place inaccessible to them.
- It is forbidden to be distracted by other things while working, as this may cause loss of control over the tool.
- Do not allow water to come into contact
with the power tool you are using, and do not carry it while holding it by the cord. - If an extension cord is used, it must be suitable for the load and also have complete insulation.
- The power cable should be kept away from very hot objects and temperature sources, from moving parts of various mechanisms, as well as from sharp edges and various liquids (especially oil).
- It is prohibited for the body to come into contact with grounded surfaces (for example, radiators and heating pipes) while working with the plane.
- It is prohibited to use power tools while under the influence of alcohol or drugs, as well as under the influence of medications or fatigue.
- Preventive maintenance
should be carried out regularly . - Do not touch the running drum with your hands.
Main advantages
The main advantages of an electric planer:
- High speed;
- Simplification of many technological operations (cutting a quarter, for example) due to the presence in the design of the plane of an angular stop, a side limiter and an adjustable processing depth;
- As a result, increased productivity;
- When working, precisely controlled physical efforts are not required, as in the case of using a conventional plane;
- Additional elements can expand the functionality of the plane.
Criterias of choice
The choice of a specific electric planer model is made based on an analysis of the following indicators:
- Rotation frequency. Must be at least 10,000 rpm. The presence of control electronics that maintains a stable rotation speed under load is welcome.
- Power. The higher, the easier the work and the higher the electricity consumption.
- Planing width.
- Planing depth and its adjustment mechanism.
- Tool weight;
- Heating intensity;
- Availability of a dust collector;
- Condition of the sole (flatness);
- Availability of spare parts (knives and belts) for this model on the market.
Features of work
The technology for working with an electric planer is quite simple. To begin with, the processing depth is set. Typically, this is done using a special rotary knob. Keep in mind that even at zero depth, many models will remove chips, so we recommend looking at models with a minus depth setting.
The board being processed must be securely fastened. To do this, it is advisable to use a special workbench that does not allow play in either the horizontal or vertical plane. Otherwise, the plane may be torn out of the worker’s hands with unpredictable consequences, not to mention damage to the board being processed.
The board must be installed in such a way that it is possible to move freely along it from one edge to the other. All interior elements that impede the employee’s movement must be removed from the path.
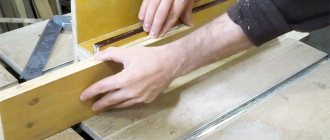
The plane is always held with two hands and is started without contact with the surface being processed. The passage is carried out along the wood fibers.
When working, ensure that the plane is positioned so that its sole is parallel to the board. The pressure on the plane should be light and even at the back and front.
The plane is passed from edge to edge. It is not recommended to interrupt, as the uniformity of processing may be disrupted. To process a wide board, several successive passes are used with a shift in width (or a plane with wide knives is initially selected).
To create chamfers along the edges of the material being processed, the electric planer has special grooves on the sole.
Hello everybody! Let's talk about the electric planer today. If you use it correctly, you will ensure high quality of the treated surface and will not allow the tool to cause injury to you. So, in this article we will look at the question of how to properly use an electric plane.
80 types of electric planers at low prices. Click to see
Operating principle of an electric planer
The main part of the electric planer is a rotating drum on which the cutting elements are attached. It is driven by an electric motor, rotation is transmitted by a toothed belt. The tool operates via an electrical cord from a 220 volt household power supply.
Planers are usually equipped with motors with a shaft rotation speed of over 1000 rpm and a power of 550 to 950 watts. The motor elements that require special attention are the carbon brushes. For convenient monitoring of their condition, cleaning or replacement, a special removable casing is installed above the motor.
Planing should begin only when the drum reaches its maximum rotation speed
You need to carefully move the plane from the end of the workpiece and begin to slowly move it forward. The sole of the tool should be directed parallel to the wood being processed
In this case, at the beginning of the workpiece, the force is slightly transferred to the front handle, and at the end - to the rear. Planing should be smooth, with an average processing speed of 150–200 centimeters per minute.
How to use an electric planer correctly
First of all, you need to understand that planing with an electric planer is only applicable to wood. Before starting work, it is necessary to securely secure the processed lumber - the quality of the resulting wood and the safety of the work process will depend on this. The presence of play can cause the workpiece to be thrown to the side upon contact with the rotating drum, possibly resulting in injury to a person.
The lumber must be secured in such a way that the worker carrying out the planing has the opportunity to move freely with a plane from one edge to the other of the workpiece.
The difference between planing on a wide board
The difference between planing a wide board and working on a narrow board is that the process is carried out in several passes along the blade. This is due to the fact that the width of the cutting knives is not enough to process the surface of the workpiece in one pass. The main difficulty in this case is the exact parallel alignment of two adjacent processed lines.
How to choose and use an electric planer correctly
An electric plane is an essential tool for anyone who deals with wood processing, and during construction or renovation it can become an indispensable assistant.
In everyday life, a traditional hand plane is usually enough for a home craftsman, but in a private farmstead or summer cottage there is plenty of woodworking. Baths, outbuildings, fences, benches and other furniture - the list goes on and on. An electric planer will save the craftsman a lot of time and effort and allow him to achieve good results. Using an electric planer, workpieces are brought to the required dimensions, surfaces are leveled, nicks, burrs and knots are removed, edges are cut, and grooves are selected. A plane, of course, is not capable of “fine” processing of surfaces to perfect smoothness; this will require additional tools. But with its main task - rough processing of wood in large volumes - the electric planer, if the operating rules are followed, copes “excellently”.
As when choosing any power tool, when choosing an electric planer, a master should start from the main tasks in which the tool will be most often involved. An important role is played by the power of the tool, which is directly related to its performance. A plane of greater power plans “deeper”, that is, it can remove a thicker layer of wood in one pass. Manual electric planers are produced with a power ranging from 0.5 to 2.2 kW. Above one and a half kilowatts is, in fact, a professional tool for large-scale work. If you plan to use the plane frequently and in large volumes, it makes sense to take a closer look at more powerful models. But, as always, the rule applies: the more powerful the tool, the more it weighs and the higher its price. It will be convenient to work with a low-power plane while suspended. Medium power models weigh between 2.5-4 kg.
Another indicator is the rotation frequency of the drum, that is, the number of revolutions it makes per unit of time. This value is very important to consider when choosing a plane, says FORUMHOUSE wind1wind: the higher the number of revolutions, the better the quality of the cut. The optimal option that you should focus on when choosing is 15000-16000 rpm.
wind1wind:
– The plane does not create a completely flat surface, but a “wave” with very fine steps. To make this waviness invisible, the number of shaft revolutions and the number of knives on the shaft are increased. These two parameters are very important when choosing.
width depends on the width of the cutting edge of the knives. The most popular knife sizes for household electric planers are 82, 102 and 110 mm. The higher the planing width, the fewer passes will need to be made to completely process the surface.
To simply process a board to a smooth surface, all you need is a plane with knives narrower than the board. But if the width of the knife does not cover the width of the material being processed, you will not get a perfectly flat surface - even a minimal “step” will remain.
The depth of cut is essentially the thickness of the layer of wood removed by the plane in one pass. In household planes it usually does not exceed 2 mm, in more powerful ones - 4 mm. Most models have depth adjustment.
Electric planers use removable blades made of carbide and hardened steel. Most of them, even carbide ones, can be sharpened and sharpened, but narrow knives cannot be sharpened: their design does not imply sharpening. Some models of planes are supplied with a sharpening device. You can make it yourself.
Olegych:
– To straighten knives you need thicker glass and a couple of sheets of good sandpaper. We soak the paper in water, place it on the glass - and off we go! But this is exclusively for straightening, knives “stuck” on nails and bricks - only for use on the machine.
The sole of the plane in contact with the surface being processed must be flat and smooth. In modern models of planes, barely noticeable grooves are made on its surface - grooves that prevent the formation of an “air cushion” between the sole and the material during operation and thus ensure uniformity of the cut. The grooves on the front of the sole are designed for chamfering the corners of parts. When choosing a plane, you should pay close attention to the quality of the surface of the sole, especially if we are talking about inexpensive models.
Blackk:
– A defect found in non-brand planes is the so-called “drunk sole”. We check this way: set the removal adjustment to zero, move the knife to the upper position. We apply a ruler along the length of the plane, alternately on both sides, so that it lies on both platforms at once. There should be no gaps between the ruler and the sole.
When choosing an electric planer, it is important to hold the tool in your hands, to understand whether the tool’s handles, start and adjustment buttons are conveniently located for you, and whether its weight suits you. Modern electric planers have many additional options and parameters that facilitate and improve the work process. But all of them, of course, increase the cost of the instrument. Among the most popular options are directional ejection of chips with the ability to connect a bag for collecting them or a vacuum cleaner, a “soft start” system and speed control. Here everything depends on the requests of the master and his financial capabilities.
A useful accessory is a universal ruler that allows you to evenly process a surface wider than the planing width of the plane in one pass, as well as planing at an angle of 90 degrees to the supporting surface. Often such rulers are included with the plane, but if not, it makes sense to purchase it separately.
The basic work performed by an electric planer is easy for a beginner to master, and if you follow simple rules, the tool will serve for a long time and effectively. Planing should begin only after the drum of the switched-on plane has reached full speed. And you shouldn’t immediately set the maximum planing depth: it’s better to remove a millimeter twice than to try to remove two millimeters at a time. There is no need to put any force on the tool: it should only be guided, and the plane should plan itself, “like clockwork.” And for this, the knives must be sharp.
It is not so easy for craftsmen starting to work with an electric planer to determine when sharpening or replacing the knife is necessary. Forum member Nomad advises using visual methods. If the knives are sharp, the surface will be smooth. If they are dull, rags of wood form on it, since the knives no longer cut, but tear it. Another sign of dull knives is wood that turns brown from high temperatures, especially in the area of knots.
Aleksej2000:
– Even with dull knives, the plane begins to vibrate on the knots, as if bouncing up and down: the knife does not cut and is pushed away from the dense material. The best thing is to install new knives and see how they work. And then the feeling of sharp knives will be familiar. And with the same sharp knives, try to walk along a knot to see the difference.
A common problem that novice craftsmen face is the displacement of the material being processed under the plane. Although a plane is one of the safest tools, there is still a risk of injury when holding wood with your hand. The problem can be solved by making a simple board clamp and limiting the lateral displacement of the plane - as forum user wind1wind advises:
– Along the width of the sole of the plane on the workbench, attach two blocks no less long than the boards being processed. The sole of the plane should pass between them with a minimum gap, but without difficulty. A piece of slats is attached to one end, against which the board will rest. Additionally, the board between the blocks can be fixed with a wooden wedge.
For this design to work as it should, the end stop made of slats and wedges should be slightly thinner than the board being planed, a forum member advises. The blocks should, on the contrary, be thicker than the board being processed by about 1/2-2/3 of the thickness of the plane sole. Then they will prevent the lateral movement of the plane during operation. On the other hand, the plane will not touch the blocks with protruding parts of its structure (belt casing, engine).
Read also: What is harder, tin or lead?
Forum users discuss the features of choosing electric planers, the advantages and disadvantages of specific models in this thread. Here you can read recommendations and get advice on how to properly operate an electric planer. Members of the forum exchange their experience in replacing, sharpening and straightening planer knives in this thread. Find information about the repair of planes, routers and circular saws here. This video explains the basics of working with an electric planer.
There are many planes and planing machines available for planing boards. However, if the board is quite wide, more than 200mm, then planing it evenly, on a plane, is quite problematic, since one side of the board is convex and the other has curved edges.
In this case, it is better to use different planing techniques. The first way is to walk, not with a wide electric planer, over protruding places. This is done in order to plan evenly and prevent the plane of the board from skewing towards one of its edges.
In this case, when planing protruding edges, it is necessary to remove the thickness of the planing with a small amount of removal, and go through the same number of times on one and the other side. Finally, we plan the board on a wide planer. If there is no planer, then special knives with rounded ends are installed on the electric planer so that there is a protrusion between narrow passages, since the width of the plane when planing is less than the board.
If you have a large machine, then in order to avoid distortions when planing an uneven board that is convex on one side, shavings are poured onto the bed, after which the board is ground in and lies flat when planing. This simplest technique allows you to avoid distortion when planing.
You should not neglect the clamping device that many planing machines are equipped with, since they not only press the board, but also press it evenly. When achieving a smooth surface of the board, the main thing is well-sharpened and adjusted knives, plus a thin layer of planing.
If your planer is narrower than the board being processed, then you should plan the board in one pass, first on one side, then on the other. Thus. You will achieve a flat surface on a wide board.
Hello, readers of the blog “build a house”. Almost all mechanical and electrical tools require proper handling and timely adjustment. We have already discussed how to properly set up a mechanical plane in our previous article on. Today I propose to consider the issue of planing with an electric planer
. At the end you will learn how to work with this tool.
Attention: To prevent sawdust and shavings from clogging the plane blade, use special bags to collect the shavings.
An electric planer can be used to chamfer a part.
. Based on the width of the required chamfer, run the plane along the edge of the workpiece the required number of times.
Planing with an electric planer
A separate condition for correct and safe planing of any structures with electric planers is the rigid fixation of the workpiece being processed.
Attention: an electric planer is a rather dangerous tool (risk of injury to fingers), so always remember safety precautions.
Only after the workpiece being processed is clearly fixed, you can start planing it. First you should start with rough processing. For this, sherhebel is often used. When using scherhebel, movements should be directed not along, but across the fibers. Otherwise, you may cut off too much wood.
Attention: if, during planing with Sherhebel, there are curls on a wooden workpiece that aggravate the planing, then you should not put too much pressure on them. Otherwise, the wood may break off in these places and this workpiece will not be suitable for further use.
Subtleties of working with an electric planer
After finishing processing the surface of small workpieces with Sherhebel, it should be cleaned first with a single, then with a double plane. If you are dealing with long workpieces, such as bars, then it is better to use a jointer or semi-jointer. Movement on the surface must be directed not against the grain, but along it. This is the only way you can get the most even and smooth surface of the wood.
Planing Caution: When using a long plane, both hands must be used. Place your palms on the handle of the tool and press both edges firmly against the surface of the workpiece.
Right choice
It should be understood that any of these lumbers are made from a wide variety of tree species. This is due to different areas of application. For example, edged wood is usually made from coniferous trees, but planed wood can also be made from pine or spruce. It is also possible to use expensive and valuable raw materials, such as larch. Understanding the difference between them, you can choose the right lumber for a specific type of work.
This is quite easy to do. Often before purchasing there is a need to independently determine the type of treatment, relying on your eyes and hands. To distinguish planed boards from edged ones, it is enough to pay attention to the following indicators:
- Processing quality.
- Rough surfaces are more characteristic of edged boards.
- Bark along the edges of the board.
Attention! Wood with a blue tint and a loose structure covered with wormholes is not a planed board. This means that the entire batch was defective. You should not buy such boards, as they cannot be used in any type of construction work. Only for movie scenery, as material for a barn.
When you cannot choose the right boards yourself, ask the seller for advice. He will describe not only the method of processing wood, but also drying methods, and also share other useful information.
Methods of performing work
- Laying a substrate made of elastic material is used if the unevenness does not exceed a few millimeters. This increases sound insulation. Most often, materials such as isolon or polyethylene foam are used. The thickness is set within 2-5 mm.
- For more serious defects, scraping is suitable. This method is also not capable of leveling out serious differences, but it can refine the surface and give it an attractive appearance. Before starting work, the floor is carefully inspected for the presence of metal fasteners. Staples and screws will have to be removed, and the nails will be sunk into the boards so that there is no chance of damaging the sanding machine.
- The putty is suitable for height differences of 2-3 mm. Sealants or acrylic compounds are used.
- Self-leveling floors or cement screeds.
- The most reliable option that will allow you to level a wooden floor with serious differences and cracks is plywood or OSB boards. For work, material with a thickness of 14-22 mm is used. There are two methods that can handle different sizes of bumps.
It is worth talking about putty and plywood in more detail.
Board after technical drying
You can purchase a board that has been dried to the desired humidity percentage in specialized conditions. Such a board does not gain moisture to its natural level, even if the structure is exposed to rain.
Among the advantages of the material:
- When dried, all microorganisms are eliminated, so it is not susceptible to fungal attack.
- Dry boards have already gone through all the changes characteristic of drying. The dried material does not change shape or size. By using lumber after proper drying, you will avoid the appearance of crooked areas and gaps. If there are defects, they will be visible upon purchase. By avoiding marriage, you also save.
However, you will have to pay a higher price, and the disadvantages will not be completely avoided. The board according to GOST 26002-83 is convenient for construction.
The optimal choice is sorted technical drying board ; it will allow the construction to be completed efficiently and economically. It is not always possible to find such an option, but in any case, the quality of unsorted dried material is better than that of boards with natural moisture.
Preparing for work
The tool can be used in two positions:
Plane sharpening angle diagram.
- stationary position: the electric planer is attached to a rigid, stable surface;
- portable: the tool is moved manually along the workpiece.
Many models come with special clamps and a bracket for the start button. In a stationary position, it is more convenient to process short-length lumber, which can be moved along the tool alone. It is advisable to process long workpieces with a portable electric planer.
The wood must be dried; raw lumber is poorly processed. The board must be firmly secured to a hard surface. The part should not sag under the weight of the plane and shift during operation in any direction. When processing side surfaces on a workbench, it is advisable to install them on special fastenings that protect them from bending and movement. In the area of rotation of the drum with knives there should be no metal elements (brackets, nails, screws) on the surface being processed or fastening elements. Hitting the metal will leave a gouge in the blades, and a protrusion will form on the surface being treated. The knives will have to be sharpened, removing a thick layer of metal, or replaced.
Correct fastening of the product
First, you should secure the product that needs to be processed.
Attention! It is unlikely that a real master will plan on his knees. Think about it.
It is better to use a carpentry workbench for this, in which the product will press into a special protrusion located below the workpiece - this way nothing will interfere with the work. The product is first carefully clamped in a vice.
In the absence of a workbench, you can use some kind of table where you could build a stop with a triangular cutout. This is the cutout where the workpiece will be inserted. The back of the block or slats can be pressed against the tabletop with a clamp. If this is not possible, then several small nails are nailed at the ends, driven at the required angle. By the way, you can find excellent material for your new wood products at https://doska-strogannaja.ru/.
Attention! Planing short products is extremely inconvenient, especially their ends. For this reason, if you plan to complete several small elements, then it is advisable to first make one large workpiece, and only then divide it into the required sections.
Hand electric plane
The first electric planer was released by Makita. Today it is difficult for a master to imagine life without this incredibly useful tool.
How to adjust an electric planer
Adjustment of electric plane knives should be carried out according to the situation using a special adjustment mechanism, which is located on the front handle of the electric plane. By rotating this handle, we achieve the required amount of release of the knives (0-2 mm); they should be positioned evenly, parallel to the bed. Excessive release makes work difficult and puts additional stress on the plane motor.
Sharpening electric planer knives
Sharpening the knives of an electric planer is carried out similarly to a mechanical one. The main sharpening difference between an electric planer and a mechanical planer is the number of knives. There are two of them here.
Guys, you know what...
In an electric planer, knives should be changed strictly in pairs, using one set. This will help avoid the appearance of imbalance. And it will not only spoil the quality of planing of the workpiece, but can also damage the power tool.
Adjusting the position of the cutting edge
Adjustment of the position of the knives is carried out according to two parameters:
- height of the cutting edge relative to the back plate;
- the size of the protruding part of the knife for planing quarters.
Having installed the ruler or glass, you need to rotate the drum, controlling the gap between the knife and the device at the edges of the slabs. The edge of the knife should lightly touch the tool without lifting it. If the knife clings to the device or does not reach it, the position must be adjusted.
Typically, knives are secured with a special wedge with expansion bolts. Using an 8 or 10 wrench, you need to screw the bolts into a wedge until the bolt moves freely. Then, using the installed eccentrics, align the height of the cutting edge with the device. Tighten (unscrew) the mounting bolts and check the position again. The desired result can be achieved after several repetitions of this operation.
At the same time as adjusting the height of the cutting edge, you need to control the protruding part of the quarter planing knife. The optimal size should be indicated in the manufacturer's instructions. On most models it is 1 mm. The size is set by moving the knife left or right along the axis of the drum. It is important to set the size correctly. It should be the same on all knives. This can be achieved by using a feeler gauge of a certain size or by measuring the distance with a caliper (a caliper with a protruding back) from the edge of the knife to the drum. After adjusting the first knife, you need to move on to the next ones. The operation for all knives is performed similarly. If a knife cannot be installed in the required position, you need to remove the wedge and check the eccentrics for integrity and free rotation.
The adjustment must be completed by checking the free rotation of the drum and the fastening of all knives.
Leveling a wooden floor with a cement screed
Experienced experts are of the opinion that if the wooden floor is strong enough or was initially laid for subsequent leveling, a cement floor screed can be used.
This method will make a rough surface with large differences almost perfectly flat.
In order to level an old wooden floor with cement, you must:
- the surface of the wooden floor is covered with a waterproofing compound
- After the layer has dried, lay polyethylene film or roofing felt. It would be correct to do this with an overlap
- a new surface is measured with a level
- beacons are laid out
- Next, prepare the cement mixture
In this case, leveling will not be difficult: cement mortar is applied to the beacons, then leveling is carried out towards the door using metal slats.
The subsequent layer of self-leveling mixture will be applied easily.
However, there is a risk of breaking the base boards with the heavy cement mixture. In this case, you will have to remove the coating and re-fill the floor. Next, use layers of foam or expanded clay.
Planing with an electric planer
A separate condition for correct and safe planing of any structures with electric planers is the rigid fixation of the workpiece being processed.
Only after the workpiece being processed is clearly fixed, you can start planing it. First you should start with rough processing. For this, sherhebel is often used. When using scherhebel, movements should be directed not along, but across the fibers. Otherwise, you may cut off too much wood.
Subtleties of working with an electric planer
After finishing processing the surface of small workpieces with Sherhebel, it should be cleaned first with a single, then with a double plane. If you are dealing with long workpieces, such as bars, then it is better to use a jointer or semi-jointer. Movement on the surface must be directed not against the grain, but along it. This is the only way you can get the most even and smooth surface of the wood.
Included with electric planer
When installing a separate side stop on the electric planer (it is usually supplied as a kit), you can make. The stop, fixing the tool at a certain distance, must touch the workpiece.
Important: If the surface being processed with a plane is uneven, it means you are using dull knives or have released them incorrectly (see at the beginning of the article).
Folding depth
depends on the number of passes with the plane over the workpiece. The more passes, the deeper the rebate.
After planing, remove the knives from the electric planer, wash them with kerosene and place them in a separate box until next time.
Preparation for working with an electric plane and rules for its installation
First, you should read the operating instructions. Next, preliminary preparation is carried out, checking:
- position of the front part of the sole;
- degree of freedom of rotation of the working drum with cutting elements fixed on it;
- presence of various damages to the plug, power cord, housing;
- freedom of movement of the power button;
- correct placement of knives.
The functionality and configuration of the electric planer must be checked at the time of purchase. The rotation of the drum is checked by moving it with your hand. The button operates by pressing it. The integrity of the unit is determined visually. When no defects are found, a test run of the equipment can be performed.
Before planing with an electric planer or performing other operations with it, it is recommended to first practice processing on unnecessary boards or bars. This will allow you to “get your teeth into” and adapt to the technique in order to get an acceptable result in the absence of the necessary practical experience.
It is recommended to start setting up the electric planer by adjusting the position of the front part of the stove with the plug unplugged. To do this, you will need to use a ruler or a suitable size piece of ordinary glass. All actions are performed in this sequence.
- The front (movable) part of the sole, using a special adjusting handle, is set to a position that provides the minimum depth when planing.
- Place the power tool on a level workbench or work table in an inverted position.
- The drum is rotated so that one of the knives is located above its axis.
- A ruler or glass is placed on the sole: they must lie in the same plane.
When the overlay on the slab is tilted, this defect is eliminated as follows:
- remove the adjustment handle and the front part of the sole;
- clean the opened cavity from chips and dust;
- lubricate the mechanism;
- put the stove in its original place;
- install the handle;
- Check the position of the sole using a ruler.
The installation of the blades is checked using a metal ruler. To do this, it is applied to the edge of the slab. Then they look to see if the blades located on the drum touch the ruler. When the knives do not come into contact with the ends of the lining, begin to regulate them. Using the hex wrench supplied with the power tool, loosen the blades on the drum.
Using the described method, the position of the blades is adjusted for models with both one knife and two or three. After completing the regulatory adjustments, they will be installed in the desired position.
When setting the correct position of the blades, they should not touch the sole when the drum rotates.
Some models of electric planes include a support stand. This makes it possible to perform work using this device in two ways:
- placing it in a stationary position, when the power tool is fixed motionless (rigidly) to the workbench or table;
- using an electric planer as portable equipment.
Electric planer with stand included
A rigidly fixed tool is, in fact, a planer. The wooden blank is moved along it, pressing it with sufficient force. At the same time, it is convenient to perform work operations with the help of a partner. You can work with short-length lumber alone.
The easiest option for preparing an electric planer for work is to contact specialists for help at a service center. Self-tuning of the tool should be carried out according to the recommendations set out in the manufacturer's instructions.
What are there
On sale you can find household and professional (semi-professional) electric planers. They differ from each other in color and markings. The first ones are cheap and light. The second ones are more expensive, more powerful and heavier. Their motor life is many times greater; they can do work every day for many hours.
As a rule, in everyday life there is no such need; an electric planer is used from time to time, so purchasing a household model for your home, but from a well-known manufacturer, is a common solution.
The processing width in one pass for household models is usually 82 mm; less common are models with knife lengths (knives are positioned horizontally) of 100 mm and 110 mm. Professional models may have more.
The tool bed is divided into two parts - the front, adjustable, which rests on the workpiece in front of the knives, and the back, which rests on the already processed wood. On the front part of the bed there is a longitudinal recess (several recesses of various sizes), into which you can hang the edge of the workpiece when chamfering, which will allow you to chamfer most accurately.
On the front handle there is usually a regulator for the thickness of the removed chips (depth of cut).
Another important component is the chip removal system. Planing produces a significant amount of chips. The planer has a pipe into which dust and chips are thrown out during operation.
An industrial vacuum cleaner can be connected to the pipe. But you can also connect a bag to collect shavings so as not to litter the room with them.
Some models of electric planers are equipped with such a bag. But you can do it for any model yourself.
How to make a chip bag? You will need a spare tube from the vacuum cleaner, which connects to the nozzle of the plane. And also a piece of fabric, a zipper sewn into the fabric to remove shavings, and a crimp clamp to secure the neck of the bag to the tube.
Some models are equipped with side and top stops, which allow you to guide the plane along the edge of the workpiece at a certain distance from it and to a certain planing depth. This allows you to select folds.
Some expensive, powerful models are equipped with a planer-thicknesser device or a simpler frame, with which the plane can be secured with the knives up, thus obtaining a small planer (thicknesser).
How to replace knives
The electric planer is equipped with knives made of high-strength, abrasion-resistant alloys.
If the knives begin to leave a mark on the wood, this indicates they are damaged and need to be replaced. A knife, as a rule, has two sharp edges, and if one is dull, then you just need to turn the knife over.
To replace knives, you must first disconnect the electric planer from the power supply. Then you need to unscrew the screws securing the knife holders and remove the holders from the groove, and then remove the knives from them.
By inserting new knives into the holders (turning the existing ones over), you can reassemble in the reverse order. It is important to set the knives in height, which is not easy and requires effort.
We process wood: what do you need to know?
Before processing lumber, you need to determine the direction in which you will plan. Usually planed in the direction of the wood grain. If the lumber is made from several boards, then you need to plan it diagonally.
To prevent the edge of the board from becoming uneven, you need to use a corner stop, which is attached to the base of the electric planer on the side and perpendicular to its axis.
When you have finished planing the wide board, you will need to align the boundaries between the passes. This stage is called scraping. For this, a special grinder is used, which will remove all roughness.
Because You are not logged in. To come in.
Because The topic is archived.
For household needs, it is necessary to put together a certain number of wooden products from 50 pieces. Raw, unplaned is suitable for everyone except the risk of injury. Is it easier to rough grind?
Grinder with petal disc? Belt sander? Or bother with an electric planer? 
I did it with a belt sander. In 2 hours, 20 square meters of floor are of acceptable quality. Even very acceptable. Without knowing it, you wouldn’t think that there was just a figurative board. It took 5-7 tapes. I rented the car for the evening.
I did it all around with a grinder too. Rack - workbench. About 3 m with a width of 0.5 m. Longer and harder. But the result is worthy. 
An electric planer is faster. Any grinder will take longer. But the planer is damp, so it won’t pick up a damp board, and the exhaust gets clogged. Yes, and sanders don’t sand raw wood, they make a mess. If you don’t have much and don’t have a plane, then a grinder with a blade.
Well, if the board is sawn not with a disk, but with a ribbon and all in waves, then it will take longer to do it with a plane than with a sander. He cuts off the top of the wave and leaves the bottom. By the time you walk about 4 times, you could have done it with a petal if you don’t need evenness.
Interskol is a pretty decent plane, compared to other cheap ones. I didn't like him until he died. I bought a bison and I understand what a cool interskol it was. I should have taken a Makita, I was greedy
Description of the tool
Knowledge of the structure and operating principle of an electric planer is necessary for everyone who wants to use this tool. It will help not only to use the device correctly, but also to repair it yourself if necessary.
Device
The design of the tool has remained virtually unchanged since the release of the first model. Only some additional functions and electrical control have appeared.
The engines also became more advanced: they reduced weight and gained more power.
The design of an electric planer includes the following parts:
- Frame;
- Electric motor block;
- Handle for support;
- Chip collection bag;
- Rubber pad;
- The sole, which acts as a support, consists of an adjustable and fixed part;
- A pipe for removing generated debris;
- Button to turn on;
- Lock button;
- Regulator for setting planing depth;
- Drum with cutting knives (from 1 to 3 pieces);
- Side limiter;
- Transmission mechanism.
Principle of operation
Various models of electric planes operate according to the same principle:
- When power is supplied to the starter windings, the electric motor rotor begins to rotate.
- Then, using a transmission mechanism, the torque is transmitted into the drum to the blades.
- They, in turn, rotate in a circle. When the blades come into contact with wood, part of the surface of the material is removed. The amount of wood cut is adjusted manually. Using the pipe, excess chips are ejected.
- When the power is turned on or off, the electric motor starts and stops not instantly, but gradually. This helps to avoid overload during work.
Sharpening knives and installing them
In order for the treated surface to be smooth and clean, it is necessary to use an electric planer with well-sharpened and correctly aligned knives, and it is also necessary to set the correct planing depth and move it correctly along the surface.
It is stupid to use a plane with dull knives, since, firstly, the surface will turn out to be rough and sloppy, and secondly, in this case the engine will receive excessive load, which will lead to its premature wear. The knives can be sharpened, or they can simply be thrown away after becoming dull, and new ones are put in their place - this applies to thin knives that are now used on most modern electric planers. Unsharpenable and many sharpened blades have two sharp sides, which allows you to use the other after dulling one side. Naturally, one-sided knives cannot be turned over.
It is better to entrust sharpening to specialists in special workshops, of which there are usually plenty in cities, since this requires special equipment. However, there are craftsmen who sharpen knives themselves with the help of household sharpeners - the most important thing here is that your eyes do not fail to see the smallest irregularities, as well as your hands, so as not to make unnecessary such irregularities. But it’s still better to contact a special service, since this procedure is inexpensive.
Now about installing the knives. Using an electric planer with blades that are not aligned correctly can be hazardous to your health and can also lead to unpleasant results on the treated surface. They can be attached differently on different models. It is better to find out how to replace it in the instructions. After installation, the knife should stick out evenly from the drum without distortion. How far it should stick out of the drum can be determined using a ruler. After installation, we set a certain planing depth, and then apply the ruler to the knife with the end side so that it is parallel to the front sole of the plane. Now you can use the second ruler to measure the distance between the front sole and the first ruler. It must coincide with the set planing depth.
After installing the blades, make sure that they do not touch the body by rotating the drum with your hands. And all work, of course, must be carried out with the plug unplugged.
How to work correctly?
When the knives enter the workpiece, the electric planer can unpredictably move to the side, jump, etc. Therefore, at the beginning of the passage, it must be held with both hands. The right hand holds the main handle, the left hand holds the planing depth control knob. Then, when the electric planer moves over the workpiece, the master evaluates how the tool behaves, and the work proceeds according to the situation.
Do not block access to the passage along the workpiece by holding the electric planer in a bent position or with outstretched arms, reaching for the surface to be processed. The master must work without hesitation. The hands are in a position in which they are less tired, and it should be comfortable to work.
High speeds allow you to remove chips without effort. Therefore, it is rarely necessary to press the tool firmly against the workpiece after starting work. For example, if there is an area of increased strength on the surface - a twisted area, knots, etc.
Checking and adjusting the position of the front plate
All adjustments to the tool must be made in the off state. The plug must be unplugged from the socket, otherwise you can not only damage the electric planer, but also cause serious injury.
When checking the position of the knives, the front plate must be set to the minimum planing depth position using the standard adjustment knob. Place the electric planer on a flat, hard surface with the drum facing up.
To check, you can use a metal ruler or a piece of window glass of suitable dimensions. The drum with knives should be rotated until one of the knives is in the upper position, above the drum axis. The ruler or glass must be laid on the slabs along the plane. The surfaces must be in the same plane.
If the control device on any of the plates is tilted, you need to check the position of the front plate and adjust it. Such a defect occurs during long-term operation of the tool without maintenance. The internal cavities can become clogged with wood dust and small shavings. Excessive force on the depth adjustment handle displaces it from its original position.
To eliminate the defect, you need to remove the handle, the front plate, clean the cavities from dust and chips, and lubricate them. Place the plate in place, check the installation using a ruler, secure the handle, checking that the dial matches the index mark.
Moisture protection
If the importance of lumber exceeds 15%, then the wood begins to deteriorate at the structural level: it swells, delaminates and shrinks, the shape of the product is deformed, cracks and gaps form. To prevent this from happening, the building material should be treated with special means to protect it from moisture.
There are two types of such solutions on the market:
To prevent this from happening, the building material should be treated with special means to protect it from moisture. There are two types of such solutions on the market:
The first type provides a long-term effect of hydrophobization (reducing the ability of wood to absorb moisture). But the treatment process with the second group of drugs should be repeated periodically.
Oil impregnations and those based on alkyd resins are most often used. They are applied with a brush or roller. But deep impregnation with a water-repellent composition has a more durable effect. This procedure is carried out in baths or autoclaves directly at the construction site. True, this method is more expensive, but it is much more effective.
How does a planed board differ from an edged board?
The main differences between sanded boards and edged boards are:
- Mandatory drying in a drying chamber. Edged lumber can be either dry or wet. Now a new variety has appeared on the market - a wet board treated with antiseptics.
- Processing of planed boards on a special grinding or jointing machine. During the turning process, all roughness and irregularities are removed, creating a perfect edge cut.
- The appearance and performance characteristics allow the use of lumber at various stages of construction, repair and furniture production.
How to plan with a plane correctly?
And now a few words about the mentioned direction of fibers or “wool”, as it is also called. Be sure to move only in the direction of the fibers. If you do this “against the grain,” you may end up causing bullying. Although in fairness it is worth noting that often (especially for wide boards, etc.) the fibers are directed in different directions - that is, from one to one, and from the other to the other (sorry for the tautology). Moreover, sometimes it is difficult to even determine where exactly the fibers are directed, although this can be clearly felt directly during the planing process. In one direction the tool will produce small thin chips, in the other it will become scuffed. In such cases, it is better to turn the workpiece around and move from the opposite end.
Planed board - application
The treated board is used in various areas of production and construction:
- production of wooden fences;
- covering roofs, facades and terraces;
- decorating false timber and beams;
- organization of gazebos, country houses, bathhouses, outbuildings or summer showers;
- arrangement of the finished floor of a residential premises;
- Planed oak boards are often used for the production of racks, shelves, tables, stools, cabinets and other furniture.
Leveling a wooden floor with a self-leveling mixture
Self-leveling floor on wood
It would be impractical to place a classic screed on a wooden floor. It has significant weight; the ceiling simply cannot support it. But you can use a self-leveling mixture, which is designed for finishing leveling. The maximum thickness of a layer of such a mixture does not exceed two centimeters, so if there is a greater difference in heights on your wooden floor, then there is no point in using such a mixture.
Technology for leveling wooden floors with a self-leveling mixture
- Clean and sand your wood flooring.
- Apply a primer coat to the surface. It is advisable to use compounds with deep penetration and protection from moisture.
- Lay a layer of waterproofing film on top of the wooden flooring. It is recommended to use dense strips and fasten the overlapping strips with double-sided tape.
- Check especially carefully for possible leaks. Secure a wooden strip in the doorway to prevent the mixture from spreading.
- Place a reinforcing mesh on the surface of the polyethylene, secure its position with staples or plastic clamps.
- Mix the self-leveling mixture in a container. Pour the dry mixture into the water in a thin stream, constantly stirring the mixture with an electric drill attachment.
- Apply the prepared mixture to the surface and smooth it using a spiked roller, expelling any trapped air bubbles from its thickness. When working with a roller, you need to wear specialized shoes, which are also equipped with spiked soles.
Processing with a spiked roller
- The drying time of the mixture depends on its composition. During ripening, its surface may need to be shed with water to prevent cracking. The room is not ventilated during this period.
Self-drying
If you wish, you can dry the boards to the required moisture level on your own, but this takes time. Before the desired humidity is reached, the wood is kept in the chamber for up to 2 weeks, while it is important to adjust the temperature, and the quality of the process is influenced by a large number of parameters. In natural conditions you will need to expect much more, plus everything will depend on humidity, ventilation levels and temperature conditions. This may take more than one month. Massiveness will slow down the process even more.
By drying the boards on your own, you will also get distortions in the geometry, and the entire defect will be yours.
Additional tool features
The tool should be positioned with the groove at the angle to be processed, launched and moved along the part while maintaining the tilt. The first pass is made along the slot; subsequent passes, if necessary, are carried out in the usual manner.
To make quarters on a plane, you need to install an additional stop to limit movement away from the direction of movement. The second stop, limiting the depth of the quarter, is located on the side surface. The stops must be set to the required dimensions. The distance should be measured from the angle of the cutting edge of the knife in the upper position. The quarter selection is performed in several passes. If the vertical surface of the quarter turns out to be steps, it is necessary to increase the protrusion of the knives beyond the side surface of the plane.
Surface treatment
An electric planer can perform three operations:
Scheme of options for sharpening a plane knife.
- chamfer at different angles;
- select quarters on blanks;
- plan surfaces.
The main purpose of the tool is to plan surfaces of various lengths and widths.
When working, the plane must be placed on the surface of the workpiece with the front plate so that the knives do not touch the surface. Press the start button, after picking up speed (the sound stops changing pitch) begin moving the plane along the surface. The tool must be held strictly parallel to the surface being processed, the movement must be uniform, without jerking or stopping. When starting to move, you need to increase the pressure on the front part, and when exiting the surface to the rear part. The plane should work smoothly, without vibration. If strong vibration occurs or the sound changes during operation, you need to turn off the tool, determine and eliminate the cause of the abnormal operation.
The depth of the passage must be set depending on the processing purposes. If you need to change the size of the workpiece, you can use the maximum size. When leveling the surface, it is advisable to work with a shallow processing depth, achieving the required quality in several passes.
Also, the depth of processing depends on the material. Hard rocks should be passed several times at shallow depths to avoid overloading the tool.
Boards, continue wood processing
Now that you have your board pieces cut to size, the following steps help bring the rough, unplaned pieces to their final size. For this, three tools will be used - a jointer, a thickness planer and a table with a circular saw. The first step is usually to choose the flatter side and plan it on each board. My tool in this case will be a jointer. Of course, you can use a hand plane, but if you have a lot of workpieces, then an electric jointer will do the job more quickly. The zigzag chalk lines on the side that will be planed make it easy to see when the piece is completely flat.
Basics of planing boards on a jointer.
Processing a wooden board with a jointer involves feeding the workpiece to the cutting head. Feed it in such a way that the narrow part of the wedge is directed towards the knives. This method will help avoid chipping your crafts. Another key point to keep in mind. Place the board on the feed table before planing. By rocking the board with your hand, determine the edge where less material will be removed for alignment, as shown in Figure 2. This step will create two points of support for the workpiece on the table and keep the part from swinging.
Planed board. A tight grip between the face of the wide board and the table, and good pushing blocks will help you get a good flat board. Don't try to press down on the board to plan in one pass. It is better to set the jointer blades to the position for easy cutting. Removing thin shavings makes it easier to plane on a jointer and will result in smoother cuts on the craft board overall.
Planed edged boards of one thickness. Once one side of the board is flat, it is now ready to be planed through the planer. Such techniques do two things at work. First, it gives the second side a flat and parallel base to the first side. And secondly, it reduces the workpiece to the desired thickness. If the workpieces have a large difference in thickness. Then the adjustment for a craft in one size is done after both surfaces are made flat and parallel. Be sure to turn the workpiece between passes. So that the edge of the board is smooth at the end of the fugues
Natural moisture board
Such products are designated EB, and are among the most affordable and in demand. Essentially, this is a log immediately after sawing, which means its moisture content will be 40% or more.
Having chosen this option, you need to prepare for the following:
- Drying out. The board shrinks as it dries, this happens to varying degrees and not always evenly. If the sawing was carried out without precision, then you will get a material with a variation in size that does not allow you to create an even frame. Among the consequences is the need for lathing and leveling. Gaps up to 1 cm may appear during assembly.
- Geometric changes. Tension is created inside, which spoils the geometry, twisting or warping the board. The longer the board, the greater the change in its geometry during drying. Some lumber allows you to use only a couple of small pieces; a large amount goes to waste. Under natural conditions, the probability of rejection is very high. Already installed boards in the frame suffer less, but sometimes they can also damage the structure.
- Microorganisms. Often boards are affected by fungi and mold; given the time to dry, they are not so dangerous, but if you immediately sew up and insulate the structure, then everything will get worse. Everything can rot and you won't see it. Antiseptic impregnation of wet wood is less effective than treatment of dry material, especially if the antiseptic is applied to the surface, without in-depth treatment under pressure.
Such boards are truly an opportunity to save money. We will build a house in accordance with quality standards, and you will not notice much difference between a frame assembled from dry boards and from wood with natural moisture when the house is delivered. However, over time, you may experience heat loss due to the appearance of cracks. If mold also appears, despite antiseptic treatment, the service life of the house will be significantly reduced.
The material can be used, but only if the constructed frame is left to dry for up to 2 months in conditions of good ventilation. But you will have to deal with geometric problems and cracks. A wet board shows itself normally only on the sheathing.