When planning to celebrate any event at home, be it a child’s birthday or a meeting between a mother and her baby from the maternity hospital, in addition to food and a festive program, you should think about how to create a festive atmosphere by decorating the room. And here affordable and elegant balloons come to our aid.
In this article you will find some interesting ideas on how to beautifully decorate a room with balloons and thereby create a festive mood for both the guests and the hero of the occasion, because both children and adults are partial to balloons!
Now let’s look at specific examples of creating various figures and compositions from balls.
Ice cream
Light and bright balls resemble ice cream balls, which means you can use them to create decorations in the form of this cold dessert. One has only to take into account that in order for the “ice cream” to fly, they must be inflated with helium, and the paper for the “cups” must be light and thin.
This composition is perfect for a baby shower, a children's themed party, or simply to create the mood at any children's (or maybe not children's) celebration.
Such decor would be appropriate for a celebration whose theme is somehow associated with sweets or cold (for example, a Frozen-themed party).
Photos in the design
To create a festive atmosphere, banners, large inscriptions, all kinds of ribbons, garlands, paper flowers, and posters are suitable. Using a photo of the hero of the occasion in a festive decoration is perfect for a children's party, and for family gatherings with the participation of grandparents, who, of course, will be delighted.
To do this, you need to, together with the birthday person, choose those photos that everyone likes. A child aged 1-3 years old does not care which photos to choose, but for an older child who has invited friends, it is very important to choose the photos for everyone to see.
It is good to place them on the wall of the room in which the holiday will take place. As an option, you can stretch a thread across the entire wall and attach a photo to it using bright clothespins. Photos attached to helium-filled balloons look great.
Cherries
Another delicious thing made from balloons. Unlike the previous option, here you can not inflate the balloons with helium, but inflate them yourself. The main requirement is that the balls must be red or burgundy so that cherries can be seen in the finished composition.
You will also need green material from the props, preferably paper - for creating leaves, thread or wire, and glue for holding the elements together.
You can make a garland from these cherries, or simply attach them to walls or furniture. Bright berries will not go unnoticed!
Hare
To make a figure in the shape of a hare you will need 1 ball with a diameter of 2.5 cm and a length of 150 cm.
Step-by-step instruction:
- Inflate the balloon, leaving the tip 4 cm empty.
- From the start, roll up a bubble 8 cm long.
- The next 2 bubbles should be 16 cm each.
- The twist of bubbles 2 and 3 must be secured by twisting them into a “lock”. You will get the face of a rabbit with ears.
- For the neck you need a bubble measuring 3 cm.
- The next 2 bubbles are the same size, about 10 cm.
- Connect twists 5 and 6 of the bubble into a “lock”. Now we have the front legs of a rabbit.
- To simulate a body, you need a bubble 8 cm long.
- At the other end of the ball you need to make a bubble measuring 3 cm.
- Both ends of the body must be screwed into a lock. You will get the hind legs and tail of a hare.
You can use a marker to draw eyes and whiskers on the rabbit.
Cloud
Another decoration option for a baby shower, because in translation “shower” means “shower” or “rain,” which means a cloud with drops will come in handy.
Choose white or light blue balls for the cloud if you want to achieve realism, but no one forbids you to build a bright, fantasy cloud. The main thing is that the color of the “droplets” matches the color of the “cloud”.
Also, such a cloud is suitable for a birthday party in the style of Masha and the Bear or Winnie the Pooh - to recreate the atmosphere of the forest. And the clouds would also be appropriate for a matinee in kindergarten in honor of the autumn holiday.
Color spectrum
You should not use the entire palette of shades. The design will turn out to be too chaotic, which will inevitably destroy the overall atmosphere. It is better to choose two or three primary colors and combine them to your taste.
Another interesting solution is several shades of the same color. For example, at a green wedding, you can create an arch or garland with a gradient from soft mint to rich herbal. Monochrome looks no less worthy, but in this case, try not to overdo it, otherwise the overall picture will turn out to be somewhat boring.
At classical ceremonies, delicate, pastel shades of pink, blue, white or gold are most often used.
A colored wedding invites you to add a palette to the celebration – shades of red, blue and even black. Advice! Remember that a balloon filled with air looks lighter than a deflated one. This can be important when choosing perfectly matching shades, especially bright or dark shades.
Flowers and bows
Girls' favorite attributes, and therefore the balloons decorated with them, will delight a birthday girl of any age and will suit almost any girlish celebration theme - be it a Barbie-style birthday or a princess-style party.
Even a not very experienced decorator can create such beauty - all you have to do is attach the decorations to the base of the ball.
To make balloons with this decor look more elegant, they should be inflated with helium or placed on a stand.
Romantic option
This decoration is ideal for Valentine's Day, wedding anniversary, or simply as a gift for a loved one. All you need for this is:
- Inflate bright balloons with helium;
- Attach decorative ribbons to the ends of the balls;
- Tie an additional gift to the ribbons - for example, some kind of game, or a gift box with a surprise;
Thus, the gift will be on the floor, in a beautiful design, and a balloon will float above it, with the image of the other half, for example. Such a decision will greatly emphasize the significance of the event, surprise your loved one, and just make him happy.
Garlands of balloons
Just like garlands made from flags, flowers or photographs, you can also make a garland from inflatable balloons. Even a child can cope with this task - you just need to thread the tails of the balls and string them on a thread or rope. A large needle like a gypsy needle works well for this purpose.
You can attach such garlands both to the wall and to the window or door. By playing with different colors and sizes of balloons, complementing them with other elements, you can create your own unique masterpiece and decorate your beloved child’s birthday with it)
Machine
To simulate a machine, you will need 1 ball of any color, 2.5 cm in diameter, 150 cm in length.
Step-by-step instruction:
- Inflate the balloon leaving the tip 12 cm without air.
- Start by rolling up a 12 cm bubble.
- Make a 3 cm bubble and twist its beginning and end into a “lock”.
- Twist another 12 cm bubble and secure both ends with a “lock”.
- The next bubble should be 10 cm in size.
- Twist 2 bubbles of 3 cm each, twist them together.
- Make a bubble 15 cm long.
- The next bubble should be 10 cm, and after that – 12 cm. The remainder should be 3 cm.
- Twists 7, 8 and 9 of the bubble must be secured with a “lock” to form a loop.
All that remains is to correct all the bubbles by turning them down.
Ghosts
For them, it is best to use white opaque balls, but for Halloween, orange ones that imitate a pumpkin will also be appropriate. Making such a cute ghost is very simple - all you need is the ball itself and a black marker or felt-tip pen. Even a child can draw a ghost’s face, and how much pleasure a child will get from the very process of creating such a festive decor.
For greater realism, we attach long paper strips to the bottom of the ball - you get ghost clothes.
Swan
To create a figure in the form of a swan, you will need a white ball with a diameter of 5 cm and a length of 152 cm.
Step-by-step instruction:
- Inflate the balloon, leaving a free end 8 cm long.
- Start by rolling up a 2 cm bubble.
- Secure the launch and twist into a “lock”.
- The next bubble should be 30 cm long.
- Connect the twist of 2 and 1 bubble into a “lock”.
- Make a bubble 20 cm long. Twist the beginning and end into a “lock”.
- You should get 2 loops. The arc of 3 bubbles needs to be inserted inside 2 loops.
- The rest of the ball will be the swan's neck. It will need to be slightly bent in the desired direction.
The remaining tip without air imitates a beak. All that remains is to draw the bird’s eyes with a marker.
Decorations for the table and candy bar
When planning how to decorate a room with balloons with your own hands, don’t forget about the holiday table. Balls on stands will look most advantageous on the table. This way they will be more noticeable and won’t take up much space.
Balloons covered with tulle or chiffon look very elegant; compositions made of balls, complemented by small decorative elements such as bows, flowers, and butterflies, will look just as nice.
Such compositions will add an elegant touch to the festive table, and little guests will not remain indifferent to such non-standardly decorated balls.
How to beautifully and stylishly decorate the entrance area, porch with balloons
For any event, decorating the front door with balloons will help create a festive mood and give you the feeling of an important, meaningful holiday.
Decor options:
Decoration for the anniversary
Decoration with daisies
Decoration for graduation
Unusual holiday decor
Rainbow Arch
Compositions and arch
Flowers and butterflies
Similar figures can be easily created from small balls. At the same time, for a flower to look really elegant, all its petal balls must be the same size, so you will have to practice a little in inflating the balls evenly)
A composition of several such figures looks the most original and elegant. You can highlight an entire wall in the room for this decor or decorate the background of a candy bar with it.
And this video shows how you can create a whole bouquet of daisies yourself:
Frame version of the figure
This option is used most often for public holidays - last call, grand opening, wedding. An entrance arch decorated with various balloons will look impressive.
The only disadvantage of the frame option is that it cannot be done independently. This will require two or three people to help create the figure.
The easiest way would be to make a “string of pearls”. In this case, the balls are simply attached to the fishing line in a chaotic manner. The main condition is that the balls must be firmly fixed, otherwise there is a risk that the figure may completely disintegrate. Assistants are needed here in order to feed the balls while strengthening them in the highest part of the structure.
If you have several friends who will not refuse help, this will be an ideal way to brightly decorate the holiday. Young children who love to run around and have fun will be especially happy with the arch.
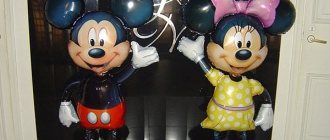
Funny faces, minions
Happy holiday - funny faces made of balloons! A smile in a balloon will certainly make a child smile in return. Maximum positivity with a minimum of effort, because anyone can draw such a cheerful face.
Well, in the case of a minion it’s even simpler - it’s a ready-made foil ball. This is how we smoothly move on to the next point...
Crown
You will need 2 yellow and red balls, 2.5 cm in diameter and 120 cm long.
Step-by-step instruction:
- Inflate the red balloon, leaving the tip 8 cm without air.
- From the start, make a bubble 15 cm.
- The next bubble is small - 2 cm. Its ends need to be secured in a “lock”.
- Twist a 12 cm bubble.
- Repeat steps 3 and 12 until the end of the ball. Close the chain into a ring.
- Inflate the yellow balloon, leaving the 10 cm long tip empty.
- Launch a yellow ball and tie 2 red bubbles to the twist.
- Twist a 10 cm bubble from a yellow ball.
- Twist a small bubble 2 cm in size. Twist the ends into a “lock”.
- The next bubble should be 10 cm long. Its end should be wrapped around 4 red bubbles.
- Repeat step 8, increasing the size of the bubble to 15 cm. Then repeat step 9 and twist another 15 cm bubble. Attach its end to red bubble 6.
- Repeat steps 8, 9 and 10.
- The end 9 of the bubble is secured with a “lock” on the twist 8 of the red ball.
Correct all the balls. Now you can put such a crown on your head.
Foil balloons
They are completely self-sufficient and do not need to be decorated in any way, but in combination with latex balloons and garlands they look quite interesting. Your only concern when preparing for the party will be to inflate the balloons at a specialized point with helium or rent a gas cylinder and inflate them at home yourself.
If you fill the balloons with ordinary air, they simply will not fly. You will either have to mount them on the wall, or take care of some kind of base or stand.
Horse
To model a horse you will need 2 pink and blue balls with a diameter of 5 cm and a length of 152 cm.
Step-by-step instruction:
- Fill the pink balloon with air, leaving an 8cm empty tip.
- From the beginning of the ball, twist a bubble measuring 8 cm.
- Twist another 3 cm bubble. Twist the beginning and end of the bubble into a “lock”.
- For the neck you need a bubble 10 cm long.
- Make 1 more bubble 3 cm in size. Twist the beginning and end of the bubble into a “lock”.
- Twist 2 identical 12 cm bubbles.
- Place the bubbles together and connect them to the previous “lock”. These are the horse's front legs.
- For the body you need a bubble measuring 12 cm.
- Repeat steps 5, 6 and 7. You will get the hind legs. They and the front legs need to be twisted in a spiral. The remaining part of the ball is the horse's tail.
- Fill the blue ball with air to 25 cm.
- From the start, twist 2 balls of 2 cm each, secure with a “lock”.
- With a “lock” you need to connect 2 bubbles of a blue ball with a twist of 1 bubble of a pink one.
- Place the blue ball on the horse's neck and form a bubble parallel to the bottom twist.
- Twist the blue ball in a “lock” around the pink one. The result was a horse with a mane.
You can make a bridle from a scrap of blue ball. To do this, you need to thread the ball between the neck and mane and tie the loose ring in a knot. Trim off the excess and tighten the bridle over the horse's face.
General recommendations
When thinking about how to decorate a room with balloons for your child’s birthday, or for some other significant event, try to plan the decor concept in advance. The main thing here is not the number of elements, but their skillful combination with each other.
If you are decorating a room where little children will have fun or where a newborn will be brought, use a limited number of inflatable balloons and pre-ventilate the room, because such balloons are a source of unpleasant odors. It’s better to complement the balloons with some neutral-smelling decoration, such as paper decoration, or give preference to foil balloons.
To ensure that the balls retain their appearance until the end of the celebration, try to protect them from sudden temperature changes. Also, do not inflate them to the maximum size - this will shorten their service life.
At the end of the festive feast, you can distribute the balloons to the little guests - let them rejoice, play with them or take them home.
Making a composition
Of course, only a professional can make some complex composition or figure out of balloons. But for a children's party, pretentiousness is not needed. We will try to learn how to make the simplest elements that you can combine at your own discretion.
How to tie a ball
No strings. This method is extremely unreliable and causes more hassle. Learn how to tie balloons into a knot; it only takes a few practice sessions.
1. Inflate the balloon to the required size and release some air from it.
2. Wrap the tip of the balloon around your index and middle fingers to create a loop.
3. Using the index finger of your other hand, insert the tip of the ball into the loop and tighten the knot.
4. Do not inflate the balloon all the way so that a small tail remains.
5. The balls are twisted in one direction, turning around their axis 2-3 times.
We have learned how to inflate balloons correctly. Now we will learn how to make simple compositions from balloons.
Flower
It is the traditional, most popular and most widely used element in balloon designs. Such flowers can be mounted separately, as decoration for walls, stairs, curtains, or collected in small compositions and bouquets.
To create, you will need four 9" balls and one 5" ball. The balloons are inflated and tied. Make sure that the large balls are the same size; if this is not the case, you can deflate the ball a little, or, conversely, inflate it slightly.
Now we connect large balls in pairs (these will be petals). Place two pairs of balls on top of each other and twist them in the middle. You should get a base with four petals (“four”).
All that remains is to tie a small ball in the center and decorate the resulting flower with paper ribbons, which must be twisted using scissors. The finished element is secured to the interior items using tape or the same paper tapes. By the way, if you attach a long thin ball to such a flower on the side opposite from the middle, you will get a flower with a stem. You can put together a bouquet of these “airy” flowers and put them in a vase or just in the corner of the room.
Chandelier
The element is somewhat more complex than a flower, but also basic. Essentially, this is the same flower, but only with an additional “four” of balls with a diameter of 12 inches. Such elements can be hung from the ceiling or simply placed around the room. If you plan to place the arrangement on the floor, tie a small balloon filled with water to its base to weigh down these design elements and prevent them from flying around the room with the slightest breath.
The “chandelier” is made in the same way as the “flower”, with the only difference that another base appears from four balls of larger diameter. They are also twisted with the first base, or, if that doesn’t work, you can connect the “fours” using paper tapes or fishing line.
Garland
Garlands of balloons decorate cornices and stair railings; they are suspended between wall and ceiling lamps. And if you choose a rigid base, you will get a column of balloons, which can be placed, for example, near the front door.
For a 1 meter long garland you will need 16 12" diameter balloons, or 28 9" diameter balloons, or 40 5" diameter balloons. For small rooms (especially rooms in an apartment), it is better to make a garland from balls of the smallest diameter. Such a garland will look neat, but it will take quite a lot of time to make.
Prepare balls, fishing line or thin paper decorative ribbons. Inflate the balloons and tie each one separately. Tie the balls into “fours” (if the garland is not monochromatic, think about the arrangement of colors: it will turn out striped if you tie four balls of different colors in the same order, and the garland will be “twisted” if you use balls in “fours” two colors).
The fours are connected to each other using fishing line or ribbons. The balls are strung on the base, then the base is secured, and so on each time. At the beginning and end of the garland, you should tie one large-diameter ball or decorate the ends with paper ribbons so that the place where the balls are fastened is not visible.
Columns, columns and pyramids are made using the principle of a garland (if you gradually reduce the diameter of the balls in the “fours”). It is better to tie a weight to the base of the standing composition for stability, and you should try to tie the balls themselves more tightly so that they do not fall over or fall apart.
What can be added?
The idea of decorating a photo zone with balloons is excellent in itself. But in some cases this is not enough, and the place for a photo shoot looks sluggish and uninteresting. In order to correct this, you can resort to various additional decorations.
- The first thing that comes to mind is to use holiday rain. For example, this material can be used to make a background for filming. Due to the ability of rain to reflect light over its entire area, the background will shimmer, which in many cases looks appropriate and elegant. The option of designing a photo zone with rain is often used by professional filming companies.
- Another idea is to decorate the photo zone with baskets of flowers. This technique - adding colors - is used in a variety of areas. As a rule, flowers in baskets are hung on a ball rim, thereby creating a more cozy atmosphere. Moreover, it is not necessary to use the basket and flowers together. So, artificial specimens can be wrapped around balls without using baskets. On the other hand, the baskets themselves can be used in another way, for example, decorated beautifully and hung in a photo zone.
- Don’t forget about the banal additions that are used everywhere: fabrics, furs, lace, multi-colored paper and cardboard, foil. By using your imagination, you can find suitable places to use them in your photo zone.
- When creating a themed photo zone, you should use various decorative items: various toys and figurines. But this must be done in moderation.
More, more balls!
An option that will delight both kids, romantic girls, and, probably, even many young mothers.
You can use it for a Jubilee, a wedding and a wedding anniversary, a children's party, Retirement Day, any significant date - for example, a celebration of receiving a diploma or being awarded a Badge of Distinction.
- We inflate the balloons (you can use regular air) in huge quantities. Immediately stock up on a pump - you simply don’t have enough strength to inflate so many balloons.
- There should be so many balls that they fall on the person who opens the door to the room - that is, from floor to ceiling. The surprise is, of course, labor-intensive, but effective!
- Well, the second option: an avalanche. It is suitable for rooms with high ceilings. We fix a wide net under the ceiling and fill this “hammock” with inflated (air!) balloons. At the right moment, one of the guests tears off the net, and the balls fall on the guests like an avalanche.
Video: How to properly sew a net for dropping balls?
History of twisting
Bouquets and crafts from balloons are created using a special technique - twisting, one of the areas of aerodesign. Translated from English, twisting is translated as rotating, twisting; in relation to balls, it literally means modeling shapes. In this type of creativity, special latex products are used. They are heavier than regular balloons, so even if they are filled with helium, they will not float. Modeling can be monosyllabic - from one ball and multi-component.
Creating figures from rubber and latex balloons began not so long ago, but already in ancient times the Egyptians and Aztecs modeled the silhouettes of animals from cleaned intestines. This is evidenced by rock paintings and hieroglyphs in ancient pyramids. With the development of chemistry and the invention of round balls, they were initially used for twisting. And in 1912 they created the first cigar-shaped elongated ball. Already by the 30s of the last century, magicians were playing them in numbers for circus performances. By the end of the 20th century, twisting turned into a mass hobby, communities, organizations, and training courses appeared.
But the wide distribution of this type of creativity today leads to the fact that it can be practiced everywhere and by completely unprepared people. Specific physical abilities are not required for classes, but you should stock up on a set of basic knowledge and suitable materials.
Aerodesign classes develop creative abilities, logical thinking, and help develop spatial modeling skills, so they are suitable for adults and children.