Doorway, Miscellaneous
After installing a new door, finishing the opening will be necessary. This step cannot be avoided regardless of the type of materials used, because it reduces heat loss and provides an excellent basis for subsequent decoration of the doorway.
Doorway without door and plaster
What is plastering?
Before plastering a doorway, you need to understand the essence of the work being performed. Finish that part of the opening that frames the door on the sides and top. Objectives of this step:
- level the surface;
- protect from destruction;
- insulate the opening.
The choice of method of performing work is influenced by a number of factors:
- technical indicators of the opening;
- intensity of operation;
- renovation budget.
Note! The choice of one method or another is influenced, among other things, by the quality of installation and the design of the opening.
If the gap is more than 5 cm, then you will have to first insulate and soundproof the opening, and only then plaster it. If the door is installed correctly, such gaps should not appear. In this case, using polyurethane foam would be the right solution.
Cement plaster
Openings where there were none
Sometimes, during major repairs or redevelopment of apartments or houses, the owner decides to change the size of the opening. If the walls are load-bearing, such actions are preceded by obtaining permission; if it is just a partition, then the housing commission is notified of the fact of the work performed. But that’s not about that now.
Passages are made in different ways, the choice of which depends on the structural material of the wall. Accordingly, slopes are formed in different ways. In brick, foam concrete and asbestos-cement partitions, passages are cut. These materials are quite soft, so large expenses for cutting the opening are not required.
Naturally, this is done according to preliminary markings, after which leveling and finishing are carried out. If the passage just needs to be widened, it is easier to do it on only one side. Although, the layout does not always allow you to do what is easier, and you have to cut the opening on both sides.
Why is this necessary?
A doorway is plastered for a number of good reasons, aesthetic and functional:
- Gaps and cracks. Using plaster, defects in the jamb are removed. Plus, after the dismantling and installation work, there are likely to be some uneven spots left; the finishing will also help hide them.
- Appearance. Even if the area near the box is planned to be finished with other materials, it is also worth leveling the slopes; they will give the opening the correct geometric shape.
- Decorative effect. Plastering can be the only way to decorate. The method is inexpensive and the work can be easily done with your own hands.
- Installation protection. Polyurethane foam, which is protected by a layer of plaster from exposure to ultraviolet radiation, will be able to perform its functional task for a long time.
Tools and materials for work
To plaster the sides of the opening, you need:
- mixer (for mixing the mixture);
- spatulas;
- roller;
- short rule or malka;
- grater;
- level;
- capacity;
- masking tape, film;
- rags;
- sandpaper;
- paint brush;
- components for solution or dry mixture;
- primer;
- putty;
- corner profile;
- reinforcing mesh;
- self-tapping screws;
- clean cool water;
- scaffolding or stepladder;
- personal protective equipment.
Finishing method
There is such a thing as wet and dry plaster. The first method means applying plaster mixtures, which are sold dry. To work, they are diluted in the proportion indicated on the package. It is advisable to strictly adhere to the recipe, because if the mixture turns out to be too thick, it will quickly harden, not allowing you to adjust the application. Too liquid will drain from the walls.
The following types of wet plaster are used:
- Cement is the cheapest, moisture resistant, but shrinks after drying. It is used as a starting material or subsequently painted, since the color characteristic of cement is gray.
- Plaster. This class of plasters is characterized by uniformity and excellent application. The surface is smooth after use, but a damp environment is contraindicated for such compositions.
- Polymer. It has excellent technical characteristics, including in terms of moisture resistance and ease of application. However, many are put off by the high price.
When plastering, several layers are applied. Each one uses different plasters – starting and finishing. The difference between them is that the finishing has fine grains, due to which the surface is smooth. There are universal formulations, but they are expensive.
Profiles for drywall
Drywall is called dry plaster, because it does everything to the opening that wet plaster does, but without diluting the mixture and applying it. This method is convenient for the speed of work. A plasterboard-lined floor will still have to be plastered, at least in the places where the screws are screwed in. However, the scope of work is much less.
This is an excellent method on how to plaster a doorway in a wall without installing a door. The surface will be smooth and neat. A huge advantage is that you don’t have to wait for the plaster to dry.
Popular ways to narrow a doorway in width and height
Many people have to face this problem, since redevelopment of residential premises, and even more so major renovations in a house, is far from uncommon. The need to reduce the height of the doorway is due to the fact that often the door model you like does not fit it in size. There are several simple techniques that allow you to level out this discrepancy between the linear parameters of the frame and the passage.
Acceptable work technology, as well as appropriate materials, are selected based on an assessment of the following factors:
- difference between the dimensions of the opening and the block;
- required strength (depending on the location of the door);
- condition of the wall.
- Preparation stage
- Operating procedure
- Method 1
- Method 2
- Method 3
Preparation stage
- “Exposure” of a section of the wall at the site of installation work
This is necessary in cases where the doorway is reduced in an already inhabited room. For example, when moving into a purchased apartment with an old layout, during a major renovation, and the like. This will allow you not only to take all dimensions of the passage with maximum accuracy, but also to assess the condition of the wall. It may be necessary to first expand it slightly, and then artificially reduce it while simultaneously strengthening it.
- Changing the Communications Trace
Also one of the typical situations. For example, if the internal electrical wiring was previously laid close to the door block. It is clear that during the installation of the new structure it will be a hindrance; you'll have to change the line.
- Taking measurements
Based on the results, a conclusion is drawn on how to reduce the doorway. That is, the most acceptable of the methods practiced in everyday life is selected.
Operating procedure
Method 1
One of the simplest technologies is to use timber of the appropriate width.
What to do:
- Select the workpiece, adhering to the required parameters. This will simplify the process of its further processing.
- Give it the required geometry. The timber will have to be adjusted to the specific dimensions of the passage in the wall.
- Width – it is advisable to trim so that the workpiece fits into the opening as tightly as possible. Then you won’t need to “wedge” it.
- Thickness - if the beam protrudes beyond the plane of the wall, it is enough to process its edge with a plane.
- Record the sample. The method is selected based on the base material. But in any case, chamfers should be made so that the caps of the fasteners do not interfere with further finishing of the opening.
- Since the door is subject to constant dynamic loads, the beam must be firmly fixed. Therefore, it is fixed not only from below, but also from the sides.
- Installing a wooden blank in place is just one of the stages in solving the problem of how to reduce the height of the opening for a new door. Here a lot depends on the method of its further design. There are enough options - sheathing with fragments of chipboard or gypsum plasterboard, purchasing wide platbands and a number of others. When choosing a technology, you need to take into account the quality of the wood and where exactly the timber is used. If the lumber is not sufficiently dried, and we are talking about an opening leading into a damp room, then the deformation will be significant, and quite soon.
- It is advisable to use polyurethane foam to seal cracks. In this case, it performs a dual function - sealant and glue. Consequently, it will further strengthen the position of the beam in the interior door opening.
Finishing technology using plaster mixtures
To work, you will need a set of simple tools and materials, without which a high-quality and smooth surface will not be possible.
Tools for work
- Rule and set of spatulas. You need one that is narrow and the same width as the wall in the opening. You may need a special one for the corners.
- Bucket for mixing plaster, construction mixer. A drill with special beaters will do.
- A grater for leveling the surface and a mesh with different cell sizes, also for mashing.
- Building level.
- Corners.
- Plaster mesh for reinforcement.
- Primer and brush, maybe a roller.
- Stationery knife or scissors.
Layer-by-layer plastered slope
Making external slopes
How to make slopes at the front door from the outside? First of all, they are cleaned of debris and plaster residues. Then a layer of primer is applied. Once the primer has hardened, cement mortar is poured on to level the surface. The final stage of work upon completion of the appearance is the painting work. This is the best option for making external slopes. Exterior finishing using plasterboard, plastic, etc. is not advisable, because such materials do not have the strength of cement mortar.
External slopes are best done using cement mortar
Preparing the opening
First, the wall is freed from dirt and dust. If there are areas of old plaster, they are removed. The falling bricks are removed and re-laid on a cement composition. Remove all protrusions on the plane so that they do not interfere with the work.
To ensure good adhesion of the plaster to the wall surface, the masonry seams are cleared to a depth of 1 cm. An important preparatory stage is applying a primer. It improves adhesion to the surface.
Next, plaster beacons are installed; they must be leveled relative to the wall and slope.
Plaster
In addition to preparation and alignment, it is important to make the correct angles according to the geometry. A special corner will help with this. It is made of thin metal, so it is recommended to work with it extremely carefully. To do this, apply a plaster mixture to the corner and place a corner on it so that the excess is squeezed out through the holes. The remaining solution is removed with a spatula.
Next, the entire surface is plastered. To do this, apply the mixture in small portions using a spatula to the wall and level it using a rule, moving from bottom to top. The movements when “pulling” the plaster are zigzag - this way it is possible to squeeze out the excess.
If several layers are required, then the next one is applied only after the previous one has dried. After this, the surface is rubbed using a special grater. Next, the slope is painted or left as is.
Note! To strengthen the surface, it is recommended to use a plaster mesh; it plays the role of a reinforcing element. With it, cracks will not appear on the slopes, and the plaster will not fall off.
In some cases, plaster is applied in two stages: first starting, then finishing. Here the grouting is performed twice - first the dried starting layer is processed, then the finishing layer. This way you can achieve a perfectly flat surface.
After drying, the beacon is removed and the resulting grooves are plastered.
Mounted corners
How to eliminate a skewed metal entrance door: solution options
- The subsidence of the canvas is visually determined as an uneven gap along the contour of the vestibule between the inner border of the box and the edging of the canvas. Characteristic is the appearance of abrasions on the side of the hinges in the upper part, as well as in the lower part on the opposite side. The culprit is most often the deformation of the hinges or their attachment point.
- Deformation of the canvas - manifests itself in uneven through gaps along the border of the vestibule or in difficulties with locking the lock. The reason is mainly a violation of production technology, when there is no low tempering procedure to relieve stress in the area of the welds. If the structure has not undergone heat treatment, then curling of the leaf is a matter of time, and eliminating door misalignment in this case is very problematic.
- Installation errors - when opening the door leaf touches the floor, if you lift it, you feel a noticeable play. In this case, it is possible that cracks will appear on the wall and the platbands will not fit tightly. The reason is quite simple - the door fasteners are loose and will need reinstallation.
Drywall installation technology
When working with drywall, finishing an opening with installed doors can be easier and faster. Tools you will need: electric drill, stationery knife, pencil, wooden block. If installation is carried out directly on the surface, then glue is required, and when making a frame, profiles are required.
Gluing drywall to the wall will only work if it is fairly level; lathing from profiles will be needed for large level differences. The gaps that have formed between the wall and the plasterboard sheet can be filled with insulation.
The first step is to install the frame; pre-cut plasterboard sheets are screwed onto it. The distance between the screws during installation is about 30-40 cm. If the wall on which the sheet is mounted is not wide, then two rows of fasteners will be enough; otherwise, more will be required.
The screws are carefully inserted into the sheet, but so that the paper layer does not break through. After completing the installation work, the places where the screws are tightened are spot-plastered.
Openings for door installation
By searching: “Preparing doorways video,” you can always find a suitable video where craftsmen share their experience. For our part, we will try to give you theoretical knowledge, relying on building rules and technologies - after all, the opening must not only be correctly calculated, but also leveled properly.
So:
- The easiest way, of course, is when the construction of a house is carried out, as it should be, according to the project. The documentation contains a diagram for filling doorways, an example of which you can see below. It indicates the sizes and types of doors, as well as gaps in the walls where they will be inserted.
Specification of doors and their sizes
- As a matter of fact, when building walls, masons immediately make the openings that are needed - the main thing is that they have accurate information on the markings of doors that will be installed in load-bearing and self-supporting structures. But as for partitions, today most often they invite not masons, but drywall specialists, for interior planning.
Construction of a structure in a gypsum plasterboard partition (see How to make a doorway from plasterboard) - the procedure is not so complicated and can be done independently. But, of course, you need to approach the work with understanding, and try not to confuse anything regarding the size of the opening.
After watching the video in this article, you will be able to cope with the task. Below we offer you a short guide on this topic.
Opening in a frame partition
The thickness of a wooden door frame is on average 5 cm - it is this distance, coupled with the size of the door leaf, that is the full dimensions. All instructions for measuring the opening for installing a door boil down to adding an installation gap around its perimeter, which should be within 3-6 cm.
It is then sealed with polyurethane foam. Deviations of a couple of millimeters are not critical, but it is better if they are larger.
Note! Maybe not everyone knows that in the door markings, the size of the door leaf is encrypted in decimeters, taking into account the thickness of the frame. If, for example, it is necessary to install a door of the DG 21*9 brand, the minimum opening should be 2.160 m in height and 0.980 m in width. This principle applies not only to doors installed in partitions, but also to all similar structures in general.
- Since the plasterboard partition is a frame structure, the opening in it is formed at the time of installation of the load-bearing elements. Wooden blocks can be used for manufacturing, but more often, an aluminum profile is used for this purpose: guide and rack. Its dimensions are selected depending on the dimensions of the partition and the weight of the door being installed, for example: PN75/40 and PS75/50.
Partition frame
- First, the perimeter of the future partition is drawn on the floor, ceiling and walls, along which a guide profile is mounted, with the back to the base surface. Its shelves form a groove into which vertical posts and lintels will be inserted. Before installing the lower guide, it is necessary to mark the location of the opening on the tapping line, because the profile is not attached there.
- Of the vertical load-bearing elements, the first to be installed are those that form the doorway. The distance between them, as already mentioned, should be 8-10 cm greater than the width of the door with the frame. Then, a crossbar is mounted between these two posts, which will limit the height of the opening.
- They cut it out from the PN profile and install it so that the shelves are turned towards the ceiling. Depending on the method of installing the gypsum board around the door, one or two short intermediate posts will be inserted into it, giving rigidity to the opening. For the same purpose, wooden blocks of the appropriate section are inserted into the groove of the side posts, to which the frame will then be attached (see How to assemble a door frame without problems).
Everything is ready to install the door
- What the partition frame looks like can be clearly seen in the previous photo. How to properly cut a profile, use the method of bending the fastening, what distance should be between the frame elements, and other necessary information, look for in articles specifically devoted to this topic, as well as by request: “Preparing a doorway video.”
We talk about this only in general terms, since the article is devoted to the process of aligning the opening. Although there is nothing to level in plasterboard partitions. Usually the thickness of the partition is made in accordance with the door frame.
If no mistakes were made during installation, all that remains is to putty the surface of the walls adjacent to the frame, finish them, and cover the joints with platband.
Combined method
You can combine both described methods. Then the first thing is to screw the drywall, then apply a thin layer of plaster. At the joints of sheets, a mesh tape with an adhesive base is used. This will reduce the drying time of the plaster and avoid leveling the surface for a long time. Beacons are not used in this case.
The process of plastering slopes
Forming a smooth opening
Repairing openings in the bathroom, or near the front door, which will be discussed later, is a completely different matter. In these places there are no plasterboard partitions, but rather thick load-bearing walls.
The front door opening is often filled with one frame with two panels or several bindings. This is justified by the fact that one door, for example, can be metal, and the second wooden.
The space between them is called the stub. Considering that the thickness of a load-bearing wall can be quite impressive - say, two bricks (51 cm), then it is natural that even a double frame does not completely fill the opening. Most often, the door is placed flush with the wall on the outside, and slopes are created on the inside.
Sometimes they are covered with wood or MDF, but most often they are plastered with cement plaster. In any case, after replacing the door, or during a major renovation of the walls, when the plaster needs to be knocked down to the base, the geometry of the slopes is significantly disrupted, and you have to think about how to level the opening.
Methods for leveling slopes
Now we have come to the most difficult stage of wall repair. By the way, invited craftsmen charge separate money for plastering slopes, and the price, I must say, is rather high - about 250-300 rubles per linear meter.
Thus, the slope of one door measuring 2.1 * 0.9 m will cost at least 1,300 rubles. Although, such work may not take too much time - it all depends on the initial state of the opening.
- Try to do it yourself, especially since you can use a variety of available materials for the work. Aligning the side walls of an opening without a door is carried out according to the same principle as plastering rectangular columns. On the sides of the slope, checking the level, two long aluminum rules are fixed on both sides, extending them beyond the plane of the surface to the thickness of the plaster.
- The rules, in this case, serve as beacons, but in principle, you can do without them. The role of the rules is just as successfully performed by ordinary profiles for drywall, which are mounted on self-tapping screws or dowels, with their backs to the side surface of the opening. Just like the rules, they need to be moved forward by the thickness of the screed.
- If there is a door in the opening, then the beacons are mounted only on one side. In the first case, excess mortar is removed with a short rule, a small spatula, or a wide spatula. If there is a door in the opening, you need to make a template from scrap materials, which is shown in the picture above.
- It can be made from a piece of plywood, hardboard, plasterboard or even thick cardboard. The main thing is to make a recess on the template that exactly fits the protrusion of the door frame. This will allow you to make a clear line of the plaster layer around the perimeter of the door. After the solution has set, but has not yet hardened, the beacons are carefully removed and a corner is formed, cutting off all excess with a spatula.
- When the leveling screed, which is made with a base mixture with a coarse dispersion of components, has dried, a perforated plaster corner is mounted on it. And then they putty. If there is no major damage to the slopes, then a thick layer of plaster will not be necessary.
- In this case, you can do without beacon profiles and install the corner straight away. By the way, when plastering walls and slopes with specialized mixtures, you can simplify the leveling process by using the same drywall. If you cut long narrow strips and glue them onto putty along the uprights of the box, you will get a perfectly even junction.
- Aligned in level, these strips will serve as beacons for applying a leveling layer. There is no need to remove them, since after the starting layer has dried, the strips of drywall will be hidden under the putty. By the way, it is also more convenient to level the upper slope with plasterboard.
Plaster mixtures, especially when a thick layer has to be applied, do not adhere very well to horizontal surfaces. You have to install the mesh, apply several layers, and each time wait for them to dry.
And the wall plasterboard itself has a thickness of at least 12 mm, plus a thick layer of glue, which allows you to level the slope in one step.
Conclusion
Plastering door slopes is not difficult. The work is carried out without the use of special tools; the skills of a professional painter and plasterer are also not required.
Voted over 300 times, average rating 4.6
Comments
Unfortunately, there are no comments or reviews yet, but you can leave your...
Add a comment Cancel reply
We recommend reading
Doorway, Locks, Miscellaneous How to measure the opening for installing the front door, comply with the standards and not make a mistake? When buying a new apartment, house or building a new cottage...
Doorway, Miscellaneous Assembly of doors with frames, fittings, installation in a doorway Door structures are considered part of the interior. They have …
Doorway, Miscellaneous How to safely break through a wall and make a doorway yourself? To achieve a visual expansion of the apartment’s area, designers ...
Doorway, Miscellaneous Self-decoration of a doorway for the New Year holidays New Year holidays are happy memories from everyone’s childhood...
How to correct sagging fabric on hinges?
On removable
The position of the blade has to be adjusted as a result of its frequent use. Dismantling is necessary to remove the door from its hinges and adjust the position strictly to 90 degrees. Depending on the type of hinge mechanisms, the installation and correct adjustment of the blade will depend. Loops are:
- card;
- mortise;
- screw-in;
- invisible.
The most common are card type loops. To remove the door from them, just open it slightly and lift it slightly. But this option is not widely used, since in addition to the card loops, decorative elements are attached in the form of plugs and covered parts.
To unscrew the hinges and allow the fabric to come off them freely, you need to open the sash slightly at an angle of about 30–40 degrees. You need to place a strong object under the canvas to fix this position. You can use a crowbar or a shovel handle. By lifting this object, you can release the canvas and achieve its complete removal from the hinge mechanisms.
In more complex structures (metal interior doors or heavy wooden ones), it is better to use a jack. This is a labor-intensive process and will require the use of additional force. It is best to handle heavy structures with two people to prevent injury.
On fixed
Non-removable mechanisms are a design for opening the canvas on both sides of the box at an angle of 180 degrees. They are multifunctional and rarely cause problems. Most often, non-removable loops keep the canvas quite level even during long-term use. But you also need to know what to do with them in order to lift the door, successfully remove it and repair it.
First you need to unscrew all the fasteners around the hinges. You often have to use special tools to help. The most convenient is a hexagon, which quickly copes with removing all excess.
If the door leaf has sagged significantly, then removing the permanent hinge mechanisms may be more difficult. Sometimes you have to lubricate the elements with oil to unscrew rusted parts and make removal easier. If deformation processes are detected, it is necessary to replace the bent retaining screws with new ones. To do this, after removing the door leaf, the strength of the fastenings is checked. Before lifting the interior door, you need to make sure you have the necessary tools and understand what kind of fastening is in front of you. Depending on the type of hinges and the material of the door leaf, it is removed from the fastenings.
We are restoring the kitchen doorway, which the previous owners for some reason demolished. Lots of photos.
Several years ago we bought a two-room apartment in a house built in 1974. We have already told you that we decided to redo everything in this apartment, since the renovation of the previous owners did not suit us at all. In previous articles, we described in detail several stages of renovation of our apartment, and in particular (you can read it by following the links):
- bathroom renovation (article 1, article 2, article 3)
- toilet repair (Article 1, Article 2, Article 3)
- redoing the floors in one of the rooms and laying laminate flooring
Today we would like to share with you information about restoring the doorway between the kitchen and the hallway.
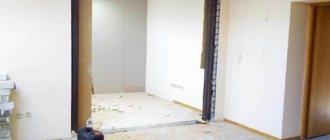
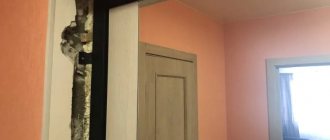
For some unknown reason, the previous owners removed the kitchen door and didn’t stop there. The entire opening was also dismantled. As far as we understood, the meaning of this was to combine the kitchen and the corridor - supposedly the passage would become wider.
We, in turn, cannot imagine the kitchen as a space combined with either a room or a corridor. Still, the room for preparing food should be isolated from the rest, at least not by a tight door, but by a door. In general, we began to restore the doorway and install the door.