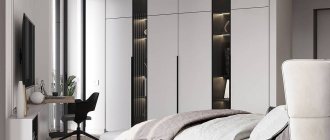
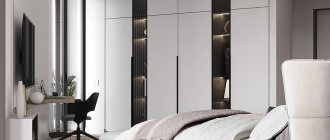
Every home still has furniture from the last century: everyone’s favorite wardrobes, which can hold quite a lot of things, and sideboards. The furniture looks boring, and has also lost its appearance. The houses or apartments of modern people should have stylish furniture. After all, what was fashionable 10-20 or even 30 years ago is now considered relics of the past.
We are not forcing you to get rid of your interior items, but we are presenting some tips that will help you transform your old furniture.
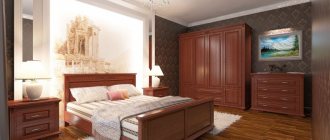
Restoration of a hallway cabinet in the Art Deco style
Updating old furniture is a creative endeavor. First of all, you need to think about how to tie the future cabinet design to the existing interior: choose the right shade of paint and fittings that suit the occasion.
Restoration of a hallway cabinet in the Art Deco style
What tools will we need?
- Sanding machine or sandpaper of varying degrees of grit.
- Screwdriver, screwdrivers.
- Putty knife.
- Paint roller (or wide flange).
- Small brush.
- Self-tapping screws and wood glue if joints become loose.
List of materials for work
- Primer composition.
- Wood putty.
- Automotive enamel in cans, black and metallic.
- Varnish.
- Masking tape (or mounting tape).
- Mirror glass to size.
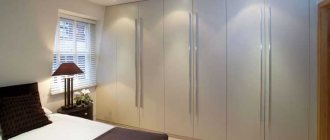
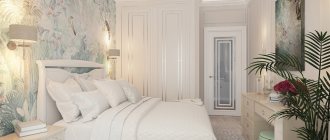
Restoring an old wardrobe
When considering the question of how to restore a cabinet, we subject it to a detailed inspection. If necessary, we strengthen loose hinges, replacing ancient nails with self-tapping screws. When installing new fasteners, we further strengthen the connection with good glue. We remove rust with a special solution.
We clean off the old varnish coating using sandpaper or a sanding machine. Traces of woodworm may be found in the tree. In this case, the walls must be wiped with a special antiseptic.
We clean off the old varnish coating with sandpaper
Now we inspect the cabinet for damage. Defects can be of varying degrees of complexity.
- Serious chips and dents. They are treated like this: first we prime their inner surface. After letting the primer dry, we fill in the defects with putty. It should be applied in several layers, waiting for each layer to dry. If you fill a dent with one thick layer, it bulges, does not hold firmly, and may crack after drying.
We prime serious chips and dents
Cabinet painting process
Having dealt with the damage, we prepare the surface for painting. How to update your closet beyond recognition? First, we clean the putty areas with sandpaper and apply several layers of primer, then the aerosol will lie evenly.
We first paint the cabinet in the main color (metallic). Then we use masking tape to delimit the parts to be painted black so as not to touch the finished surface. Apply a black tone. The contrast is very impressive.
We insert tinted mirror glass into the cabinet doors. This method of restoration will help to visually expand the room and give old furniture a completely different look.
Inserting tinted mirror glass
We screw in new fittings, selected taking into account the shade of the surface. A wardrobe in the Art Deco style will decorate the most presentable hallway.
We attach new fittings
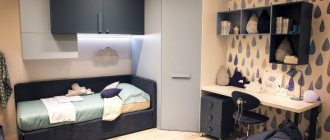
Kitchen lighting: possible options, do it yourself
If you don't want to spend a lot of money, there is one great option for how you can accomplish your task. Moreover, redoing it with wallpaper actually turns out to be quite effective and original. No special skills or abilities are needed here. In fact, you simply re-paste the wallpaper, just like on the walls. Only here a slightly different surface will be used in the form of cabinet facades. This method is relevant for living rooms and hallways. But in the bathroom and kitchen it’s hardly worth covering cabinets with wallpaper.
The kitchen and bath are directly exposed to a lot of moisture. Even if the furniture is located away from the hob and sink, excess moisture can still lead to rapid deterioration of your decor.
There is nothing difficult about covering the outer surfaces of the cabinet with your own hands.
You can look at the photos before and after such a restoration to understand how impressive and effective it is.
Although detailed step-by-step instructions are not needed here, I will describe the main points. You will need:
- choose wallpaper;
- thoroughly clean and degrease the facades;
- take measurements of the cabinet body;
- cut off the required amount of material;
- prepare glue that will adhere to the surface;
- treat the cabinet or just the wallpaper with glue (read the instructions);
- attach the canvas;
- remove excess glue;
- give time to dry.
If the wallpaper is chosen correctly, literally one roll is enough to completely transform old furniture.
It's simple, fast and original.
Work order:
At first I wanted to paint it like this without removing the door, then I realized that it would be inconvenient. So I took a risk. and took it off. It turned out not to be difficult. True, worries about how to put them back on were present until the last moment. In the end, I also screwed it myself; I didn’t have the patience to wait for my husband))).
I pulled out the built-in lights and wrapped them in a suspended state with masking tape. The same tape was used to protect the walls on the sides of the cabinet, the floor, and the mirrors on the doors. Prepared the workplace. I decided to paint it. on the bed)))! I covered it carefully with polyethylene. And I have never regretted this choice. The bed was large and high, everything fit, there was no need to bend over and crawl on all fours. I prepared approximately equal stacks of books and wrapped them in cling film. They are needed as substrates so that the doors can be lifted and painted as if suspended; the painted edges will not come into contact with a flat surface.
Stage 2.
I sanded all surfaces that needed to be painted. It is necessary to sand lightly, without fanaticism, with the finest sandpaper. Light circular movements. Purpose: to create roughness without removing the laminated layer. If there are dents and scratches, they should be filled with putty at this stage. After sanding, thoroughly wipe all surfaces with degreaser. It will remove dirt, grease marks, and everything that can disrupt the adhesion of the primer and paint.
Stage 3.
Primer. I went through hard-to-reach places with a brush, and the rest with a roller. A thick layer is absolutely not necessary; it must be covered with primer without drips and in a thin layer. Uneven coloring is not a problem, but there should be no gaps. I didn’t prime the rattan inserts; the paint applied well to them anyway.
They are easy to paint - just roll them with a roller; with a brush it is more difficult not to go beyond the edges. Wipe off any blemishes immediately with a cloth. Each layer was dried as recommended by the manufacturer; the acrylic dries “touch” in an hour and, in principle, you can carefully turn the door over and paint the other side.
Stage 5.
I assembled the closet. I screwed the doors and handles. I removed the masking tape and cleaned everything up. At first I planned to keep the doors open for two days, I was afraid that they would stick. Nothing like that - you can close it right away.
Required Tools
To repurpose old furniture, you will need certain materials and tools. Depending on what kind of furniture needs to be remodeled and what method will be used for this, the choice of tools depends. Most often needed:
- Brushes of different hardness, width and bristle length;
- Roller;
- Sharp knife;
- Needle;
- Metal meter;
- Protractor;
- Hammer;
- Grinder machine;
- Chisel;
- Screwdriver.
Elegant abrasions
If brushing is too rough for your taste, there are more elegant aging techniques. Pay attention to this one if your interior is designed in Provence, boho or shabby chic style.
First, colored paint of a rich or pastel shade is applied to the surface - but always noticeable. After drying, it is thickly rubbed with paraffin or wax, and then a second layer of light paint is applied.
The wax is removed with regular sandpaper, and the bottom layer appears under the light coating. Delicate aging looks especially good in milky, beige, cream, olive, lavender, linen, pistachio and soft pink bases.
Photo: severdv.ru
Photo: pinterest.ru
Main stages of work
To restore an old chipboard or solid wood cabinet, it is important to do the work in stages. The master will have to take the following steps:
- Preliminary determination of the final furniture style. Here you need to look around, evaluate the color scheme of the room. Understand her general style. After all, as a result, the furniture should fit into the overall interior.
- Dismantling an old cabinet. It is necessary if the doors do not fit tightly or sag. In addition, you will have to disassemble the furniture in order to change the drawer pull-out mechanisms and check the fastenings of the shelves. If necessary, change them too. In general, disassembly means removing all moving parts.
- Minor repairs. At this stage, all elements of the cabinet need to be washed and cleaned of dirt, soot, and dust. It is important to take the old fittings and go with it to the store to purchase new ones. Be sure to stick to the style you choose for your new cabinet.
As soon as the most difficult stages of repair are completed, you can begin decorating.
Etching
Etching is a more complex chemical process than staining, so it requires careful preparation and selection of reagents. But this technology is good for cabinets made of hardwood. This way you can give them a rich, deep shade and emphasize the texture.
The simplest home recipes use decoctions of leaves, bark, tea, coffee, and potassium permanganate. But more effective are chemical components that can be purchased immediately with instructions for application and indicating the exposure time for different types of wood.
Photo: forum.guns.ru
For example, 1% copper sulfate will help give oak a brown tint, 1% iron sulfate will give it a gray-lilac tint, and 4-5% iron will help give it a blue-black hue. You can paint a birch dark red with zinc sulfate, and greenish-yellow with potassium chromium.
Calcium chloride gives the coffee shade to light rocks, and Epsom salt gives the unusual purple color. And different combinations of these reagents create olive, lilac and golden tones.
Photo: pinterest.ru
Photo restoration
Another option on how to transform an old cabinet is to use photographs or photo wallpaper. This can be done with the help of printing companies engaged in large-format printing: with their help, you can enlarge any photographs and decorate the surface of the case with them, turning it into a panel or collage.
Modern technologies make it possible to make large-sized and high-quality pictures on almost any surface.
Before gluing the photo to the cabinet, you need to clean the surface of the furniture from old paint and level it using sanding and a layer of primer. After this, you can start gluing up photos. It is also practiced to secure the new appearance of the cabinet by applying a layer of transparent varnish.
When applying a picture to glass or a mirror, the picture will be glossy, but on chipboard it will be matte, like a photograph printed on matte paper.
Staining
Stain is a tinting liquid that allows you to change the shade of wood, but completely preserve its texture. Apply it strictly parallel to the fibers, and paint over it with several layers of varnish or pearlescent glaze coating.
Soft fibers absorb the coloring composition more strongly, and from dense fibers it is washed off naturally. If you want to make the texture even more expressive, repeat the process several times. In order not to miss the result, first try the stain on that part of the cabinet where it is not visible.
Photo: kuzmich24.ru
Photo: rusremeslo.ru
Photos and photo wallpapers
To achieve dramatic changes, it is not necessary to change the facades of the kitchen unit or other types of cabinets. Sometimes it’s enough to print your favorite photos or buy photo wallpaper.
If you contact specialized companies, you can use printing equipment to print your photographs and favorite images in the required format. Or just look for photo wallpapers on sale that you like.
Mirror decoration
An elegant solution is to install mirrors on the fronts of an old cabinet.
Mirrors will add volume to the room and brighten the space, making it more attractive.
For such a transformation you will need mirrors and fixtures. Having carefully measured the facade, you can order canvases from a specialized workshop.
A mirror on the closet door will immediately transform the room and update the interior.
It is worth considering that the use of liquid nails implies a horizontal position of the surface. Therefore, you will have to either disassemble the cabinet body or use conventional hinged fasteners.
There is no need to cover the entire surface or apply thick stripes too close to the edge.
Old furniture that has served for a long time does not necessarily need to be replaced. With some imagination and a little effort, you can give it a new look with your own hands and increase its service life by several years.
We hope that our ideas and advice will be useful to you.
Remodeling methods
Do-it-yourself furniture remodeling begins with examining the product. It is necessary to determine the condition of the furniture, its rotten places and breakages. To update the product, different methods and technological processes are used.
Painting
This method is used to update all wooden products ─ tables, chairs, chests of drawers, cabinet walls, cabinets. Water-based paint is used to refinish wooden furniture. It is characterized by high moisture resistance and heat resistance.
For work, use acrylic paint, which dries quickly and does not have an unpleasant odor. The texture of the plastic surface on the product can be obtained using thixotropic paint. It does not leave streaks and goes on in an even layer. To remake furniture with your own hands, you need to follow the sequence of work:
- Disassemble the structure ─ unscrew the fittings, remove the doors, pull out the drawers;
- Cover mirrors, glass, and parts that cannot be painted with construction tape;
- Wash each part with soapy water;
- Work in glasses and a respirator;
- Clean wooden surfaces with fine-grained sandpaper;
- Prime the parts of the product;
- Putty on existing cracks and chips;
- Eliminate dust formations;
- The product is ready for painting.
The paint in the can is applied with smooth movements at a distance of 30-35 cm from the surface. To obtain a good result, it is recommended to apply the paint in 2-3 layers to the product. You can open the surface of the product with varnish, and after the varnish has dried, remove the construction tape.
Film
A special decorative film is used to remake Soviet furniture. Furniture structures decorated in this way turn into beautiful and presentable products with different images. How to remodel furniture using decorative film:
- Clean the surface of the product from paint and varnish;
- Open the surface of the product with a degreasing liquid;
- Cut the film to the dimensions of the parts;
- Remove the protective film, apply it to the product and smooth it with a plastic spatula to remove bubbles.
Self-adhesive film
If you don’t want to bother with paint, varnish and resin, there is an even simpler solution - decorative film. The stores offer many collections, from imitations of other materials to photo printing, textured, luminous and mirror coatings.
First, mark the film and cut it, and then glue it like tape, slowly and carefully pressing it to the base and expelling the bubbles. The main nuance is to carefully level the surface of the cabinet in advance, otherwise the film will highlight all the defects.
Photo: br.pinterest.com
10 best ideas on how to decorate a room for the New Year
Stenciling
Applying decorative plaster is a more complex procedure that allows you to create voluminous facades with an unusual three-dimensional pattern.
This method produces three-dimensional elements, which can then be painted or gilded.
The renewed surface can also be painted in the desired color, gilded or even patinated, giving a slightly aged effect.
If the product you will decorate is covered with old paint, you must sand the entire surface with sandpaper.
To work you will need:
- Decorative plaster;
- Putty knife;
- Special tape;
- Sandpaper for cleaning the body;
- Stencil (you can buy it or make it yourself from cardboard).
Rollers for decorative plaster.
You must first treat the areas where the decor will be applied. Stripping is done down to the wood layer. If there are cracks, it is recommended to cover them with a layer of putty to level the surface.
The stencil is attached to the cabinet using tape, and a layer of decorative plaster is evenly applied over it.
The stencil is removed before the plaster dries. Any irregularities that appear are smoothed out with a knife or spatula.
When the decor is dry, you can sand it again.
After this, you can begin painting or coating with acrylic varnish. This will protect the surface from damage for a long time.
Antiquity in noble craquelure
Create with your own hands an antique rarity from a cabinet with a beautiful gilded texture, consisting of many small and deep cracks, “testifying” to the venerable age of the item.
Craquelure is a painting method in which the base layer of paint, enamel or putty cracks.
To create a “magic potion” you will need:
- Two-phase craquelure varnish;
- Transparent acrylic varnish with a matte texture;
- “Golden” powder as a grout (powder made from non-ferrous metals crushed to a finely dispersed state - bronze, aluminum, copper);
- Grout sponge.
To ensure that the paint becomes cracked, the surface is first coated with craquelure varnish.
Sequencing.
A cabinet aged using the craquelure technique will look like an expensive antique.
ON A NOTE! Instead of powder, a special composition for patination and bitumen wax, “dry” pastel are suitable. The longer the craquelure layer dries, the deeper the cracks appear on the surface of the furniture.
Fabric decor
You can also update an old closet using fabric. This will give the outline softness and volume and allow the furniture to harmoniously combine with the interior. The convenience of this technique is that you can change the selected color at any time without having to re-prepare the surface.
The facade design fabric should be combined with the textiles already in the room.
To update your closet you will need:
- Textile;
- Layer (sintepon or foam);
- Stapler for furniture.
The contrasting patterns on the fabric front of the cabinet are very elegant and also give the interior a “Japanese” atmosphere.
First, the lining is attached over the entire surface of the body using staples (another option is to use liquid nails). The material is stretched over it and symmetrically secured.
Dry brush
Dry brushing is another technique that decorators learned from painters for elegantly distressing old cabinets for classic interiors. Take a little paint onto a flat synthetic brush, wipe off the excess on a rag or paper, and then brush over the base.
Do not press too hard, but go lightly around corners, joints and protruding parts. The brush hairs do not leave continuous lines, and the result is not a dense coating, but as if scratched.
Photo: kraski-net.ru
Photo: proffstroygroup.ru
Patination
Patina is a characteristic antique coating that occurs when bronze or copper oxidizes. Its natural color is greenish-brown, but other options are used in decoration, including colored ones.
Apply bitumen varnish to the base and immediately wipe the surface so that it remains only in relief and recesses. And on top, coat the cabinet with a special shellac varnish, which at the same time provides resistance to scratches and damage.
Shellac varnish itself gives the surface a tone of old copper or gold. At the same time, it emphasizes the wood texture well, so it is often used to patina wooden furniture on its own.
Photo: mebel-v-nsk.ru
Acrylic patina is ordinary diluted acrylic paint of a suitable shade. It is spilled in the same way on the raised areas, and all excess is wiped off with a clean rag.
Wax patina is a separate composition that is rubbed over the surface, giving it a tint and a characteristic satin sheen.
Chemical patina looks the most natural, because it simply speeds up natural processes hundreds of times. Paint the cabinet with paint containing fine metal particles and apply a special oxidizing agent on top.
Photo: trikita-spb.ru
10 cool ideas on how to decorate your apartment for the New Year