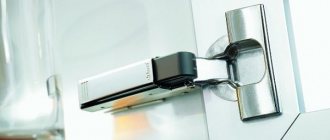
Adjusting furniture hinges
Adjustment of the position of the facade in the horizontal plane, as well as the gaps between the facades, can be done using a screwdriver and an adjusting screw screwed into the hinge body. The adjusting screw has a groove in the lower part, which fits into a special groove in the mounting plate. In this case, during adjustment you need to slightly loosen the clamping screw.
To adjust the furniture façade in the vertical plane, you need to loosen the screws securing the mounting strip and by moving the strip up or down, adjust the height of the façade, then fix the strip by screwing in the screws that secure the strip.
Recently, innovative NEO hinges with 3D adjustment have appeared. It allows you to adjust the position of the front vertically, horizontally and overlay without loosening the screws, which greatly simplifies and speeds up the adjustment process. Even non-professionals can do it at home.
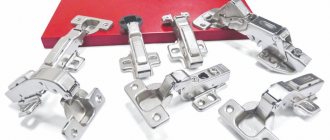
Installation of BOYARD furniture hinges
The durability of the loop largely depends on the accuracy of the filler holes. Exact hole matching can only be achieved using filler equipment.
It is impossible to use Euroscrews to install a hinge without first accurately drilling holes of the required diameter. The use of screws does not guarantee the perpendicularity of the hinge installation relative to the doors, which will lead to increased loads on the hinges (the main structural elements) and to their premature wear (door sagging, jamming when opening and closing, creaking). Taking these specific features into account, a range of BOYARD hinges was developed, with the ability to manufacture each hinge according to different additive standards for the rapid transition of furniture factories from hinges from other manufacturers to BOYARD hinges with economic benefits without loss of functionality.
Parameters and requirements for installing BOYARD hinges
Preparation for mounting the hinge cup
Calculation of the required number of loops for installation
The question of the number of hinges required for installation on one facade does not have a clear answer. The dimensions of the facade, as well as its weight, matter. In special cases, such as the use of glass facades, facades with aluminum profiles or unusually wide facades, a trial installation of the fastening hardware is necessary.
Façade designs in which the width is too large in relation to the height should be avoided.
In borderline cases, one additional loop should be planned. For hinges with a reduced cup diameter, you can use scheme 2, also not forgetting about an additional hinge for non-standard dimensions and weight of the facade.
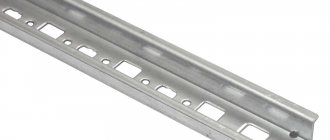
Methods of fastening during installation and drilling for various types of fasteners
Attaching the mounting plate
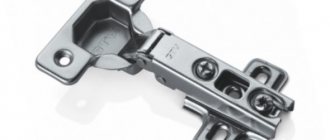
Installing the hinge on the body
The upper part of the hinge body is inserted with a slot under the pre-mounted screw of the strike plate (1) and is fixed in the desired position.
The upper part of the hinge body with the hole is lowered onto the pre-mounted screw of the strike plate (1), inserted under it (2) with a translational movement and fixed in the desired position.
The upper part of the hinge body with quick-release fastening is inserted into the grooves of the pre-installed strike plate (1), fixed by pressing from above (2) and adjusted with a fixing screw.
For more accurate and accurate installation, calculations are used using hinge installation formulas, taking into account their design features and installation method.
Let's consider the principle of using calculation formulas using the example of a four-hinged standard hinge H301 for overhead A
Calculation formula for installation
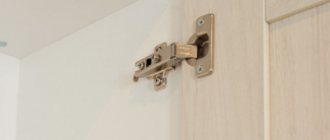
How to adjust furniture hinges
To properly set up the operation of the canopy, you first need to check the position of the cabinet itself.
Doors on the facade will help sag under their own weight or due to skew of the body. To do this, we check the position of the box with a level and level it either by altering the suspension on the wall, or by trying to adjust the height of the legs. Any mortise hinge has at least three position adjustment screws. In general, the system allows you to adjust the position of the door, its displacement by 2-4 mm vertically, horizontally and in depth. Since there are usually two loops, the angular deviation can also be corrected. A more detailed description of the screws for adjusting furniture hinges is given in the video:
But you can also use the diagram below.
How to adjust furniture hinges vertically
In all training manuals and manuals, it is usually recommended to begin adjusting the door position by eliminating the most obvious problems with the hinges. If the screws are not screwed deep enough or are loosened at both fastening points, then one half of the facade will simply drop a few millimeters lower relative to the other.
Advice! First of all, you need to check the condition of the screws themselves. If the cabinet is assembled from chipboard of low quality, then it happens that the fasteners are pulled out of the particle board.
In this case, you will need to unscrew the screws, place a piece of a match or toothpick in the hole and tighten the fasteners.
If the fastening is in order, you can adjust the height of the sash by unscrewing the screw 1-2 turns. Next, we will raise the cabinet door level with the other half, fix it and at the same time raise the “butterfly” hinge to the same height. All that remains is to tighten the fasteners with a screwdriver, use a ruler and a level to check the accuracy of the installation.
How to adjust furniture hinges horizontally
Since when opening a cabinet a person usually grabs the corner of the door with his hand, the main part of the load falls on the nearest hinge. As a result, the door may warp, the upper parts of the two doors will collide head-on, and a huge wedge-shaped gap will form between the doors below.
In this case, you have to adjust the horizontal displacement along the front on one of the hinges, usually the top one. To level the position, you will need to unscrew the adjusting screw, which is located first from the end, as in the diagram.
Before adjusting, you need to loosen the screw, align the door and only then tighten the fastening point
If a cabinet with a skewed door has been in use for a long period of time, then you will probably have to adjust the lower canopy. Using a school wooden ruler, it is convenient to control the size of the gap between the edges of the sashes, so as not to adjust, as they say, “by eye.”
You can configure cabinet doors with four hinges in the same way. Initially, you need to adjust the gap on the top and bottom hinges, then use the screws to level the gap in the middle of the sash. One of the options for adjusting the horizontal reach is shown in the video:
How to properly adjust furniture hinges in depth
Front or depth adjustment makes it possible to adjust the size of the gap between the ends of the side walls of the cabinet and the ends of the door in the open position.
Frontal adjustment is the most important; the durability of the hinge depends on the accuracy of the gap setting.
If the doors do not open completely to an angle of 90°, then most likely there is no working gap at all. To fix the problem, you need to adjust the specified distance at 0.6-3.4 mm. Again, it is very convenient to use a ruler as a gauge.
Adjusting the gap is easy:
- We turn out the screw farthest from the facade;
- Place a ruler on the end of the wall and fix it with your hand;
- Next, you need to adjust the protrusion of the screw with a screwdriver so that the cabinet door leaf opens fully.
It is also not recommended to make the gap too large; in this case, you will have to additionally adjust the position of the horizontal movement with a nearby screw.
Installation of strikers on wide facades.
The second group of reps. The slats are a mount for the HF lift levers. Let's count them. All strike plates are of the same type - 175H5400.
Let's first calculate X using an example. Let's assume cabinet height KH = 720 mm. Then, according to the table at the bottom of the figure, X = 47 mm. This X dimension is set off from the center line of the lower façade.
Difficulties usually arise when calculating the position from the edge of the facade.
SFA is the overlay of a façade on a side wall. Let's look at it with an example.
Let’s say the width of the case is 600 mm, then the width of the facade is 596 mm (but it can be different!), the thickness of the case wall is 18 mm (but it can be different!), then the overlap of the facade on the side wall will be 16 mm. This is SFA.
SFA= Cabinet wall thickness - (Cabinet width - Front width)/2
Then b = SFA + 12.5
For our example it will be 28.5 mm
Calculation and installation of Tandembox guides
To calculate the drawer on tandembox guides, we use our standard cabinet with a height of 720 mm without legs and a width of 600 mm with two drawers 356 mm high.
For the calculation, we use a complex option: drawers of height D with one rail, add an inner drawer at the top. We use all this initial data for design in the Dynalog program.
| Rice. 43. Drawers on tandembox guides, one internal drawer |
As output data, we receive the details of the cabinet, a list of accessories that need to be purchased for the manufacture of drawers on tandembox guides.
In addition, we receive drawings with information on drilling the side walls for tandembox guides, as well as coordinates of the drilling points for the upper and lower facades and the rear walls of the cabinet with drawers on Tandembox guides.
| Rice. 44. Drilling the side wall to install tandembox guides |
| Rice. 45. Drilling facades for tandembox guides |
| Rice. 46. Drilling the back walls of tandembox drawers |
Read further:
|
DIY installation of Aventos HF
Continuing the story about assembling my kitchen, I’ll tell you how I installed Aventos HF façade lifts from Blum. This mechanism allows you to lift folding facades consisting of two halves of both the same and different heights. I used the more popular symmetrical option (calculations of asymmetry will be given in the file attached at the end of the article).
Nicely laid out the installation kit (top to bottom, left to right):
Let's proceed directly to the installation. To mark on site, I use a proven technique: First, I transfer the filler dimensions onto A4 paper.
| First, we install the power mechanisms on the cabinet body. It doesn’t matter what kind of facades you have, MDF, aluminum frames or something else. First you need to drill two holes with a diameter of 5 mm and a depth of at least 5 mm. This is done in order to fix the Aventos HF mechanism. The red in the figure shows the protruding edges, which will fit into the drilled holes. Let's start marking the holes. kH is the height of the cabinet, H is the distance from the top edge of the cabinet, which is what we need. If the body height is from 480 to 549 mm, then H is calculated using the formula: H=kHx0.3-28mm, H=kHx0.3-57mm Let’s say our case height is 720 mm, so we calculate using the second formula. All dimensions are ready, now we drill holes, fix the mechanism and screw in the 4th self-tapping screw with a diameter of 4 mm and a height of 35 mm. |
Bloom loops. Part 2. Installation and adjustment. Detailed master class.
After watching a detailed master class, you will learn how to install Blum furniture hinges on a body, learn how to adjust furniture hinges and why shock softeners are needed (damper or mortise shock absorber). This video will help if you assemble furniture with your own hands, be it a kitchen, a small bedside table or any other furniture. Not everyone knows how to install this or that fitting correctly. furniture. When installing furniture hinges, it is much easier to install if you have a furniture jig, but if you don’t have one, you can also use simple, homemade templates. Installing furniture hinges is, first of all, correct marking. If you have already assembled your kitchen with your own hands or with the hands of assemblers, sooner or later you will need to adjust the furniture hinges. 7:32 You can see how to adjust a furniture hinge from this minute. Many manufacturers do not use impact softeners on furniture. This is not correct, because... they not only reduce noise when closing the facade, but also compensate for the necessary hinge gap. Thanks to them, all facades are aligned in one plane. This is part 2. If you haven’t seen the first part of the video, you can watch it here: idplayer.info/show/Wnl6WlFCUEUxNWM.html My VK page: id457010280 Instagram: mebelprostomoskva Facebook: profile.php?… Twitter: vgerasimov469 ****** **************************************** ************ #furnitureissimple #gerasimovvyacheslav #how to regulate the hinges ******************************** ************************************
Features of Blum fittings for kitchen cabinets
blum drawers, overview of guides and drawer systems
Blum kitchen fittings are indispensable in the kitchen
Accessories - convenient operation of the headset. The company's product range is varied - from lifting mechanisms and removable hinges to extension systems, guides and accessories for bar counters.
Such fittings are suitable for any interior
All items are of different configurations. Various types of furniture hinges are made to suit every taste: texture, color and shape. Features of kitchen fittings from Bloom:
- full access to the contents of the upper cabinet through the use of a lifting mechanism;
- silent opening and closing of doors;
- adjustable door opening angle;
- soft, silent closing of drawers.
Advantages and disadvantages
Sometimes it’s invisible, but that doesn’t make it any less necessary.
High-quality products have virtually no flaws. Its advantages:
- hinges with closers are equipped with a shock absorption system - soft closing of the door regardless of its weight;
- lifting products with precise adjustment - the door is fixed in any position;
- hinges - easy installation without special tools;
- durability of fittings, quality of parts.
Easier to work in the kitchen
The only downside is the high price of the product.
Installation of top strikers.
We install counter strips on the cabinet ceiling. The strike plate is what the top front hinge is snapped onto and secured to (Clip top 120° hinge without spring). This counterplate is the same as for attaching the levers, but more on that below. Wide facades are MDF, chipboard, solid wood, wide aluminum frames. Installation of strikers for such facades group 1 the same as in the previous section. Note that the positions of resp. strips along the width of the facade depend on the addition of holes for the hinge cup. Usually difficulties arise when calculating the position from the edge of the facade.| box height KH | H calculation |
| 480-549 | KH*0.3-28 |
| 550-1040 | KH*0.3-57 |
I had boxes 600 mm high, so 600 * 0.3-57 = 123 mm. for an assembled box, like mine, you also need to subtract the thickness of the upper horizon 16 mm, it turns out 123-16 = 107 mm
We retreat two sizes from the front edge of 37 mm and another 192 mm from it. We pierce these points.
Place the piece of paper on the top horizon and align it with the front edge. We apply marking dots through the holes.
It is advisable to prick them with an awl or dowel.
We drill these points with a 5 mm drill to the same depth (at least 55 mm, but not all the way through).
The next step is to position the lift on the side wall. There are protrusions on it that should fit into the previously drilled holes.
If everything is done correctly, it will hang even without screws))
To fix the lift, you will need 4x35 mm self-tapping screws. - they are not included in the installation kit.
We place them in the holes marked with the corresponding pictogram and tighten them.
The corresponding manipulations are repeated on the other side.
Now we install the bars. which wind from back to front and from top to bottom until they click.
This is what a fixed bar looks like.
We set the second one in the same way.
Warning!
You should not use your hands to lower the barbell down, since when it rises then it can leave you without teeth.
We mark the strikers for the hinges. We set aside 102 mm from the outer edge of the box. We draw a perpendicular. on which we set aside 22 and 32 mm. We prick these holes with an awl.
By turning the self-tapping screws into these points, we attach the counter strips.
We mark the first door. A pair of blind holes for the hinge cups are marked on top (21-22 from the edge) - the center of the hole, which is drilled with a 35 mm Forstner drill.
At the bottom there is a strike plate for the hinge, which is identical to the markings for the bar on the body.
We drill holes for the hinge cups with a 35 mm Forstner cutter. To prevent dust and sawdust from flying in different directions, I limited the drilling area with boxes and casings.
We align the loop using a square and fix them, having previously drilled holes for the screws.
All other holes are also drilled out with a thin drill (not all the way through).
We also attach the strikers under the hinges. We snap the facade onto the frame so that it does not interfere.
Similarly, we mark the hinge cups on the second facade and drill them out.
Mark and drill holes for the strike plate. Its location is calculated based on the height of the box, the height of the facade and the type of striker plate. I used 177H3100 strips, so the X value is 47 mm.
| box height | X | X |
| 177H3100, 177H3100E, 177H3100E10, 177H5100,175H3100, 175H4100 | 175H5400,177H5400E | |
| 480–549 mm | 70 mm | 68 mm |
| 550–1.040 mm | 47 mm | 45 mm |
We fasten the strikers and hinges with self-tapping screws
We snap the hinges of the second half of the facade onto the strikers of the first.
We fasten (by clicking in the same way) the lifting mechanism rods to the counter strips of the lower facade.
Having closed and opened the facade a couple of times, we set the length of the rods, which is then fixed with special clamps. In the previous photo they are pressed out, in the next they are fixed.
The facades should move smoothly, reaching the highest position and, when closing, fit tightly to the frame.
If this does not happen, we use the adjustment options. Loops can be adjusted horizontally and vertically *see file at the end). The lifting force is adjusted with this screw...
All that remains is to put on the decorative cover
And then a circle with a logo.
At this point the installation can be considered complete.
Important!
To complete the picture, as usual, I provide a file from the manufacturing company on the basis of which all calculations were made.
Download AVENTOS HF additive
Types of accessories
Fittings are understood as structural elements: retractable systems, locks, closers, magnets, handles, rails, baskets and others. Without them, the operation of the kitchen unit would be impossible. The cost of a set of fittings is up to a quarter of the cost of the kitchen. When purchasing a kitchen, you need to take the choice of fittings seriously, since changing them after installing the kitchen is difficult and expensive.
Retractable
The movement of drawers and other roll-out elements is ensured by retractable mechanisms, which are a system of full or partial extension guides. Roller or ball guide support rails are attached to the cabinet walls and make it possible to move drawers and shelves along them. More convenient, but also more expensive, fully retractable designs. In inexpensive kitchen sets, partial extension systems are more often used.
Roller guides are quickly installed and make it possible to effortlessly pull out and return the drawer to its place. Ball guides are placed on spacious drawers that can withstand weights of up to 80 kg. These mechanisms are distinguished by their reliability and quiet operation. The guides of the latest retractable systems for soft closing are equipped with pneumatic closers.
Locking locks
Kitchen cabinets may contain bulk foods and sharp cutlery, which should be kept out of reach of small children. Locking mechanisms are used for this purpose. The mechanism is a durable plastic lock with a braid or latch, secured with double-sided tape to the door or drawer.
Closers, magnets
To extend the life of modern furniture, hinges with closers are used, which slow down the movement of the door and facilitate its silent closing. The closer, attached to the hinge cup, optimally regulates the load on it and begins to work shortly before complete closure.
Gas lift closers used for upper cabinets have a number of advantages:
- have a long service life;
- provide self-regulating smoothness and noiselessness;
- securely fix the open door;
- makes possible the absence of numerous handles, which gives the facade a stylish look.
The disadvantage of gas lift is that the cylinder is filled with gas at the factory, which guarantees tightness, but requires complete replacement in case of breakdown.
Magnets are practical devices that help close kitchen cabinet doors tightly without slamming. The operating principle of a furniture magnet is based on the difference in poles. A magnet with one pole is installed on the door, and a magnet with the opposite pole is attached to the body.
Pens
The main design elements that decorate, add style and add convenience to the kitchen are cabinet handles.
When choosing handles, it is important that their design fits into the style of the kitchen set and the kitchen space as a whole. Handles come in the following shapes: teardrop, key, button, ring, shell, rail and staple
The most convenient are button handles and brackets, which are easily mounted on the facade.
Handles are made of wood, metals, plastics with elements of colored glass, crystal, porcelain, leather and stone. Experts recommend using corrosion- and deformation-resistant aluminum or steel handles.
Rails, baskets
The railing consists of a hollow metal tube with a chrome finish, holders and a corner located above the stove and countertops of the base cabinets. Located at an accessible distance, the rails create additional comfort during cooking; small mesh shelves are hung on them for storing small kitchen items, such as jars of spices. The hooks hold ladles, skimmers, cutting boards, potholders and kitchen towels.
For rational use, the lower cabinets can be equipped with stainless steel mesh baskets. The convenience of a capacious mesh container is that it is visible from all sides and allows you to quickly find the desired item. A cargo basket on roller supports, being an alternative to a drawer, can be equipped with a stand for bottles, household chemicals, and baking sheets.
Manufacturers of kitchen accessories offer a good solution for lower and upper corner units in the form of a storage mechanism called a “smart corner”. The design consists of two mesh baskets placed one above the other with a solid bottom, allowing them to withstand tens of kilograms of weight. Part of the system is attached to the front of the cabinet, which allows the entire structure to slide out along the guides when the door is opened.