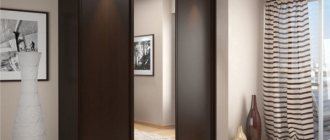
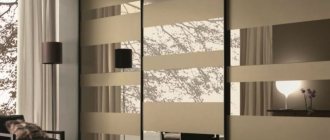
Sliding wardrobes are increasingly appearing in modern apartments to replace traditional wardrobes. However, the advantages of such cabinets in the form of a convenient storage system and compact size do not exclude the disadvantages in the form of frequently observed problems with door adjustment.
Doors in closets can bend, pop out of their tracks, squeak, and have other sliding problems. Most of these problems are quite capable of being solved by the owner of the cabinet himself, having a basic understanding of the functioning of the structure.
Today we will talk about how to deal with ordinary faults in wardrobe doors and successfully adjust them.
Adjusting wardrobe doors
How to fix a squeaky kitchen cabinet door?
When opening/closing the kitchen cabinet, the door began to creak.
When examining the door, it turned out that it was the upper hinge that held the door that was creaking. I decided to spray on the creaking hinge with WD-40. After this, the creaking began even more. What to do? Why did the squeak intensify after lubrication with VD?
If the kitchen was recently installed and the hinges have already started to creak, then there can only be two options: either the hinge is defective, or the hinges are not installed horizontally, that is, not on the same line and one hinge is working normally and the second is under load and therefore
Getting to the spring that creates friction is quite simple
It may also not be the hinge that creaks, but the door that rubs against the lid or the bottom of the drawer. This happens due to incorrect installation of hinges or incorrect adjustment of the facade.
After I sprayed WD-40 into the hinge, it seemed very strange to me that the creaking intensified. Armed with a screwdriver, I completely removed the cabinet door and unscrewed the top hinge, which was creaking. When examining the hinge, the assumption arose that it was the spring inside the mechanism that would hold it together. I poked and poked this tube with WD-40, poking and poking, that it was already leaking from that unfortunate loop. But the creaking still remained, and after spraying with VD-40 the creaking intensified.
So if suddenly your kitchen cabinets start to creak and you decide to lubricate the hinges, then don’t even think about using WD-40. Take the time to disassemble the loop and lubricate its inside with salidol .
Source
How to repair old kitchen furniture with your own hands
>> Kitchen DesignKitchen Renovation
You can update and significantly improve your kitchen set without significant investment on your own. If the kitchen furniture is already on its way out, you shouldn’t rush to get rid of it, because if you have the desire and then apply some effort, you can turn it into “candy.”
We put furniture in order with our own hands
Repairing a kitchen unit should be divided into several stages:
- repairing cabinets and replacing hinges on doors;
- thorough cleaning of furniture from dirt;
- degreasing surfaces;
- decorating the front part and countertops in the most appropriate way (with self-adhesive tape, varnishing, painting, decoupage technique or other similar methods).
Rehabilitation of kitchen furniture, of course, always begins with the removal of all the contents of the cabinets. In order to improve the overall appearance of the furniture, it is advisable to completely reassemble it or, at a minimum, tighten it in all the necessary places. It would also be a good idea to lubricate all the hinges to eliminate creaking and other extraneous sounds.
If we are talking about a set made of natural wood, such furniture is most likely better preserved than its counterparts made of MDF or chipboard. This is due to the fact that wooden furniture does not deform over time, but only becomes covered with scratches and other defects, which are quite easy to get rid of.
How are furniture hinges processed?
If the reason is that the oil in the part has dried out and does not allow it to function fully. You need to lubricate the hinges with a special substance. Suitable for this:
When there are no special means at home, you can use improvised means:
The main thing is that the substance is slippery and greasy. The means at hand will help get rid of squeaking for 1-2 weeks. Choose special oils for furniture hinges or lubricants. They penetrate deep into crevices and ensure long-lasting operation of furniture.
What types of lubricants should you avoid?
Even if a squeaky door is very annoying, there is no need to try to lubricate it with the first grease you come across. It is highly undesirable to use organic substances - lard, butter and vegetable oil. They contain a large amount of water, which will interact with the metal and cause its slow corrosion.
Over time, this will only make the squeak louder. Also, animal fats quickly decompose, they can even become moldy.
The popular product WD 40 should also be used with caution. It is not so much a lubricant as a washing composition. It cleans the mechanism of dirt, but at the same time washes away the old lubricant. The quick effect of the first application will be replaced by worsening problems. Therefore, after using WD 40, it is recommended to lubricate the hinges with a thicker lubricant.
How to lubricate quickly and correctly?
The algorithm of actions is simple:
Important!
In order to properly lubricate the parts, before the procedure you need to thoroughly clean the old lubricant and remove debris.
Apply the lubricant using a brush, brush or cotton swab. This should not be done with your fingers for safety reasons. To prevent the door from accidentally closing and pinching your fingers, it is recommended to secure it with a wedge or ask someone to hold it. When lubricating, you need to carefully handle the upper parts, since the entire load of the structure goes to the upper parts.
Creaking when opening furniture can appear in both new and old designs. The reasons for the appearance of such a sound may be different. The main thing is to find out in time why the creaking appeared. Then the furniture will last for many years and will not make sharp, unpleasant sounds.
Source
How to lubricate a cabinet door so it doesn't squeak
After 10 years, our expensive cabinet began to creak. You open the door and it creaks. If I lived alone, then I wouldn’t mind it, but when half the family wakes up at night because the wife opened the drawer to take a diaper, you finally decide on the feat and lubricate the door hinges.
In fact, this matter is not worthy of writing, because it is a very simple process. Take some oil, I happened to have bicycle oil on hand:
The oil is very old, almost as old as the cabinet itself. However, you can lubricate
If you don’t have anything at hand, then you can use:
Anything that makes it slippery can be used. The question is how long the effect will last.
A can of oil is best, where the oil can be sprayed in a targeted manner to the desired location.
Now let's look at the loops:
There are different types of hinges, but in essence, the script of the hinges occurs due to the friction of the parts against each other, causing step sliding. Every little utterance creates a sound. And a lot of sounds create creaking.
This is what my Hinge looks like on a closet door.
Now let's see where it is necessary to add oil so that the door does not creak.
If the oil drips, then it is necessary to drip into the loop from above, so that little flows down from top to bottom and touches all the parts.
If you spray, you should spray into the cracks; it is advisable to cover the cabinet with tape from splashes.
After lubrication, you need to open and close the doors several times. After some time, the door will stop creaking and you will sleep peacefully at night.
Source
Features of lubrication of various types of doors
Having decided how to lubricate the door hinges, all that remains is to do it correctly. The methodology for performing work is influenced by many factors: material, location, design.
Iron door
Usually it starts to “sing”, sagging due to the heavy canvas and corrosion. Iron doors, as a rule, are street entrance doors; they are predominantly all-welded, non-demountable structures. They will have to be processed on site without removing them. You just need to select a strong stop to lift the sash.
First you need to clean the fittings from dirt and rust, and lubricate them in places where the metal rubs - between moving elements.
Be sure to wipe off leaked residues, and then open and close the door several times to distribute the substance along the internal hinges.
Plastic
Mostly indoor, but sometimes balcony. In the latter case, the sash from the street is first processed, and then from the side of the room.
The open door needs to be lifted slightly using a stop. Apply a small amount of oil and close the cloth.
Important : stains from grease are very noticeable on white plastic, which is not visible immediately, but some time after the procedure. It is preferable to make a test in an inconspicuous place before “treating” the door and observe the reaction of the material to the substance.
Wooden
Installed mainly in apartments and between rooms. The procedure is carried out according to the generally accepted scheme, but is simplified by the fact that some models can be easily disassembled, providing access to the fittings. Otherwise, lubricant is introduced into the gaps on the hinges.
Important : it is better to protect natural wood from contact with chemicals, as deformation may occur or a stain may remain.
Glass
Despite the apparent airiness, such a door is very heavy, which is why the design uses special hinges with rubber seals. During installation work, this place is treated with glue to increase reliability and extend service life.
This feature does not eliminate grinding and creaking, and does not interfere with lubrication, but it is better to be aware of it when planning to carry out processing.
Important : oil cannot be washed off glass, so it is recommended to use WD-40.
Accordion door
Easy to understand, but requires a thorough approach:
- cleaning the groove and wheels from anything that has stuck during the door operation;
- lubrication of all moving elements.
But the latter is performed exclusively with a special silicone agent. Only the rubbish will not stick to it.
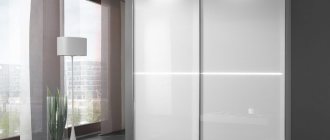
Sliding door
Most often it makes noise not because of poor lubrication, but because of debris that accumulates in all possible places. Some hardened deposits can be cleaned with a wire brush, and other debris can be cleaned with a vacuum cleaner.
Important : to make the wheels move more easily, apply silicone lubricant after cleaning.
Causes of squeaking.
There are several reasons for a cabinet door squeaking:
These reasons are easy to eliminate if you have a certain skill. The main thing is to identify what causes the sound. Remember that careless handling of oil and lubricants can ruin the appearance of the cabinet. Lubricating the hinges does not always correct the operation of the mechanism. In 5% of cases, specialist intervention is required to eliminate the squeak.
Common faults
The sliding wardrobe system includes one or more doors. They move along the guides using rollers that are attached at the bottom or top.
To ensure that the doors do not hit and close completely when opening and closing, the design provides for the use of a stopper and a closer.
The main reason why vertical, height adjustment or correction of other problems may be required is long-term operation. Don’t forget about initially incorrect installation or the use of low-quality fittings.
Most often, owners of wardrobes encounter the following problems:
- over time the door sags;
- the stoppers are worn out or displaced, and therefore the door does not lock;
- the gap between the doors has increased and the doors are skewed;
- the door simply dangles and flies off the guides;
- the canvas does not move well along the guides, it moves slowly;
- Uncharacteristic extraneous sounds appeared during the opening and closing process;
- the connection has become loose, etc.
You can clearly see that there are quite a lot of problems and malfunctions. The costs for a specialist in such a situation will be impressive. Therefore, sometimes it makes sense to learn how to fix problems with your own hands.
Yes, you may need to purchase a special wrench that is used to adjust and install the stoppers on the coupe. But believe me, if the door falls off, they will charge a lot of money for repairs. In addition, the scheme for independently restoring the functionality of a sliding wardrobe is quite simple. You can master it by reading this material and watching various videos. On them you will see how cabinets with bottom and top rollers are repaired, and much more.
Subsidence and loose closure
Over time, the doors often sag and do not close as tightly as before. You are unlikely to like the spontaneous opening of doors. And you will not put up with this.
To correct the situation, two components need to be adjusted. Or simply install a lock on the wardrobe. But that’s not about that now.
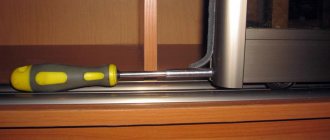
Let's start with setting up the Schlegel. If you have a door with lower types of roller guides, you must:
- remove the sealing material from the end side of the sash;
- peel off literally 30 centimeters of the sealing tape;
- under the tape, find the 2 holes required for adjustment, as well as the bracket;
- using a hexagon, make the adjustment;
- if you turn the bolt clockwise, the blade will rise;
- if you rotate counterclockwise, the blade will lower.
Each time you turn the key, use a level to check the evenness of the sash. Gradually you will be able to get rid of the resulting distortion. Just don't rush.
If you have a wardrobe with top rollers, then the adjustment principle will be much the same. The suspension roller is usually located at the top, and this is where you should look for the adjustment screw. Here, a screwdriver is more often used, with which you need to rotate the lock clockwise or counterclockwise, raising and lowering the angle accordingly. After the adjustment has been made, the locking nut should be tightened tightly.
Problems with the closet door.
Over time, an unpleasant malfunction may also occur in the operation of wardrobe doors. For example, wardrobe doors begin to jam or creak when opening.
In this case, the causes of the problem may be a faulty roller mechanism, an uneven floor, or improper installation of the facade. Also, malfunctions in wardrobes occur in the following cases:
- due to debris getting into the rollers and guides,
- in case of deformation and wear of the roller mechanism,
— poor adjustment of the rollers when installing the door leaf.
Possible problems
Installing sliding doors in a wardrobe is one of the most difficult moments when assembling this piece of furniture. It is these components that tend to periodically break or become deformed as a result of improper installation or subsequent careless handling. Even those owners who used the cabinet very carefully sooner or later may encounter phenomena such as:
- lack of smoothness;
- skewed door leaf;
- lack of door locking when closing;
- peeling off the buffer tape
- the web jumping off the guide track;
- the appearance of extraneous sounds.
To adjust compartment doors, you do not need in-depth knowledge of its functioning.
Fortunately, all of the above shortcomings can be eliminated, moreover, with the proper skill, you can do without calling specialists. It is enough to have among the tools such basic items as a hex wrench and screwdrivers of different calibers.
Warp door leaf
This problem manifests itself in most coupes due to loose closure of the door and the side pillar at the top or bottom. In order to correct this situation, adjustment is applied using a screw located at the bottom of the door.
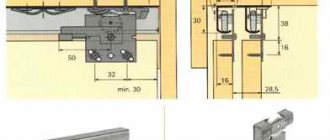
Step 1. Peel off the buffer tape, under which you will find two holes. The hole on top is intended for assembling the door, while the task of the bottom is to adjust the location of the roller (higher or lower). It is the bottom hole that we need.
Holes for assembly and adjustment
Step 2. Take a hex wrench designed for confirmations. You can take either a C-shaped or L-shaped option.
Set of keys
Step 3: Insert the key into the bottom hole and start turning it. The direction of rotation determines the change in door position. When rotated clockwise, the door will begin to rise; when rotated counterclockwise, the door will begin to lower.
The direction of rotation of the key determines the movement of the door
Step 4. Rotation must be carried out until you are sure that the door is tightly adjacent to the side post both at the top and bottom to avoid further distortions.
Closing from above
Closing from below
Step 5. Inside the rails you can find stoppers (steel springs), the purpose of which is to hold the door leaf and press it against the side post. If the stoppers have not been adjusted or for some reason are not working properly, the door will not stop in the place intended for it.
Stopper
Step 6. In order to move the stopper, take a piece of plastic or fiberboard (some craftsmen prefer to use a screwdriver or even a knitting needle). Press the plastic against one of the edges of the stopper and move it in the desired direction. At the first attempts, you may end up with an undershoot, so after each movement of the plastic it is important to check the movement of the door in practice and correct the result if necessary.
Adjusting the stoppers using a piece of plastic
This instruction solves two possible problems at once - the door is skewed and the doors do not fit tightly, which is a natural consequence of the skew. The number of stoppers directly depends on the number of door leaves, therefore, in cabinets with several doors, for proper operation of the mechanisms, it is necessary to periodically check all the corkscrews.
Peeling off the buffer tape
There are several ways to return the brush or schlegel to the correct position:
- If the length of the tape allows, it may be enough to simply tuck it into the hole. This method is not the most possible of all, since over time the brush can simply get knocked out;
Inserting the boot into the hole - applying super glue. When distributing it, it is important to ensure that the product does not fall into the hole for adjusting the height of the door, which we talked about in the previous section. Otherwise, subsequent corrections to the skew will be very problematic;
Using superglue to fix the boot - use of clothespins. You can easily purchase clothespins at any furniture store. In order to use them, you should fix the door with a wooden wedge. After fixing, take a clothespin and put it on the brush and profile with the cut facing you. Upon completion of the procedure, make sure that the door roller can fit into the rail grooves.
Fixing the door with a wooden wedge
Attaching clothespins
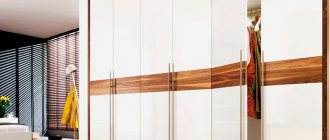
Kitchen cabinet doors squeak.
A beautiful and functional kitchen set is the dream of any housewife. When designing, the storage space for dishes, food, kitchen utensils and many other small items is taken into account. Door facades are made from a wide variety of materials. In cabinets that are used several times a day, squeaking may occur over time.
If your kitchen cabinet hinges squeak, simply lubricate them. The doors will open silently and smoothly again.
Different hinges are used for different kitchen cabinets.
Be sure to check their work. Incorrect installation or sagging of the facade may be the reason why the cabinet hinges creak.
The process of lubricating hinges.
Furniture manufacturers recommend treating door hinges at least once a year. This increases the service life of the mechanisms and prevents the appearance of unpleasant squeaking.
What should you do if your closet doors squeak? What is the sequence of actions?
If the door leaf is heavy and bulky, then ask your loved ones to help hold it while you apply the product.
The designs of hallway cabinets with photos presented in this article will help you not only choose the right model, but also decide on the design of the entire room.
In this article we will touch on the topic of cabinet designs for the living room. Our selection will clearly demonstrate different examples of furniture arrangement.
In this article we will examine the topic of cabinet design, show examples of photographs and find out which furniture will best suit your interior.
Source
How to disassemble butterfly loops?
To do this you need:
- Place the door against the frame and mark where the hinge
it. - Unscrew the fittings from the canvas, attach them to the box beam according to the markings, making precise marks.
- Use a drill (diameter 2.5 mm) to make holes.
- Place the door leaf against the frame and tighten all the screws.
Interesting materials:
What paint to paint plastic with? What paint should I paint my tires with? What paint to paint a wooden floor? What paint to paint the floor in the room? What paint should I paint heating radiators with? What paint should I use to paint sandwich panels? What paint to paint vinyl wallpaper for painting? What cereal can you feed rabbits? What kind of varnish can be applied to oil paint? What kind of varnish after water stain?
A cheap remedy for squeaking door hinges, which can be found in the kitchen cabinet
Receive one of the most read articles by email once a day. Join us on Facebook and VKontakte.
Why does the door start to creak? It is quite obvious that the root of the problem lies in the loops, which over time begin to “behave badly”. The lubricant dries out and wears out, the hinges begin to rust, and after some time that same ominous creak appears, capable of unsettling even the most reserved stoic. Most often, to solve the problem, it will be enough to simply add a lot more lubricant and “develop” the door.
The question is what to drip? Most people will say it should be an oily lubricant. The option is good, but you can use a completely unexpected remedy to solve the problem, namely vinegar. True, not just anyone will do. You can immediately forget about ordinary table vinegar; we are only interested in natural apple or grape vinegar. 3-4 drops of this substance will be enough to solve the problem.
To achieve maximum efficiency of the method, it is recommended to disassemble the loop. After this, a few drops are applied to each moving element. The loop comes back together and after this it no longer creaks. Vinegar will remove rust and get rid of hated noises. If there is no desire or opportunity to disassemble the loop, then it is recommended to saturate the moving part using an ear stick or cotton wool, which was previously dipped in the miracle composition. You can also use a regular injection syringe, but the most important thing is not to let the vinegar get on the woodwork or floor. It should be remembered that if dust and dirt have accumulated on the hinges over many years, they must be removed before lubrication.
Did you like the article? Then support us, click
:
Source
Various types of lubricant
Lubricating door hinges is the first thing you can do against annoying squeaking noises. You can use both industrially produced lubricants and improvised home remedies.
But it should be remembered that only properly selected lubricant will have a long-term and effective effect.
Universal means
Well-known and affordable products that are easy to buy in a store or find in your garage:
- WD 40 - comes in a can with a convenient dispenser, allowing you to easily reach hard-to-reach places. A very effective product that cleans the surface and improves the sliding of parts. It works instantly, but not for long. You must use oil afterwards.
- Litol - due to its pronounced water resistance and frost resistance, it is widely used for lubricating entrance doors and gates. Not afraid of adverse weather conditions.
- Solidol is a popular inexpensive product, the effect of which will last for a long time. The reason for this is the thick and viscous consistency of the lubricant.
Machine oil
Ordinary machine oil is a good lubricant for door hinges. Almost every household has a bottle of this technical liquid.
Car owners always have waste - oil left after replacing it in the car with a new one. Oil for engine or car parts is also suitable. It is better to choose one whose viscosity is higher.
Sewing machine oil
Handicraft workers will most likely have oil for sewing machines on their households. A small plastic container with a thin spout will allow you to place a drop of oil exactly where you need it. Sewing machine oil is usually light in color and does not leave a dirty residue.
Vegetable oil
As a last resort, you can take vegetable oil from the kitchen. A short-term effect will be achieved, but some negative consequences are also possible.
Vegetable oil is too liquid, it spreads a lot and dries out quickly. Also, a lot of dust and dirt sticks to it, which leads to wear of the mechanisms. Over time, such oil can darken and thicken, which leads to damage to the fittings.
Pencil lead
An alternative to oil is dry graphite lubricant. The door is lifted and small pieces of pencil lead are placed in the hinges. When opening and closing the door, the stylus crumbles, and the resulting powder prevents squeaking. An easier way to use is to pour crushed stylus into the cracks of the hinges.
Paraffin or wax
Candles made of wax or paraffin are sure to be found in every home. A piece of the substance is heated to a liquid state and buried inside the creaking mechanism. When cooled, the wax hardens and forms a smooth sliding surface.