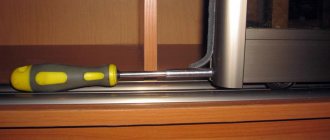
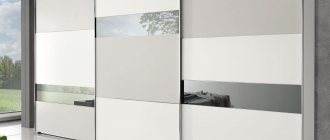
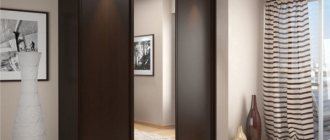
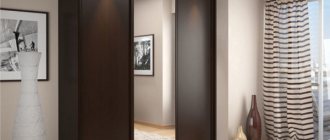
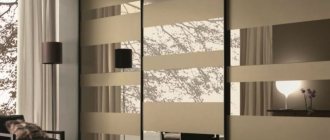
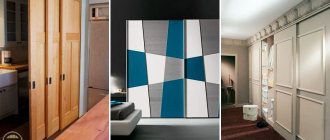
Correct room measurements
Correct measurements are the first step to successful assembly and installation of a sliding wardrobe. Unfortunately, smooth walls and floors are quite rare. Furniture, on the other hand, is a structure with right angles. Therefore, when measuring the space allocated for a wardrobe, you should take into account the curvature of the walls and make the necessary technological gaps. To understand what size the future product will be, using a construction tape, we measure the height and width in several places: top-bottom-middle along the wall, height at three or four points, and width relative to the floor and ceiling at the estimated depth of the cabinet.
Now you should pay attention to protrusions, sockets, radiators, door openings and other objects located nearby. Nothing should interfere with installation, and in the future the cabinet should not block any of the above. Therefore, in order not to forget about their existence, it is best to draw strategically important objects and measure the distance to them.
Material
Materials for making furniture handles:
- Zamak is a lightweight, corrosion-resistant material consisting of an alloy of zinc, aluminum, and copper. It's inexpensive, it's all about manufacturing technology. Mainly used in the production of pens in China.
- Plastic is a type of polymer that provides products with reliability, variety of shapes, and lightness. Such handles for cabinets in a nursery look impressive.
- Ceramic is a reliable accessory to use, since it is based on metal, and the ceramic coating itself is used to give it an interesting shape. It is used to decorate cabinet fronts not only in classic, but also in modern design. Manufacturers: Türkiye, Italy, China.
- Wood - such a handle is not only functional, but also beautiful; it looks especially stylish if it is artificially aged. Wooden fittings are relevant for classic, rustic style.
- Metal with galvanic coating is resistant to corrosion; the higher the quality of the galvanic coating, the more durable the product. In the production of accessories, galvanization is carried out after the threads for fasteners have already been cut. This is a guarantee that over time the fastening points will not rust.
Purpose of furniture wax, advice on the correct use of the composition
Tsamak
Plastic
Ceramics
Tree
Metal
Calculation of the overall dimensions of the wardrobe
Width
The width of the wardrobe is calculated by determining the smallest size obtained. In our example it is 1670 mm. In order for the cabinet to fit smoothly into a niche, it is necessary to subtract 50 mm from the actual (minimum) width of the room. Thus, we get a technological gap that allows us not to worry during subsequent installation.
Depth
The depth of the wardrobe also depends on previously made measurements. In our figure, the minimum size that can be used is the distance to the switch, that is, 690 mm. Subtracting 30–40 mm from it, we get the depth of the cabinet. It is worth noting that 650–700 mm is the optimal depth of a sliding wardrobe, allowing you to effectively use its internal space. A sliding door system usually takes up 80–100 mm, which means the remaining usable area is only 550–600 mm.
Height
When calculating the height of the cabinet, you will have to remember the school mathematics curriculum, namely the Pythagorean theorem. For what? The sliding wardrobe is a rather bulky design, which is easiest to assemble on the floor. When lifting it, it is necessary to take into account the diagonal of the side wall so as not to rest against the ceiling.
Pythagorean Theorem: “In a right triangle, the square of the hypotenuse is equal to the sum of the squares of the legs.”
The figure shows the side of the cabinet, the diagonal of which (AC) is the longest segment that affects the rise of the sliding wardrobe from a horizontal position. Below the image clearly shows the application of the theorem, during which we found out that with the overall dimensions of the side wall being 650x2400 mm, a sliding wardrobe can be installed without a threat to the ceiling, since the diagonal of the side is significantly less than the height of the room.
Characteristics of the slats
When choosing a profile, you need to take into account its dimensions and characteristics
When choosing a profile, you should take into account its size, color and such characteristics:
- The wall thickness of the slats varies; the most reliable products are those with this parameter, which is 1.6 mm;
- The profile can be painted using various methods; the best options are anodized or film coating;
- fittings are sold in individual strips or linear meters;
- profiles are often sold complete with other parts, without which it is impossible to install wardrobe doors (handles, rollers, corners, decorative strips, etc.);
The cross-section shows that the density of the inexpensive domestically produced profile is less than that of imported analogues.
A significant characteristic of a profile is its origin. German, Swedish and Italian companies produce high-quality products. Domestic profiles are slightly worse.
Profile sizes
All types of curved slats for a sliding wardrobe can have different sizes. After all, the dimensions of the models of this furniture are different. In addition, many manufacturers work according to their own technical specifications (TU).
When determining the optimal profile dimensions, the following points should be taken into account:
- width of door leaves;
- length of connecting elements;
- Dimensions of dividers;
- main characteristics of the cabinet.
The most common sizes of aluminum profiles:
| Sectional diagram of the plank with dimensions in millimeters | Profile type (the length of all standard elements is 5.5 m) |
| Vertical C-shaped strip Used as a one-sided handle profile for compartment doors. | |
| Vertical H-Bar Serves as a reversible handle for compartment doors. | |
| Horizontal lower edge of the door leaf The lower rollers are inserted into the track of this bar. This profile is fastened with self-tapping screws. | |
| Horizontal upper frame of the door This profile is fastened with self-tapping screws. | |
| Horizontal intermediate strip Used for joining door leaf elements. Fastened with self-tapping screws. | |
| Clamping intermediate rail It can be used as a vertical or horizontal profile. It is fixed by clamping between the door elements. Such strips can be bent to create a specified pattern on the canvas. | |
| Double-slide upper guide profile The top of two sliding panels is inserted into it. | |
| Double-slide lower guide profile The rollers of the two sliding wardrobe doors move along it. | |
| Single Slide Top Track The top of the sliding door is inserted into this. | |
| Single-slide lower guide bar The web rollers move along it. |
Color palette
The profile for compartment furniture can be painted in a variety of colors. In this case, the tone of the fittings should be in harmony with the color of the cabinet itself.
When choosing relatively cheap steel profiles, you should remember that they are covered with not very high-quality paint. As a result, after some time the cladding may begin to peel off, crack or peel off.
Modern technologies of anodizing and polyvinyl chloride wrapping are used to paint aluminum profiles. The resulting coatings are characterized by strength, durability and aesthetic appearance.
Often the planks are painted in the color of some metal.
Often, an aluminum profile is painted in colors that imitate metal:
- bronze;
- silver;
- gold;
- polished steel;
- nickel;
- chromium.
This coating looks modern, stylish and noble.
In addition, the following colors are common:
- white and its tones;
- black and its shades;
- champagne;
- beige;
- brown and its tones.
An example of a profile color palette.
In addition, each manufacturer has its own line of colors that imitate the tone and texture of various types of wood. It could be:
- oak (bleached, stained, dark, light);
- wenge;
- walnut (dark or light);
- cherry (classic or victory);
- beech (light or bronze);
- maple (glossy or mahogany);
- mahogany, etc.
Using the interior space of the cabinet
Before you start creating a wardrobe project, you need to decide for what purpose it is intended. Simply put, what things do you plan to store in it. And here again you need to arm yourself with a tape measure and carefully examine the cabinet that you are currently using:
- The optimal distance between shelves is 300 mm. But it’s better to approach this issue individually: measure stacks of folded things, try on boxes of shoes, analyze what doesn’t suit you in the old closet.
- The required cabinet depth for hangers on which hanging items are placed is 550–600 mm. If the actual depth of the future wardrobe varies within these limits, then without a doubt you can use a rod. If the depth is significantly less, then it is best to install retractable hangers and then things will be located “facing” you.
- Decide what you will store in the drawers, what height they should be and how many drawers are needed.
- Advice from the expert: it is advisable to divide wide drawers into several cells, thereby creating an organizer that optimizes the storage of oversized items.
- Study the market for the proposed accessories for sliding wardrobes: retractable nets, tie hangers, built-in ironing board, pantograph, shoe shelves, etc. Properly selected fittings will greatly facilitate filling the internal space.
Calculation through the program
Excel from Microsoft
Using this table, you can calculate all the sizes of components for sliding doors and their cost. Initially, several tabs are given, in each of which you need to enter data in turn. In the “parameters” the initial dimensions are entered. Next come “laminate” and “components”. As a result, the result is displayed in the “parameters” and “estimate” windows.
This program will be convenient for both professional furniture makers and ordinary users who want to calculate the details themselves.
Creating a Project
There are many computer programs to help you create a project. But if graphic editors are higher mathematics for you, all you have to do is arm yourself with a simple pencil, an eraser, a ruler and a checkered piece of paper. We will draw the wardrobe by hand.
On a piece of checkered paper, the easiest way is to draw an image to scale - let two cells be equal to 10 cm. That is, the height of our wardrobe is 24 cm (48 cells), and the width is 16 cm (32 cells). We draw a rectangle, based on the overall dimensions and not forgetting about the chosen scale.
Next, you need to decide on the design of the cabinet itself—whether it will be on adjustable legs or the sides will be placed directly on the floor. In our example, we will consider the option of a sliding wardrobe with a plinth, that is, the sides stand on the floor.
The plinth is the bottom strip that connects the two sides of the cabinet. Its recommended height is 100 mm.
We separate these 100 mm (2 cells), we get an internal opening. Before you decide to divide it in half with a vertical line, carefully read the following advice from the wizard.
The sliding doors of the wardrobe will interfere with the drawers if it is divided into equal halves. The middle side of the cabinet must be moved to one side by 50–70 mm, and drawers must be installed in the smaller part. You should also pay attention to the fact that the door rail has a certain height. It is enough to raise the front of the lower drawer by just 10 mm, and it will be able to move out without any hindrance.
So, the wardrobe is divided into unequal parts and the lower drawer is drawn with the necessary gap. Now it’s time to show your imagination and try to use the resulting space in the most functional way. Here is the sketch our designer came up with:
Based on it, you can easily sketch out your own initial wardrobe design on a sheet of paper.
How to calculate the dimensions of guides and profiles?
In order to determine the dimensions of the upper and lower guides, experienced craftsmen use a simple formula: subtract 2 mm from the opening width we already know.
In addition to them, the design of the wardrobe contains horizontal connecting and dividing profiles. And here again the question arises about what kind of handle is present in the design:
- If the handle is asymmetrical, then to determine the length of the horizontal profile, subtract 2 times 26 mm from the width of the doors.
- If the handle is symmetrical, then to determine the length of the horizontal profile, subtract 2 times 32 mm from the width of the doors.
Please note: the basis for calculating the length in this case is not the width of the opening, but the width of the doors, which was calculated earlier. Do not forget about this so as not to make mistakes in determining the parameters.
Independent calculation of parts
Calculation for a standard size wardrobe
So, you already have a wardrobe design. All that remains is to calculate the detailing. Before you start calculating the dimensions of the parts, you need to decide what kind of chipboard the cabinet will be made from. There are two standard sizes of chipboard thickness - 18 and 16 mm. Most furniture companies use 16 mm thick chipboard in their production. We will also take a sixteen-millimeter slab as a basis. This value will appear in absolutely all calculations.
Let's get started. Initially, to make it easier, write down on a piece of paper the name and quantity of all the parts present in the wardrobe in a column. For example:
- roof - 1 pc.
- bottom - 1 pc.
- outer side - 2 pcs., and so on
Let's look at the correct algorithm using the example of a calculation for a cabinet with overall dimensions of 1670x2400x650 mm.
To avoid confusion, add the thickness of chipboard to your drawn wardrobe design, that is, make the lines double. This way you won't miss any thickness.
Roof - 1 pc. — 650x1670 mm
Technically, it is correct if the roof of the wardrobe lies on top of the sides, and is not located between them. This means its size does not change. It matches the dimensions of the cabinet - 650x1670 mm.
Bottom - 1 pc. — 650x1638 mm
The bottom of the cabinet is attached between two sides, therefore, it is necessary to subtract two chipboard thicknesses: 1670 – (16 + 16) = 1638 mm.
Outer side - 2 pcs. — 650x2384 mm
The outer sides are covered with a cabinet roof. Calculation formula: 2400 – 16 = 2384 mm.
Inner side - 1 pc. — 550x2268 mm
Expert advice: the sliding door system, depending on the manufacturer, has a depth of 80–100 mm. For full opening, it is necessary to reduce all internal parts by this size. That is, the sides and shelves located inside the wardrobe should be 80–100 mm less than the overall depth.
Calculation of the inner side of the cabinet:
- depth 650 – 100 = 550 mm;
- height 2400 – 16 (roof) – 16 (bottom) – 100 (basement) = 2268 mm.
Base - 1 pc. — 100x1638 mm
The plinth is the bottom strip that connects the two outer sides of the wardrobe and supports the bottom. The length of this strip is equal to the length of the bottom of the cabinet, the height is 100 mm (a different size is possible, but not less than 50 mm).
Shelf - 1 pc. — 550x861 mm, 4 pcs. — 550x761 mm
Let us remind you that the inner side of the cabinet is shifted to the left by 50 mm for the purpose of comfortable operation of the drawers. It follows that the shelves on the right side of the cabinet should be longer than those on the left. To make it easier, we first calculate the size of the shelves as if they were the same, and only then subtract 50 mm: 1670 – 32 (outer sides) – 16 (inner side) / 2 = 811 mm.
- 811 – 50 = 761 mm - the length of the shelves on the left side, where the drawers are;
- 811 + 50 = 861 mm - the length of the shelves on the right side of the wardrobe.
After calculations, be sure to check. The sum of all parts must be equal to the overall width of the cabinet: 761 + 861 + 16 + 16 + 16 = 1670 mm.
Drawer front - 2 pcs. — 150x757 mm and 2 pcs. — 250x757 mm
The height of the drawer is arbitrary. But the width is a technical value that must be calculated based on the internal size of the opening in which the boxes are located. In our case it is 761 mm. For durable and efficient operation of the drawer, you need to subtract 4 mm from the internal size (to put it simply - the length of the shelf) for the technological gap. That is, the width of the facade: 761 – 4 = 757 mm.
Expert advice: when calculating the width of the facade, do not forget about the edge, which will subsequently be glued along the perimeter. It also has its own thickness. Therefore, do not forget to subtract the thickness of the selected edge from the actual size of the drawer front.
Calculation of parts for a custom-sized cabinet
A non-standard wardrobe is considered to be a product whose overall dimensions exceed the dimensions of a laminated chipboard sheet. Main dimensions of chipboard: 1830x2750; 1830x2440; 2070x2800 mm.
When planning to independently make a cabinet 3000 m long, a beginner is faced with the problem that the roof and bottom do not fit into the dimensions of the chipboard. How to get out of this situation? It’s simple - we design a wardrobe in two parts, that is, now there will be two sides inside, not just one. The roof, bottom and base will also consist of two parts. Essentially, these are two separate cabinets pulled together.
Important: the depth of the inner sides is 80–100 mm less than the size of the wardrobe.
In addition to the above, it would be correct to install such a large wardrobe not just on a plinth, but on plastic adjustable legs, which are subsequently covered with a removable bottom bar.
We recommend that you carefully study the diagram to avoid errors in calculating the cabinet detailing. The proposed drawing clearly shows how the parts are arranged, taking into account the design of the non-standard cabinet and the thickness of the chipboard.
We select the necessary furniture fittings.
The body parts can be connected using various furniture fittings.
The simplest fittings are furniture dowels. It is a wooden barrel with a diameter of 8mm and a length of 30mm. The 8x30 dowel is mainly used for non-adhesive joints. The most typical is a dowel measuring 8x35 (for adhesive joints with slab thickness of 18 mm). In general, there are dowels of other diameters and lengths, but sizes 8x30 or 8x35 are the most common.
Furniture dowel.
Using furniture dowels, you can make a permanent connection between two parts. To do this you need to put them on glue. It is better to use glue pva d 3 or d4. In this case, no additional fasteners will be required.
When assembling a cabinet, it is better to use dowels simultaneously with an eccentric tie (minifix), confirmants or a tightening screw with a nut. With this connection, the dowels do not need to be glued in and thus you get a high-quality connection with the possibility of complete disassembly if necessary.
To install a furniture dowel 8x30, you must first drill blind holes with a diameter of 8 mm in the parts. At the end of the part, the hole should be 18mm deep, and in the plane of the second part, 14mm deep. The depth of 14mm is given for chipboard with a thickness of 18mm.
It is advisable to observe the depth of the holes, since if you drill a hole more than 18 mm deep at the end of the part and drive a dowel into it, there is no guarantee that it will not sink even deeper when attaching the second part.
When connecting two cabinet parts at an angle of 90 degrees, first a dowel is driven into the end of the first part, and then into the plane of the second part. If you first drive the dowel into the plane and not into the end, then there is a possibility that the dowel will pierce the part through.
Connecting parts using dowels. In the photo, the dowel is driven into the plane, but correctly the dowel needs to be driven into the end of the part.
Confirmee. This is a furniture screw with a hex head. Most often, a confirmant with a diameter of 6.5 mm and a length of 50 mm is used to assemble cabinets. It can be used to reliably connect various parts when making furniture. Confirmants are used mainly in conjunction with furniture dowels. The dowels prevent the parts from moving relative to each other, and the confirmants reliably attract them to each other.
To install the confirmant, you will need to drill two holes. At the end of the part you need to drill a hole with a diameter of 4.5 mm (D2 in the figure below), and in the plane of the second part a through hole with a diameter of 7 mm (D1 in the figure below). When drilling through holes, a wooden strip must be placed under the part at the drilling site. This will avoid chipping the laminated coating where the drill exits.
Confirmee.
Confirmant installation diagram.
The installed confirmand's hat is closed with a special decorative plastic cap.
Eccentric furniture tie (minifix). With the help of such a tie you can connect various parts of the body. Its advantage is that this screed is not visible on the front or side of the cabinet, unlike the confirmant. But, on the other hand, the connection made with the help of an eccentric furniture tie is inferior in strength to the connection on confirmants.
Furniture screed(minifix)
To install such a furniture tie, you will need to drill different holes in the parts to be connected. For the eccentric itself, you need to drill a hole with a diameter of 15 mm and a depth of 13 mm. The distance from the edge of the part to the center of the hole should be 43mm.
At the end of the part where the eccentric will be installed, it is necessary to drill a hole with a diameter of 8 mm. So that this hole connects to a hole with a diameter of 15mm. How the holes should be drilled correctly can be seen in the picture below. It should be noted that all holes are drilled from the inside of the parts.
Installation diagram of an eccentric furniture coupler.
A hole with a diameter of 5 mm is drilled in the plane of the second part and a screw from the eccentric coupler is screwed in. Then the parts are connected, and the eccentric is tightened clockwise with a screwdriver.
We screw in the eccentric coupler screw.
We connect the details.
We tighten the eccentric.
Compression screw with nut.
This type of tie is intended for connecting parts in furniture production. The connection is very rigid and durable. The only drawback is that after installing the screw, the screw head is visible on the front side of the part, but it looks pretty neat. If you plan to make a cabinet cabinet in which quite a lot of things will be stored, then such a connection will be the best choice because of its strength.
The screed must be installed in conjunction with furniture dowels. To connect two parts, you will need to install at least two furniture ties and two dowels. To install such a screed you will need to drill 3 holes. In the plane of the part where the round nut will be installed, it is necessary to drill a hole with a diameter of 10 mm and a depth of 13 mm (dimensions A, B in the figure below). A hole with a diameter of 8 mm is drilled perpendicular to this hole from the end of the part. In the second part, a hole is drilled in a plane with a diameter of 8 mm.
Compression screw with nut.
Installation diagram of a coupling screw with a nut.
Tighten the clamping screw.
Raffiks screed
This is another type of screed. Its design is similar to the minifix eccentric tie. Its advantage is that it is not visible on the front or side of the cabinet, but in terms of connection strength it is significantly inferior to the connection of parts on confirmants or a screw tie with a round nut.
Raffiks screed
To assemble a cabinet on rafixes, you need to drill two holes. One hole with a diameter of 20 mm must be drilled in the plane of the part. The drilling depth should be 13-14mm, the center of the hole should be at a distance of 9.5mm from the edge of the part. The second hole is drilled with a diameter of 5 mm for the tie screw in the plane of the second part.
Raffiks screed installation diagram.
Install Raffiks into the hole.
We screw in the screw from the Raffiks tie.
We connect the details.
Tighten the Raffiks tie.
Various cabinet cabinets can be assembled using such a screed, but if you are assembling a built-in wardrobe, the geometry of the walls may make its own adjustments and the alignments may not match, this point is worth remembering.
Furniture overhead hinge.
If you are assembling a cabinet with hinged doors, then you cannot do without a furniture hinge. Installation dimensions can be seen in the figure below.
Furniture hinge installation diagram.
Door marking diagram for installing a furniture hinge.
To install the hinge, you need to drill a hole with a diameter of 35 mm in the door. It is convenient to drill using a Forstner drill.
Forstner drill.
Shelf holders. These holders are designed for installation in a cabinet of removable shelves. They come in two types: a galvanized cylinder with a diameter of 5 mm and a corner.
Shelf holders.
To summarize in the description of the most common furniture fasteners, I would like to say that holes for eccentrics and dowels need to be drilled as accurately and perpendicularly as possible, because they don't forgive mistakes.
Nuances of cutting parts in a sheet of laminated chipboard
Having written out all the details on a piece of paper, you have two options. The first is to go straight to the company with this list, where specialists will cut it and transfer it to the furniture shop for cutting. The disadvantage of this option is that you will not be able to control how correctly the cutting of parts in the chipboard sheet is done, which means there is a possibility of overpaying.
The second option is more complex, but much more profitable for you - to lay out the parts yourself and pre-calculate the required number of laminated chipboard sheets.
Taking into account the structure of the slab
If you plan to make a wardrobe from chipboard with an applied wood structure, you need to rewrite all the details in a certain pattern. For example, by specifying the first size against the structure.
If the chipboard is smooth and plain, the dimensions of the parts can be written in any order.
Cutting the cabinet body parts and rolling the ends.
If you are planning to make a cabinet, then you have probably already thought about how to cut laminated chipboard into parts of the required sizes. Buying expensive tools to make one cabinet is unprofitable. You can, of course, try to cut it with a jigsaw, but the cut will be uneven and chips of the laminated surface of the slab are inevitable. The remaining option is to find a company that will make high-quality cuts of laminated chipboard on a sawing machine with a scoring disk and carriage. As a rule, such companies also provide services for processing the ends of parts and, at the same time, sell chipboards of various thicknesses and textures.
Such a company needs to provide a list of parts with dimensions, indicating on which sides the edge should be. They can also tell you where you can buy furniture fittings and profiles.
First of all, look for furniture production; if there is a Leroy Merlin store in your city, then they also provide such services, but the price of their services is quite high.
Those who have difficulty calculating the dimensions of cabinet parts can use Pro100, a free, simple furniture design program. There is a lot of information and lessons for this program on the Internet.
Pro100 program interface

