The cost of furnishings directly depends on the material they are made from. Laminated chipboards are widely used in furniture production - the products are inexpensive, have a wide range of models and a variety of shades and textures.
To increase strength, moisture resistance and decorativeness, particle boards are covered with a laminated front layer in the form of a film based on melamine resins.
You can make furniture with your own hands from laminated chipboard, but it is worth considering that if you cut it yourself, you can get chips on the front surface. Experts recommend making a drawing of the future product and ordering cutting of parts in a store or furniture workshop using special equipment.
DIY furniture from laminated chipboard
Main material: chipboard
Wood in its pure form is practically no longer used in cabinet furniture; solid wood is considered an expensive luxury material.
Now wood is being replaced with a cheaper material - laminated chipboard (abbreviated laminated chipboard). Most often, these boards have a thickness of 16 mm; chipboards with a thickness of 10 and 22 mm can also be found on sale. 10mm sheets are typically used to fill wardrobe doors, and 22mm sheets are used for bookcases and shelves where high bending strength is required. Also, sometimes the structure is decorated with elements made from 22 mm laminated chipboard.
Almost all furniture parts are made from 16 mm laminated chipboard (except for doors and facades).
Laminated chipboard
Laminated chipboard is cut on special machines along guides. Of course, you can saw it off at home using a jigsaw, but then there will be chips and wavy irregularities on the edges. It is almost impossible to saw off chipboard evenly with a jigsaw at home.
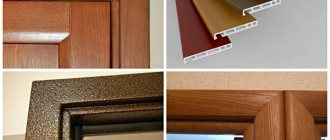
Edges
The most vulnerable place of laminated chipboard is when it is cut down. It is the easiest way for moisture to penetrate inside, so if the protection is poor, the ends may soon swell. Therefore, the ends are closed using edges; there are several types of them.
- Melamine edge is the cheapest, but of poor quality. You can stick it on at home using an iron.
Melamine edge
- PVC edge 0.4 and 2 mm is the best option. It can only be glued on a special machine, so it is done immediately when ordering a cut. To save money, 0.4 mm is glued to the invisible ends, and 2 mm to the external ones, which will experience constant loads and friction.
PVC edge 2 mm
- ABS edge is similar to PVC, but made from environmentally friendly material.
- Mortise T-shaped profile - inserted into a groove previously made with a milling cutter. Rarely used.
Mortise T-profile
- Overhead U-profile - can be easily glued to liquid nails at home. The main disadvantage is that the edges will protrude a few millimeters, so dirt will get stuck under it. On the other hand, this drawback allows you to hide a poor-quality cut.
Overlay edge
Article on the topic: edging laminated chipboard.
Safe finishing rules
- Chipboard needs to be sawed into pieces slowly; a saw with a fine tooth is better for this - this way you will get an even cutting line. You need to drill smoothly, using only a sharp drill and turning on high speed drills. It is necessary to control the perpendicularity of the drill's entry into the material, otherwise you can chip in a noticeable place. To remove irregularities, a rasp and a plane are needed; the tool is moved from the outside of the workpiece to the inside. It is important to prevent fibers from being pulled out - this will ensure a neat cut of the part;
- Laminated chipboard does not need additional processing, you just need to smooth the edge. The rest of the surface is painted, varnished or a special film is glued. Adhesive tape is used to protect the surface from splitting when sawing. If you are cutting by hand, the saw must be positioned at an angle. The edge of a part covered with teeth is an unpleasant sight, especially noticeable on white fiberboard boards. Saw the material slowly; excess haste will cause an unsightly joint between furniture elements;
- Dull or slowly rotating drills, in most cases, break out the edges of the hole. Only with the help of a sharp and high-quality drill can you make a smooth hole. If the cut is good, no additional processing will be required. When working, a circular saw leaves irregularities on the edge, which are removed with a plane. It is carefully guided along the edge, towards the inside, so that the edge becomes neat. For laminated boards, do not use a rasp;
- You can finish the surface of furniture made of fiberboard in 2 ways - either by painting furniture made of chipboard or by covering it with decorative material or varnishing it;
- Often the cladding is carried out with a special film, which has an adhesive coating on one side, which simplifies the finishing of furniture. It is unusually thin, for this reason the surface must be well sanded before gluing. You can stick laminated plastic, it is stronger and noticeably thicker. It is glued with a special glue; this coating makes chipboard furniture beautiful and at the same time protects the surface from external influences;
- Wood products are usually varnished; particle boards are varnished very rarely, only if it is necessary to “ennoble” the unattractive appearance of an ordinary board. Before varnishing, the surface must be leveled with putty. Even after factory processing (without lamination) it needs leveling. The smallest defects will be visible under the varnish film, and this greatly deteriorates the appearance of the furniture. After filling the chipboard, you should get a very smooth surface, and one coat of varnish should be enough for it. If after varnishing defects are noticeable, you will need to sand the surface again with sandpaper and varnish again;
- The layer of protective varnish should be thick, it prevents harmful fumes. You need to pay attention to the joints - you need to make them as tight as possible. Wallpaper and fabric are not suitable for finishing chipboard; these are porous materials that are not capable of serving as protection. Carpet can also allow harmful substances to pass through;
- The edges of the fiberboard slab can be trimmed with thin wooden strips. The wood is selected in a suitable color; the material must be in harmony with the coating of the piece of furniture. When you have glued the required number of wood planks, you need to varnish them, like the entire surface, or completely repaint the furniture. Even planks 5 mm thick will protect the edges of the slab well. If you glue a wide strip, it will prevent the tabletop from sagging.
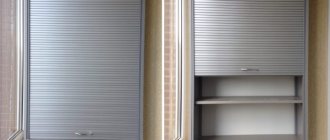
Facades
Kitchen fronts and furniture doors are usually made of more elegant material. But if you are making a drawer door inside a sliding wardrobe that no one will see, you can use regular 16 mm laminated chipboard with a 2 mm PVC edge for it. But the cabinets in the kitchen should look more presentable.
The facade is a separate furniture element. It is usually made to order. If the dimensions of the facades are non-standard, their production may take several months.
You can easily navigate the standard dimensions: usually the facades are made 2 mm smaller than the cabinet itself on each side. Therefore, for a standard 600 mm cabinet, a 596 mm façade is used.
The height of the kitchen cabinet also depends on the facade and ranges from 715 to 725 mm for floor cabinets (without legs) and low wall cabinets, and 915-925 mm for high wall cabinets.
Standard front sizes for kitchen cabinets
Types of facades
Since facades serve mainly a decorative function, the choice is huge; they differ in appearance and material.
- Facades made of laminated MDF. This is a pressed material, more moisture-resistant and dense compared to chipboard. Most often, the surface is laminated to look like wood. But no matter how strong the film is, over time it can come off at the edges and crack. The main advantage of this material is its low price and fast production.
MDF facades
- In addition to standard blank facades, there are also options with figured cutouts for stained glass. The glass is attached to the cover on the reverse side.
- Softforming - such facades are similar to ordinary MDF, but have a characteristic two-color layout with relief on both sides. They can only be used in dry rooms, bedrooms or living rooms.
Softforming
- Postforming – even higher quality and durable products. Thin plastic at the edges is wrapped 90° or 180°, thereby eliminating unnecessary seams at the corners. Chipboard or MDF boards are used as the base. Typically, postforming is done in a strict form, without unnecessary pretentious decorative elements.
Postforming
- Plastic facades are of high quality, but expensive. They consist of a base (chipboard/MDF) lined on both sides with thick plastic. They always have a strict design and a flat surface, glossy or matte. The edges of the slab are sometimes protected with ABS edges or aluminum profiles. Super-glossy acrylic plastic has been especially popular lately.
Plastic facades in aluminum profile
- Facades made of wood and veneer are suitable for lovers of natural materials, but they are expensive. In addition, there is a long debate about environmental friendliness: there is an opinion that there is so much varnish and impregnation that there is only one name left for the tree.
Wooden facades
- Painted facades to resemble enamel. They have a significant drawback - the surface is vulnerable to scratches and deformations, and has low chemical resistance. They used to be popular due to their rich color, but with the advent of glossy acrylic plastic, everything changed.
- Aluminum facades with glass are suitable for a high-tech kitchen. They look modern, but are difficult to manufacture and install. Non-standard fittings are used for their fastening.
Large DIY wardrobe
At first glance, large cabinets with full-wall fronts seem to an amateur to be something incredibly complex. But cabinet and modular furniture is assembled from separate segments using the same technology.
In fact, the height and width of the structure are reflected only in the cost, otherwise there is no difference whether you are assembling a modest bookcase, a cabinet with shelves for a balcony, or a huge glossy mirrored cabinet with many sections. All actions are the same, only the sizes and purpose of the blocks change.
For example, the photo below shows the contents of a large cabinet, but if you look closely, you can see that this giant consists of alternating, virtually identical blocks. You just change the sizes and embed the necessary sections.
By complementing the design with standard repeating blocks, you can build an arbitrarily large cabinet.
As practice shows, for an amateur the most difficult thing in creating three-dimensional structures is to draw a competent drawing and paint the details according to this diagram. Simply put, write down exactly the number of parts and the size of each part.
A piece of paper, a pencil and an accounting calculator will not help you; you will almost certainly get confused and make mistakes, and correcting them will cost a pretty penny later. I recommend downloading the Russian universal program “Business – Furniture Maker”.
More precisely, this is a whole set of programs weighing 100 MB; for designing just one cabinet there is a separate subsection called “Business Cabinet”. It’s not difficult to understand the program; the developers have posted several detailed half-hour video tutorials for free access.
The Business - Furniture Maker program is ideally suited for independent planning of combined structures.
Calculating the layout using this program is a pleasure. You can see all the partitions, frames, fastenings and connections in a three-dimensional projection, and most importantly, you can easily control and change any design parameters.
Plus, you can specify where the edges need to be laminated, after which the program will separately show you detailed details, with all the small costs from the length of the edge tape to the number of handles, corners and confirmations.
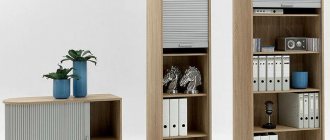
Back walls and bottoms of drawers
The back wall and bottom of the drawers are most often made of HDF. The smooth side of the sheet should face the inside of the cabinet/drawer. The thickness of the sheets is 3-5 mm, the color is selected to match the chipboard.
Some people prefer to attach HDF to a furniture stapler, but this cannot be done. Over time, the brackets will become loose and the structure may warp. It’s not worth talking about the bottom of the drawers - a stapler is clearly not suitable for fastening.
Furniture LDVP
Sometimes it is inserted into a groove prepared with a milling cutter, but all dimensions must match down to the millimeter.
Most often, HDF is attached to nails or self-tapping screws. It is better to use self-tapping screws with a press washer, but before screwing them in, you must drill a hole, otherwise the product may crack.
In rare cases, for example, to create a “stiffener” in a tall cabinet or in drawers with high loads, fiberboard is replaced with laminated chipboard. These materials can also be combined.
Required Tools
To repair or assemble chipboard furniture yourself, you need a small set of materials and tools. Everything you need can be found at home, or bought for a small price.
For work you will need the following tools:
- Small drill or screwdriver. Of course, it is better to use a small and not heavy drill to assemble furniture;
- Circular saw, router, jigsaw. If you don’t have these tools, you can rent them;
- Level, square, tape measure;
- Set of hex keys, countersinks, drills;
- Conductor.
The materials you will need are:
- Chipboards;
- Wax of the desired color;
- A felt-tip pen for retouching or a marker of the desired shades;
- Wax melter;
- Varnish;
- Felt fabric;
- PVA;
- Staple.
With such a small set, you can both update furniture and make new ones.
Tabletops
A tabletop is a horizontal work surface on which you can cook, eat, read, write, etc.
Most office and desk tables, as well as cheap dining tables, have a tabletop made of the same chipboard as the main parts. The thickness is 16 or 22 mm, it is necessary to frame it with a 2 mm PVC edge.
Special countertops are used for the kitchen. They are a sheet of chipboard 28-38 mm thick, which is covered on top with durable plastic using postforming technology. Moisture-resistant countertops are green when cut, while regular chipboard is gray. A proper kitchen countertop should have a drip tray that will prevent dripping liquid from getting onto the fronts and drawers.
Cutting a regular and moisture-resistant countertop
The weak point of such countertops is the cut edge. They are usually covered with a simple melamine edge, so they become unusable within the first year of use. To avoid this, it is recommended to protect the edges with special aluminum profiles (end strip), and to protect against moisture, pre-coat the cut with silicone sealant.
There are also other types of profiles: corner and connecting strips, which are needed for joining several cabinets with different countertops.
Corner, connecting and end strip for table top
Another element is a decorative corner that closes the gap between the wall and the tabletop.
Skirting board for table top
A wall panel is sometimes used to finish the apron. Unlike tiles or mosaics, it is more practical due to the absence of seams and is inexpensive compared to glass splashbacks.
The tabletop is attached to the cabinets from below using short self-tapping screws to horizontal spacers so as not to spoil the smooth front surface.
Scheme of fastening the tabletop to the cabinet
Countertops made from natural or artificial stone are higher quality and more durable than others. Natural stone is heavy and requires special care due to its high porosity. But artificial stone does not have such disadvantages; it can be given any size and shape. The main disadvantage of stone countertops is the high price; for a small kitchen they cost from 40 thousand rubles. and more.
An alternative option is a countertop made of tiles or porcelain stoneware. You can make it yourself, but the tiles cannot be mounted on regular plywood or chipboard. The base must first be covered with cement-fiber sheets.
Decoration
Before implementing a plan for decorative finishing, you need to clearly decide on the style of the new piece of furniture and determine the method of covering it. There are several techniques for decorating chipboard cabinets. Let's consider painting and filming.
Paint
The most reliable and capital finishing method is painting. It is very easy to do and inexpensive. Particleboards are treated with acrylic, alkyd, aerosol or ordinary wood paint.
Reference. Acrylic spray paint adheres to the surface better than regular paint. The treated surfaces are uniformly painted and smooth.
Chipboard painting is carried out in stages:
- Level and dust the work surface.
- Degrease and apply primer.
- Existing chips are filled with putty and rubbed.
- Apply one or two more layers of primer.
- Paint the surfaces with the chosen paint.
You can decorate the cabinet using a stencil with fancy multi-colored or plain patterns and symbols.
Cover with film
Self-adhesive film will give the cabinet originality and the desired style. The film should fit harmoniously into the interior design. But such a coating will not last long.
To complete the work you will need:
- primer;
- solvent;
- soft fabric;
- knife and scissors;
- roller;
- sanding paper.
Pasting with chipboard film is carried out according to a given algorithm:
- Taking measurements.
- Cutting the material in the required quantity to decorate the surface.
- Removing the protective layer from the film.
- Pasting a furniture panel with a prepared cut.
Important ! When using self-adhesive film, the surfaces of the product are treated with a primer to improve the adhesion of both planes.
To prevent wrinkles from forming, the plane is smoothed with a roller . Start from the edge on which the material is applied.
To treat large areas, you can use a different method of covering with film. The base is a solution of water and soap. Remove the protective layer from the material and place it on the floor. Using a spray bottle , apply a soap solution to the adhesive layer of the film and apply it to the surface. If desired, you can apply film gluing together with painting.
Upon completion of the work, the final design of the cabinet is carried out - mirrors are installed, lighting and other functional elements are arranged.
If you are considering making cabinets from other materials, we recommend considering furniture board, cardboard and drywall.
Location of parts
A detail is any element of cabinet furniture: lids, tabletops, walls, facades, shelves. Each part can be either nested or invoice. Choosing the right type of location is very important.
Let's look at examples of two kitchen cabinets: one of them will stand on legs, and the second will be hanging.
Base cabinet:
As can be seen in the photo, the operating stress in the floor-standing cabinet is directed downwards from the lid and in the first option is naturally transmitted through the parts to the cabinet legs.
Correct and incorrect options for assembling a floor cabinet
In the second, incorrect option, the load is transmitted through the confirmat (furniture screw), and because of this it will be torn out of the part at a fracture.
Wall cabinet:
In the second example, the opposite is true: the load will go to the bottom shelf, and the attachment point will be on top.
Correct and incorrect assembly of a wall cabinet
If we use the same fastening scheme here as in the floor cabinet (option 1), all 4 bolts will be constantly under the load of being pulled out of the wood. Therefore, it is better if the confirmations experience stress on the fracture (see diagram “correctly”).
A rigid frame and a strong base are the conditions for furniture stability
If the frame is insufficiently rigid, the cabinets sway, and the main reason for this is the lack of reinforcement. Fiberboard sheets for rear walls cannot provide this. We add 25 cm wide chipboard cross ties to each section at different levels and secure the confirmations. This arrangement will provide maximum rigidity.
For a plasterboard cabinet frame, only a metal profile with purchased fasteners is allowed.
Incorrect installation and insufficient number of supports will deform the bottom under load. To prevent this from happening, we install supports every 30-40 mm from each bulkhead. The sliding wardrobe can be installed on supports 25 mm high with the possibility of adjustment through the holes at the bottom. The only drawback is the space between the bottom and the floor, which will be the trash can. The second option is to use kitchen legs with a height of 100 mm.
Wardrobe frame
Furniture fasteners
Furniture fasteners are hardware (metal products) that are used to connect parts. Most often, connections are made at right angles.
- Wooden dowels - inserted into pre-drilled holes in both parts. They are used for preliminary fixation and increasing the shear load, then the parts are fixed in a more reliable way.
Dowels
- Furniture corners are a popular, but outdated type of furniture fastening. Among the disadvantages: appearance, loosening over time and bulkiness.
Furniture corner
- Euroscrew (confirmed) – furniture screw. This is the main fastener for parts in modern furniture. Furniture makers almost never use ordinary self-tapping screws. Confirmats have a larger thread, so they stay inside the chipboard much better.
Confirmat
The holes for them can be drilled directly on site. To do this, use a special drill that makes a hole with different diameters for the thread, neck and head of the Euroscrew. The most commonly used confirmats are 7*50 mm. When drilling, special attention should be paid to the perpendicularity of the drilling, so as not to spoil the coating of the part with a through hole.
Drill for euroscrew
Furniture screws are tightened with a hex key or a screwdriver attachment. The caps for a Phillips screwdriver cannot be tightened tightly until the end.
The main disadvantage of this type of fastening is that screwed-in caps remain visible. To hide them, use plastic plugs matching the color of the chipboard.
- Eccentric ties are a modern and correct method of fastening. It leaves a hole only on the inside of the product, but requires very precise drilling.
Eccentric coupler
To obtain the required holes, use a Forstner drill. There's not much point in going to the trouble of using them to assemble items that will be hidden, but they work well for attaching drawer doors.
Forstner drill
Article on the topic: DIY kitchen assembly.
How to choose slabs?
To make furniture beautiful and durable, it is necessary to make it only from high-quality material. There are several enterprises in Russia that produce laminated particle boards of European quality, these are:
- Russian laminate;
- Syktyvkar plywood plant;
- LLC Kronshpan.
If you are interested in how laminated chipboards are produced, we recommend reading this article.
The listed enterprises produce large sheets of laminated chipboard, so you need to either cut them , or find a workshop or organization where they will cut the board into pieces of the required size.
In addition, you must immediately purchase edging tape , because after cutting the edges will be uncoated and will differ greatly in color.
We also recommend that before purchasing a laminate, contact the manufacturer and find out the addresses of official dealers in your region. After all, “Russian Laminate” and “Kronshpan” are well-known brands under which they sell high-quality products, so there are often cases of fraud when a low-quality product is offered under a well-known brand.
Purchasing from an official dealer of these enterprises, as well as careful attention to the documentation on chipboards, will help you choose truly high-quality products.
Furniture fittings
- Handles - everything is clear here. They are usually attached with screws.
- Legs are convenient in rooms where wet floor cleaning is often done, for example, in the kitchen. Any wood, especially chipboard, will quickly deteriorate from daily contact with water. In addition, the legs can be used to level furniture on uneven surfaces.
- A silicone damper is a cheap but very useful part that can reduce the noise of impacts from cabinet doors. It is glued to the top and bottom of the cabinet door or end to soften the impact.
Silicone damper
- Furniture hinges. Round cutouts for them (additives) in the facades can be made in any furniture workshop, if the manufacturer has not made them in advance. The hinges differ in the degree of door opening. Standard hinges have an opening angle of 180° and a closed angle of 90°. The hinges have a special mechanism that allows you to adjust the doors in height and seating depth. Separate hinges are sold for glass doors; you can clamp the glass into them without drilling a hole.
Furniture hinges
Among the inexpensive manufacturers of accessories, we can recommend the Chinese Boyard, and among the serious global manufacturers, the Austrian Blum.
Choosing a door mechanism
If you decide to use traditional door leaves, you will have to buy hinges. The sliding door system must be well sized and made from solid materials. It consists of a rail, rail supports, rollers, kickback protection, bumpers and guides.
It is worth remembering that such doors always have at least two sliding doors. This is important when choosing guides.
Drawers and slides
There are many ways to make furniture boxes. The simplest of them is to assemble a perimeter from laminated chipboard. If a beautiful facade is required, it is screwed onto the main frame from the inside (like the tabletop). The façade can also be secured to eccentrics as the fourth wall of the drawer.
But the main thing is not to assemble the drawer, but to secure it correctly.
Drawer guides are divided into roller or ball guides.
- Roller guides are usually attached to the bottom of the drawer. He will ride on them on two rollers. A pair of such guides costs about 150 rubles, but it is highly not recommended to use them. The main disadvantage is that they do not allow the drawer to be pulled out completely; a heavy drawer in the more than half-open position may simply fall.
- Ball guides, or as they are also called, “full extension telescopic guides,” can exactly double the length. They have many balls inside, like bearings, so they provide a smooth ride.
Roller and ball guides for drawers
- In addition, Blum has metaboxes and tandemboxes. These are ready-made side walls of drawers with installed guides. All that remains is to install the façade, back wall and bottom.
Create a drawing
If you need to make a wardrobe with your own hands, drawings will be the first step towards your goal. You have to decide on the size, design, and configuration of the furniture. First of all, you need to decide what the handmade product will be used for and what its content will be. It is important to determine which compartments are needed, set their parameters and other features.
After this you need to measure the room. If there is a niche, then the distances between the side walls and then between the floor and ceiling are determined. It is also necessary to set the depth of the niche so that the cabinet does not protrude beyond its boundaries. Next, you need to choose the type of structure (cabinet or built-in), decide what kind of doors they will be, and decide on the finishing method. Having completed all the measurements, you need to make a drawing with your own hands in the traditional way (on paper) or in a special program.
If your ideas don’t come up, you can use a description or a ready-made solution borrowed from the Internet. It is important to take into account the characteristics of the material and compare them with your capabilities. The more complex the design, the more experience and skills will be required from the master. It is also important to think through all stages of assembly; there should be no unclear moments. Only then can you start working.