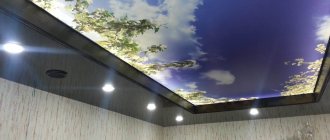
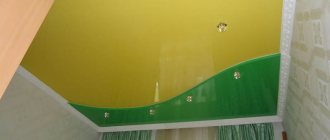
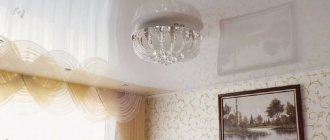
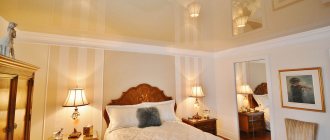
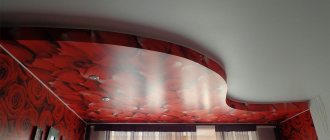
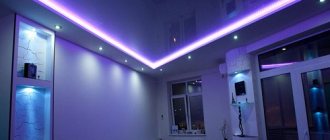
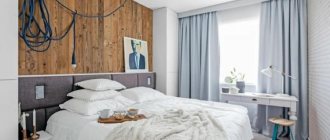
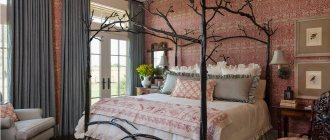
Among modern methods of finishing the ceiling surface, stretch two-level ceilings occupy a key place. They look unusually fresh and presentable both in photos in advertising brochures of installation organizations and in person, representing an extremely successful design solution for interiors that are completely different in nature. Meanwhile, in order to skillfully use all the advantages of a two-tier structure, it will not be superfluous to know what impact they have on the visual appearance of the premises - and how this happens in specific examples. We present you with extensive material that will certainly come in handy if you are eager to install two-level stretch ceilings - 100 photos with the best ideas and useful tips for integrating a complex ceiling structure into the interior.
- All the benefits of use;
- All disadvantages of use;
- Installation features. Video;
- Table of color and texture compatibility;
- Interaction with light sources;
- Use in various types of premises;
- Conclusion.
All the benefits of using
If the stars light up, it means someone needs it. Likewise, tensioned two-level structures are successfully implemented in modern city apartments and private houses for the simple reason that they allow the owners to realize some design ideas due to their obvious advantages. Which ones?
- modern style
- for those who are accustomed to following trends, it is the factor of relevance of a particular decision that plays a key role; - effective camouflage of pipes and communications
- nothing will spoil the appearance of the room, and if necessary, you can easily gain direct access to them; - unlimited zoning possibilities
- this can be a division within a room into several both decorative and functional zones; - variety of lighting scenarios
- additional levels of the ceiling structure can be used to place various lighting sources on them and create unusual lighting effects; - increasing the scale of the room
- it is noted in the photo that suspended two-tier ceilings work great to visually increase the height of the room - but not in the case of very modest-sized rooms; - the potential uniqueness of each project
- there are no limits when it comes to creating ceiling structures with several levels, which means that there is a real opportunity to uniquely customize your interior while costing a minimum of money spent; - a combination of different textures and shades
- due to such stylistic synthesis, new forms of decorative design of the ceiling are realized.
Summarizing all of the above, we can say with confidence that two-level ceilings can be perfectly implemented both in the format of an ordinary city apartment with a small area, and in a spacious country house, where, as you know, square meters are not really counted - why? , when there are already plenty of them?
Materials and tools for work
To install a two-level ceiling, you will need the following tools:
- screwdriver;
- perforator;
- two-meter rule with level, hydraulic level;
- devices for marking – pencil or marker, tape measure, upholstery cord;
- step ladder;
- metal scissors for cutting profiles or a hacksaw for cutting wooden beams;
- hammer;
- construction knife for cutting drywall.
Materials needed include:
- drywall. Choose it taking into account the operating conditions in the room where the ceiling will be installed. The optimal sheet thickness for the first tier is 8-9.5 mm. Thicker sheets are heavier, so experts do not recommend using them in construction. For cladding the second level, gypsum boards with a thickness of 6 mm are usually used. Buy the material with a small margin (3-5%);
- profiles: guide and bearing;
- hangers or knitting needles. What to choose depends on the distance between the rough ceiling and the decorative coating;
- fastening elements: metal screws, dowel screws, self-tapping screws for gypsum boards.
When calculating the number of fasteners, take into account the following key points:
- the profile is mounted on the ceiling in increments of 60 cm;
- GKL sheets are screwed every 25 cm;
- to install one connector (“crab”) you need 8 screws;
- one suspension unit is attached to the ceiling base using 6 self-tapping screws.
For finishing you need to purchase putty. To mask the joints between sheets, as well as transitions from one level to another, and gaps between walls and ceilings, you need sickle tape. If you want to insulate ceilings or provide additional sound insulation, make sure to purchase these materials as well.
All the disadvantages of using
As much as we would like, everything has a downside - and often the facts discovered on it have much greater weight and significance. But not in the case of stretch ceilings in several levels - for this it is enough to look at even a few photos from catalogs. By and large, only the following points can be attributed to a small number of their disadvantages:
- reducing the actual height of the ceiling
- acquires any significance only if the room itself cannot boast of extra centimeters upward; - higher cost
- an increase in the amount of consumables inevitably entails an increase in the price tag for the overall project, you have to put up with this or choose simpler and more affordable design options, there is no third option; - complicated installation
is a fairly logical disadvantage, which actually matters only if you decide to install such ceilings yourself, but most often this work is entrusted to the shoulders of professionals, so this disadvantage can be considered quite dubious.
Photo gallery of lighting ideas
There are many implementation options. It all depends on the parameters of the room and personal preferences. Multi-level stretch ceilings with proper lighting will not look too bulky or put pressure on your head. The design will become the main decoration of the interior.
Installation features. Video
Above we noticed that the installation
two-level tension fabrics are slightly more complicated - due to the need to construct
a metal frame
, which will serve as a supporting structure for the second level. If you analyze the entire installation algorithm point by point, then there is nothing complicated about it:
- first, a general plan is drawn up - you must decide how the lower level will be designed;
then it is necessary to take the required measurements and prepare profiles for constructing a metal frame; - after the frame is ready, all that remains is to cover it with plasterboard;
- at your request, you subject the drywall to finishing - so that it fits into the interior as successfully as possible;
- stretch the polyvinyl chloride film using a heat gun according to the standard method, which has already been described more than once both online and on our website.
Here is a detailed video instruction that allows you to visualize all this
Types of suspended ceilings
The ceiling canvas can be a PVC film or fabric impregnated with a styrene compound to increase strength.
The advantages of film include:
- High strength (can withstand loads of up to 100 kg per 1 cm2);
- Not susceptible to moisture, combustion, dust accumulation;
- Easy to clean;
- Available in several finishes - glossy, matte, satin
- Wide range of colors and prints, any design can be applied
There are not so many disadvantages of this material, but they do exist: the risk of working with a heat gun; if mechanical damage occurs, the canvas cannot be restored; they cannot be installed in non-residential premises with temperatures below 0°C.
Fabric fabric has higher strength than PVC film, and this is probably the main advantage of such a material. Also, the fabric is not afraid of temperature changes and mechanical damage (it won’t be accidentally damaged if installed carelessly).
But the disadvantages are more significant: there is no moisture resistance, cleaning such a surface is extremely problematic, the palette is poor.
Color compatibility table
The use of several levels of the ceiling surface in a single design concept implies compliance with certain color combination rules. Of course, any rules are made to be broken - and in some cases we even recommend doing so, but information about basic tonal combinations will definitely not be superfluous.
For convenience, we have compiled it into a compact table. Use it!
| Color | Optimal combination | Undesirable combination |
| White | Blue, red, black | Versatile, but requires dilution |
| Beige | Brown, emerald, red, black | Yellow |
| Grey | Fuchsia, red, purple | Green |
| Pink | Brown, white, olive, mint | Purple, orange, light green |
| Red | White, black, yellow | Brown, pink |
| Yellow | Blue, lilac, light green, light blue | Black |
| Blue | Red, white, gray, brown | Green, purple |
| Black | White, red, light green, yellow, orange | Versatile, but requires dilution |
Interaction with light sources
With the advent of a large number of additional lighting
Designers have an excellent opportunity to directly influence the atmosphere in the room, and suspended two-tier ceilings came in handy here.
As a rule, one of the levels is located along the perimeter or along one of the walls and takes an active part in the zoning of the room
through the placement of spotlights or LED lights. These light sources belong to the category of additional ones and, in addition to performing a direct practical function, help to achieve an artistic division of a single living space into several functional zones.
Let's see how all this happens in reality.
What light sources are actively used?
- spots
- spotlights, which are often called recessed, have the ability to illuminate a space within a radius of a maximum of 2 meters and therefore are most often used in a bunch of 4-6 pieces, placed sequentially or in random order; - LED strips
- LED strips that stretch along the perimeter or along one of the walls and perfectly illuminate the space, are the basic element of the so-called hidden lighting; - chandeliers
- a classic version of the main lighting, most often its central element; in the case of two-level ceilings, it is placed mainly on the PVC sheet itself; - lampshades
- there are a large number of variations - and each of them can play its role in a simulated lighting scenario; they can be placed both on the plasterboard part and directly on the tension fabric.
It should be noted that quite often LEDs
are located on the upper level in such a way as to highlight certain areas, thereby helping to achieve a voluminous and beautiful display of the pattern printed on the canvas. The most common options:
- starry sky;
- specific constellations;
- solar dawn;
- space theme;
- geographic Maps.
Use in various types of premises
The functional features of premises are one of the main factors that determine the nature of the finishing of their ceiling structure. Take a look at the photo above: placing suspended two-level ceilings in one case can advantageously emphasize the scale of the room and the specifics of its use, but in another it can disrupt the harmony in the air and create an uncomfortable, poorly optimized interior. In addition, in bathrooms, balconies, and children's rooms, you need to be very careful when using a multi-level structure - due to direct mechanical impact, the stretched fabric can tear, and permanent temperature changes affect its performance.
However, people love two-tier suspended ceilings and actively use them in their “homes”. Let's look at how this happens and what rules should be followed so that the final result after installation is pleasing to the eye. Well, when is it worth abandoning the rules in order to get an original and effective interior?
In the living room
If you live in a private house
and want to emphasize the luxury of your living room, we recommend that you view the following photos of suspended two-tier ceilings: among them there are many options with deep relief and unexpected contrasts.
It’s not enough to have a large living room - you also need to be able to use the free square meters to the maximum. With the help of a complex ceiling structure and properly designed lighting, you can advantageously illuminate the recreation area or place other accents in the interior.
It always looks great when the ceiling is symmetrical to the floor design of the room. For example, as in the images below.
As a rule, in urban environments, with the help of two-level suspended ceilings, owners strive to emphasize the internal volume of the room. A higher scale is achieved by introducing an additional level in one of the corners of the room. Hidden lighting system
- another tool that, in skillful hands, turns into an accurate designer weapon.
Look at how it hits not the eyebrow, but the eye.
In the kitchen
Modern kitchens do not always allow the use of several levels of finishing on the ceiling at once, but if such an opportunity exists, why not take advantage of it?
In city apartments:
- narrow frame;
- spot lighting throughout the entire area of the lower tier;
- a light-colored tension fabric placed in the center;
- central chandelier (if possible)
This schematic arrangement of accents allows even in modest kitchen-type rooms to achieve excellent visualization of the interior. All laws of proper zoning are observed, the work area is favorably illuminated by symmetrically placed spots, and a chandelier is used as the main lighting source. Instead, if desired, you can use a ceiling-type lamp - three lamps hanging over the dining table will be enough to organize a comfortable meal and a great atmosphere.
Be careful with experiments in modest-sized kitchens: failure to maintain color balance can cause an uncomfortable interior that puts pressure on the brain. In particular, be extremely careful when using black. If it’s really hard to overcome your sympathy for it, then give it a place on the modeled frame, and give the main level a pure white color. The combination of two contrasting textures - glossy
and
matte
. In this case, it is best to place the first one on the frame, and the second one in the central part.
In private houses, there is little point in adhering to any specific schemes, since each house has its own layout, and most of the schemes known and recommended by experts simply do not work. It is best to seek the help of a professional designer - he will be able to take into account all the nuances of the room and develop a unique project. Of course, maximum attention should be paid to the ceiling surface.
We offer you a photo of the successful use of suspended two-level ceilings in the format of a spacious kitchen in a private house.
In the bedroom
Leave all provocations with color and texture for other rooms - in the bedroom you need to create an extremely cozy atmosphere that is as conducive to relaxation as possible. pastel colors for two-level ceilings.
, avoid geometric congestion and torn lines.
Soft, absolutely unobtrusive lighting and delicate accents on the bedside area of the two-level ceiling are welcome.
If your bedroom uses a central chandelier, then prefer not the most massive design: the light source should be natural and not blatantly appear in the field of view.
A separate case - imitation of a ceiling under a starry sky
using LED lamps. Using different types of lighting, you can achieve a unique color scheme for a two-level ceiling. Of course, someone will say, it’s a hackneyed plot, it’s time to come up with something new. But take a look at the photo below, where stretch two-tier ceilings of this type are presented. Isn't it a winning solution?
In the hallway and corridor
One of the most interesting tools that helps to slightly enrich the rather meager design of modern hallways with the help of
stretch ceilings. As a rule, in apartments these rooms cannot boast of substantial dimensions, so you can use a little trick: use ceilings of this type approximately as in the following photo.
Thus, you skillfully kill two birds with one stone:
- visually enrich a room that is modest in aesthetic characteristics;
- make it longer with the help of lower tiers parallel to each other.
Consistently placed lamps on a two-level ceiling enhance the desired effect.
Here are some more interesting photos with two-level ceilings in the format of modern hallways and corridors. Carefully study the interior - it contains great ideas, each of which can potentially fit organically into the design of your room.
In the children's room
Children passionately love everything bright, playful, and fabulous. Therefore, in terms of choosing colors and motifs when organizing a stretch ceiling, parents have completely free hands:
- Flora and fauna;
- stars and sun;
- fairy-tale heroes;
- motifs from comics and animations.
Do you want a blue sky filled with vital energy on your ceiling? Please!
Have cartoon characters left the TV screen and settled on the suspended ceiling? Why not?
Incredibly beautiful butterflies flutter, creating a great mood and a reason to smile? A great option for a ceiling in a nursery!
As you might have guessed, for installing a two-level stretch ceiling, anything that is in one way or another within your child’s interests and constitutes a map of his inner world is suitable. However, be careful with the lower level: children often like to frolic with all sorts of objects, so the risk of damaging the stretched fabric is permanent.
