The advantages of modern computer chairs are difficult to overestimate - a comfortable design provides anatomically correct back support, reduces the load on the spine, and eliminates tension in the neck muscles. The only inconvenience is that any office chair is delivered disassembled, and it is not always possible to resort to the services of an assembler. In most cases, this is not necessary - understanding how to assemble a computer chair is quite simple and on your own. First, you will need to understand the principle of the design and the functionality of each element, and then study the instructions, which are always supplied with the furniture. The description of the assembly process and useful tips collected in the article will allow you to carry out all the manipulations without extra effort, while saving your family budget.
Possible difficulties
It happens that when disassembling office furniture it is inconvenient to unscrew the short rear fastening screw. In this case, it is recommended to replace the screwdriver with a screwdriver.
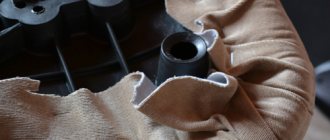
If the gas lift moves away from the piastra with great difficulty, using a bronze or wooden drift will help solve the problem. It should be remembered that strong impacts may cause the plastic cross to burst.
It happens that when replacing or repairing rollers, a metal rod gets stuck in the cross. This often happens if the office furniture has never been disassembled, since over time all the fastenings become compacted. In this case, the use of technical lubricant will help eliminate the problem.
Experts do not recommend repairing a worn pneumatic cartridge. This part can only be replaced. The device contains compressed air pumped into a chamber under high pressure; its accidental release can cause serious injury to a person.
The swing mechanism is also rarely repairable. Usually it is changed immediately, but the main difficulty is that it is very difficult to find this spare part. In this case, the best solution may be to purchase a new office chair.
Before disassembling office chairs, experts immediately assess the condition of the crosspiece. Inexperienced users often change a shaky base. However, it can last for several more years. In order to secure the chair support in a stable position, it is necessary to insert a metal pin into its rod and seal the connections.
You can also repair minor damage to the upholstery yourself. To do this, you need to use a furniture stapler. Cleaning of contamination should be carried out before dismantling and repairing the product. Also, before disassembling computer chairs, they are usually vacuumed.
In order not to waste time on frequent repairs of rollers, you can install special plugs - gliders - instead. However, with them it will be more difficult to move furniture on the floor than with wheels. The plugs are attached to the sockets according to the same principle as the rollers. The use of gliders allows you to reduce the height of the chair.
In order to avoid frequent breakdowns, it is recommended to choose high-quality furniture from well-known manufacturers with a warranty period of at least one and a half years. If the malfunction is serious, it is better not to risk disassembling the office chair at home, but to seek the help of a qualified specialist.
Inconveniences during disassembly
State of the cross
Office chair gliders
Contents of delivery
The equipment is what the office chair consists of. In this case, these are two components: a support part with height adjustment and roller wheels, as well as a seat with a backrest. For compact packaging and ease of transportation, they are disassembled into smaller parts. Each delivery kit is supplemented with instructions that detail how to assemble a computer chair.
Assembling the chair should begin by checking the availability of all components.
The standard set includes the following elements:
- roller supports or wheels - serve for the mobility of the chair;
- cross with overlays - the main supporting part;
- lifting mechanism with casing - responsible for the height of the seat;
- an adjusting element for connecting the backrest and seat;
- two armrests;
- back;
- hardware;
- hex wrench;
- seat.
If the contents of the package correspond to the list and have no defects, scratches, or abrasions, you can begin work; the assembly diagram will help with this. The procedure will not cause difficulties if you follow all the instructions exactly.
Self-installation
The whole process begins from the lower moving part. Under no circumstances should you start assembly from the seat, because... then there will be complications in the final configuration. Also, we must not forget that assembly is carried out not on the floor, but on a surface (it is advisable to use a box, since its physical parameters are ideal for the future chair).
you need to find a cross. Usually it has from 4 to 6 blades, but sometimes there are 8. It turns over and lays on the box. The surface must be soft, because you will have to apply force to get the roller into place (you need to press until it clicks). If the roller does not go, then there is no need to increase the pressure, and most likely there is a groove in the design so that it can simply be loaded without a click. Thus, you need to install all the rollers - with a full hand, each one takes no more than 5-10 seconds; The shock absorber has the form of a tube and a synthetic enveloping material. The shock absorber is installed with the open tube facing up (towards the seat). During installation, minimal free play is possible (it will eliminate itself during operation), but it is better that it does not exist; the glass is going. Typically, the kit comes with 3 through cylinders, which fit into each other according to size. Alternatively, they can be put on the shock absorber in turn from smallest to largest
The function of the glasses is 90% visual and 10% safety (if something unexpected happens, there will be a chance to carefully get out of the chair without getting any injuries).
At this point, the supporting part is considered completed, and you can proceed to the chair itself. It’s already visually clear where the fulcrum will be and what to expect in the future, so the procedure is as follows:
- the seat is turned over with its “front” side on the box, and in the center of the base there is a platform for the mounting system. This system will ensure a reliable transition from the chair leg to the seat (it is advisable to purchase a metal base, but this is not always possible, so you need to carefully look at the quality of the plastic). All fastenings are made using screws, the number of which is from 4 to 8 (when applying the plate to the seat, the holes will match perfectly);
- the armrests will serve to connect the seat to the backrest. To install them, you just need to move the seat a little to the edge of the working surface and you can screw it on (if the assembly takes place on a box, you don’t even have to move it, because the dimensions of the box are specially made by the manufacturer for ease of assembly). To fix each armrest, 2-3 screws are provided;
- the entire resulting composition is moved to the edge of the box so that only 2/3 remains on the surface. The backrest is applied to the armrests from the inside, and fixed in the manner described above. At the same stage, it is imperative to check the quality of all threaded connections of the chair, because then such an opportunity will no longer arise;
- all visible places of bolted connections are closed with special plugs that match the color of the armrests. No tools are required here, but you will have to apply force (sometimes until it clicks - you need to look at the plugs).
Once the top and bottom parts have been assembled, they can be joined together. To do this, simply install the shock absorber into the tube (do not confuse it with a lever, because in some models this is possible - if you press the button too hard, it will press through, but this will be a reason to purchase a new chair).
Attention! All components are in stock
Our Telegram channel https://telegram.me/chairspb
Checking the contents
Experts recommend checking the package in advance to make sure you have all the parts.
Wheels
Most product models are equipped with special wheels that are mounted on the crosspiece. The diameter of the rollers does not exceed fifty millimeters, and the size of the rods is ten millimeters. Most often, the wheels are supplied separately from the crosspiece and therefore you will have to install them yourself.
If the chair will be placed on parquet or linoleum, it is recommended to buy rubberized casters. They will not damage the surface and will not leave marks on it.
Cross
When checking the package, you need to make sure there is a crosspiece. This is an irreplaceable part on which the rest of the structure is installed.
The crosspiece is made of the following materials:
- Wooden. Wood parts are used in expensive office chairs. The advantages of wooden crosses include an attractive appearance and resistance to high loads.
- Chrome plated. Such products are considered the most reliable and durable. Chrome parts are versatile, as they are installed in both expensive and budget chairs.
- Plastic. Budget chairs are equipped with plastic crosspieces. In terms of strength, they are inferior to products that are made of metal or wood.
Lifting mechanism and casing
The kit should include a special mechanism for raising and lowering the seat. It is installed between the chair support and its cross.
A gas lift is a hydraulic gas device found in every office chair. If it is not included in the package, you will have to contact representatives of the store where the product was purchased.
Seat, back, 2 armrests
In addition to the above components, the kit should include two armrests, a seat and a backrest. These details make the office chair more comfortable. However, sometimes the kit may be missing something. Most often this happens when they buy budget models of office chairs that are sold without armrests.
Set of bolts and other fasteners
The parts from which the chair is assembled are secured using special fasteners. Bolts and screws should be included with the rest of the chair. Most components are attached to each other with small screws about one and a half centimeters long. To attach the side armrests, stronger fasteners are used - bolts.
Special key
Some office chairs have components that are secured not with screws or bolts, but with fasteners with a special hex hole in the head. Such fasteners are not very common, and not every person has a tool for working with hexagons. Therefore, manufacturers must ensure that a special key is included in the kit.
Step-by-step instructions for assembling the chair
Assembly will be quick and enjoyable if you follow the sequence we suggested.
Install the rollers into the slots
With a little force, insert the wheels into the holes on the chair legs
First, install the rollers into the crosspiece - to do this, insert them with the rods into the holes on the lower surface of the crosspiece and press firmly until they click. You can use a rubber mallet, but it is not recommended to hit the plastic parts of the parts too hard.
After all the wheels have been inserted, place them on the floor and press the entire body onto the legs of the office chairPrepare the seat
Attach the piaster to the bottom of the seat using bolts
Attach the backrest adjustment mechanism to the back of the seat and the piastres to the bottom.
IMPORTANT! When installing, make sure that each screw is equipped with two types of washers - flat (it increases the contact area of the inner surface of the head) and lock - to prevent the nut from unscrewing. Manufacturers offer various options for devices that regulate the position of the backrest and seat to suit the characteristics of the spine of a sitting person.
The most common:
Manufacturers offer various options for devices that regulate the position of the backrest and seat to suit the characteristics of the spine of a sitting person. The most common:
- piastra – can only regulate the vertical displacement of the seat and backrest relative to the floor, used in conjunction with the FDA;
Piastre mechanism for office chair - PVM (spring-screw mechanism) - reliable and unpretentious, adjusts only the angle of inclination and the distance of the backrest relative to the seat, used together with a piaster in inexpensive models;
Spring-screw mechanism for swinging the chair - Top gun - provides “swinging” of the monolithic seat with an angle from 95 to 130º, but at the same time the legs can come off the floor and the chair can tip over. When choosing such a product, give preference to a mechanism on bearings with a tilt axis shifted to the edge and a working position lock;
Top gun swing mechanism for office chair
- synchronizing mechanism - under the influence of the gravity of a person’s weight, it automatically changes the angle of the seat simultaneously with a change in the seat position, the most expensive solution for top managers.
Synchronizing mechanism for an expensive office chair
The correct location of the socket and adjusting screw is indicated by the arrow
When installing, please note that the seat for the gas lift rod should be directed forward, and the adjacent adjusting screw with a plastic handle should be directed back. Insert the armrest brackets into the side slots and tighten with screws
Installing armrests on both sides of the chair
Put the backrest on and tighten it with the adjusting screw.
Installing and screwing the backrest of the chair
Install the gas lift into the crosspiece
Assembled casing-cover and gas lift - shock absorber for the chair
Remove the protective caps from the ends of the gas lift and insert it with its base into the upper central hole of the cross. Assemble the casing - it is often made of several parts connected according to the principle of a telescopic pipe and put it on the gas lift. Insert it into the center hole of the cross. You have assembled the load-bearing part.
We assemble the supporting part - insert the gas lift into the crossWe install the casing in place and get the finished lower part
Connect both parts of the chair
Carefully place the office chair seat onto the shock absorber
Place the seat on the gas lift rod and press firmly or sit on it - this is necessary for a strong fixation to occur.
Press with your hands to ensure fixation occurs.
Carry out assembly quality control
We sit down on a comfortable chair and check the success of the assembly
While sitting on a chair, press down on the piastres lever. The seat will lower. Pull the lever up. If there is a return to its original position, then the assembly was successful.
So, you assembled a new office chair without the help of your boss, and now you won’t give it to anyone.
Black office chair assembled
Design Features
Before assembling an office chair, you need to familiarize yourself with its main features.
The main feature of such furniture is the mechanisms installed in it. They are used to manually adjust the angle of the backrest and seat. Some types of chairs have a special swing system that allows you to set the product to any position. With its help, it is possible to adjust not only the angle of inclination, but also the rigidity of the rear backrest swing. Also, office chairs have a gas lift, which is responsible for adjusting the height.
Preparatory stage
Before starting work on assembling a chair at home, you need to decide on the basic parameters of the future product. You should start with the appearance. In accordance with the style of the room where the upholstered furniture will be installed, a suitable model is selected.
It is advisable to study the range of finished products in exhibition halls or look at photos in catalogs. In the first case, you can clearly see and touch the planned model, but the search will take some time. In the second case, the time spent will be minimal, but the final appearance may differ significantly from the desired one.
Having studied the range of chairs and decided on the model, you can begin preparatory work. First, you should measure the place where you plan to put the furniture and calculate the dimensions. To avoid mistakes in fitting parts and not to forget anything, competent drawings and diagrams are drawn up.
The generally accepted ergonomic seat height is approximately 45 cm, its width and depth vary from 40 to 45 cm. The height of the backrest from the floor should be about 1 meter. For comfortable sitting, a slope of 3 cm is made from the edge to the back.
To make a drawing of a chair on a sheet of graph paper or graph paper, a completely finished model is initially drawn, after which the following are depicted separately:
- back;
- side detail;
- seat;
- armrests.
When schematically modeling, it is necessary to take into account the thickness of the material from which the chair will be made. Synthetic and natural fabrics have different parameters, which can affect the final collection of parts. After completing the drawing, it is advisable to draw part templates on cardboard and cut them out. This will make it possible to try on life-size dimensions and project the necessary elements on the material.
For components, you can go to the construction market or a specialized store. You can also order materials for delivery, but in this case it will not be possible to visually evaluate their appearance and quality.
Quality checking
It is very easy to test how suitable a computer chair is for use through simple operations. The reliability of the lifting device is the first aspect that must be considered. When testing it, you need to sit in a chair, press the handle of the chair height adjustment mechanism (piaster) - under the pressure of your body weight, the seat will begin to lower.
When the required level is reached, you must stop pressing the handle. If you pull it up and rise from the seat, the chair will return to its original position. Quiet and stable operation of the lifting mechanism is the second condition that will indicate successful assembly work. And finally, fasteners and components connecting areas must be lubricated with machine oil.
You can learn about assembling a computer chair in the video below.
Many buyers wonder how to assemble an office chair? This question arises after they bring a box of spare parts that need to be assembled into a single whole. It doesn’t matter whether it’s a children’s chair or a computer chair, the assembly instructions will be the same in both cases. Assembling such a piece of furniture will not be difficult if you carefully follow the recommendations.
Let's look at what parts are in the box after unpacking the computer chair. Pay attention to their appearance - they should not have any damage, scuffs or other visible defects.
In the container you will find the following parts: wheels, cross with pads, lifting device, casing, bolts, armrests, seat and back, connecting mechanism. Note that the backrest and seat can be separate, or they can be a single unit. If all the necessary spare parts are in place, you can start working.
Common breakdowns
As noted above, an office chair is a rather complex device and any of its structural elements can fail.
Damage to the cross
The problem with this element may be destruction at the junction of the beams. The material from which the cross is made is important here.
As a rule, the base is a hollow structure into which a polypropylene pipe of suitable size and cross-section can be inserted. It, in turn, must be rigidly fixed to the base and the damaged beam.
In order to dismantle the crosspiece of an office chair, you need:
- Remove the rollers. As a rule, they do not have a rigid fixation and are quite simply removed from the mounting sockets. To illustrate the process, it is recommended to watch the video:
- Dismantle the piastra. Fastening to the seat is done “on a cone”. Disconnection from the gas elevator is carried out by tapping on the attachment point. The correct process for disassembling an office chair is shown in the video:
- Remove the retaining clip located in the recess on the top of the hydraulic lift.
- Knock out the gas lift to repair or replace the five-arm.
The process technology and dismantling device are shown in the video:
Destruction of the swing mechanism
If the chair does not hold the “horizon”, then the problem is most likely in the destruction of the swing mechanism.
Fastening to the seat is done with four screws using a shaped screwdriver. The element is dismantled as follows:
- The bolts that secure the rocking mechanism from the seat are unscrewed
- The gas lift is knocked out of the device mount.
This element is made of metal.
It should be noted that most chairs originating from the Middle Kingdom are not suitable for domestic spare parts. This concerns, first of all, the swing mechanisms (size discrepancy).
- Chinese mechanisms: 200 x 200 mm.
- Domestic: 200 x 150 mm.
In order not to re-drill holes when replacing an element, we suggest using adapter plates. How it looks assembled can be seen in the figure below.
Air chuck failure
The pneumatic cartridge of the chair is a two-chamber structure filled with air. When you press the adjustment lever, the valve stops the flow of air between the chambers.
If, when pressing on the valve, the gas lift rod does not extend, it means that the integrity of the piston, seal, etc. is compromised.
The dismantling process is described above. To clarify the process, watch the video about replacing the gas cartridge on office chairs:
A fairly common cause of gas lift failure is the bending of the adjustment lever, which does not allow pressing on the cartridge valve. In this case, the repair can be easily carried out independently: you need to bend the lever to its original state.
Accessories
Wheelchairs are usually equipped with:
- Wheels - entirely made of plastic or with rubber inserts. It is better if the wheels are equipped with special bearings so that they move quietly and do not damage the floor covering.
- Armrests: they can have attachments to the seat, backrest or connect them.
- Cross - can be metal or plastic.
- Chair adjustment mechanism:
Plate - Adjust the height by pressing the gas lift valve. Spring-screw mechanisms change the height and tilt of the backrest. Top gun - responsible for tilting the back of the chair and rocking. Multi-block mechanisms are expensive, but compact and allow you to adjust all floors. Stop allows you to fix the most comfortable position:
- Headrest: allows you to relax as comfortably as possible.
- Cushions under the waist and hips: provide a correct and comfortable fit.
Photos of frameless furniture with your own hands
https://youtube.com/watch?v=wZ_YQvpZHPM
Useful tips
If a person decides not to purchase a computer chair, but to assemble it himself, then he will be able not only to spend time profitably, but is guaranteed to provide himself with durable furniture with an exclusive design. You should focus on the interior of your personal office not only at the stage of creating a drawing, but also when choosing upholstery fabric. If everything is done correctly, the chair will meet all the user’s needs and will become the envy of friends and acquaintances.
Some people assemble massive computer chairs from wood. They have a large mass, but are as stable as possible. The disadvantage of such structures is not only immobility, but also the lack of adjustment elements and wheels. The metal profile gives additional freedom at the stage of creating a drawing and during the final assembly of the product.
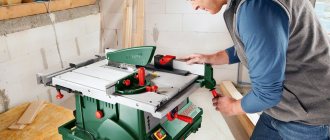
Alternatively, you can assemble a chair-table with a special tabletop for installing a laptop. This solution is suitable for freelancers, but ineffective for gamers.
Before you make an office chair with your own hands, you need to thoroughly prepare and review several master classes. Working in an office can have a significant impact on posture, including when using standard furniture, so creating a design to individual requirements is the best solution, but it also has difficulties
It is important to assemble the most comfortable, but at the same time not overly comfortable furniture. An office is a place of work, not relaxation. You can assemble computer chairs with your own hands from old furniture, but this will significantly worsen the appearance of the product.
It is better not to use used materials, especially when making furniture for a child. By choosing a previously used profile, wood and upholstery, you can significantly reduce the life of the chair
You can assemble computer chairs with your own hands from old furniture, but this will significantly worsen the appearance of the product. It is better not to use used materials, especially when making furniture for a child. By choosing a previously used profile, wood and upholstery, you can significantly reduce the life of the chair.
Of course, making furniture yourself is an expensive business, but it is several times cheaper than purchasing products from a specialized store. But you can cut costs, for example, by using a lift from an old chair, as well as wheels, adjustments and fasteners. But in the end you will still get a unique thing that no one else will have.
Stylistic decision
The color, style and design of a product can accurately tell about its owner. Such characteristics provide information about a person’s well-being, as well as his demandingness. For example, an additional element in the form of a lumbar cushion or headrest shows the luxury of the chair. This option is more likely to be purchased by a manager than by an ordinary employee.
If we touch on the topic of practicality, it is better to choose dark colors so that dirt is not so noticeable. There are many shades of brown, gray and black, so you can choose the right one. If you want to stand out, show your originality and individuality, you can choose bright colors or choose a print that suits the style of the room.
We must not forget about the combination of furniture and interiors. For example, bright shades will look good in informal settings - printing companies or advertising agencies. And monotonous and discreet options are perfect for the strict classic style of the office.
Tips and warnings
1. Even before you start assembling the chair, prepare enough free space for work. Fold all the necessary elements of the chair in such a way that later, during work, you do not trip over the unfolded parts.
2. And, of course, be careful during assembly so as not to pinch your fingers.
If you follow all the above recommendations, your computer chair will be assembled in just a few minutes. We wish you good luck!
But it’s better to contact us - call right now 8(499)394-03-19! We assemble office furniture.
Tell your friends about us!
Return to list of articles
Selection of materials
Almost any wood is suitable for making a chair, but it is best to start with the cheapest, for example, pine. Later, when you have mastered the basic skills of handling turning tools, you can “swing” at oak, teak, cherry or other elite species.
When choosing lumber for a future chair, you should take into account the pliability of the wood, its color, durability and other characteristics. Thus, oak is very hard, and over time its color becomes darker, and the darker the oak product, the more noble and beautiful it is considered.
Stain is a special substance for treating wood that has coloring properties. It does not cover the texture, but makes the surface a tone darker, allowing you to create the effect of an expensive rock. Thus, you can make the same cherry or merbau from pine in a couple of hours.
Whatever wood you choose, remember that this is a material that reacts to changes in temperature, humidity, and room microclimate. To extend the life of the chair, all its elements should be treated with anti-corrosion compounds to eliminate the risk of damage by parasitic insects. After purchasing lumber, you cannot immediately start working - you need to give it time to “get used to” the atmosphere in the room. Leave the wood for several days in the room where the work will take place, and when acclimatization is complete, you can begin creating blanks.
To make a chair you will need ordinary turning tools:
- hacksaw or jigsaw;
- sanding machine or sandpaper of various grain sizes;
- drill and set of drills;
- wood screws;
- screwdriver;
- hammer;
- stain (if necessary);
- varnish or paint for finishing the product.
A little about the finishing of the chair. If you want to preserve the beautiful texture of the wood, coat it with clear (or tinted) varnish. If you plan to use the chair outside, for example, in the garden or on an open veranda, it is better to coat it with PF-170 alkyd varnish or Yacht varnish - these products will protect the wood from fading under the sun and humidity. For “home” chairs, use a special furniture varnish. Nitro varnishes dry quickly, but they emit a pungent odor, so it is better to work with them on a balcony or in a well-ventilated area.
Required Tools
In order for the process of replacing the upholstery on a computer chair to go well and as quickly as possible, you need to have all the necessary tools with you, among which should be:
- furniture stapler with staples - with its help you can quickly and securely fasten new material to the seat and back;
- a device for removing furniture staples - needed for safe and quick work on changing old upholstery;
- pliers;
- a set of pins to secure the new upholstery before installation;
- a screwdriver or a screwdriver - with their help you can quickly unscrew the chair and, after reupholstering, reassemble it;
- tape measure - for taking measurements and creating a pattern;
- scissors – necessary for cutting out the pattern.
Having prepared the tool and fabric for the reupholstery, you can begin work.
How to set up the swing mechanism
The first thing to do is determine the rigidity of the swing. This parameter depends on the weight of the sitting person. If the computer chair was purchased for a child, the spring must be loosened. If we are talking about a chair for an adult weighing 90 kilograms, then it needs to be turned to the maximum.
Algorithm for setting the rotation mechanism:
- Find the spring responsible for the swing of the structure. As a rule, it is located in the front of the chair under a plastic cover.
- To adjust, turn the knob clockwise or counterclockwise, periodically checking the optimal firmness for the person sitting.
Some chairs have a different structure. Instead of a spring and a round handle, they are equipped with two levers (right and left). The first is responsible for raising and lowering the seat. The second is for the rigidity of the swing.
VMMGAME THRONE
To begin with, it’s worth saying a few words about they have been producing gaming chairs and tables in various price categories for a long time and quite actively, from budget ones, such as the hero of our review, to the premium segment in the “MAROON” series.
This is a Russian company that has its own production in China, which allows it to supply affordable products to the market while keeping the cost of chairs and tables comfortable for the average gamer.
The THRONE line of gaming chairs is an “entrance ticket” to the world of comfortable gaming. Entry-level chairs in which the main thing is high reliability, accessibility and versatility.
The model range consists of 6 colors. In fact, an interesting selection of colors, covering the widest possible range of user requests.
Types of wheels for chairs
Wheels are classified based on the types of material from which they are made.
Wheels made of soft materials, polyurethane or with a rubberized base. This type of product is mainly used for soft floor coverings, parquet or laminate.
Advantages:
- due to their structure, they do not press through soft coverings such as linoleum;
- do not scratch laminate;
- When using such wheels, there is no noise from their contact with the laminate.
Flaws:
A set of wheels for parquet or laminate flooring with a rubberized surface is more expensive than wheels made of plastic.
Plastic wheels are mainly installed on chairs intended for use in industrial premises with a tiled surface or other less susceptible to damage.
Advantages:
- A set of plastic wheels has a low cost, which affects the cost of the entire chair, making it cheaper.
- Plastic wheels are suitable for industrial premises, as well as at home, where the flooring is, for example, carpet.
When buying a chair, you need to clearly understand for what purpose and on what surface it will be used.