Home / Wood processing / Wood bending
Curvilinear furniture frame structures are difficult to produce, and large curves cut from straight sections of wood will require complex manufacturing techniques to avoid the weakness of short fiber and large, uneconomic waste. However, using dry or wet bending techniques, complex curved shapes can be produced quite economically, and since the fibers will run along the bend rather than across it, the finished product will be stronger. Dry bending involves first dividing the wood into thin sections, but thicker pieces can be bent by soaking or steaming.
Michael Toneti's bent café chairs and rocking chairs are classic examples of bent furniture made by steaming, and in the thirties of the 20th century, furniture made from laminated materials became an element of high fashion, after the invention of industrial methods for producing various grades of plywood. Both steam bending and layer bending can be accomplished in the home workshop, and both methods continue to be used in the antique furniture industry and by skilled craftsmen and designers.
Steamed wood can bend with a relatively large bending angle. The steam softens the wood fibers enough to bend them and mold them into the desired shape. It may require significant bending force, but it is quite achievable in a home workshop using basic equipment. You will need to make a template, a clamping clamp and a steam chamber. Wood bending is not a precise procedure. There are many options, and often trial and error is the only possible way to obtain the desired result.
Some features of working with wood
Bending of wood is accompanied by its deformation, as well as compression of the inner layers and stretching of the outer ones. It happens that tensile forces lead to rupture of the outer fibers. This can be prevented by carrying out preliminary hydrothermal treatment.
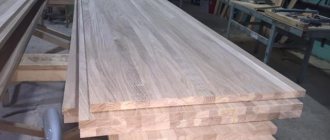
So, you can bend blanks of timber made from solid and laminated wood. In addition, planed and peeled veneer is used for bending. The most plastic are hardwoods. These include beech, ash, birch, hornbeam, maple, oak, poplar, linden and alder. Bent glued blanks are best made from birch veneer. It is worth noting that in the total volume of bent-glued blanks, birch veneer occupies approximately 60%.
Bending
When steaming the workpiece, the compressibility increases significantly, namely by a third, while the tensile ability increases by only a few percent. This means that it is not a priori worth thinking about whether it is possible to bend wood thicker than 2 cm.
Machining methods
In some cases, there is no point in resorting to softening: for example, if the part is fixed to a sufficiently rigid frame, it will take the desired shape over time due to natural changes in humidity. Another special case is the need to bend plywood to a radius less than that allowed for a certain thickness. Here it is worth using both softening of the sheet and its mechanical processing.
One of the processing methods before bending is to apply a series of cuts parallel to the folding axis on the inside of the bend. It is better to make cuts with a cone cutter using a linear guide. The depth of the grooves should be no more than 3/4 of the thickness of the workpiece, and in the end at least two layers of veneer should remain intact.
If the cuts face the inside of the part and are hidden from view, there is no point in calculating their number and pitch. Subsequently formed scars can, if necessary, be leveled with automotive putty and sanded to a smooth state. With due diligence, it is possible to calculate the reduction in the length of the arc during bending, using a known angle and radius of bending. In this case, the number of cuts will be equal to the quotient of the arc reduction divided by the thickness of the cutter in the widest part of the entry. The required number of cuts must be evenly distributed over the entire bend radius.
Before fixing to the template, the cuts formed in the plywood are filled with high-quality wood glue, such as Titebond 2. Exposed glue can be immediately removed with a spatula or sanded after drying. While the glue hardens, the plywood is firmly fixed to the template.
You can also make it easier to soften thick plywood by perforating the workpiece. Holes with a diameter of 2–3 times the thickness of the plywood are made with a core cutter or Forstner drill in a checkerboard pattern with a step of about 80–100 mm between them. The degree of perforation can be greater; this is determined both by the flexibility of plywood to bend and by the required final strength of the part. Naturally, this bending method is only suitable for hidden technological elements that do not form a finishing plane. If desired, the bent part can be sheathed on one or both sides with veneer or thin plywood, having previously softened them.
Often, when manufacturing structural elements from wood, it is necessary to obtain curved parts, and it is not always possible to produce such an element by simple sawing or milling.
Wood bending is used for this purpose .
This technology makes it possible to use wood more economically than the technology of its mechanical processing, which is especially important for areas with a shortage of timber. Actually, wood bending is an ancient method of producing curved blanks, based on the property of wood to change shape under the influence of moisture, temperature and external load, as well as its ability to maintain its acquired shape even after the load is removed. External loads in this case are bending forces combined with the plasticity of wood, allowing wooden blanks to bend. Theoretically, the essence of these processes is the occurrence of normal (perpendicularly directed with respect to the cross section) stresses in the material, stretching the material along the convex side and compressing it along the concave side. This process is associated with a shift of layers of material along the fibers. Therefore, the cut should go exactly along the fibers, and knots are unacceptable.
The magnitude of the resulting stresses depends on the thickness of the bar, and they differ significantly in the areas of tension and compression: the permissible stretch of wood does not exceed 1-2%, but the compression limit reaches 15-20%. That is why, during free bending, wood parts are destroyed due to the rupture of the outer layers, which are subject to tensile forces. To avoid such breaks, you should use boiling or steaming of the wood - in this case, the wood The steaming method is preferable, since in this case the wood fibers are saturated with moisture more evenly, however, in artisanal conditions this method is not always technically possible. Therefore, it is better to use boiling instead, especially if you need to bend a small section of the part.
Wood bending tips
Cooking should be done in water heated to 90-95 oC; the water should not be brought to a boil.
The duration of welding is determined by the type of wood, its initial moisture content and the thickness of the block. For example, a 40 mm thick beech block with an initial moisture content of 15% must be boiled for 1 hour 30 minutes. Then the part must be secured in the template clamp and, gradually increasing the load, give it the required shape. Deciduous wood (birch, beech, ash, hornbeam, maple, linden, etc.) is the most plastic, therefore it is often used to produce bent wood blanks.
Delamination method
Delamination
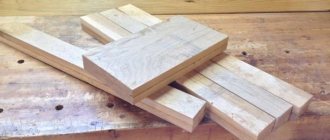
First you need to make a piece of wood that will be bent. The boards should be slightly longer than the length of the finished part. This is because bending will shorten the slats. Before you start cutting, you should draw a diagonal line with a pencil. This needs to be done across the underside of the board. This will help maintain the sequence of the slats after they have been moved.
The boards are cut with a straight-layer edge, in no case with the front side. So, they can be added together with the least change. A layer of cork is applied to the mold. This will help avoid any unevenness in the shape of the saw, allowing for a cleaner bend. In addition, the cork will keep the delamination in shape. Now glue is applied to the top side of one of the wooden slats.
The glue is applied to the lamellas with a roller. It is best to use urea-formaldehyde glue, consisting of 2 parts. It has a high level of adhesion but takes a long time to dry. You can also use epoxy resin, but this composition is very expensive, and not everyone can afford it. Standard wood glue cannot be used in this case. It dries quickly, but is very soft, which is not welcome in this situation.
The boards are held together after gluing
The bentwood blank should be placed into the mold as quickly as possible. So, another lamella is placed on top of the lamella coated with glue. The process is repeated until the bent piece reaches the desired thickness. The boards are fastened together. After the glue has completely dried, you should shorten it to the desired length.
How to bend wood
If there is a need to manufacture a curved wooden element, then at first glance it may seem that it is easier to cut out the necessary element in a curved form, but under such conditions the fibers of the wood material will be cut, weakening the strength of the part, and as a result, the entire products. In addition, when sawing, there is a huge waste of material, which cannot be said about the method, while the wooden blank is simply bent.
Wood is cellulose fibers held together by a chemical called lignin. The flexibility of the tree depends on the placement of the fibers.
Only well-dried wood will be a reliable and durable source material for the production of various products. But changing the shape of a dry wooden blank is a difficult process, since dry wood can break, which is very undesirable.
Having studied the technology of how to bend wood, and the fundamental physical properties of wood, which allow you to change its shape and then preserve it, you can fully engage in bending wood at home.
BENDING TECHNOLOGY WITH MAKING NOTCHES ON BLANKS
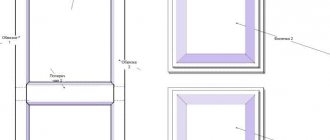
When determining the number of cuts to be made on a workpiece for bending along a known radius (it also depends on the width of the groove and the type of wood), we use an auxiliary structure. To do this, we take a block similar to the workpiece (Fig. 2). We cut out one single cut on it with a depth of 2/3-3/4 of the thickness of the block. Draw a straight line on a sheet of paper and mark the cut point on it.
We place the block on the paper so that its lower edge before the cut coincides with the drawn line and the marked point of the cut, and fasten the block with a clamp to the work table. We set aside the distance of the required radius b on the line and the block and bend the block until the upper edges of the cut meet. The distance a between the end of the line and the mark on the block will be the distance between the individual cuts that can be marked on the workpiece.
If cuts need to be filed on the outside of the workpiece, the distance between them and, accordingly, their number are determined in the same way. We bend the workpiece as much as the elasticity of the wood allows. If the test piece of wood breaks, then this can be expected from the workpiece fixed in the mold.
Based on materials from the magazine “Do It Yourself”
Source: www.norstar.ru
Sawing a curved piece of wood
- A wooden curved piece can be made either by sawing out the shape or by bending it. When cutting a wooden part, there is no need to use additional types of processing, special devices and knowledge, as is the case with bending.
- In addition, cutting out a curved part saves time; cutting out a spatial shape is faster. But this is where the positive aspects of sawing, in comparison with bending, end.
- If you cut out a curved product, a mass of irretrievably lost material is formed, which becomes waste. In addition, cross sections of conventional edged lumber fall within the radius zone of the cut part. This significantly worsens the appearance and complicates sanding and other finishing of the wood.
- The manufactured part may break at the rounded sections of the fiber that run across the section.
Manufacturing of rafter systems for semicircular and pointed roofs
The most common forms of roofs for cottages are “hip” and “double-pitched”. This is explained by the fact that this roof shape is well known to many builders, and all stages of manufacturing are described in detail in any methodological publication.
However, many private developers would like to move away from the “clichés”. There is a growing interest in domed, semicircular and pointed roof shapes. In addition to its attractive appearance, such a roof has a number of significant advantages:
- High strength and load-bearing capacity;
- High resistance to strong winds;
- Snow does not accumulate on the surface of such a roof and rainwater does not stagnate;
- Larger volume of internal usable space and ceiling height in the residential attic;
- Elements of an arched rafter system (especially if they are made in the form of trusses) can become an effective decorative element of the interior decoration of the attic.
Steaming and bending video
We present to your attention a video about the technological process of bending wood:
Good luck and success! Until we meet again, Andrey Noak was with you!
—Categories
- Textiles. Various ideas for working with materials (868)
- Rag rug or what can be made from old things (275)
- Sewing (175)
- Teddy bears (120)
- Leather (97)
- Clothing designers, fashion (57)
- Fabric flowers (48)
- Batik (33)
- Indian patchwork (11)
- Soutache (7)
- Knitting (854)
- Spokes (502)
- Hook (244)
- On the fork (9)
- On fingers (7)
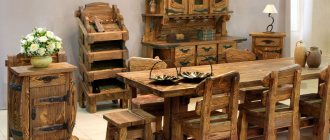
- Furniture and everything related to wood (518)
- Wood carving. (96)
- DIY furniture (65)
- Wood painting (38)
- Birch bark (31)
- Sawing (30)
- Burnout (13)
- Leaf products (12)
- Furniture of the 21st century. (12)
- Screen (12)
- Products made from matches (7)
- Art Nouveau. Furniture and craftsmen (5)
- Art Deco. Furniture and craftsmen (1)
- Home renovation and design (517)
- Interior detail (148)
- Interior (123)
- Mosaic (93)
- Interior painting or frescoes (42)
- Stained glass (39)
- Cleaning and means for it. (36)
- Everything from garbage (16)
- Cooking (450)
- Baking (173)
- All meat (91)
- Blanks (41)
- Drinks (18)
- Korean dishes (13)
- Soups (12)
- Salads (10)
- Milk and dairy products (10)
- Fish (5)
- Sauces (5)
- Embroidery (434)
- Beads (80)
- ribbon embroidery (41)
- Cross stitch (24)
- Satin embroidery (10)
- All made of paper (291)
- Papier mache (60)
- Cardboard (36)
- Corrugated cardboard (7)
- Arte Francese (4)
- Paper mosaic (4)
- Weaving (227)
- Macrame (36)
- Wire (24)
- Wicker furniture (8)
- Notebook (217)
- Painting (186)
- Modeling (177)
- Plaster (78)
- Cold porcelain (20)
- Salt dough (7)
- Art history. Cultural studies (168)
- Philosophy Stars (3)
- Art (157)
- Watercolor (32)
- Health. (150)
- Felt (140)
- Cottage.Garden.Vegetable garden (100)
- Stories from life. Life in France (46)
- Plastic and everything made from it (43)
- Introduction to Drawing (42)
- Eggshell carving and embroidery (30)
- Sculpture (30)
- Metal. Working with it (18)
- Candles (16)
- Glass.Working with it (13)
- Bone (8)
Necessary materials
For work we will need the following wooden elements:
- 6 pcs. legs (height 5 cm x width 7 cm x length 50 cm);
- two longitudinal slats: front 2 pcs. (near edge – height 4 cm x width 4 cm x length 80 cm) rear 2 pcs. (far edge 4 cm x 4 cm x 100 cm);
- cross bar 3 pcs. (height 4 cm x width 4 cm x length 40 cm),
- galvanized metal corners (4x4 cm) 14 pcs., (5x7) 6 pcs.,
- 34 planks (height 2 cm x width 5 cm x length 50 cm), from which we will make a seating area.
How to bend plywood, fiberboard, MDF
At home, plywood is bent by increasing its humidity, then ironing it (an iron is required), and fixing it in a template. Any frame element can serve as a template and its shape does not necessarily have to be curvilinear. The product is attached to the template using tape. You can clamp bent plywood between two spacers, give it a bent shape using ropes, tying them around the product in several places along the radius of curvature. Plywood can only be used after it has dried. It seems that we have figured out how to bend plywood - let's move on.
How to bend fiberboard? The technique is the same as in the previous case! How to bend MDF? In this case, you can go in two ways: either bend thin sheets (no more than 5 mm) and glue them together, or use flexible MDF. in which there are transverse slots on one side. The thickness of such sheets is usually 8 mm. When bending, they are placed on top of each other with their milled sides, and then glued together. That's all!
https://
Using chemical impregnation
In order to destroy the lignin bonds between fibers, it is possible to influence the wood with chemicals, and this can be done to the fullest extent at home. Ammonia is ideal for this. The workpiece is soaked in a 25% aqueous ammonia solution. At the end of which it becomes very obedient and elastic, which allows you to bend, twist it and squeeze out relief shapes in it under pressure.
Ammonia is scary! Based on this, when working with it, you should follow all safety regulations. Soaking of the workpiece should be carried out in a tightly closed container located in a well-ventilated room.
The longer the wood is in the ammonia solution, the more plastic it becomes. After soaking the workpiece and giving it a shape, it is necessary to leave it in this curved form. This is necessary to fix the shape, and so that the ammonia evaporates. Again, bent wood should be left in a ventilated area. It is noteworthy that after the ammonia has evaporated, the wood fibers will regain their former strength, and this will allow the workpiece to retain its shape!
Wood steaming box
The box must have a hole for the steam pressure to escape. To prevent the structure from exploding
The steam outlet should be located in the bottom of the box. In addition, the box should have a removable lid through which you can pull out the bent wood after it has acquired the desired shape.
After steaming, the required shape of the wood is fixed and dried until a moisture content of 15% is achieved. Next, the fixed form is kept for 5-7 days and finishing is carried out.
Chemical treatment
Chemical treatment of wood to improve its plasticity is carried out by aging in solutions. There are ready-made chemicals in stores. Thick pieces should be removed from the solutions after several hours. And leave for some time for a more uniform distribution of the solution inside the workpiece itself. Because the outer layers of the workpiece become saturated and partially lose their ability to absorb.
Some recipes for preparing solutions for chemical wood treatment to add plasticity
- 1.Water, wood glue, glycerin, alcohol in a ratio of 3:2:1:1
- 2.Water, glycerin, alcohol, in a ratio of 4:2:1
- 3.Ammonia solution 10%, glycerin, alcohol, ratio 3:1:1
- 4. The workpiece is soaked in a 25% aqueous ammonia solution. The longer wood is in an ammonia solution, the more plastic it becomes
Don't forget that temperature speeds up chemical reactions.
When working with chemical components, remember safety precautions. We protect ourselves with an apron, gloves, goggles and a mask to prevent toxic fumes from getting into the lungs, eyes and skin.
Steam box heating
Steam box
First, prepare the steam box. It can be made by yourself. Its main task is to hold the tree that needs to be bent. There should be a hole in it to allow the steam pressure to escape. Otherwise it will explode.
The steam outlet should be located in the bottom of the box. In addition, the box should have a removable lid through which you can pull out the bent wood after it has acquired the desired shape. To hold the bent wood piece in the desired shape, clamps should be used. You can make them yourself from wood or buy them at a specialty store.
You should make round scraps of wood - several pieces. Off-center holes are drilled in them. After this, you need to push the bolts through them, and then drill another hole through the sides to push them in tightly. Such simple crafts can become excellent clips.
Now it’s time to steam the wood; to do this, you should take care of the heat source and close the wood piece in the steam box. For every 2.5 cm of thickness of the workpiece, the product needs to be steamed for about an hour. After time has passed, the tree must be removed from the box and given the required shape. The process must be completed very quickly. The workpiece bends neatly and softly.
Shaping
Some types of wood bend more easily than others due to different elasticity. Different methods require different amounts of force to be applied.
Once the desired result is achieved, the bent tree must be fixed in this position. You can secure the tree while shaping it. This makes it easier to control the process.
Bending wood. Some important tips
- Curved wood of the desired shape is fixed in this position for a while until the structure of the wood is stabilized (5-7 days on average, after drying up to 15%).
- It is important that different types of wood bend differently. Hard woods take bending well (oak, beech, elm, etc.).
- Coniferous species are practically not used in bending.
- The thinner the piece of wood, the easier it is to bend.
- The best option for a workpiece for bending will be material split along the fibers.
- Choose the wood to bend carefully. It must be free of defects (knots, resin pockets, cracks, etc.)
Regardless of the method used to prepare the wood for bending, once the wood is removed from the mold, the bend will relax slightly.
Therefore, the bend radius should be slightly smaller than necessary in order to subsequently compensate for this effect
Tire as an effective way to avoid wood destruction during bending
Since the main problem is fiber breakage on the outer radius side, it is this surface of the workpiece that needs to be stabilized somehow. One of the most common methods is to use an overhead splint. The tire is a steel strip with a thickness of half a millimeter to two millimeters, which covers the beam or board along the outer radius and bends on the template along with the wood. The elastic strip absorbs part of the energy when stretched and at the same time redistributes the destructive load along the length of the workpiece. Thanks to this approach, coupled with humidification and heating, the permissible bending radius is reduced significantly.
In parallel with the use of steel bars in bending devices and machines, mechanical compaction of wood is achieved. This is done using a pressing roller, which presses on the workpiece along the outer bending radius. In addition, the template form in such a device is often equipped with 3 mm teeth (in increments of about 0.5 cm), oriented towards the movement of the workpiece.
The purpose of the jagged surface of the template is to prevent the workpiece from slipping, to prevent mutual displacement of fibers in the wooden massif, and also to create a small depressed corrugation in the concave radius of the part (the fibers are pressed inside the massif, therefore, problems with folds are solved).
Bending pattern with tire
Pressing with a tire allows you to bend bars and boards made of coniferous and soft deciduous wood with a minimum percentage of defects. Please note that parts made of relatively hard wood when bent with pressing become approximately ten to twelve percent thinner, and pine and spruce blanks become 20-30% thinner. But the positive aspects of this method include a significant increase in the strength characteristics of the finished product, as well as a significant reduction in the requirements for the presence of flaws and defects in wood blanks.