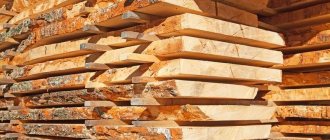
How to dry wood cuts
Let me start with the fact that my husband and I bought our first apartment in our lives and began to gradually inhabit it.
I am very inspired by eco-design, but we live in a large metropolis, so I wanted to add a piece of nature to the new interior. The first thing that needed to be done for a more or less comfortable stay was to equip the kitchen. After scrolling through a lot of beautiful pictures, I really wanted to make a panel from wood cuts for the wall above the dining table. I read a bunch of sites on how to dry wood at home, since no one uses fresh saw cuts - they crack badly and can become moldy. To be honest, there is very little information on the Internet on this matter, it is poorly verified, scarce and contradictory. Search data for your request:
Wait for the search to complete in all databases. Upon completion, a link will appear to access the found materials.
Go to search results >>>
WATCH THE VIDEO ON THE TOPIC: Drying birch cuts in the microwave. // Drying birch cuts in the microwave.
How to dry wood correctly
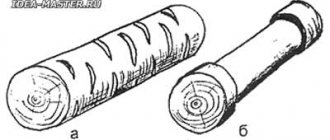
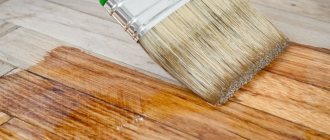
Any chisels in sets and individually from foreign auctions and stores. Delivery guarantee. Welcome, Guest. Please login or register. Did not receive your activation email? Submit this topic Print. What should be done to prevent wood from cracking during drying? Andrey, you hit the nail on the head. The most pressing issue for any carver. Guys, let's develop it. The very first thing is to block the pores on the ends of the wood, on the cross sections, so that they do not dry out faster than the main part.
When drying, the tree decreases in size, and the difference in drying causes tension in the wood, and as a result, cracks. This can be done by smearing the ends with paint or glue. I use PVA. In addition, you need to avoid drafts, since the breeze removes moisture only from the side that blows.
The best drying temperature is slightly above room temperature. And constantly turn the wood over so that it dries as evenly as possible. It is also important not only to avoid cracks, but also rotting, the appearance of fungus, larvae, etc. To do this, the tree must be cleaned of bark, dirt, and rot that appears on the surface must be cut off.
Dry in a dry place. Away from wet and dirty surfaces such as dirt floors or damp concrete walls. You can also treat the wood before drying with alum to remove rot, fungi and larvae. I would like to ask Alexander Balter how he dries alder, I’m so tormented with this tree - I can’t find the temperature, or it will sprout with a fungus or ferment, I was surprised the first time, it smells like decent mash and foam comes out of the ends.
At least they drank it on the boards before drying. I read somewhere that you can put it on the battery by first wrapping it in newspaper and securing the whole thing with tape, while rotating the tree and replacing it as necessary. In principle it is possible. In this case, newspaper is needed so that the moisture comes out more evenly. I'm not too sure about the tape, just put it in the bag.
And change the newspaper more often. So that you don’t have time to get damp. Don't forget to process the ends. Yes, but in the bag, condensation will form from the battery. Anatoly A. Andrey, always leave a reserve in the workpiece for cracks. Andr, IMHO – the battery is too much. It is enough to put it somewhere in a corner of the house and change the newspaper every other day, and tie the bag tightly.
This is how I dry pieces of boards if I need them very urgently. And you know, from completely raw ones, with almost dripping juice, normal material is obtained. Dry and without cracks. Leonid, my alder tree was cut down in the winter and dried in the stumps, although in the village, all year round in a panel house. Nothing was rotten, on the contrary, it was even dried out in my opinion. But they cut down my aspen tree in the summer, cut it down onto boards and threw them in a heap in the open air.. How I cleaned these boards later, dear mother.
So they were covered either with mold or something else. Such a specific smell, similar to medicine and clearly with a hallucinogenic effect.
At one time, I carried out all sorts of experiments on drying boards and settled on batch assembly and drying on the “edge” or “upright”. He placed the blanks on the gaskets with his feet, then twisted the outer gaskets with wire and placed them on the edge. This method prevents the boards from curling into a “propeller and groove” and allows moisture to escape more evenly.
It is advisable to periodically change the boards. Drilling also helped, if I noticed that a crack had appeared, then I drilled a hole along its path, but here you need to take into account that the invisible part of the crack can already go far. I drilled both the ends and the side parts, where the threads are small or there are none at all according to design. We need to experiment. It is better to harvest wood closer to autumn, when sap flow decreases; you must also keep in mind that in the butt part the humidity is higher than in the middle of the trunk.
You can leave bark rings at the ends, sometimes it helps. The ideal place for drying is the attic of the house. There were no cases of mold or blooming. In general, I rummaged through old records and found this information. Natural drying in the open air requires 1 year for every 25 mm of thickness. So, until free moisture comes out of the wood, it is not advisable to cover the ends with paint. It is better to wait until it dries, and when the first cracks appear, file about a cm from the ends, and coat with paint, glue or wax.
The moisture content of wood can be determined by sawing off a piece, weighing it, placing it in a heated oven, it doesn’t matter that it breaks, the main thing is that it dries, weigh it again, the difference in percentage between the first weighing and the second will be the moisture content of the source material. Try making a polyhedron from a round blank. I dried birch logs like this.
Chipped or hewn dry better. Quote: Doctor Lecturer from November 19, At home, summer sawn boards were drying in the corner, bleeding with juice. About a month. October Mon. SMF 2. SimplePortal 2. How long did it take for the boards to dry this way? I mean at home, in the corner.
how to wash off old film adhesive from a façade
how to wash off old film adhesive from a façade
Post by Muravisha » 12 Jul 2022 13:46
Re: how to remove old film adhesive from a façade
Post by Alexander Belov » 12 Jul 2019 14:58
Re: how to remove old film adhesive from a façade
Post by Alexander Belov » 12 Jul 2019 15:39
What kind of cosmophen for erasing have you tried? 5k or 10k?
Re: how to remove old film adhesive from a façade
Post by Muravisha » 12 Jul 2022 17:50
Re: how to remove old film adhesive from a façade
Post by Alexander Belov » 12 Jul 2019 17:53
The most non-aggressive) they would at least try 10k)
Re: how to remove old film adhesive from a façade
Post by Muravisha » 12 Jul 2022 17:55
Re: how to remove old film adhesive from a façade
Post by nuker » Jul 13, 2022 11:41 pm
Re: how to remove old film adhesive from a façade
Post by Ruslan EFF ADV » 13 Oct 2019 21:18
For this case, it may not be relevant, but in the future it will be useful to everyone. Remember the No. 1 solution for removing old glue from any films - SOAPY WATER))) I myself somehow ended up re-gluing a part of the facade with a screwed-up tint, which left all the glue on the glass after dismantling! (I decided to entrust a new person with what turned out to be a very responsible job) I tried everything to wash off the glue, both solvents and degreaser, while simultaneously scraping it off the glass with a spatula. Until I just tried an interesting method: We fill a sprayer with water with a good portion of fairy or a similar product, pour the surface and let the glue soak into it (it will absorb, don’t worry), you can repeat several times, after which we take a scraper with a blade for cleaning glass and scrape it off all the glue is like butter from a sandwich. When it comes into contact with water, it does not dissolve, but on the contrary, it begins to coagulate, so you don’t get smudges (like from solvents) and with one good pass of the scraper you can remove all the glue from the area being cleaned. As for the sandwich panel, you just need a more humane tool, as an option - a plastic scraper, or try rubbing it with rags while pouring the same solution at the same time.
Having subsequently taken an order for plywood façade (200m2), the task was to remove the old film, which had already shrinked wildly, was full of cracks and had separated into separate segments, having stood on the façade for N number of years. The experience with the screwed-up tint turned out to be very helpful. Without hesitation, we stuck to this technique and removed the film with glass scrapers, because... It was no longer possible to tear it off completely, then they filled it with soapy water and removed the remaining glue COMPLETELY, without smudging. The guys spent a very long time with this, it was actually not easy, but this method turned out to be the most effective for such cases. I hope it is useful to someone. (traces from double-sided tape are also easily removed)
Source: sign-forum.ru
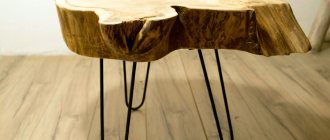
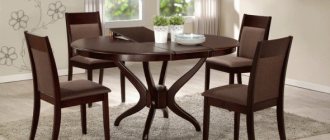
How to correctly make a cut (pancake) from a tree
Wooden slabs are wide vertical cuts of a tree trunk, similar to large slabs or horizontal parts of logs that have undergone special processing. They are made from hard wood, mainly oak or poplar. They are used for the production of original furniture products or as separate, independent parts of the interior of the room. With their help, product design projects are created that are unlike any other. And a room with such furniture looks creative, elegant and unique. The use of wooden slabs is very widespread.
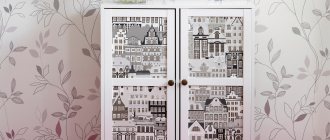
Advantages of self-adhesive film
Among the main advantages of using self-adhesive, many users note the following:
- Reliable protection of the base from moisture;
- For transparent and translucent film brands, it is possible to preserve the original design of the product;
- Affordable cost and savings that could have been spent on redecorating furniture;
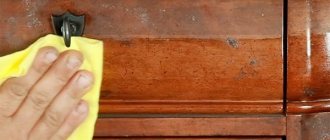
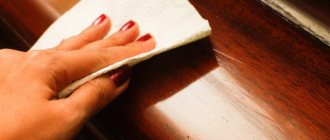
- Ease of use, including both application and removal from the surface of the furniture facade;
- Easy to care for. In principle, polymer protective film does not require special care. However, if dirt gets onto the coated surface, it can be easily removed using any type of household detergent, including aggressive (acidic and alkaline) and abrasive.
How to dry wood
This tree species can figuratively be called universal, since logs and finished lumber from birch are dried in the same way as any other wood, which we will discuss in detail in this article. Before you start drying birch, it is important to block the pores at the ends of the workpieces and on their cross sections. Wood processors cover the ends and cuts using paint or glue, in particular PVA. If these actions are neglected, the ends and cross sections of birch blanks will dry out quite quickly than the main parts of the blanks. When a birch dries, it shrinks unevenly, decreases in size in some places more and more quickly, and in other places practically does not change its basic dimensions. As a result of this unfavorable uneven drying of the wood, a certain tension is formed in it, which, so to speak, is released and breaks the fibers of the material, forming cracks.
general information
There is no definition of the term “veneering” in various dictionaries. In essence, it means pasting materials with the thinnest layer of decorative wood-based coating. In principle (if you don’t go into specific details) this is the same lamination technology. The only difference is that, as a rule, products (objects, structural parts) made of wood are subjected to such surface finishing.
Veneer has a certain classification. Differences in production technology, as well as durability and specific use. A detailed description of the groups is unlikely to interest the reader. It is enough to note that if you plan to finish furniture with your own hands, then it is advisable to focus on peeled veneer (a natural product)
and fine line (the so-called reconstructed modification).
They have a lot in common - ease of working with the products (the layer is very thin), a variety of textures (especially fine-line modifications) and an affordable price.
Therefore, talking only about furniture restoration is not entirely correct. With the help of veneer, you can give a “second life” to old door jambs and panels, wall panels, countertops - there are plenty of options for using such finishing.
There are several technologies for fixing veneer. There is only one available for DIY implementation - “hot”, which is based on the use of glue. This technology is excellent for restoring wooden furniture. The other two require special equipment and are not suitable for home use.
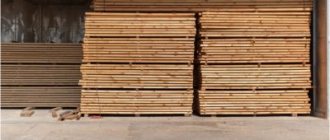
Drying end-cut wood at home
By Turbo4x4, October 9, in Technologies. There are several ways to dry wood, but as a rule these methods are industrial - if you have a log and it’s five to seven years old, then there won’t be any problems - I covered the butt with paint and forgot. But what about boards and blanks that I cut in the forest not in the spring, of course - When is the maximum amount of sap in wood in the fall? At the moment I need two axes with a natural bend in degrees per mm of the product. Can you imagine this crookedness? And with great difficulty, naturally, I found such a crook. Birch, perfectly clean when cut - like butter.
Features of drying fruit wood
Fruit wood is a valuable material that can be used for construction, but is more often used for decoration, making decorative items and tools, as it has a beautiful texture.
To ensure that the finished item is not just beautiful, but also durable, special attention is paid to the processing of the material. There are features of drying fruit wood that must be taken into account so that the treated surface does not subsequently have defects.
When fruit tree wood is properly dried, it is very durable, does not crack, and is easy to process, cut, saw, polish and sand.
What are the types of veneering?
The main types of veneering or veneering are three types. Namely, hot, cold and membrane veneering.
The most affordable method for home use is the hot veneering method. Here the veneer is glued to the base with an adhesive.
The other two types of veneering - cold and membrane - require special machines and other production facilities. So, cold veneering is pressing veneer onto a base. For this purpose, pressing machines or screw clamps are used.
Membrane veneering is performed on complex relief surfaces. And is based on vacuum joining of smooth and textured boards and veneer
How to dry apple wood
Apple wood is the most common material among all types of fruit tree wood. This is due to the wide distribution of the plant itself.
Before drying apple tree wood , you need to create the right conditions and select a temperature regime that will ensure the preservation of the structure. After processing, the core should acquire a red-brown tint and yellow-pink sapwood, the rays of the core should be inconspicuous.
Apple tree wood is highly drying, heavy, hard, has average resistance to biological damage, and is also of average density. The shrinkage rate is even higher than that of hardwood.
All this suggests that apple tree wood needs to be dried in a special mode to avoid warping and cracking.
Drying recommended by professionals proceeds according to the following scheme:
- lumber is stacked in a place protected from weather influences;
- atmospheric drying is carried out until a certain humidity level is reached (20-25%);
- moisture-heat treatment and soft drying are carried out;
- Final drying is carried out at temperatures up to 60 degrees to a humidity of 12%.
When the process is carried out correctly, it takes 25-30 days, which takes a lot of time. But forcing the drying of apple wood leads to a decrease in quality.
Self-adhesive for furniture - what is better to buy
It is important to understand that not all of the film can be glued to slab materials. If the self-adhesive you randomly chose from the market sticks to the surface of the furniture, then most likely the coating will not be perfectly smooth, but will soon begin to bristle in the corners and will come off after a short period of time. There are two solutions to this problem, namely, to purchase an industrial facade that will not peel off and will look great at the same time.
The second solution is to purchase a high-quality film that will have a high level of adhesion to all surfaces, even wood.
Similar materials can be bought in such large construction stores as Leroy Merlin, and the cost will vary from 130 to 900 rubles per roll.
The standard length of a really high-quality coating, having a thickness of 0.3 to 0.5 mm, in a roll will be 2 meters with a width of 0.45 meters. The difference in cost is determined by the thickness of the material you choose and the quality of the adhesive composition. It turns out that the higher the cost of the film, the better it is.
How to dry pear wood
The pear is the third most common fruit tree after the apple tree. When properly dried, pear wood has a soft texture; vessels, rays and annual rings are faintly visible at the cut site. The shade is very pleasant, it can vary from pink to brown, from yellow to red, which depends on the age of the cut tree and how the item was used, whether it was in direct sunlight.
If pear wood is dried correctly, it has a high density, but at the same time remains flexible and can be easily painted, sanded, and polished. The pear dries out greatly and easily releases moisture, despite the fact that when freshly cut it has a humidity of 90-100%.
The process of drying pear wood should be carried out according to the following scheme:
- steaming at 110 degrees until lightening (the optimal color is uniform pinkish-brown) and reaching 130% humidity;
- drying at a temperature of 70 degrees to a humidity of 30-35%;
- drying at a temperature of 50 degrees to a humidity of 22%;
- moisture-heat treatment and drying at a temperature of 30 degrees until a humidity of 9% is achieved.
Drying pear wood ideally takes 20-25 days, after which processing can begin. This material is most in demand for the manufacture of:
- living room furniture;
- bedroom furniture;
- boxes and decorative items;
- imitation ebony.
Method number 2: Hot air
Exposure of the adhesive layer to high temperature makes it more mobile and weakens adhesion to the base. At the same time, treating furniture with hot air does not have a mechanical effect on the furniture, which prevents it from damage. To blow hot air, you can use both a construction and household hair dryer. If the device provides such an opportunity, then the temperature is set to 60-70C. The surface is blown over for 50-10 minutes. After which the self-adhesive film, as a rule, comes off easily without any additional mechanical stress. There may be traces of adhering glue on the surface. To remove them, you need to use any type of solvent or gasoline.
IMPORTANT! The first two methods can be used if the external decorative material of the furniture can withstand exposure to elevated temperatures.
How to dry cherries
Cherry and cherry wood are popular for their special pink hue. In some countries, in Germany in particular, these trees are specially bred for timber. In Russia, industrial breeding is carried out in the Krasnodar region.
A special difference between cherries and sweet cherries is their pinkish-brown tint, which becomes deeper and more saturated the older the tree, and the red color shows through well. The structure of the wood is uniform, the fibers are straight, and the annual rings are clearly visible. Craftsmen especially value cherry because when polished, even without the use of special compounds, it acquires a characteristic glossy shine.
Proper drying of cherry and cherry fruit wood makes it possible to obtain a material that can be easily processed, cut, and becomes resistant to rotting.
Since sweet cherry wood is low-drying and practically does not warp, the drying process is quite simple:
- stacking;
- drying under diffused sunlight for up to 12 days;
- steaming;
- soft drying at 40 degrees;
- the second drying phase at a temperature of 70 degrees for up to 15 days;
- moisture-heat treatment and drying to a humidity of 8-10%.
Drying cherries usually takes about 30 days. This is exactly what is needed to get really high-quality wood from which you can make:
- parquet;
- souvenirs;
- sliced veneer;
- exclusive furniture;
- musical instruments (pianos, grand pianos);
- smoking pipes;
- small-sized dishes.
Repairing kitchen facades with your own hands: everything will work out!
Repair is usually a costly and troublesome task, except when it is done on your own. If you approach the matter wisely, you can get a wonderful result while spending a small amount of effort and money.
When initially choosing facades for the kitchen, you need to pay attention not to the appearance, but to how wear-resistant the material used is (reaction to elevated temperatures and humidity, the action of acids and alkalis, fragility of structures, susceptibility to chips and scratches), as well as to repairability later.
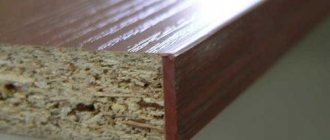
Almost all external parts of the kitchen are made of MDF, chipboard or solid wood and form its base, which is covered with a decorative coating on top.
Such a coating can be various films, plastic, veneer or acrylic. It is their properties that will determine how long the kitchen can serve without requiring repairs.
Laminated facades
They usually consist of MDF or chipboard, which is first covered with a melamine film on top, and then varnish is applied over it. This is one of the most wear-resistant finishing options and is quite difficult to repair. This material has the main advantage - an affordable price.
Frame facades based on MDF
They are frames made of MDF panels covered with either veneer or PVC film. Glass, rattan, chipboard or plastic can be inserted into frames. They are characterized by low wear resistance, but repairing such facades is quite simple.
Facades covered with PVC film or plastic
They are also based on MDF, which is covered on top with either film or laminate. The advantages of such facades are increased wear resistance, an attractive price, excellent decorative properties and good maintainability.
Common reasons for this type of repair include peeling of PVC film from MDF when exposed to temperatures above 75 degrees, and heavy cleaning of frosted plastic.
Wooden kitchen fronts
The most expensive, but spectacular type of kitchen facades. It has good wear resistance, provided that certain rules for caring for the product are followed, but can fade when exposed to direct sunlight.
Depending on the type of kitchen facades, if they are worn out and the nature of the damage, you can use certain types of repair work yourself. The repair can be gentle in case of minor changes in appearance or major, when more serious efforts are required to bring the headset into proper shape.
Wooden kitchen fronts
In order to repair wooden kitchen facades with your own hands, you must initially determine the type and nature of the damage, decide how radically the appearance of the kitchen should change after restoration, choose the appropriate repair method and carry it out using the presented technology.
Surface decoration
It is used in case of minor scratches and minor chips, and also as a gentle method of changing the appearance of kitchen furniture.
In order to hide minor scratches and chips, you can use a wax pencil matched to the color of the headset. It is melted over the damage and then sanded to smooth the surface. This procedure is also repeated when decorating the surface with vinyl stickers to achieve a perfectly flat surface. The pencil is not selected by color.
Decorating kitchen furniture using stickers
It is worth noting that scratches on glass cannot be removed this way.
Decorating the surface with vinyl stickers is suitable when you want to update the kitchen facades and hide small surface defects at the same time. The repair process does not take a huge amount of time; it is carried out without removing the facades from their hinges.
To do this, you need to clean the restored surface from dust and debris, degrease it and, using a plastic spatula, slowly apply the sticker to the material, carefully separating it from the base.
Pasting kitchen facades with vinyl self-adhesive film
This type of repair is suitable when the area of problem areas is large or you want to completely change the appearance of the facades. To get a good result, it is better to use expensive material for pasting, a thick and textured film, for example, German. It adheres better and hides even minor scratches without their restoration.
Here's what you need for pasting
It should be borne in mind that this method of kitchen renovation can only be used on smooth and uniform surfaces. Covering, for example, moldings or strips with film will be very problematic.
In order to properly cover facades with your own hands, you need:
- using a screwdriver, remove and conveniently place parts of the furniture on the table;
- thoroughly remove dust from them, degrease them using special solutions, for example, white spirit;
- take the dimensions and draw them on the film using the dimensional grid on the reverse side, a ruler and marker, and a canvas of the required size and shape. It’s better to add 2 cm along the edges just in case. Cut out the film;
- Carefully separating the film from the base, paste the facade using a plastic spatula. To achieve a high-quality result, you can use a hairdryer, which will allow the film to lie perfectly on the surface without bubbles. If they appear, you can use a needle or a stationery knife to puncture.
Coloring
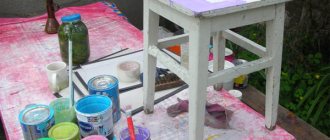
One of the most effective types of facade restoration. This method is used provided that the surfaces being repaired are free of damage and chips. If they exist, then it is better to restore them using a wax pencil or other suitable material. To paint facades, use enamel, acrylic paint for MDF or car spray.
To properly paint kitchen facades with your own hands, you need to:
- remove the doors from their hinges and lay them on a relatively flat surface, having previously dismantled the fittings on them (handles, hinges);
- rinse the surfaces well and then degrease them using a special material;
- clean the facades with fine sandpaper, then remove dust from the surface;
- using a spray gun, apply the primer in several layers so that each layer has time to dry;
- starting with hard-to-reach places, apply paint evenly using a roller or brush in one or several layers. Let it dry. You can liven up a painted element by adding a cute design using a stencil;
- After painting, the facades can be varnished to obtain shine and additional protection from aggressive environments.
Varnishing
This method is used to restore existing varnished facades or apply it as a protective layer to a painted surface.
To varnish surfaces with your own hands you need:
- first dismantle the facades, then clean them of fittings;
- thoroughly clean the surface with fine sandpaper, and then remove all resulting dust and debris with a damp sponge;
- the next stage of preparation is priming the facade in several stages until the primer is completely dry;
- After the primer mixture has dried, you can apply acrylic furniture varnish with high wear resistance on top. The varnish can be transparent or pigmented. In order to get an impressive result, colored varnish is applied, adding transparency to it with each layer.
Drying of other fruit species
In addition to apple, pear and cherry, wood is widely used:
Features of drying fruit wood are related to the structure, density, humidity, and resistance to biological agents. In any case, the conditions are individual for each breed, and a competent drying process takes from 20 to 40 days.
Although industrial drying is optimal to obtain an ideal result, it is also possible at home if the features of the process are studied, you have a professional moisture meter and good dryers are selected.
Source: blog.flexyheat.ru
Selection of material (board or solid pine)
Lumber is inspected and selected without knots. A tree with a wormhole, a longitudinal core cut, and non-parallel fibrous wood is rejected. Planed beams and boards bent by the drying process, moving away from the planned parameters into any of the planes, are not suitable for the tabletop.
Natural wood
Available wood, its properties:
Substitutes
Improved properties have led to the creation of wood boards without strong torsion in a humid environment, protected by plastic (laminate), and therefore moisture-resistant, with a wide range of decorative properties, ease of processing, and low specific gravity. Widely used materials:
- plywood,
- Chipboard, laminated chipboard,
- cement bonded particle board,
- OSB (oriented strand board),
- with the addition of cement and gypsum - DSP, GSP,
- MDF, fiberboard – medium and fine fiber.
Most pressed boards contain phenolic resins and are therefore relatively safe. Natural wood smells of phytoncides - it’s useful.