DIY paneled doors
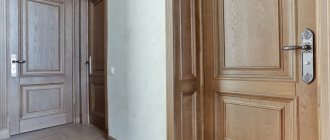
Hidden interior doors are now becoming fashionable.
They look simple and elegant. You can see what it looks like here: https://berezha.com.ua/skryityie-dveri/ Well, if you decide to install panel doors, you don’t have to buy them: you can make them yourself. Why is a homemade door better than a factory door? Moisture is absorbed into untreated wood, and panels and dowels isolated from the external environment gradually dry out. After just a year, they will easily mix in their grooves, and the strength of the panels and frame will be compromised.
Sometimes it is easier and cheaper to make new doors than to repair old ones.
Making doors with your own hands is possible even for a novice craftsman: to create them, just follow the instructions.
How to make a door with your own hands?
- We determine the dimensions of the finished canvas. To do this, we measure the door frame. The finished door should be 4 mm less than the width of the frame. At the edges you need to leave 2 mm for fit.
- We apply markings on the hardboard. We cut out two blanks for the door leaf. You need to remember: the higher the quality of the fiberboard, the less labor will be required for the manufacture and subsequent finishing of the door, the longer and more reliable the door itself will be.
Making the frame yourself
For the frame it is better to take boards:
- Conifers: They are less susceptible to rotting.
- Well dried: so that the dimensions do not change when drying.
If there are knots or minor damage on the boards, it’s okay: they won’t affect the quality of the box.
Useful video on the topic
For details on the process of making door frames, see this video:
We carefully measure the height and width of the doorway, and according to its dimensions we make a frame from 50 mm timber. The width of the frame must correspond to the width of the opening. Important: gaps must be left between the finished door and the ends of the opening; this should be taken into account when assembling the frame. The free space is filled with tow (foam) and covered with platband.
It is easier for a novice craftsman to make a door from six panels. To attach them you will need:
- Cut two main side posts measuring 80x50 or 100x70 (width and thickness).
- Two horizontal cross members of the same width and thickness to strengthen the bottom and top.
- Rail-jumper.
- Four middle crossbars.
We cut out a tenon in the lintel and sawed out grooves in the side posts. Their optimal dimensions are: length 8-10 cm, width and depth - 1.5 cm. Tenons and grooves are necessary for connecting vertical and horizontal parts.
The ends of the crossbars are also ground for tenons, and chamfers are cut on their sides. The panels will be inserted here.
We make panels with our own hands
The easiest way to make them is from solid boards, and it’s cheaper to assemble them in parts, from several boards. To do this, tenons and grooves are cut out in the blanks (in a mirror order). The depth of the latter is 1.5 centimeters. If the panel is assembled from very thin boards, then instead of cutting out a tenon, you can use a connecting insert that will fasten the parts together (this will require glue). As soon as the glue has dried, we make oblique cuts along the perimeter of the panel so that the strip fits tightly into the chamfers.
Useful video on the topic
For a more detailed look at the process, we recommend a 19-minute video where a professional master will tell you how to make a panel for a door:
After this, we cut out the figareas on the plane: the very decorative elements that make the paneled door, assembled in the workshop independently, unique. We carefully sand the resulting product, revealing the beauty of the wood.
Assembly of the structure
We completely assemble the door without using glue yet. We adjust all the parts, sharpen the tenons, check the joints. We trim the ends, remove everything unnecessary, in a word, we bring the door, which has not yet been glued together, into its proper form. The panels need to be aligned with the posts and secured with wooden pins. The more carefully this work is done, the more aesthetically pleasing and durable the door will be.
When all the parts are in place, the door is disassembled. An inexperienced craftsman may number the parts so as not to mix them up during the final assembly process.
All parts are coated with glue. The door is reassembled. It's time to dry. The door must be dried lying down and always under uniform pressure. Once the glue has dried, the door can be used for its intended purpose.
Source: silastroy.com
Products with panels - an affordable way
These are the most complex designs, but if you use ready-made insert panels made of laminated chipboard, the process will be simplified. It is easy to make such doors with your own hands step by step, following the recommendations. But first, drawings of individual elements are prepared indicating the exact dimensions. Using them, there will be no problems with assembling individual parts into a single whole.
Such models are most suitable as interior ones. They buy boards with a thickness of 25 mm or more, high-quality ones, but the species is not necessarily expensive. Budget pine will serve well indoors, because the climate here is constant.
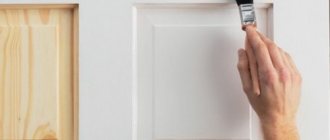
- 1. Arm yourself with a grinder with a grinding wheel and carefully polish the material. Only a wide surface is processed; the sidewalls will subsequently be formed by a milling cutter. It is used to cut off the sharp edges of corners, but only slightly, giving a beautiful look.
- 2. Change the knife and select a groove along the entire length of the board on one side. Its width is equal to the thickness of the chipboard, usually 16 mm. Strictly adhere to the dimensions and center of the end. The optimal depth is 15–20 mm.
- 3. Using a hand-held circular saw, cut the ends at 45° on all four boards. You should be very careful about two things: strictly adhere to the dimensions and cutting angle
. The standard side posts of the frame have a height of 200 cm, and the upper and lower crossbars correspond to the width of the canvas. - 4. Cut out the laminated chipboard for the panel. Its dimensions are calculated based on the internal size of the opening, to which double the depth of the groove is added. If desired, intermediate partitions are installed, in which recesses along the entire length are also selected, and small spikes are made at the ends.
- 5. Assembly is very simple: boards are hammered onto the stove with a mallet, no glue is used. Make sure that everything is in place, there are no gaps, deviations from the parameters, or distortions. Holes are drilled and confirmations are installed - a special metal fastener, which is placed below and above.
The door with panels is ready, you can start finishing. But all the fittings are installed in front of it - locks, handles, hinges, so as not to damage the decorative coating later.
Types of panel doors
Since panel doors are very reliable, provide excellent sound insulation and perfectly complement the decor of the room, they are always popular, especially as interior doors. A distinctive feature of a paneled door is the presence of a fairly massive frame, as well as inserts called panels. Panels can be made from various materials:
Scheme of cutting a paneled door.
- one of the most beautiful options is glass inserts, which can be made using transparent or frosted glass, but stained glass looks especially attractive;
- Plywood or chipboard are often used as panels; this is a fairly lightweight and budget option for panels;
- Solid wood can be used to make inserts, which makes the door more expensive, but also more durable.
The panels are attached using both a tongue-and-groove system and a special glazing bead, which makes it easy to replace the inserts if necessary.
Pros and cons of products with inserts
The following parameters are considered the undeniable advantages of paneled products:
- ease of execution and use;
- light weight of the product is achieved using lightweight panels;
- ease of installation;
- high insulating qualities. Thanks to the presence of the frame, a tight fit with the door, the heat in the room is retained for a long time. In addition, extraneous noise from outside will be less noticeable;
- low cost and wide range;
- structural strength guarantees long service life;
- There are no problems with maintenance, especially for products with a varnished coating;
- sophisticated and pleasant look. Some models are made with stained glass inserts. They will decorate and transform the room, adding special chic and uniqueness.
- The simplicity of the design allows you to make the doors yourself.
The frame of the paneled door is made of solid wood
Advantages of a self-made panel door
If you decide to install a paneled door in a room, you do not have to use a purchased version. If you have a little skill and desire, you can make such a door yourself. If you make the doors yourself, the price will be much cheaper than a similar option sold in a store.
The process of assembling a paneled door.
Self-made panel doors will eliminate the need to adjust them to the size of the doorway, since they are initially made according to certain measurements.
Due to the manufacturing features, self-made doors are less susceptible to destruction due to exposure to temperature and humidity changes. Among other things, you can make exclusive doors yourself at a more than affordable price.
The preparatory stage of manufacturing a paneled door
To make a paneled door with your own hands, in addition to desire and certain skills in working with wood, you will need a relatively small set of tools:
- tape measure and pencil;
- wood hacksaw;
- sandpaper with coarse and fine grains;
- chisel;
- screwdriver.
The materials needed to make a door include the following:
Tools for installing panel doors.
- to create a box you need thick boards, the width of which should be up to fifty millimeters, you can use a special beam, in total you need three pieces: two for making the vertical part and one for the upper transverse part;
- to create a frame you need fairly strong beams and slats, reliability depends on their strength;
- to make panels you need to purchase chipboard, plywood or glass;
- in some cases, you need to purchase a bead to secure the panels, in particular, this is necessary if the panels are made of glass;
- For fastening you need glue and screws;
- you need to stock up on fittings (door hinges, handles, locks);
- Don’t forget about finishing materials (paint, varnish, various specialized coatings), which are selected depending on the operating conditions and design concept.
Installation of fittings and opening design
Ready-made doors are supplied with fittings already installed. It is better to purchase work by Finnish masters. Products from Finnish companies stand out for their better quality.
The operating rules are as follows:
The lock and handles should be placed at a height of one meter from the floor. Therefore, first the location of their location is marked with boundaries based on actual dimensions.
You can see the rules in the video:
- The door leaf cutouts are being prepared. First, a sample is made from the end part for the latch and the door lock fastening bar. Several holes are made with a drill, which are processed with a chisel to the required size. After this, the front and inner parts of the canvas are drilled. This is done with a crown of smaller diameter so as not to damage the coating. Then the holes for the handle and lock are expanded to the desired size.
- Now you can install the lock body and handles. Holes are made to mount the plate and it can be installed.
- The location of the answer on the frame is determined, and samples are also made under it and the tongue. The strike plate can be inserted and secured, after which decorative trims can be installed.
Next, you need to install extensions and platbands. Methods of attaching the latter may be different. They are nailed or placed on glue. Sometimes all options are used. Finished products are purchased in the store.
Platbands are not used for compartments. The guides and sliding mechanism are covered with special decorative strips. At the final stage, the threshold is set.
Making a paneled door
The initial stage of door installation is the manufacture and installation of a doorway, or door frame. In order for the door to look attractive and not spoil the design of the room, it is important to make the door frame correctly and evenly. It should be without distortions or differences in width.
After installing the door frame, you can begin to make the paneled door itself with your own hands.
Initially, you need to draw several sketches of the future paneled door on paper, taking into account personal preferences and common sense in terms of complexity of execution. A paneled door can be quite complex to make, so it is best for novice craftsmen to start by making a door with six panels. The selected sketch is detailed, all dimensions are marked on it. Based on the selected sketch, the necessary materials for making the door are purchased.
Framed door installation.
In order to make a door with your own hands, first of all, a frame is made - the basis of the structure, which is responsible for its strength and on which the panels are attached. The more securely the frame is made, the more reliable the paneled door itself will be.
Using a tape measure, measure the size of the doorway. To design a door, you need to take into account that it should ultimately be four to six millimeters less than the width of the door frame, which must be left for a normal fit. In accordance with the obtained dimensions, the basis for the future door is made from the timber purchased for the manufacture of the frame. To do this, mark the required length on the beam, which must be smooth and without mechanical damage, using a pencil. Then, using a hacksaw, saw off the excess part. If possible, you can cut the beams to the required size in a store to facilitate and speed up the door manufacturing process. Such sawing will be of higher quality, since the use of modern equipment allows you to obtain optimal results. This produces two side main posts, two crossbars that are attached to the bottom and top of the structure, as well as internal crossbars and slats that serve as jumpers.
To tightly fasten the parts together, grooves and tenons are made in the right places, which should fit perfectly in size. For additional fastening, the parts are coated with special wood glue, which connects them more tightly. Special chamfers are made in the places where future panels are attached.
Panel door installation diagram.
After making the frame of the future door, you can begin making the panels. If wood is used for the panels that will be inserted into the door, then it is better to use solid boards to avoid the need to create a prefabricated chamfer. The finished part is cut out of the solid wood according to the dimensions of the chamfer that will decorate the door; special cuts are made along its edges, which allow the panel to be securely attached to the chamfer.
If it is impossible to make panels from a single piece of solid wood, but there is a desire to use wood, then the panels are made from pieces of wood, which are fastened to each other using a system of tenons and grooves, additionally coated with wood glue to give greater strength. After the panel assembled from pieces of wood is ready, cuts are made along its edges for fastening with a chamfer.
Panels made from wood can be further decorated by processing with special tools, but for this you need to have certain skills.
If the panels are made of chipboard or plywood, then they are cut from the selected material in accordance with the required dimensions.
Glass inserts are also cut, if necessary, to the size of the door, or initially, when making lintels and slats, they are based on the existing dimensions of the glass inserts.
If glass with a painting imitating stained glass will be used as an insert, then such painting should be done in advance, before attaching it to the door.
The glass panels are secured with a bead, which makes it quite easy to change the glass if necessary.
After the door is made, processed and coated with paint or varnish, all the necessary fittings are attached to it. After this, the door is installed in the opening.
Source: dekormyhome.ru
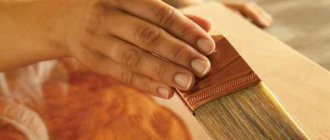
Decoration
The final stage in making doors with panels with your own hands is decorating them. This is done not only for aesthetic purposes, but also taking into account the increase in strength and reliability of the product. If you used natural wood, it is best to cover it with stain and varnish. This impregnation will create a protective film for the material, and the varnish will additionally protect it from moisture, fungus and insects.
The product can also be painted in neutral or, conversely, bright colors; the colors should be selected to match the interior. If this option is not for you, try covering the canvas with veneer, film or laminate.
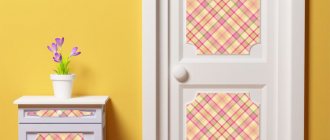
Decorating a paneled door by painting
A very interesting solution is to create a contrast between the door frame and the panels. For example, you can paint the vertical and transverse strips, and decorate the inserts with an ornament, design, or simply paint them a different color. A great way is to stick film, wallpaper or fabric.
As for the glass inserts, you can also decorate them yourself. To do this you will need simple float glass and your imagination. You can create a unique painting on its surface, imitate a real stained glass window, or simply stick a translucent film. If desired, you can apply your favorite photos and other images to the surface.
As you can see, making a paneled door with your own hands is not at all difficult, the main thing is that you have desire, patience and creative skill.
We recommend watching the video:
Peculiarities
Before you start designing a door, thoroughly understand its structure. Find out what features it has. The main difference between such doors is the presence of inserts that make the product sophisticated and elegant.
Attention! Due to the fact that special technology is used in the production process, the door becomes not only reliable, but also elegant.
Installation and its varieties:
- A blank sheet made of plywood. It consists of elements made from sheets of plywood, fixed inside with self-tapping screws;
Blind installation
- With glass inserts. Glass inserts are used to fill the canvas. The canvas looks decorative and is light in weight.
Insert
- Made of wood. This design is considered durable and reliable. The insert in this case is made from thin wooden sheets, but it should be noted that this way the production costs a large sum of money.
Natural wood
The technological manufacturing process is that the frame and insert are connected to each other. This is done using special fastenings with glazing beads. Manufacturing also involves other types of fastenings.
Installing an interior door frame
Let's consider the features of installing a swing structure.
Preliminary preparation of materials
To begin with, you should make sure that you have the following components:
- box;
- canvas;
- loops;
- lock and handle;
- chisel;
- jigsaw and other tools.
Door frame assembly
The box is a frame for installing the canvas in the opening. It is quite possible to install it yourself.
- Place all the parts on the floor the same way they will later be installed on the wall.
- Next, you need to adjust the box exactly to the size of the canvas, trim off the excess, leaving a couple of centimeters just in case. The cutting is done with a jigsaw or hacksaw.
The box is assembled using self-tapping screws, nails, or by cutting out a tongue-and-groove lock. For the latter type, the planks are connected strictly perpendicularly
For nails, the edges of the planks should be cut at an angle of 45 degrees, paying attention to ensure that the cut is even, so that the box does not warp later and there are no cracks or gaps left. Nails should be tapped from the sides and top
Installing the box in the opening
Step-by-step instructions for carrying out the work:
The pre-assembled U-shaped structure is inserted into the prepared opening. The beams are fastened using bolts. To do this, several holes are drilled in the wall and in the box. The gap between the wall and the box should be approximately 10-20 mm
It is important to check how level it is installed using a level, in relation to all planes. After this, fixation occurs as follows: wooden wedges are inserted into the gaps around the perimeter of the structure, and spacers are inserted inside the opening.
The remaining cracks are filled with polyurethane foam and left to dry for 2-5 hours, but complete hardening will occur only after 24 hours.
Tools and materials needed during the work process
In order for the technological process of making a door to be carried out correctly, theoretical knowledge will be required, as well as materials for the work.
To work you need:
- A hacksaw, which is used to work on wooden material;
- Screwdrivers of different diameters;
- A simple pencil and tape measure for measuring;
- Fine to medium sandpaper.
Hacksaw for woodworking
Before you start work, you should clearly decide on the material from which the door will be made. For strength, you need high-quality wood species that have high resistance to any factors. Oak or ash are perfect for work. In addition, production can be made from pine. This material is also of high quality and low cost.
How to seal cracks?
During operation, solid wood doors begin to dry out, which leads to the formation of cracks in the door leaf. To correct this situation, you need to attach metal corners to the joints of the bars or glue slats. They are placed in the cracks, and after the glue has completely dried, the surface is cleaned and sanded. If small cracks appear on the door, they can be easily repaired using a spatula and wood putty. Sometimes structures are sheathed on the front and back sides with veneer or fiberboard sheets.
Overlaid door trim allows you to hide visible flaws and is considered an original decoration. After the protective sheets are nailed to the canvas, they are painted with paint in several layers and the surface is well shaded.
Step-by-step instruction
First of all, measure the doorway. Build a box using a wooden beam. Currently, all blanks are sold on the construction market. This way you will save time and money.
Once the box is in place, fix it in the required position. To do this, the structure must be accurately measured.
Frame
Panel and its production
Next, let's look at how you can make panels yourself. First, we note that the manufacture depends on the material that is chosen for these purposes. It could be glass or wood.
Build process
If the work is supposed to be done from an array, then you need to start preparing the sheets according to pre-made measurements. To make the assembly process easier, use the tongue-and-groove connection method.
Attention! If the workpieces are connected using glazing beads, then the assembly sequence will not matter at all.
If the door is equipped with glass inserts, then for a beautiful appearance many designers recommend using colored glass or one that is additionally decorated with film. In addition, if you use, for example, stained glass, the design can fit perfectly into absolutely any interior.
What is this?
Properties
Such doors look incredible and beautiful and have become the most complex in terms of execution method. The presence of inserts in them creates a beautiful appearance. It looks extremely interesting if you use a non-traditional panel, for example, round/oval/with patterned slats that look like they were made in an antique style. According to the panel thickness method, they are:
- Embossed or voluminous along the edges, which are considered classic and are made using milling, or by pressing the material.
- Stacked, which look chic due to the connection of different slats through a tongue-and-groove connection.
- Flat, for decoration, craftsmen create carved or applied wooden ornaments.
Now let's talk about the design features.
Characteristics
Door designs with panels are simple and well thought out. Most often, the base is a frame made of spliced solid wood; a frame, most often made of wood, is attached to it, and the base is a panel. The fastening of the inserts and the base is done either with carpentry adhesive or with liquid nails (sometimes using a tongue-and-groove joint), which is fixed with glazing beads. At the assembly stage, serious manufacturing companies must tie the fabric together using screws, which gives the structure high strength. For high resistance to changes, a technological chamfer is made at the junction of transverse and longitudinal sections. Inserts in the form of panels can be not just decorative, but they also play a functional role. In the latter case, a structure is made of 2 plates, between which an insulating layer is laid. Such insulated door panels can be installed as entrance doors, or as a transition to an unheated room (veranda or balcony).
Varieties
Among all types there are wooden panel doors and more. They are the most popular because they have a rigid frame, and are complicated by panel inserts that add presence and beauty to the door. The classic type of such doors can be called hinged. They are installed on the box stand using 2-3 pairs of hinges, and when closed they fit tightly into the grooves and are convenient for use in those rooms that are quite spacious. The advantage of swing doors is reliability, simplicity and the ability to install latches with locks. Such doors can be decorated with various panels, from voluminous to lightweight, or even weighted with overhead ornaments. Sliding doors became another variety. They come with one or two doors, which are mounted on rollers and move along the lower/upper guide along the wall, and this door option is convenient in small rooms. This type includes cassette, cascade and radius doors. They are usually decorated with frosted/stained glass inserts, veneered MDF/bamboo inserts or flat panels.
At the same time, the main thing is not to make the structure heavier, which stands vertically only by being fixed in the guides. Wooden doors with panels are folding. These are special accordion doors that consist of several narrow leaves that are connected to each other using hinges. They are attached to the door frame with hinges, and when opened they move to one side. Locks are not provided in such a door, and they are often made openwork and light, with thin glass or wooden panels. Swinging panel doors have become an unusual and rare variety. They can have 1-2 leaves, which are attached to the door frame with canopies and can swing open in all directions. These options look very beautiful due to the opening method, and therefore they are usually not decorated with complex panels.
Benefits of DIY
If during the renovation process you and your whole family decided to install doors, this does not mean that you should go to the store to buy the finished product. For those who have at least some skills in home craftsmanship, it will not be difficult for them to build it themselves, without resorting to outside help.
Let's look at the advantages of making it yourself:
- Price. When you make it yourself, you will save a significant amount of money compared to the ready-made version presented in the store;
- When installing it yourself, you do not need to make additional adjustments, since the measurements taken will initially come to the rescue;
- The paneled version of the installation differs from its analogues mainly in that it is less exposed to external influences and is practically unaffected by various temperature indicators.
Installation
Installing a door involves performing the following steps:
- leveling and plastering of door slopes;
- fixing wooden planks;
- screwing the aluminum guide into the upper door frame;
- placing the leading part of the leaf at a minimum distance to the door jamb with fastening to the floor (bottom) and to the guide (top);
- connecting the driven leaf to the leading leaf (using hinges);
- fixing the driven part in the guide (use a carriage equipped with rollers);
- installation of limiters (the sashes should not touch the surface of the walls);
- lubrication of mechanisms with an oil composition.
Installation of a book door with hanging elements is carried out as follows. After leveling the slopes, extensions are made from MDF panels, which are fixed in the opening using dowels. The space between the extensions and the wall is sealed with polyurethane foam.
Installation of hanging elements is carried out:
- an aluminum rail in a strictly horizontal position crashes into the upper part of the door frame;
- a carriage on rollers is inserted into the rail groove, which should move without interference;
- limiters are mounted in the extreme part of the rail;
- attaching the carriage to one leaf;
- lubrication of metal structural elements.
If a heavy door is being installed, then you should additionally consider installing a floor system with a roller mechanism. The aluminum rail is being installed into the floor. A carriage with a roller mechanism, which is connected to the bottom of the sash, is inserted into the rail.
The door moves along guides using sliders. Self-tapping screws are used to fasten the guides. The book is closed using handles and latches.
Help with decoration
After making the door, the last stage is decoration. Such manipulations are carried out not only for aesthetic reasons, but also in order to enhance the strength and reliability of the canvas. When using natural wood, the surface is covered with stain or varnish. With the help of such impregnation, a film is created that protects the material. The varnish also protects the finished product from high humidity.
In addition to these types of processing, you can use a paint coating, for example, in some neutral or, on the contrary, extraordinary color (if the interior requires it). If this option is not suitable, then it is possible to finish it with veneer or, for example, decorative film.
Decorated look
The option of creating a contrast between the door and the panel is often used. That is, you can paint the vertical and transverse planks, and decorate the existing inserts with an unusual pattern or paint them in a different color scheme.
If you pay attention to the presence of glass, you can also decorate it yourself. For this purpose, special decorative materials are used. You can create a unique design or an unusual stained glass window. If you wish, you can depict family photographs or other pictures you like that bring positive emotions every day.
Making beautiful doors yourself is easy and without the help of qualified specialists. They will have not only a functional character, but also a decorative one, as they will express the individuality of their owner. In addition, you will be able to show not only your true skills, but also please your entire family and friends.
And see how the manufacturing process takes place and all its details in our video. You can take more useful information from it.
Source: mezhdveri.ru
Painting
At the next stage, the finished structure is processed and decorated. It is recommended to adhere to the following plan:
To finish the door, paint, varnish, and stain are used.
Experts advise treating the door with special protective agents against moisture and pests . If the door leaf will be installed in an apartment, then it is coated with a fire retardant. To perform a more complex decoration option, you will need the help of a specialist. Read more about painting and treating doors in the article “Painting wooden doors.”
Source
How to make paneled doors correctly?
If you want to save on interior finishing work and carpentry, and this is a considerable part in monetary terms, then try to do everything yourself. As they say: “The eyes are afraid, but the hands do.”
Content:
Types of doors
Let's try, having acquired basic knowledge, to make a door with our own hands. Doors are divided: – by location – into external and internal; – according to materials – wood, metal, plastic, composite; – according to the design of the canvas – paneled, smooth, prefabricated, with double skinning; – according to the nature of movement – swing, sliding, folded, lifting.
The procedure for installing door blocks
When installing door blocks, the following procedure must be followed: – cleaning the opening in the wall; – installation of the box in the opening; – horizontal placement and nailing of the threshold; – vertical installation of the box from the hinge fastening side, fastening it from above and below;
– hanging the door leaf and checking the accuracy of the fit; – checking the tightness of the door rebate and the operation of the lock; – fastening the box on all sides; – nailing of platbands; – recessing nail heads.
Interior doors
There are “right” and “left” doors, depending on the opening side and the hinges. If you stand on the side of the door into which it opens, then the “right” door will have the hinges on the right, and the “left” door will have the hinges on the left. According to the nature of movement, internal doors are divided into: – swing doors; – transforming doors and partitions.
It should be noted that advanced developers include in the project space for the use of finishing materials, installation of modern doors, in houses that are offered to clients, such as houses in the Ulyanovsk region.
Hinged doors have different configurations, they can be rectangular and arched. Based on their internal filling, swing doors are divided into solid, panel and panel doors. We will try to assemble a paneled door. The best way to learn is to take an old panel door, disassemble it and reassemble it and then everything will be clear.
We make a paneled door
To make doors, you need to have a well-dried, wide pine board. Since birch boards “twist” very strongly, and aspen boards are too soft, it is not recommended to use these types of wood. To get a good door, the wood you choose must be aged for 1 year in a cool, dry place.
Before making a paneled door, the ends of the opening are first sewn up with a board. Then, the height and width of the opening are carefully measured. There should be a gap of 20 mm wide between the door and the ends of the opening. Taking this into account, a box of 50 mm wide timber is knocked together. and a thickness equal to the thickness of the wall. Experienced carpenters fasten the box with wooden pins.
The resulting free space is sealed with tow or foam and covered with a casing. To close and open the door tightly, there must be a gap of 5 mm between the frame and the door leaf. Now the number of panels is determined (the panels are the inserts that make up the door leaf). The door is 2 meters high and 90 cm wide. It is convenient to assemble from six identical panels. Moreover, by changing the size of the panels and their shape, you can create a different pattern of the canvas.
Types of doors by design
A solid wood box has the following advantages:
At the same time, wooden canvas has the following features:
To reduce absorption, the board is dried, treated with hot steam and impregnations.
Massive doors
Before making wooden doors, it is recommended to determine the features of the production process. The dacha can be protected from robbers by a massive canvas, for the manufacture of which thick tongue-and-groove or planed boards are used. The resulting structure is strengthened with horizontal or inclined jumpers.
To make a massive door, dense wood is used
To make a massive entrance door, cedar, larch or oak are used. This type of wood is characterized by a dense structure and textured pattern.
If the project of a summer cottage includes a bathhouse, then linden and pine are used to arrange the opening. The bathhouse must be used after treating the wood with an antiseptic.
Paneled doors
To make paneled fabric, boards and beams obtained by gluing lamellas are used. Then the workpiece is covered with veneer. Before constructing the canvas, a drawing is prepared. It indicates the configuration of the panels. It can be the same or different. Glass can be used instead of wooden elements.
Paneled doors are most often installed indoors
To equip the vertical and transverse elements, you will need to glue the timber. To make the canvas, a floorboard of appropriate thickness is used. To fix individual elements, spikes are used.
Door assembly diagram
If a panel is used to make the canvas, you need to consider:
Since the paneled door is thin, it is considered the best option for creating an interior doorway.
Panel doors
The panel box is made of fiberboard, veneer or laminate. The frame is assembled from boards. Fiberboard, MDF or chipboard sheets are used as a shield.
Panel door design
The canvases under consideration are classified into the following types:
To create a high-quality canvas yourself, the frame is first covered with plywood. The material is laid in 2 layers. Size of 1 layer – 24 mm. This technology prevents deformation of the coating.
Paneled door: what is it and where is it used
First you need to decide why the product received such a name. Initially, a panel is a thin insert in a wooden panel, which is most often used on interior doors. In other words, it is a sheet of plywood, wood, glass, chipboard, MDF, which is installed as a decorative element. Panels can be different in shape and size, and differ in color from the main canvas. What is most important is that if one of them is damaged, it is not necessary to replace the entire door; it is enough to simply replace the damaged area.
This technique allows you to create non-standard shapes and turn a boring door into an original product, where each panel focuses attention on individual fragments of the door. It can contain patterns, textured grout, volumetric elements and much more. It all depends on the designer’s imagination.
The use of paneled doors has no frames; they can be found not only in residential buildings, but also in offices, public places, and entrance areas. Only the material of the inserts themselves differs depending on the purpose of the premises and the requirements for the stability of the panels.
What are the characteristics of different types of wood?
Wood is the leader among building materials. It is distinguished by its characteristics, simple processing and aesthetics. Wood is divided according to consumer characteristics, the value of certain species and the possibility of use. But the most common classification is the division into coniferous and deciduous materials.
Hardwood
I would like to immediately note that deciduous materials are inferior to coniferous ones. However, for carpentry they are most often used because of their beautiful texture, variety and decent physical properties. Among the most popular breeds:
- Oak. Durable and valuable material - it has a beautiful texture, bends easily, and is resistant to bacterial contamination. Suitable for furniture, doors, finishing elements, floor tiles - both as solid wood and as veneer.
- Birch. Light colors, almost invisible veins. The wood is very dense in texture, which is often used in the furniture industry. However, birch is afraid of high humidity and splits along the fibers.
- Ash. It resembles oak material, but is still distinguished by complex processing; it bends, cracks and rots easily when exposed to unfavorable factors.
- Aspen. Valued for its easy processing and uniform aesthetic texture. Due to its porosity, it is suitable for the manufacture of only large elements.
The most popular breeds in construction and finishing are:
- willow;
- hornbeam;
- poplar;
- Linden;
- beech.
Valuable, rare species include mahogany, pear, plum, walnut, and apple.
deciduous and coniferous trees
Conifers
Coniferous wood materials are more durable, accessible, have a characteristic resinous odor, and are resistant to fungal and bacterial contamination. Among the popular breeds:
- Pine. The tree has an even trunk, and the material itself is light, durable, and non-plastic. Pine is a very common tree species. But the ease of processing is offset by the fact that the material dries out over time and is highly resinous. If it turns blue, it means the storage technology was broken.
- Larch. It is distinguished by a dense structure, high strength and a pleasant aroma that will persist throughout the entire period of use of the door. In processing, larch is valued for its small number of knots. Wood has natural bacteriological protection. Wood does not rot, but only becomes stronger from the influence of moisture.
- Fir. Beautiful and easy to process wood. But please note that the quality of such natural material depends on the area and growing conditions of the tree. If fir wood is too soft, it is attractive to pests and quickly deteriorates when exposed to environmental factors.
- Cedar. The tree has a beautiful aroma and a bright, pleasant smell. Most often, cedar is used as a decorative material. This is a durable, rot-resistant, but expensive tree. The color of the material is like light beige, pale pink and dark brown. Cedar is also valued for its pleasant aroma, healing and antiseptic properties.
- Spruce. The physical characteristics of such wood are very similar to pine. But processing is difficult - this is due to increased hardness and a large number of knots. Other characteristics: soft, beautiful material with a golden tint. Able to maintain natural color for a long time. Does not crack, has a slight resin content.
When choosing coniferous wood for carpentry, know that you will have to remove resin stains yourself. To do this, the wood is thoroughly dried and subjected to special antibacterial treatment.
Advantages and disadvantages
Like any door group, paneled doors have their advantages and disadvantages. Let's define the main ones.
Firstly, it is an aesthetic appearance, which, due to its versatility, allows you to complement any interior and make it complete.
Secondly, this is a significant reduction in the weight of the canvas due to the use of thinner plates of material for panels. This item will be useful for those who are going to order non-standard products with a large area, the weight of which can damage the door hinges.
Thirdly, as already mentioned, it is easier to restore and repair paneled doors, since they are like a puzzle - you can replace one part without touching the other.
Fourthly, the panels do not allow the door leaf to dry out, and, therefore, increase its service life, which cannot be said about solid arrays.
And finally, paneled doors are much cheaper than their counterparts, since their production uses fewer materials and expensive parts.
There are not many disadvantages to such door panels, first of all, the use of raw materials that do not meet production standards. But this happens extremely rarely.
Design options
The huge range of materials used in the production of panel doors contributes to a wide variety of design solutions for these structures. This versatility of the products allows you to choose a paneled door block for almost any room interior.
For living rooms, bedrooms and kitchens, paneled doors with transparent or translucent decorative inserts are often chosen. In rooms such as a bathroom or restroom, as a rule, door blocks with blank leaves are installed. The interior door production industry has reached such a level that today you can find paneled doors for any interior and in any style. This result is achieved, not least, thanks to the wide range of finishing materials used. The most common of them are veneer, laminate and polyvinyl chloride.
Panels can be straight or curly, of different shapes, and include additional decorative overlays. In addition, these products are often made in volume, with carvings and original relief. One of the advantages of paneled doors is the ability to replace elements of the door leaf some time after the start of operation. Moreover, an ornament or pattern can be applied to glass paneled elements, and a blank door leaf can be converted into stained glass. In addition, such structures are covered with self-adhesive films with printed images.
Manufacturing materials
The most expensive ones are made from valuable wood species. They have increased strength, both due to the characteristics of the material and due to the non-standard fastening of the panels to the canvas. In addition to standard species - oak, beech, teak, walnut, and others, paneled doors can also be made from more exotic wood, for example, mahogany. In some cases, exotic species are imitated by applying a special varnish.
For those who like to save money, but prefer solid natural materials, soft types of wood are suitable. They are durable enough to serve their owners for a long time, but are not as expensive as valuable breeds. Structures made of soft wood are suitable for rooms where traffic is not so high, or where doors are used only during a certain period, for example in a country house. Despite their affordable price, they are treated with special anti-corrosion and anti-fungal compounds and, at the request of clients, treated with varnish with pigments, which allows you to give the wood the required shade. Even after such manipulations, the canvas looks natural and impressive.
Combined doors involve a combination of inexpensive materials and good finishing. The first point allows you to make the door attractive to the buyer, and the second allows you to use it in various design solutions. This option may not last for several decades, but it will be an excellent addition to the interior in times of austerity.
Source: www.inmyroom.ru
Installation of MDF doors
Every year, interior doors made of MDF become more popular. To satisfy customer requests, the production of MDF doors is carried out in accordance with fashion trends.
For decoration, different types of glass are used: frosted, transparent, darkened, smoky, textured. A rich palette of shades allows you to choose products to suit any interior.
Panel
Such products are very popular for furnishing rooms with a modern interior. They have a special design. In the production of doors, a single piece is used. Main components: frame, filler and finishing.
Pine timber is used to make the frame. MDF sheets are attached on top of it, empty cavities are filled with hardboard or cardboard. Lightness and good insulation of the door are achieved due to hollow filler cells. Often the panel fabric is decorated with glass inserts. Expensive and high-quality structures made of MDF have an internal filling made from the same material.
Paneled
The basis of the canvas is the frame. For its production, beams made of solid wood or laminated veneer lumber are used, which have undergone careful selection and drying. The frame consists of two vertical posts connected by horizontal crossbars - drawers. Grooves for the panel are cut on the inside. The frame itself, made of four elements, turns out to be shaky. For reinforcement, auxiliary jumpers are used to provide spatial rigidity. The design is resistant to distortions, bends and deformation. Glass and MDF panels are used for filling. MDF panel doors have both a modern and classic look.
This is interesting: Mechanism for interior sliding doors: let’s find out the question