The kitchen is one of the most significant places in the house. In the evening, coming home from work or school, the whole family sits down at the table, has dinner, and over a cup of tea tells how the day went, what ideas they want to bring to life. This is why the environment in the kitchen affects our emotions and sensations. The mood immediately deteriorates; you don’t even want to enter the room if the furniture doesn’t look right. Therefore, it is necessary to put the interior items in order. Even the simplest method - painting the kitchen unit - will significantly change the appearance.
The kitchen is one of the most significant places in the house.
Benefits of DIY painting
To transform your kitchen furniture, you don’t need a big investment; you just need to buy paint. Painting the set is not a difficult task. If you have never done this, you can easily cope with this job.
The environment in the kitchen affects our emotions and sensations.
This kind of furniture renovation is the most common option. Here you do not need to be a specialist and have extensive experience in this matter. The method is very economical, but the result will exceed all expectations. Coloring will take a fairly short time, without much effort.
Even the simplest method - painting the kitchen unit - will significantly change the appearance.
Accessories
Before hanging the restored facades in the kitchen, you need to replace the old fittings with new ones. It guarantees the ergonomics and functionality of the furniture. It is worth inspecting and replacing hinges, guides, closing mechanisms, and handles.
If the mounting holes have widened or part of the fabric is missing in their place, the fittings will have to be moved to another area.
We begin the work by dismantling the fittings. We fill the old holes with putty. It is best if it is on an acrylic base, matching the color of the kitchen facades. After the putty has settled and dried, it is sanded with sandpaper, painted or varnished. You can then drill other holes and install the hardware.
It is better to replace roller guides in kitchen drawers with more reliable ones - ball ones. Handles are matched in style and color to the updated kitchen facades.
Choice of colors
So, if you decide to repaint your kitchen set and decide what color it will be, be prepared for the fact that you will have to change the textiles on the windows and the upholstery material on the upholstered furniture. You can choose one color or several, which is becoming very popular; it is important that the color scheme is in harmony with the overall interior. For those who have taste, it will be easy, but for those new to this business, it will be a little difficult.
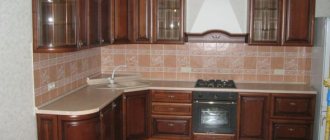
Neutral solution. This includes all varieties of beige, as well as brown, black, gray and white. When combining these colors, it is quite difficult to make a mistake; you just need to carefully combine dark tones. The most common option: the upper cabinets are light in color, the lower ones are dark. This combination is more suitable for classic interiors.
It is important to remember that it is better not to combine only dark or only light colors. Don't forget about bright colors. So, black can be combined with red, light green, mint, pink, beige, white - with blue, lilac, blue, beige - with red, lilac - with cappuccino color, burgundy - with cream, white, wood color, etc. Two bright or two neutral colors are an interesting option, but you should rely on your taste here. The theme of vegetables and fruits will look no less interesting.
If you want to have an original interior, combine contrasting colors - yellow with lilac, orange with blue, blue with red or pink. For a calmer environment - orange with red or yellow, green with yellow or blue with green.
Today, the use of several colors simultaneously has become widespread. For example, with a colorful detail you can “dilute” two calm shades. You can use a different color for each individual facade - your kitchen will be in retro style. The main thing is a competent approach, and simple painting will give new life to an old set.
To transform your kitchen furniture, you don’t need a big investment; you just need to buy paint.
Water-based emulsion, silicone or alkyd?
The final result of your work will depend not only on how you handle the roller, but also on the type and quality of paint.
So, let's figure out what “water emulsions”, enamels and “silicones” are.
Water-based
It is water-dispersed - perhaps the best option for the kitchen, which is very popular.
Advantages:
- practically odorless, harmless, easily washed off hands and tools;
- easy to apply with a uniform, indelible layer;
- dries quite quickly (a couple of hours is enough);
- the solvent is ordinary water, and not some smelly and harmful chemicals;
- ideal in terms of price-quality-ease of use;
- a huge range of color solutions: the entire “water emulsion” is sold in white, to which, after you select the desired shade, a dye (pigment) is added and a special machine mixes the final color right in front of you.
The only drawback is that water-based paint must be applied to a completely dry wall. Because of this nuance, repair times may suffer.
There are two types of water emulsions:
- Acrylics - make up 65% of the range of water-dispersion paints, are universal, and are represented on the market by a large number of manufacturers;
- Latex analogues are more wear-resistant and durable than acrylic ones, but have lower vapor permeability, that is, they can “accumulate” moisture. Most often, this type is used for painting non-residential premises, and sometimes for exterior decoration.
Alkyd paints
Despite its less popularity, this type is quite often used for painting indoor walls.
Advantages:
- have a high level of wear resistance, elasticity and strength (in comparison with “water emulsion”);
- are not afraid of changes in temperature, humidity, or direct contact with water;
- As a rule, they have a more saturated, rich color.
The downside is that:
- alkyd base, which has a persistent pungent odor and is fire hazardous;
- diluted with white spirit;
- Such paints are sold in a specific color, so you are limited in the choice of undertones.
All alkyd paints are divided into two types depending on the type of base:
- pentaphthalic (marked on jars as PF);
- glyphthalic (GF marking).
In addition to the letter designation of the type of base, the cans are marked with a digital marking that indicates the category of enamel.
For example, the GF-230 marking means that this enamel is glyptal-based, the number “2” means that it is intended only for coatings inside the house (walls, ceilings), 30 is the manufacturer’s catalog number.
If the first number in the marking is “0”, then it is an alkyd primer.
Silicone
They appeared on our market relatively recently and have already firmly occupied their niche, thanks to the following properties:
- excellent water resistance;
- the best indicators of resistance to ultraviolet radiation, fading, and chalking;
- resistance to alkalis, which allows them to be applied to a wall that was plastered only a couple of days ago;
- practically odorless and absolutely non-aggressive;
- like water-based analogues, pigmentation of any shade is possible.
Of the shortcomings, we can name only one - the high price.
But, no wonder, all the qualities they possess make this product worth the money.
There are cheap “analogues” of silicone paints, which are called “siliconized”.
They are a composite, a mixture of silicone and acrylic bases. Here are a couple of examples.
This has a positive effect on the price of such a product, but has a detrimental effect on its quality.
Therefore, we recommend that you definitely clarify this point in the store, especially if some model stands out in price among others.
Paint selection
Today in stores you can see a huge assortment of paints. But not every one is suitable for kitchen facades. You should not use water-based emulsion or oil-based paint - they will lie unevenly and leak. Acrylic paint is also not recommended - it will not tolerate moisture and various cleaning agents.
After all the work has been done, we attach the fittings, insert glass, and hang cabinets.
The best option is aerosol alkyd paint in cans or auto enamel. This material is applied smoothly, without smudges, its properties are reliable, resistant, easily tolerates humidity and temperature changes, and is available in a variety of colors.
Care after coloring
A painted kitchen set requires care to ensure its appearance is preserved for a long time. Temperature changes, high humidity levels, grease and other contaminants are factors that affect the attractiveness of kitchen furniture. Facades and buildings are sensitive to moisture (even if painted with washable paint), ultraviolet radiation, and chemicals. Abrasive materials and rough cleaning agents can damage the paint layer. Overheating also affects the lifespan of your renovated kitchen. Painted surfaces must be wiped daily with dry wipes to prevent prolonged exposure to water (mainly from splashes). If there are minor defects in the design, moisture will “find a loophole” and gradually begin to destroy laminated chipboard and MDF (this is the material used in furniture production). Prolonged exposure to ultraviolet radiation can be avoided with proper placement of kitchen modules; curtains also solve this problem. The sun's rays damage the structure of some types of paintwork materials and lead to color fading. It is better not to use concentrates; soft (diluted) formulations are suitable. Before washing the headset, it is important to read the manufacturer's instructions. Abrasive powders and hard sponges are not allowed in painted kitchens. The hood and protective structures will preserve the integrity of the paint layer and increase the durability of the painted kitchen set.
Caring for your headset
Necessary materials
The materials we will need are:
- aerosol paint,
- sandpaper,
- wood primer,
- solvent,
- putty,
- gloves,
- protective glasses,
- masking tape,
- glitzal for decorations,
- accessories (if you decide to change the old one),
- oilcloth or film so as not to drip onto the floor.
Painting the set is not a difficult task.
Installing a new countertop
If the wear of the countertop is small, you can restore it: putty, paint, varnish, cover it with ceramic tiles. If the table surface is made of chipboard or fiberboard, it can be covered with film.
If there is severe damage to the tabletop, it is better to replace it. Before ordering its production, it is necessary to take measurements. You can make the tabletop yourself. For a product made of MDF or chipboard, the sections are insulated with plastic overlays, which can be screwed on with self-tapping screws or fixed with wood glue.
The next stage is dismantling the old countertop and installing a new one. If a built-in sink or stove is planned in any part of the kitchen unit lid, you must first take measurements and cut a suitable hole with a jigsaw.
After this, you can install sections of the countertop on the cabinets and secure them using tires or special fasteners. Then install the sink and stove into the holes and seal the joints.
Step-by-step painting algorithm
How to paint a kitchen set? First you need to remove the doors from the cabinets, all fittings, stained glass or simple, mirrored cabinets. If there is a PVC film on the surface, remove it using a hair dryer. We approach this stage of work very carefully so that not the slightest piece remains. Then we clean it from dirt and dust. Now you need to sand the surface using fine-grain sandpaper or a sander. The plane must be smooth, carefully processed, without minor defects. Use the same method to remove old paint. In addition, you can use special liquids to remove paint and varnish. We wipe the surface again, remove dust, it is better to use a brush so that dust does not get into the cracks.
For perfect coloring, apply the paint by moving the brush or roller in one direction, no need to rush.
The next step is to treat the surface with a degreaser. Let it dry, prime the surface using wood mortar. Leave until completely dry, optimally 24 hours. To completely remove all unevenness, apply putty. After drying, you need to sand it again. After the surface is completely in order, we begin painting.
It is necessary to cover everything around with film to prevent paint from getting on it.
For perfect coloring, apply the paint by moving the brush or roller in one direction, no need to rush. If you are using a range of tones, tape off the borders with masking tape. Of course, spray painting will be more accurate. Here we must remember that during operation some of the material will be sprayed to the sides. Therefore, it is necessary to cover everything around with film to prevent paint from getting in. For a more saturated color, you can paint it again after the first layer has completely dried.
For a more saturated color, you can paint it again after the first layer has completely dried.
After all the work has been done, we attach the fittings, insert glass, and hang cabinets. This is how the original kitchen set turned out so easily and simply, which we reconstructed ourselves.
Coloring will take a fairly short time, without much effort.
Primer
Priming is necessary so that the layer adheres well to the surface, and the composition will also help remove remaining flaws. You need to select a primer solution based on the type of wooden material that will be primed. The tool is a roller or brush, drying will take approximately 24 hours.
Priming is necessary so that the layer adheres well to the surface, and the composition will also help remove remaining flaws.
The final stage is decoration
Many people want their kitchen to be unique and comfortable. Not everyone has the opportunity to change their headset to a new one. The best way to update furniture that is unpleasant to the eye is to decorate it.
You can choose any method; in addition to restoring the set, you can update the dining area by replacing the upholstery on chairs, stools, or sewing covers on them.
In addition to painting, you can tidy up facades using self-adhesive film; its choice is very wide - a variety of colors, various patterns that imitate wood. The material is applied to the treated surface and leveled with a special spatula. If bubbles appear during the work, they are pierced and pressed to the plane. If the film is glued crookedly, with “wrinkles,” remove it and glue another piece.
Today, the use of several colors simultaneously has become widespread.
If you don't want film, use photo wallpaper. The plane is pre-processed - sanded, primed. After complete drying, glue the photo wallpaper. Then we coat it with varnish to protect the surface.
You can use a different color for each individual facade - your kitchen will be in retro style.
If you want an original kitchen set, use decoupage. Here, decoupage cards or napkins with a pattern are used; you can take various pictures cut out from magazines, or print some design on a printer. We place the images on the facades, glue them onto PVA, and leave them until completely dry. Finally, coat it with several layers of clear varnish.
The main thing is a competent approach, and simple painting will give new life to an old set.
Variety can be added by gluing mosaics, tiles or decorative skirting boards - moldings. Parts of the required length are glued to the surface, forming a frame.
The best option is aerosol alkyd paint in cans or auto enamel.
You can choose any method; in addition to restoring the set, you can update the dining area by replacing the upholstery on chairs, stools, or sewing covers on them. You can also apply an image to the surface of the table using decoupage style.
You can choose one color or several, which is becoming very popular; it is important that the color scheme is in harmony with the overall interior.
Facade decoration
The easiest way to beautifully decorate a facade, if its front part is smooth, is to cover the surface with self-adhesive film. It is better to choose color and texture according to the overall style of the interior.
The front part can set off a separate object in the design or play the role of a bright accent. We paint the back and end parts of each door the same color as the front.
Procedure:
- We use wood putty to fill the holes from the old handles: in most cases they do not match the mounting bolts on new models.
- We clean the remaining paint from the façade. This is done after the putty has completely hardened.
- We sand all the irregularities and degrease the surface with a solvent.
- We measure out the approximate amount of self-adhesive film. It is important that the area of the self-adhesive exceeds the size of the surface to be pasted. Some people glue the film straight from the roll, but this is not entirely convenient.
- We remove part of the protective coating along the entire width from the edge of the piece of film, apply it with the sticky side to the edge of the door, and smooth it out well. If bubbles appear, remove the film that has not yet been completely glued and eliminate the defect.
- Gradually remove the protection from the film and smooth it on the surface of the door, moving from the middle to the edges.
On a note . Air bubbles on a completely pasted surface can be dealt with using a needle. It is enough to carefully pierce the film, release the air and level the space. If the film is stuck with wrinkles, it is better to remove it and glue a new piece.
The hardest part is cutting the edge. It’s rare that someone succeeds in cutting out a piece of self-adhesive perfectly evenly and gluing it so that the edges clearly coincide with the surface. That is why it is easier to glue the film onto the product and then trim the edges with a stationery knife or scissors.
To hide irregularities and protect the edges from fraying, the perimeter of the facades can be covered with a decorative plastic corner.
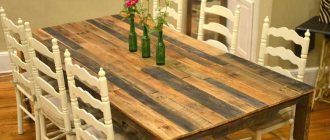
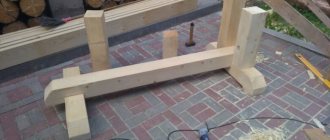
How to age wood
This method of working with wood is very common. Designers use it when restoring furniture and in interior planning. You can age wood yourself, and your unsightly furniture will look completely different, even more advantageous than factory furniture. How to age wood at home? Here are some methods that are simple but highly effective.
Parts of the required length are glued to the surface, forming a frame.
A special method of aging is brushing. Here, using a metal brush, soft fibers are removed from the plane. The brush should move exactly along the grain line. The pressure is applied evenly. Thus, a drawing is obtained, the texture of which can be increased by tinting. The next step will be sanding the surface. Upon completion of work, remove dust and sawdust. Now we will tint using a dark shade of Belinka. Apply tint using a brush or roller. After a few minutes, very carefully remove the outer layer of paint with a sponge, thus revealing the wood pattern. Let it dry completely and apply clear varnish.
If you decide to repaint your kitchen set and decide what color it will be, be prepared for the fact that you will have to change the textiles on the windows and the upholstery material on the upholstered furniture.
Large parts of the interior, for example, ceiling beams, are also decorated using this method of aging and further painting.
1. Painting in several layers.
This method is used to restore furniture, and the result is a wonderful effect. Before starting work, the wood must be scratched, chipped, indented, abraded, even wormholeed. This will require certain tools. In order for the result to be obvious and look authentic, this must be done, but in moderation. Then we take a dark-colored Pinotex tinting agent and apply a layer to the surface. Let it dry and sand it down.
Variety can be added by gluing mosaics, tiles or decorative skirting boards - moldings.
We apply white translucent “Belinka” as a second layer, but so that the dark base is visible. Let it dry, then take a wire brush and, moving along the fibers, form a textured pattern. We dilute the white glaze in half with a solvent and apply it to the surface again.
For those who have taste, it will be easy, but for those new to this business, it will be a little difficult.
2. Aging by open fire.
Here they use a gas burner, the wood is treated with fire, the wood becomes saturated in color, then they are sanded, revealing the design. Finally, a protective varnish is applied.
When combining colors, it is quite difficult to make a mistake; you just need to carefully combine dark tones.
3. Using vinegar and steel wool.
This method is based on the chemical reaction of these substances and how the color and surface of the wood subsequently changes. The result is magnificent.
The most common option: the upper cabinets are light in color, the lower ones are dark.
4. You can use the craquelure technique .
Using this method, you will not only age painted furniture, but also give it a cracked appearance. Of course, these are not all the ways to age wood. In fact, there are also more intricate techniques. We have listed the most affordable ones.
There are various options for restoring furniture.
There are various options for restoring furniture. Use all your imagination and skill, and you will achieve the desired results.
A special method of aging is brushing.
Finishing and decorative processing
The process should be completed by polishing. Use sandpaper to remove defective parts, then use linen cloth impregnated with special products and polish the furniture. In order for the effect to be high-quality, the application is done quickly, and in three layers, each must dry for 12 hours.
Decoration is carried out on a dried coating, and finally the surface is treated with finishing compounds. There are the following options for decoration:
- Creating an aged coating. Patinated material is used, which is spread over the cabinet using a sponge or brush. Next, the surface is polished;
- Decoupage, the effect is obtained using the decoupage technique;
- You can draw a variety of patterns; for this you need stencils; there are ready-made templates for sale, or you can make them yourself;
- Chaotic irregularities and patterns can attract the eye. To create them, you can simply apply paint with a sponge, stamps, brushes, etc.;
- You can combine several colors, highlighting textured details, you can also paint the inside and outside in different tones, highlight the ends;
- Sometimes they resort to decorative details. Pebbles, rhinestones, etc. are glued on.
There are no restrictions in terms of decor, you shouldn’t overdo it, but you can show your imagination. And create an original design, not forgetting about the skillful implementation of the idea into the overall interior.
Patinated material is used, which is spread over the cabinet using a sponge or brush.
Drying process
In professional production, drying is carried out by convective method at a temperature of 35 - 60 degrees and a relative humidity of 50 - 80% for 1.5 - 2 hours. It is impossible to achieve such conditions at home.
Each paint is dried differently.
It will take about 24 hours for complete drying, but there may be deviations in one direction or another, depending on the composition of the dye. If polishing of a glossy surface is required, this procedure should be done three days after painting.
The thicker the paint layer, the longer it will take to dry.
After drying, the tape is removed and, if necessary, the gaps are tinted.
What is MDF
First, it’s worth understanding what MDF is. Translated from English, the abbreviation “MDF” translates as “medium density fiberboard.” This material is made from wood fibers.
MDF production includes the following stages:
- Sawdust is crushed to a powder state. To do this, the raw materials are brought to 100 degrees temperature and 80 percent humidity. And then it is ground in a defibrator.
- Then urea-formaldehyde resins and paraffin are added to the powder. The mass is thoroughly mixed and dried at a temperature of 200 degrees. By the way, the mixture dries within a few seconds.
- The resulting mass is transferred to a hopper and compacted, and then rolled out with a roller along a conveyor. This creates a slab.
- It is fed to the press, and under a pressure of 350 MPa and when heated to 230 degrees, the pressing stage goes through. After this, the pressure decreases three times and the process of adjusting the thickness of the plate takes place without high temperatures.
- The cooled slab is sanded and cut into pieces of the required size.
If you cannot find special paint for MDF, you can use painting compounds for windows and doors, or for wood.
Fiberboard is one of the most commonly used materials in the furniture industry. And this is no coincidence. MDF has enough advantages:
- Moisture resistance;
- Strength;
- Availability;
- Long service life;
- Possibility of creating various reliefs and decor;
- Resistance to temperature changes;
- Wide range of applications.
You can paint the furniture yourself.
Often, happy owners of MDF furniture believe that it is impossible to repaint such interior items with their own hands. But in vain. Everything is much simpler than it might seem at first glance. The main thing is to choose the right paints, namely:
- Primer compositions;
- Paints with high hiding power and wear resistance;
- Varnishes or polishing kits.
With a wide range of colors to choose from, you are sure to find something that suits you.
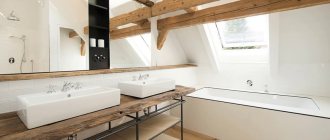
By painting MDF surfaces, you will refresh the interior, extend the service life of products and significantly improve performance. The latter is especially true if you decide to update the furniture in the bathroom or kitchen.
Choose quality paint manufacturers.
However, there are also disadvantages to coloring. Firstly, it will cost you much more than covering the facades with decorative film. And, secondly, painted surfaces fade over time.
Why is this necessary?
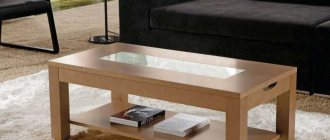
Painting and repainting furniture is an interesting and inspiring procedure. It’s no wonder that social media accounts dedicated to restoration work attract thousands of followers. People are interested in watching how craftsmen use their own hands to make modern Scandi-style furniture from grandma’s old cupboard. Or how an unpretentious chipboard coffee table can be turned into a fashionable interior accent.
Restoring old furniture is both saving money and a great way to extend the life of a not very fashionable, but strong and reliable design, and a great opportunity to turn something outdated into something current. And if professional restorers have a lot of tools, methods, technologies, home craftsmen can limit themselves to the most accessible ones. Repainting furniture is the main one.
Here are 5 reasons to repaint chipboard furniture.
- It will merge with the overall ensemble of the interior.
- It will look modern.
- The situation will change, and so will the mood of the household.
- Minor flaws and deformations created by time will be hidden under a layer of paint.
- This is a great DIY renovation experience that won't hurt anyone. And if in the future you want to save on the services of masters, you can start learning right now. And repainting is an ideal activity for beginners.
Can we get to work?
We've sorted out the choice of materials, now let's move on to changing the old furniture. For clarity, we chose two different surfaces: a laminated chipboard cabinet and an MFD shelf.
We will share the easiest and fastest way to color them. Even a beginner can handle this.
First, let's take the necessary tools, namely:
- Several brushes (It is better to buy not the cheapest ones, since there are times when they fall off. This will not have the best effect on the coloring composition)
- Roller
- Masking tape
- Priming
- Sanding cloths
We also took:
- Gray acrylic paint (The most common option, so we’ll focus on it)
- White acrylic
Remember! The lighter the surface, the more difficult it is to paint. This is a painstaking and complex process that requires the application of many layers. If light paint is not necessary for the interior, then it is better to take a different color. This will make it easier for you
task.
- Oil paint for wood
- Varnish
The entire handmade transformation process is divided into two stages: