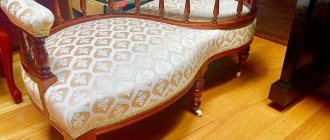
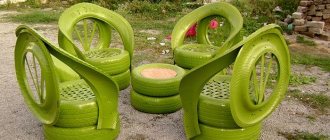
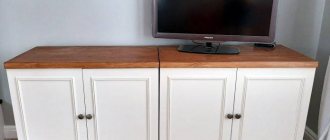
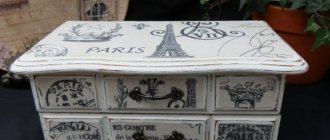
You can use various techniques to decorate a room. One of the common ones is using old furniture. There is no need to rush to throw out outdated bedside tables; you can turn them into a stylish design element with your own hands. For such decor, ordinary materials and paints are used, the main thing is to immediately decide what result you want to get.
To decorate an old bedside table, you can use various attributes: paint, fabrics, buttons and even stones.
How to restore an old cabinet
Of course, you need to stock up on sandpaper, varnish, paint and other equipment.
Completely clean the surface of old varnish or paint.
Advice!
First, cleaning is done with coarse and coarse sandpaper; when the coating is removed, you can clean it with fine paper.
Next, you should apply a layer of new coating - varnish or paint. The paint can be selected in any color that suits your interior. Decorate the doors with a pattern.
It's easy to update old furniture! 50 ideas that will help you
Have you inherited a set of furniture from the beginning of the last century, or are well-worn chairs and chests of drawers gathering dust in your house and are sad to part with? Congratulations! You have the opportunity, and most importantly, the right texture, to update old furniture and interiors at minimal cost, thereby transforming your home. You will only need a couple of hours and a small set of repair materials. With their help and if you have the desire to create, you can achieve great results quickly and easily!
Before you start work, you need to prepare the necessary materials. In order to update old furniture, it is convenient to use paint in cans. In this case, you will only need a few aerosols of the desired shades. There is no need to purchase rollers of different sizes, numerous brushes and solvent. So, before we start painting, we carry out preparatory work. This stage cannot be neglected, because the quality of the painting and its durability largely depend on it.
- First of all, we clean the surface to be painted from dirt and dust, and then wipe it dry.
- We sand varnished furniture with sandpaper.
- Before painting, it is advisable to coat the surface with a special primer. This way we will achieve the best adhesion of the paint to the coating.
- We cover the area that we do not want to paint with old newspapers or plastic wrap, and also protect the surrounding area from excess paint when spraying it.
- We use masking tape to tape off parts of the furniture that are not to be painted, as well as to obtain a smooth edge to the area to be painted.
- We protect our hands with gloves.
- Before using the container, shake it vigorously for several minutes. We spray from a distance of 25–30 cm from the surface to be painted.
- Designers advise boldly using bright contrasting shades, decorating the surface with drawings, as well as decorative elements, colored film and various moldings. The main thing is not to be afraid to fantasize, be creative and realize your most unusual ideas!
Well, a selection of our photos will help you look at old furniture in a new way!
1.
To turn an old dark chest of drawers into an original dressing table, just update it with bright paint. You can purchase new handles for doors and drawers, or clean the finish of old ones using a special metal cleaner.
2.
New interior design is not a reason to replace furniture. Using paint, you can change the shade of a table or chest of drawers, fitting them perfectly into the surroundings. By covering the area around the moldings with masking tape, you can easily paint them the desired color. In this case, golden strips and handles perfectly decorate the white chest of drawers.
3.
A dull, unsightly chest of drawers that you wanted to push into the darkest corner of the dacha can become a real decoration for the living room. To do this, all its elements are painted with white paint. Gray moldings will perfectly highlight the drawers and contrast with the main color. The color composition will be complemented by original silver handles.
4.
Wood is an excellent texture for creating decorative effects. This chest of drawers was painted white, after which the drawers were covered with colored film and highlighted with moldings. New fittings gave the composition a complete look, allowing the old furniture to be updated and turned into an ideal addition to the interior, decorated in light colors.
5.
Don't rush to get rid of your beat-up desk. The white shade will refresh and allow you to update old furniture. And with the help of masking tape, you can experiment and create a pattern on the drawers that will help fit the table into its surroundings. In this case, the color shades of the drawers are ideally combined with the decorative shelves on the tabletop.
6.
In an hour and a half, you can repaint an old cabinet white and creatively decorate its door with black squares. We treat the interior space using an aerosol can with yellow paint. Unusual handles will perfectly complement the new look of your cabinet, which will become a decoration in the hallway.
7.
An old lacquered cabinet from Soviet times gets an updated look with the help of two contrasting shades. Their bold combination is perfectly complemented by thin moldings painted with golden paint. The handles on the doors are also processed in the same way.
8.
To update your grandmother's old chest of drawers, you can paint the frame white and the drawers gray. Then, using a stencil and white paint, we create a magnificent openwork effect on them. New fittings will complement the look. By the way, the drawers can be swapped, after which your family will definitely think that you have purchased new furniture!
9.
An old cabinet can be turned into a great serving table. Aerosol paint will help create smooth color transitions that look impressive thanks to the combination of contrasting shades. A minimum of work - and such a great result!
10.
The updated chest of drawers organically combines light and dark shades. An original decorative element was created on the drawers using masking tape. The hardware looks like new after applying gold paint.
11.
Using stencils, you can easily update old furniture, making it fashionable and stylish. This chest of drawers with an original ship design will now decorate the nursery. Contrasting color combinations look great here.
12.
Old wooden chairs can be easily restored by painting the frames with bright paint and replacing the seat upholstery. In this case, the yellow paint harmonizes perfectly with the golden pattern of the fabric. Original, practical and inexpensive!
13.
You are quite capable of making a bright designer chair! We paint the frame of the ancient exhibit with bright paint, change the seat upholstery and make striped covers to match the main shades. A small contrasting pad – and the harmonious look is complete!
14.
This creative coffee table can be made using a stencil. First, we paint the entire structure with white paint, wait until it dries completely, and then put the stencil on the tabletop and spray it with a bright blue tint. The new table is ready and fits perfectly into the interior!
15.
A shabby wooden chest of drawers is a great opportunity to create something special with your own hands. Bright sunny shades, interesting color combinations and new fittings will help update old furniture and turn it into an original decoration for your bedroom.
16.
An excellent solution: the green chest of drawers are visually highlighted with the help of thin moldings painted white. Using masking tape, you can easily and simply paint thin furniture parts in the color you want. New handles on the drawers complement the attractive look of the chest of drawers.
17.
The old bedside table was changed beyond recognition with the help of bright green paint and decorative film that covered the tabletop. The old fittings were used - they were removed and painted black. Stunning decoration of the original interior!
18.
Skillful hands turned an old bed into a small sofa, with its headboard becoming its back! The structure is painted white, the seat is upholstered in attractive fabric, and cute cushions complete the new look.
19.
Grandma's old chest of drawers turned into an elegant dressing table for a modern bedroom. Delicate pastel colors are complemented by the original design of the decorative film that covers the doors. You can update old furniture very easily, getting great results with minimal effort!
20.
A section of an old Soviet slide was turned into an excellent storage unit. The base is painted white, the doors are covered with a decorative film of pleasant colors and decorated with new fittings. Simple solutions – and global restoration!
21.
If you can draw, you can decorate white dresser drawers with bright designs or intricate patterns. To create them, choose colors that match the shades of the interior.
22.
This folding table gets a makeover with yellow paint and an original pattern on the tabletop. Using stencils, you can create a variety of color compositions that will perfectly fit your updated furniture into the surrounding environment.
23.
The old shabby desk began to look stylish and modern. Unusually designed legs give it an elegant look, and light colors refresh and update it.
24.
Updating old furniture, or rather this bedside table, is easy and simple. It is enough to cover it with white paint, and draw the pattern on the doors with a regular marker with a thick pen, and then fix the result with colorless varnish. You can complete the work by installing new fittings. After all, manufacturers today offer a huge variety of handles and hinges of all shapes, colors and sizes.
25.
If you no longer like the new coffee table, hurry up and get some paint! Using aerosol cans, we change the color of the frame - and now the updated piece of furniture pleases the eye.
26.
Painted with bright colors, this garden group looks fresh and festive. A combination of contrasting shades looks advantageous, as well as bold accents created with the help of multi-colored pillows. Such garden furniture can decorate any terrace.
27.
We clean the surface of the old chest of drawers with sandpaper, removing the peeling varnish. After this, apply primer and paint. In our case, the old fittings only emphasize the vintage style of the updated piece of furniture. Fashionable, creative and tasteful!
28.
Using paint, you can update old furniture and combine tables and chairs from different groups into a single composition. We paint the table white and cover the seats of the chairs with white fabric. Fresh furniture is pleasing to the eye!
29.
Do you want something new? A kitchen cabinet can be changed beyond recognition by painting its frame and drawers one color, the countertop another, and installing new handles. Feel free to experiment with colors and accessories!
30.
Don’t rush to send your old Soviet-era table-book to the landfill. Using stencils and paint, you can create a fancy design on furniture, after which you won’t even need a tablecloth for such a table.
31.
Children's furniture should be bright and attractive! You can update old furniture and create a unique interior with your child by painting the table and chairs. Add more colors and contrasting combinations, interesting designs and patterns. Your baby will sit at such a table with great pleasure.
32.
Old chairs will look like new after painting and reupholstering. Minimum effort – and great results!
33.
This well-worn stool now looks bright and fresh. Pleasant contrasting shades allow you to update old furniture, creating a new look. A comfortable and practical stool will become a real decoration of the kitchen or dining room.
34.
And this is how you can update a stool for a nursery. With the help of bright shades of paint, old and shabby furniture has been made fashionable and creative. Agree, such a beautiful stool has a place in a new nursery!
35.
White interior color is one of the newfangled modern trends. Light furniture looks light and elegant. At the same time, there is no need to spend significant funds - you can update the chest of drawers with your own hands using high-quality paint, making it an effective element of a fashionable interior.
36.
An antique mirror frame will look like new after painting. A spectacular shade will help her regain her former chic, and you will refresh your interior!
37.
Color accents are very important to create a modern interior. You can decorate the room in two primary colors, and use a third to highlight the details. Spray paint can help give objects the desired shade, say golden.
38. 39, 40.
Bright doors will become a real decoration of the interior, emphasizing the excellent taste of its owners. Using masking tape and high-quality spray paint, you can give the door leaf and door frame any shade, even the boldest, and also create an effective combination of contrasting colors.
41.
Feel free to experiment with contrasting shades! Such furniture will reflect your individuality and creativity.
42, 43, 44.
Bright colors, interesting combinations of shades, new fittings - and a shabby chest of drawers is unrecognizable! Updating old furniture is easy and simple with spray paint. All you need to do is choose colors, add imagination and create the interior of your dreams!
45.
Designers do not have the concept of “outdated furniture” - only vintage, which means it is certainly fashionable! Add fresh shades and create an original interior!
46.
Painting tape will help you create creative geometric designs on your furniture. Add accessories to match the chosen shades - and enjoy the new look of your home!
47.
Bright, bold shades will transform old furniture, which in turn will refresh the room and fill it with inspiration. After all, after painting a shabby table, you will want to change everything around it!
48.
You can paint the outside of the shelving unit one color and the inside another color. It will turn out bright, bold and original!
49.
With the help of spray paint and your imagination, you can easily and simply update old garden furniture. The most unexpected decision is sometimes the most correct one. Choose a creative path to create original garden compositions!
50.
Bright, fresh shades of updated furniture will fill you with positivity and bring back a great summer mood. With Motip aerosol paints the world around you becomes more beautiful!
When starting to update your furniture, don't be afraid of minor difficulties that you may have to face. After all, an excellent result will be a reward for your efforts and will inspire you to create a unique, original interior for your home!
Armchair from a chest of drawers
A vintage and stylish chair can be made from an old chest of drawers if you remove several shelves and cut off the walls for armrests. Cover with foam rubber and fabric.
Advice!
To produce armchairs or ottomans yourself, you need to choose foam rubber with maximum density, at least 10 cm wide.
Actions for furniture restoration: sequence
Of course, as is the case with the necessary tools and materials, the sequence of actions may be different, but there is a mandatory order of work that is worth considering if this is your first time dealing with furniture.
Video - Painting wood with an antique effect
Table No. 1. Correct sequence of restoration work
| Stage | Description |
| Dismantling of furniture and fittings | It will be much easier to work with furniture if you first disassemble it into individual elements. Usually they remove the hinged doors, drawers, take out the shelves, and if possible, unscrew the frame parts. The adhesive frame should not be disassembled unless you are sure that you can then connect the parts properly. You also need to remove all the fittings - handles, hinges, locks. Before disassembling the furniture, take photographs showing the fastening points - this will make it easier to assemble. It is better to put the fittings that you plan to put in place into boxes or bags and sign them. |
| Removing paint or other top coating | Depending on the piece of furniture that you are going to restore, you can use one of three ways to remove the old coating: - sandpaper; — construction hair dryer; - varnish remover. Methods can be combined - the main thing is to achieve a flat, smooth surface. At this stage, be sure to use protective equipment against dust, varnish residues, and chemical compounds - wear a mask or respirator, goggles, and gloves. |
| Repairing various damages | Using specialized compounds and products (putty, furniture wax, grout) you need to mask all defects - cracks, differences or unevenness, scratches and chips. The choice of material depends on the amount of damage. So, it is better to fill deep cracks with wax, putty on large worn areas, and rub over scratches and chips. |
| Preparing for the final coating | Before applying the finishing coat to the furniture, you need to level all surfaces again - remove excess grout and matte them. For this, the most delicate sandpaper is usually used, after which the surface is polished with a rag. If you plan to use furniture primer, it should be applied as the last step. |
| Applying the finishing coat | If you want to preserve the structure of the wood, use tinted or colorless products - you can take varnish, stain, oil or wax. In another case, paint (it is better to use water-based paint) or furniture enamel will come in handy. Please note - if you have chosen a bright but light paint, it is better to first paint the furniture white; then a different shade will fit better against such a background. |
| Installation of accessories | The very last step is installing the fittings. You can return old elements to their rightful place, or replace them with new ones. |
New pens can change a familiar thing beyond recognition
Tools and materials
See also:
Hanging bed: do it yourself, design options
To carry out restoration work, you will first need to not only select a varnish, but also prepare some necessary materials and tools.
Of the main consumables you need to take:
- nail polish remover (solution);
- masking tape;
- tassels;
- sandpaper of different grain sizes;
- metal scraper;
- spatulas;
- wood putty;
- rags and brushes for cleaning dirt;
- soft sponges;
- cardboard or film to protect adjacent surfaces;
- regular solvent such as White Spirit.
All work is divided into several stages. This includes preparation, application and sanding.
Preparatory activities
At the first stage, you need to prepare all the materials and conveniently place the tools around you.
Before painting the furniture, it must be brought into appropriate condition. For this:
- the varnished surface is washed with a solution to remove varnish;
- then washed with plain warm water;
- peeled off areas of varnish are removed with a scraper;
- The surfaces are sanded with sandpaper until they become matte;
- dust is removed;
- the furniture is thoroughly dried.
This completes the preparation.
Glamorous option
A glamorous bedside table in a delicate shade is suitable for a girl’s bedroom. To make such furniture you need to take:
- Glaze with glitter or light satin paint in a soft blue color.
- To decorate the door leaf, you need to take straws or light fabric in a small floral pattern. Tapestry, velvet, and brocade are perfect for this.
- Elegant metal door handle.
- For the outer part of the bedside table, you need to take 3 special elements that will play the role of a parapet.
Article on the topic: How to properly connect the installation to the sewer?
For the cabinet you can use a variety of design elements:
- Instead of blue, it is good to use a pale pink or lilac version, but a rich burgundy or fuchsia shade also looks great. It all depends on the overall interior and its color scheme;
- To decorate the door, it is allowed to use gold or silver paint, but in this case, a subtle contrasting pattern must be applied to its background. This is done using a stencil;
- For the top, which can be used as a tray, frosted glass with a pattern works well.
