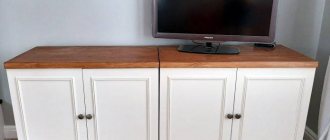
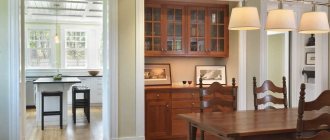
Kitchen tables have their own characteristics. Before starting repairs, it is necessary to conduct a full inspection of this piece of furniture. The strength of the countertop plays an important role. It must withstand heavy loads and physical impact. In this regard, the base on which it is installed must also be strong.
An example of using wood putty, which will help correct all the unevenness of an old countertop
Note! Kitchen tables are not only a place to work, but are also used to store kitchen utensils. To do this, they have built-in drawers, shelves and doors. They deserve special attention.
If the table is equipped with shelves, then you should pay attention to their fasteners. If necessary, you can purchase special caps made of wood or plastic from a furniture store; a thin, durable metal corner can also be used as a fastening for shelves. Pay attention to the condition of the canopies that secure the door. It is best to replace them with new ones, since with frequent use this part is subject to the greatest wear.
Natural wood is given freshness by special polishing agents, which can be found in any hardware or furniture store.
If the table is equipped with drawers, check how firmly their walls and bottom are connected. To make them easier to use, you can replace the fittings with which the drawers are pulled out. You can buy it at a furniture store. You can also buy various types of comfortable handles there.
Advice! When replacing awnings, choose ones that are designed for furniture. They will ensure more convenient and reliable operation of the doors.
When repairing a desk, you should pay attention to all of the above. After watching a detailed master class on remaking old furniture with your own hands, you can repeat it yourself.
An example of a restored bedside table. Now it is a bright element of the interior and a functional piece of furniture in the bedroom
Furniture restoration. What does it mean?
Restoration will help save the situation. The word is familiar to many, but people associated with culture and art understand it best. However, isn’t it an art to give old chairs and stools their former beautiful appearance, to tidy up a sideboard or closet? Carry out a few simple procedures and make them look as if you just bought them in a store.
Moreover, if you think about a new purchase, then even with the most conservative calculations it will be quite a decent amount. So is it worth spending money if you just use inexpensive materials and spend very little time restoring furniture with your own hands?
As a result, you can become the owner of exclusive, original furniture that fits perfectly with the new design of your room or kitchen.
Shelving options
There are different variations of shelving. The difference lies not only in design features. The materials used and their combinations may be different. In each case, there are subtleties of work that are better to find out in advance.
Wood
It’s not difficult to make a wooden rack yourself. For work you will need supports, bars and boards. To secure the structure, metal corners, clusters, and screws are needed. To process the structure you will need impregnation, varnish or paint. The work progress is as follows:
- To begin with, the parts are prepared. If the size of the purchased building materials is larger than required for the intended design, then the dimensions are adjusted by trimming.
- Elements ready for assembly are pre-processed. To do this you will need special impregnation, varnish or paint. The parts are dried before further fastening together.
- At the location of future shelves, metal corners are screwed to the vertical beams. Horizontal supports are attached to them. After this, the installation of the shelf begins. All this is first done with the bottom shelf. By analogy, all remaining tiers of the rack are made.
This is an option for manufacturing the simplest design. It will be more difficult to make a rack with side walls, as well as more complex products. If necessary, anyone can find a diagram, drawings and a detailed description of the work process.
From pipes
The work usually uses various pipe remnants that are at hand. These can be ordinary round variations, but it is better to opt for profiled specimens.
Chrome-plated pipes are preferable for home shelving; in other cases, you can get by with what you have in stock.
You can use different materials for shelves. Most often it is plywood or boards.
Fittings, angles, and tees are used to connect parts. Flanges are used as wall mounting and legs. Working with metal is more difficult. This requires special knowledge and tools. The structure is assembled according to the diagram.
From profile
To make the racks, a metal profile is used from standard galvanized elements made of material with a thickness of at least 0.5 mm.
Characteristics are selected based on the loads to which the structure will be subjected.
Self-tapping screws with a press washer are used as fasteners. They press well to the metal surface. For shelves you will need plywood, board or OSB. Before starting work, be sure to make a drawing, which will become a guide in the process of assembling the structure.
From boards
Before starting to assemble a rack from boards, a drawing is made, as well as materials are prepared. When the cut to the required dimensions is completed, marks are placed on the boards of the side parts for future shelves. At these places, corners are attached to fix the guide shelves.
If necessary, install the side and rear panels of the structure. It is recommended to further strengthen the fastening with self-tapping screws using wood glue. The finished structure is sanded and treated with varnish or paint as desired.
The shelving unit is a popular piece of furniture. It is used in the home interior, as well as for auxiliary household purposes. There are different types of racks.
Elementary variations are easy to make with your own hands. No special knowledge is required to perform the work. Having familiarized yourself with the different ways of making shelving, you will be able to quickly choose a suitable design.
Preparation as the basis of work
Any business requires careful preparation; this is necessary for a high-quality result. This also applies to furniture restoration. Before finishing, you always need to prepare the surface.
Since the body is often made of wood, the following steps are carried out during preparation:
- Carefully inspect the surface to identify various large and small defects.
- Warmly wash away contaminants using detergents. Dry the surface.
- They dismantle the furniture. This greatly facilitates the further process and preserves intact the elements that are not subject to alteration.
- If the part that needs to be corrected does not come off, then everything else is covered with film and sealed with tape. After this, the remaining part can be safely restored without fear of ruining the rest.
- Restoring upholstered furniture requires a more careful approach. The upholstery is removed very carefully. A pattern is then made from it using new material. The packing is also removed and replaced.
Removing the polishing layer
If there is polishing that needs to be removed, you need to:
- Use a special liquid composition.
- Use paper towels or napkins;
- Work with a brush made of natural bristles;
- Use steel wool, coarse sandpaper and a spatula.
During the work itself, the binder composition is poured into a mug or into a container with a wide neck. Apply a thick layer to the surface with a brush containing the mixture. After some time it softens and is removed. Use a spatula to carefully scrape off the residue, always along the wood fibers.
The procedure is repeated until the entire surface is completely cleaned. In this case, additionally use steel wool and sandpaper. At such a moment, it is better to have rubber gloves on your hands, and to avoid inhaling harmful fumes and not clogging your respiratory tract with fine dust, wear a respirator.
Detected cracks are masked with soft wax, selected according to the shade, rubbing it into the surface. To smooth out chips and gaps, putty is used; after complete drying, the surface is sanded with sandpaper. The varnish is applied only after the entire structure has been carefully processed and primed.
If a beginner has to do the work, it is best to use visual aids on a specific topic. Carefully study all aspects, view photos of the restoration of old furniture.
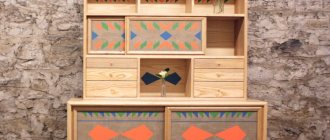
Restoring an old bookcase
I want to talk about my first restoration experience. I know that there are many professional artists, but the good thing about the Theme Fair is that here absolutely everyone can talk about their own personal experience.
I once saw a friend’s rack where she kept all her paints, napkins and other things necessary for decoupage and needlework. But I keep everything in the corners! And I liked the idea of a shelf or bookcase so much that I “went online” in search of suitable furniture. What I liked was expensive. What is inexpensive, did not fit into the interior of the room. I was considering IKEA options. And it didn’t “appear” to me at all. And then a friend, shyly, said that there was a bookcase in the courtyard of their parents’ house. It was still left over from her husband's grandparents. But since it has been standing on the street for a long time, then... Well, of course I’ll take it! Whatnot! Antique! This is not trash and not even vintage, but almost an antique! 
And so my friend’s eldest son brought this bookcase, called and left. I go out, and she, my dear, is standing by the garbage chute. A friend later said that her family scolded her for giving away such rubbish - it was a shame. Thank you for agreeing to take her in your cool car!
This is how she was at the beginning of our “acquaintance”.
Mold, dust, cracks, some dark circles. The plywood peeled off due to dampness, and the dog gnawed the corners of the lower shelves. The legs were rotten from dampness.
First, I washed my beauty from dust and mold. I put it in the bathroom, turned on the shower and washed and washed. The flowing water was very black. Then I put it on the open balcony to dry. Since last year’s summer, unlike this one, was hot, the whatnot dried out quite quickly. I decided to remove the plywood from those shelves where it had completely peeled off.
Then she armed herself with a metal brush and began to remove the remaining varnish. Now I use a drill with an attachment for this, but then I used it manually. With a drill I could have done it much faster, and I wouldn’t have stripped my hands. So, if you don’t already have a drill, buy one. Let it be a small drill, especially for us women needlewomen.
And after everything unnecessary was removed (dirt, mold, old varnish, peeling plywood), the long process of gluing together what could still be glued began. To do this, I needed PVA glue, office clips and old coasters for dishes. These are like cork on one side and a pattern on the other. In principle, any hard, straight surface of something will do. I coated the peeling edges of the shelves inside with PVA glue, placed a stand on top of the shelf and a stand on the bottom and fastened them with office clips. In narrow places I made do with just clamps. Even clothespins were used.
And so, step by step, I glued all the edges. Now we had to deal with the gnawed corners and rotten legs. Good friends suggested how this could be done. I'm sharing! You need to take wood dust, which can be found in any woodworking shop. It is collected after polishing wooden products. Mix this wood dust with PVA glue and voila!
I'm lucky. My friends at that time had a small furniture production shop and they brought me a jar of oak wood dust. To level the chipped (gnawed, rotted, torn off, etc., etc.) places, you need to take any spatula and, gradually, applying a mass of glue and wood dust, set the contour you need. The mass should not be too liquid or too dry. I knead by eye. There is no need to apply a large amount at once. All this will sag. It is better to do this in several stages, each time sanding and applying new layers. The diluted mixture will keep well for several days if you wrap the container in a plastic bag.
Restored the corners, legs, contours of the balusters, covered up cracks and chips. When all this “dirty” work was completed, I thoroughly sanded all surfaces. Once again I would like to note that with a drill all this would be faster, better and easier. And finally, the most creative, but not the easiest stage began. Step by step I coated all surfaces with wood stain.
Wood impregnation is a special composition for wood processing. It not only gives the wood color, but also protects the wood from damage by putrefactive fungi, black mold and various insects. There are colors for every taste. I chose "Tick". Of course, you could use regular stain. Moreover, the bookcase will no longer be standing on the street in the rain, but in the apartment. And stains are much cheaper. But let everyone decide for themselves what material to work with. I decided like this! After processing, the bookcase already looked great!
After that I coated my beauty with a good yacht varnish. Why yachts? Firstly, it gives a certain color, and secondly, I spent so much effort in order to bring this thing back to life that I wanted to make it a “masterpiece”, for centuries. Finally, when the varnish had dried, I tried to slightly disguise the dark stains on surfaces. I took the stencils and painted the designs with gold paint. Even a stencil for the dial was used. And this is what happened. I gilded the corners to hide their imperfections. I gilded the edges of the shelves.
And now my beauty stands in the “red corner”, pleasing my eyes. And, of course, I didn’t put my bottle jars on it, which was so beautiful, but I placed all my crafts on the shelves. I hung my embroidery on the wall. I walk and admire it.
It took me the whole summer to restore it. After all, I had no experience in restoration work yet. You can’t work on an open balcony in the rain or heat. And you also had to go to work and do household chores. This and that. But, as they say, “The one who walks can master the road.” And I wish everyone to discover themselves in some area of creativity. Try it even if you have never done it before. Try it, experiment. It's so interesting!
Basic techniques
At the last stage of decoration at the time of restoration, they resort to not only painting compounds and varnishes. Currently, many professional designers and furniture makers like to use various technical techniques in this matter.
With their help, they sometimes manage to produce absolutely vintage and exclusive elements from completely nondescript items. The following methods are distinguished:
Painting with paints
The most accessible and simple method. In other words, painting with paints and varnishes. The color is selected to match the general background of the room in which the restored object or a certain decorative element will be located.
A thin layer of paint composition is applied to the prepared surface. The work uses a stencil with a specific pattern or design. After drawing the contours, the stencil is removed and the drawing is painted.
DIY shelving: diagrams and drawings
The principle of making a rack with your own hands depends on the chosen design.
The simplest options are stationary and collapsible blocks with shelves. This is a structure of transverse supports and vertical posts.
In one case it is strengthened and immovable, in the other it suggests the possibility of easy changes to the design. The transformation occurs mainly due to the ability to change the level of the shelves. This is achieved by using perforated metal for the base.
Mobile and rotating racks offer expanded functionality, but not everyone can make them themselves. To decide on the design, you need to clearly understand the purpose of the item and take into account the dimensions of the room.
In any case, work begins with choosing the type of rack. This will be followed by drawing up a drawing. Even if this is a simple option, a diagram marking the parameters of the future product will be required to complete the work.
Each component of the item is assessed in detail and included in the drawing. Having completed a schematic representation, it becomes possible to evaluate the upcoming result and make the necessary adjustments in time.
The next stage of work will be the purchase of materials and preparation of tools. Everyone here has their own strategy.
Having gone through all the preparatory steps, they proceed directly to production. First you need to prepare all the details. The blanks are made according to the scheme and previously specified parameters.
After this, the frame is assembled, which is subsequently supplemented with shelves. They act strictly according to the planned scheme. In this case, the likelihood of needing alterations is minimal.
Craquelure
Here there is a combination of two methods at once: decoupage and varnishing. Furniture is thus finished in an antique style. To do this, apply a varnish layer and leave it until completely dry, then apply craquelure varnish on top.
After drying, small cracks form, very similar to antique ones. At the last stage they can be gilded with gold paint.
Veneering
The name of this technology comes from the main material – veneer. These are thin wood sheets from different species. From them, according to preliminary measurements, elements are cut out.
Using simple PVA office glue, they are glued to a surface that has been prepared and primed. A hot iron is used to smooth the surface.
Required tools and materials
Before starting any work, you need to prepare everything you need - buy material, tools. The list consists of the following:
- Furniture fittings;
- Putty material for wood;
- Facades, if necessary;
- Paint or stain (preferably spray);
- Construction knife;
- Construction hair dryer;
- Screwdriver;
- Sharp scissors;
- Iron;
- Self-adhesive furniture film;
- Wax for furniture of different consistency;
- Candle;
- Spatulas;
- Rags, clamp;
- PVA glue;
- Wood varnish;
- Felt pen;
- Edge for processing ends.
This is not the entire list of materials and tools, since you can update old furniture in several ways, each option has its own specific set of necessary tools.
Patching
This method allows you to give old furniture nobility. The birthplace of this concept is Italy. It is based on the formation of a specific plaque, similar to formations after the oxidation process on bronze and copper objects.
- Curtains for the kitchen - 120 real photos of new designs. Options for the ideal combination of modern curtains in the kitchen interior
- How to diversify your home interior: DIY decor and beautiful design ideas
- How to hang curtains - step-by-step instructions with photo examples and recommendations. Exclusive curtain design solutions from experienced craftswomen
Currently, the main colors used to give wood furniture a distressed look are gold, silver and copper.
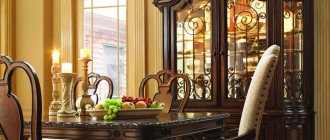
Restoration items
For the most part, restoration includes old sideboards, chests of drawers, cabinets, tables, high-back chairs, stools and all other items whose lifespan is estimated in decades. It is not surprising that over time they become unusable. Having studied all the restoration techniques, many people come to the aid of their “mute household members”
The old sideboard is cleaned of peeling varnish, freed from all defects and, after carrying out the already familiar operations, returns to a new life. Since the surface is very wide, in such work they sometimes use not only brushes of various widths, but also a roller. The main thing is to ensure that there are no leaks or small bubbles.
Types and purpose of racks
Some variations of shelving are suitable for use in a residential interior, while others are appropriate exclusively for household purposes.
They differ not only in appearance, but also in design features and materials of manufacture.
Typically, a shelving unit for a garage or balcony is simpler in appearance, but stronger and larger. Instances for storing books, disks and small items can be more elegant and interesting.
To the garage
A shelving unit in a garage is an important piece of equipment for a comfortable workspace. Often the storage system here is made continuous along the entire perimeter of the walls. In most cases, the choice falls on simple stationary shelves from floor to ceiling.
With this option, it will be easy to place everything you need. In addition, small mobile and rotating racks can be used. Typically, structures are made of metal or wood, and the materials are often combined.
Before making shelving in the garage with your own hands, it is important to make all the calculations. First of all, the dimensions and arrangement of elements are determined. Typically, the frame for attaching shelves is made of metal guides.
They are attached to the wall using dowels or special screws. The shelves can be bolted or welded depending on the material chosen. Do not forget about painting the structure, this will extend its service life.
To the balcony
By analogy with a garage storage system, it is easy to create a structure on the balcony. Here you can make shelves secured with guides to the wall. Such a stationary system will provide a secure storage location.
In a space that is used not only for storing things, they prefer to install more aesthetic options. Most often these are reinforced or free-standing wooden products.
This would be an ideal solution for a balcony. It is not necessary to make complex designs. A simple but neat shelving is most relevant here.
On the shelves of such a piece of furniture you can store everything: from food preparations for the winter to decorative elements.
To make such a piece of furniture for the balcony you do not need to have any special carpentry skills. Everything is elementary, but the work requires attention.
If it is possible to understand the intricacies of implementing complex options, then you can make a beautiful rotating rack, convenient pull-out shelves, or think through design features taking into account individual desires and needs.
For books
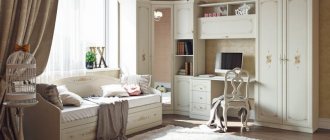
A bookcase, although a common element of home furnishings, should not have any special aesthetics or design features. Most often this is a standard simple set of shelves on a base.
A typical material for making such things is wood. Metal and plastic are used less frequently.
The external features of the bookcase depend on the style of the interior in which the item is intended.
Popular design trends do not involve the use of complex structures. If necessary, instead of elementary stationary products, mobile, rotating models are made.
The more complex the format of a thing, the more effort will have to be put into making it. If you wish, you can study the operating principles necessary to complete a special model. Without carpentry skills, the result cannot be predicted.
For flowers
A popular type of shelving is the option for plants. This is a structure that can stand alone or be placed in a window opening.
Such racks are convenient for displaying not only numerous decorative indoor plants, but also seasonal seedlings. They even set up a home garden on such shelves.
The flower rack can be installed on the floor, table, attached to a wall or inside a window opening.
For the manufacture of such structures, materials that are resistant to moisture are used. The basis can be not only wooden blocks, but also pipes.
Shelves can be either wooden, metal or durable glass. Popularity belongs to simple variations. In complex designs, shelves can be pulled out, there may be built-in lighting and other functions that simplify operation.
Mobile rack
Mobile shelving would be a great idea for young, dynamic people. They make it convenient to change the space as needed. Mobile racks include:
- Large movable structures. These are options that are not fixed to the wall. Typically, shelving units on wheels fall into this category.
- Compact variations. These are portable shelves for various small items. They are usually installed on a table.
- Items with mobile type design features. Racks can have roll-out, rotating, or removable shelves. A thing can change its initial configuration in different ways.
Mobile shelving is often more difficult to make with your own hands than stationary variations. Not everyone can cope with technical difficulties.
Suspension
Another option for shelving is a suspended structure. Roughly speaking, these are ordinary connected shelves with several sections.
The design is very popular where the usable area is very limited.
Mounting to the wall makes the structure stationary. Hanging rack shelves can have different designs. Simple variations are easy to make with your own hands.
Restoration of chairs and stools
Everyone knows that kitchen furniture wears out the fastest, since this is where many people like to spend most of their time. Here, unfortunately, sometimes you don’t need to wait several decades to understand that upholstered furniture requires repair.
And if you try hard, she can regain her attractiveness. Moreover, it still performs its functions perfectly.
To tidy up a stool with a soft seat, you need to very carefully remove the upholstery from it. If the furniture upholstery is good enough, then you can leave it and, proceeding as described above (protect all elements of the stool that are not subject to restoration), begin restoring the legs.
- Curtain tiebacks - 150 photos of new exclusive designs
- Do-it-yourself tulle - step-by-step instructions on how to sew beautiful tulle. Photos of ready-made ideas and modern design
- Curtains for gray wallpaper - options for the ideal combination of curtains in a gray interior (TOP-150 photos of new designs)
In the event that the old fabric or leather of the seat is no longer suitable for use, patterns are cut out of them in similar sizes. Also, a piece of foam rubber is cut to the size of the seat, which is then attached to it with small nails.
Finally, the furniture is reupholstered with either prepared fabric or leather. The result is an updated kitchen and, most importantly, without any costs.
Chair repair
It’s hard to imagine any home without chairs. Today it is such a commonplace item that few people pay attention to it. This can happen in two cases - either when the chair is properly designed as an interior item, or when it breaks. We will look at how to get from the second option to the first.
An option for restoring old armchairs with covers in a vintage style
The chair consists of three main elements:
- legs;
- seats;
- backrests
All of them can fail sooner or later. If the breakage is caused by the legs, then they must be firmly secured, as otherwise the use of the chair becomes dangerous. If the seat is broken, it can be replaced by cutting out a corresponding piece from plywood or fiberboard. The same can be done with the back. You can also make the stool soft if desired. To do this, soft foam-based upholstery must be attached to the seat and backrest.
Advice! If you decide to install or replace the upholstery on a chair, it is best to use fabric stitched to the foam. You can find one in a textile store, and you should attach it using a construction stapler.
Photos of the restoration process of old furniture
Did you like the article? Share

0