Owners of summer cottages know that it can be difficult to cope with insects on their own. This problem can be solved much better and faster with the help of starlings. But in order for them to live in the desired area, you need to take care in advance and make several birdhouses. By the way, not everyone knows that not only starlings, but also other birds can live in such structures. Therefore, you will learn how to create a simple birdhouse with your own hands right now.
What can you make a birdhouse from?
Every spring, birds fly from warm countries. It can be difficult for them to find housing: old birdhouses are often destroyed and trees are cut down.
Birds help nature and people. They fight insect pests and their larvae and protect trees. In addition, they make people happy by singing and give joy. Our job is to take care of them. The simplest thing we can do for them is build birdhouses.
Birdhouses not only serve as homes for different types of birds, but are also a decorative element in garden and park landscapes. You can find birdhouses made of a variety of materials and bizarre shapes.
What materials are birdhouses made from:
- The most famous and reliable material is wood.
- Plastic.
- Cardboard.
- Metal.
- Plywood.
Important: The right house for birds is one that is made of wood. Other materials are not suitable for providing comfortable living for birds. Birdhouses made of chipboard, cardboard, and plastic serve for decorative purposes and are located in places where rain does not penetrate.
The right birdhouse: what is it?
Instructions
Having studied the sizes for birds, and having prepared all the necessary materials and tools for a birdhouse made of wood with your own hands, you can safely proceed to the next steps, namely making a house.
- Mark the boards with a pencil and tape measure.
- Use a hacksaw to cut the resulting boards.
Important! The roof should extend beyond the base of the birdhouse to prevent precipitation from getting inside.
- Use a drill or jigsaw to cut a hole (entrance for birds).
- Outside (at the joints) it is necessary to drive nails.
- Place a bird perch under the hole.
After making sure that all the parts are present, you can begin to fully assemble the house.
Dimensions of birdhouses and hole diameters for wagtails, titmice, and various birds: table
Wood is the only natural material that can provide birds with protection from the cold and rain. Let's not forget that birds are part of nature, and they are not adapted to life in an artificial environment.
What characteristics should a tree have:
- The most suitable types of wood for birdhouses are birch and oak.
- Pine trees are not suitable for these purposes because they emit resin.
- The thickness of the boards must be at least 2 cm to retain heat.
- The inside of the birdhouse must be rough so that it is convenient for birds (especially chicks) to get out of the house.
- Boards should not be fastened with glue; it can release harmful substances.
- There should be no nails or screws protruding from the boards, as this could injure the birds.
Let's talk separately about the size of birdhouses. Birds come in different sizes, which means that houses must be the right size for different species.
Table 1 “Sizes of birdhouses for different birds”
| Bird species | Taphole diameter (cm) | Bottom Width(cm) | Front wall height (cm) | Back wall height (cm) |
| Tits | 3-3,5 | 10-12 (square) | 22-25 | 28-30 |
| Wagtails | 5 | 40*15 (rectangle) | 15 | 18 |
| pikas | 6 | 16-18 (square) | 22-26 | 28-32 |
| Flycatchers | 4 | 10 (square) | 7 | 14 |
Features of bird houses:
- Wagtails will choose a house in the form of a rectangle with a threshold in front of the entrance, because this bird likes to trample in front of the entrance to the house.
- Pikas settle in birdhouses with two entrances. This helps them escape if cats attack.
- The flycatcher likes to settle in a semi-hollow - a house that looks like a natural hollow in a tree.
How to make a nest box step by step
House for flycatcher Birdhouse for wagtail
Examples of design solutions
Let's take a look at the best birdhouse ideas for birds. You can easily do some of them yourself.
Bird Photo Booth Photo Booth and Bird Feeder. This option is ideal for all bird lovers. You can get cool photos taken in a variety of modes - burst, macro, time-lapse, etc.
Winsor Pop feeder. It is a small ceramic tire. Designed for both birds and squirrels. Outwardly it resembles a children's swing made from car tires.
Veseys. The beauty of the feeder lies in the simplicity and laconic design. If you decorate it with ribbons, you can get a real Christmas wreath.
Birdhouse from Nendo Bird-apartment. The project was developed by Japanese designers. This is a whole tree house with one entrance for people and 78 holes for birds.
The internal space is divided by a partition with several “eyes”, allowing you to observe the life of birds from the inside.
Clas Olhson. The Swedish development is not just a birdhouse. This is a kind of mini cottage with furniture, a lawn, perches and stairs.
Eschert Design. The Dutch created a series of “tea sets”, consisting of a teapot and saucer. The teapot is designed to fill the food, and the plate plays the role of a drinking bowl.
Fancy. The moon-shaped feeder is convenient because you can immediately see how much grain is left. In addition, it brings a touch of romance to the surrounding atmosphere.
How to make a birdhouse from 8 mm plywood: drawing with dimensions, step-by-step instructions, photo
Important: For the birdhouse, you can use unsanded waterproof plywood. Water resistance means there is no need to treat the walls of the birdhouse additionally. If you have sanded plywood, make notches on it.
The process of making a birdhouse from this material is standard:
- Draw a drawing of the parts using a simple pencil and a square.
- Cut out the parts with a hacksaw or jigsaw.
- For the tap hole, drill a hole so that a jigsaw file fits into it. Next, cut out the entrance in a circle. You can drill out the tap hole with a file.
- Sand the cut lines with sandpaper.
- Mark the locations for the screws and drill holes.
- First, assemble the front wall of the house by attaching a perch to it.
- Then connect the walls together.
- Finally, attach the bottom and roof.
- Nail a long piece of wood to the back wall for further installation of the birdhouse.
Birdhouse project Cutting out the entrance Assembling the birdhouse parts This is what a birdhouse made of plywood looks like
Requirements for birdhouses
Bird houses should be comfortable and safe for their residents. And people also want the visual appeal of their products. Therefore, when deciding to start building birdhouses, you need to try to find a middle ground.
What can you make a house for birds from? It is best to use wood. And not coniferous species. The optimal choice is oak, birch, alder, maple.
Some craftsmen manage to create something worthwhile from plywood, cardboard and even plastic bottles. But all these materials are inferior to natural wood in terms of environmental safety and aesthetics.
How to make a birdhouse from a cardboard shoebox: step-by-step instructions, photos
As you already understand, birds are not stupid creatures. They choose a reliable home that will protect them from rain, cold, and predators. It is for this reason that a birdhouse made of cardboard should not be taken seriously, but as a decoration, yes.
If you have a cardboard shoe box lying around, don’t rush to throw it away. You can give it a second life by building a decorative house. Compliance with the dimensions is not important here, because birds will not settle here.
Step-by-step production of a birdhouse from a cardboard box:
- Cover the edges of the cardboard box with tape to prevent the edges from falling apart over time.
- Mark the taphole with a pencil.
- Cut it out using a utility knife.
- Decorate the box.
- Attach it to a tree or under a roof.
Cardboard box birdhouse
Bird house made of cardboard
It is quite possible that birds will choose your cardboard house as a feeder if you regularly put treats there in the form of seeds and bread crumbs.
Feeder out of the box
Assembling a birdhouse
- We screw the side walls to the front wall using self-tapping screws from the edge to the center of the birdhouse.
- To round the corners of the bottom, you can nail a glazing bead.
- We attach the bottom and roof to the foundations, based on the chosen design.
- The roof must be removable to allow washing and changing feed.
- To join the planks and make the roof look beautiful, nail a corner of approximately 30x30 cm on top.
Important! Do not forget to fasten each part with a self-tapping screw or nail, so the house will not fall apart during any interaction with it.
How to make a birdhouse from a juice or milk carton: step-by-step instructions, photos
You can very quickly and easily make an analogue of a birdhouse from a package that contained juice or milk. To do this, you will need an empty juice or milk carton, scissors, rope or wire for fastening.
Step-by-step production:
- Cut two holes in the box. Two holes are made so that the bird can quickly fly away if it is in danger.
- Make small holes for the rope or wire and thread the rope through.
- Secure the tree house.
If you apply diligence and use your imagination, you can make a bright, colorful, original house. Ideas in the photo below.
A milk carton feeder that even children can make Decorative birdhouses from juice boxes
How to make a birdhouse from wine corks: drawing with dimensions, step-by-step instructions, photo
Wine corks are a good material for making a birdhouse. Due to their density, they allow the house to remain dry even during rain, and also serve as additional insulation.
- The easiest way is to glue corks onto the finished birdhouse using hot glue, which also serve as original decor.
- It is not advisable to hammer the plugs into the birdhouse with nails - the sharp ends of the nails can injure the birds.
Birdhouse insulated with wine corks
You can make a decorative birdhouse. For this you will need:
- Traffic jams;
- Hot glue;
- Cardboard.
Step-by-step production:
- Glue the corks together with hot glue. Take an equal number of corks on each side of the house.
- In your design, leave room for a tap hole.
- To make a roof, glue corks onto cardboard.
- Attach the roof to the house.
- Decorate the birdhouse as you wish.
Birdhouse made from wine corks
Decorative birdhouse attached with wire to a tree
Safety precautions
- Use linen gloves to avoid driving the splinter.
- Wear safety glasses to prevent sawdust from getting into your eyes.
- The working tool (knife, saw) must be sharp. Remember that a blunt tool can easily injure you; it is poorly fixed in the wood and tends to slip off.
- Check the functionality of power tools.
- Use a ladder when hanging the finished birdhouse.
- If you want to paint the birdhouse, use unscented, water-based paint that is not bright in color. Try to make the bird house invisible to predators.
How to make a birdhouse from newspaper tubes: drawing with dimensions, step-by-step instructions, photo
Another material for decorating birdhouses is newspaper tubes. You can find out how to make them in this article.
Wicker bird houses Weaving from tubes
How to protect a birdhouse from cats, squirrels, magpies: tips
- Experienced people advise placing birdhouses away from trees, on poles.
- The birdhouse should be located at a height of 4.5 m.
- A tin collar attached to a pole can serve as protection against cats.
- You can also make a barrier on the pole in the form of a roller of barbed wire.
- The design of the birdhouse must be correct: a long canopy will not allow a magpie, squirrel or cat to stick its head into the entrance.
- The perch in front of the entrance should not be made too long, otherwise a predator will easily settle on it.
- The diameter of the taphole should be no more than 5 cm, and it should be located almost at the roof. A large canopy will thus protect the predator from entering the house.
Material used
The choice of material for a birdhouse must be approached very carefully.
Recommended:
- aspen;
- oak;
- birch;
- wood fiber boards; wood chips;
- plywood.
Cardboard can be used, but the shelf life of such a product will be reduced to several months, but deciduous trees are the best option.
Not recommended:
- pine;
- Christmas tree, pine needles.
On this basis, the entire birdhouse will be covered in sticky resin, so coniferous trees will harm the birds more than they will benefit.
If you only have such boards, then before work you need to dry them and let them sit for several weeks.
Additional material:
- nails 4 cm;
- water-based paint;
- hacksaw (jigsaw);
- ruler or tape measure;
- hammer;
- a simple pencil or marker;
- drill (mill - 5 cm);
- brush.
Is it possible and how, what color to paint a birdhouse with gouache, what to draw on it?
If you want birds to live in your birdhouse, do not paint or decorate it with colorful decorations. Feathered friends do not care about beauty; for them, protection comes first. A bright birdhouse will attract cats.
A decorative birdhouse serves primarily for beauty. Therefore, when creating it, it is appropriate to use all kinds of decorations and paint.
For painting you can use acrylic paints, gouache, and oil paints based on drying oil. Gouache is very easy to use as it dries quickly.
In order for gouache paint to lay flat on the surface, you need to follow a certain sequence:
- First, use sandpaper to sand the surface on which you will apply the paint.
- Then apply the base - white acrylic paint. Wait until completely dry.
- The next stage is drawing a sketch of the drawing and painting with gouache.
- Wait for the gouache to dry completely, and then open the drawing with varnish.
- It is advisable to apply the varnish a couple of times.
If you don't know how to draw, you can use stencils. Simply transfer the pre-prepared templates onto the birdhouse using a pencil, and then paint with a brush.
What can you draw on a birdhouse? Everything your imagination tells you - birds, flowers, patterns, butterflies, grass and trees, abstract patterns. There is no limit to perfection. You can see examples of drawings on birdhouses in the photo below.
Birdhouse with drawings
How to paint a birdhouse with gouache
Painted birdhouses
in bird houses.
Very often you can see WRONG birdhouses made with errors. Such beautiful painted bird houses are certainly cute and beautiful, but the birds don’t want to live in them. And the houses just hang empty on the tree - purely for decorative purposes.
Let me tell you what mistakes craftsmen make in making birdhouses. So that the bird house made by your own hands is not only beautiful, but also initially correct . Then the birds will like your homemade birdhouse at first sight.
MISTAKE #1
entry hole too low.
The window-door in the birdhouse must be located at a height of at least 30-40 cm. This height is needed so that the bird has the opportunity to create a nest at the bottom of the house.
By the way, the photo above is an example of another fastener - a metal U-shaped bracket is nailed to the roof of the bird house (like an eye for latch bolts).
Look, on the transparent birdhouses in the photo below we can see that the bird is dragging more branches into the house. And if the window is low, the branches will block the exit from the house and it will be impossible for the bird to get out of it. And the bird itself does not want to sit in a nest where its head will be level with the window, it will be so anxious. It is much safer if the window is high - and the wind does not blow on the wet, unfledged chicks, and the mother bird feels safe.
By the way, the photo above shows the original model of the birdhouse, the back wall of which is made of glass with suction cups. Such a house is mounted on a window in a large house and you can watch the birds settling in the nest. You just need to comply with the condition - a window. In the place of the window glass where you plan to mount such a birdhouse on suction cups, you must first seal it with tinting film - so that the birds do not suspect third-party observation.
MISTAKE #2
hole too big.
Starlings will not settle in a house with a door large enough for the cat's head. Cats love to climb trees in search of nests of defenseless chicks. And such a house with a large hole is easy prey for them.
The small hole of the birdhouse was not invented in vain. The cat's head and paw should not fit into the hole, but starlings and other birds should calmly climb inside. Therefore, when you make a birdhouse with your own hands, make a small hole in it.
Only if you live near a forest line and are making houses for owls flying in the vicinity, then a large hole will of course be appropriate.
MISTAKE #3
BRIGHT COLORING of a birdhouse.
If you do not live in a blooming jungle, and if the house you are planning is not designed for parrots with bright plumage, there is no need to paint it in bright colors. Birds trust only natural colors and natural materials. This birdhouse is good to use as a designer piece for your living room or as a piece for a competition for a school or kindergarten. But birds will not live in it.
Mossy, aged houses are much nicer for feathered mothers than sleek, glamorous, smoothly planed apartments.
And if you want your bird house to be original and beautiful, then know: you can make a decorative glamorous design in natural shades. Here in the photo below is just an example of such a house, which at the same time looks chic from an aesthetically human side and does not scare away birds at all with its bright colors.
But the houses that are dearest to the feathered heart are those that are maximally disguised as an ordinary hollow in a tree. After all, starlings initially settled in hollows. From time immemorial it has been this way - it is embedded in their bird genes: to look for a hollow. So make them an artificial hollow from slabs of rough bark ( sold as firewood).
Or take your house made of planed boards and additionally decorate it as a living hollow - cover (or glue) it with twigs, branches and pieces of bark.
Birds love houses made of unplaned wood, with elements of bark and rough branches.
MISTAKE #4
There is no bird stand.
It is inconvenient for birds to climb the smooth boards of a wooden house. It's hard for them, their little claws slip off.
This is especially important for the INNER SIDE of the walls of the birdhouse. It is better to line the inner front wall with small slats-ladders (so that the bird inside can climb along them to the exit window).
Or nail a piece of bark, or an old grater, or, in short, any ribbed and rough surface to the inner wall of the birdhouse. Or place a short inclined board inside the birdhouse (from the bottom to the window) so that the bird can climb up this slide to the exit of the house.
Also, if the outside of your birdhouse is made of smooth planed boards, make sure that the bird has a footrest.
These could be simple twigs or branches that you cut while pruning apple trees in the garden.
These can be river pebbles glued with hot glue from a glue gun. Or, instead of pebbles, you can stick on logs of branches (cut them into round saw cuts and paste them over the house).
Any old, rusty thing from the barn is suitable as a stand for the birds' legs - a door hinge, a valve from a water pipe, a faucet, a reel from an old fishing rod, a rake, an aluminum fork, a key. Anything can become a perch-stand in a homemade birdhouse.
Such things will only add originality and creativity to your simple bird house.
WHAT ELSE
we can
HELP THE BIRDS.
In addition to hard branches, to build a nest, birds need soft material - tufts of dry grass, moss, feathers, rag debris, pieces of paper, which they collect everywhere themselves, spending long hours on low-level search flights.
Why not make the bird's work easier and place a construction warehouse next to the bird's home. Housewarming in your birdhouse will come much earlier if everything you need to create comfort is located next to the house.
You can collect bunches of grass yourself, tear the cotton wool into pieces and place it in such a way that it is easy for the bird to pull out pieces of material from this construction warehouse. There is no need to tie the grass into tight bunches with thread - the bird will not be able to pull the grass out of the tight bunch. You need to make storage out of a mesh container.
You can hang a box with rags, cotton wool and moss nearby. To prevent the wind from blowing the material away, the box can be covered with a mesh (metal) or a plastic mesh, which we place on the bottom of the kitchen sink.
Or weave and twist balls from flexible branches and insert cotton wool, centipon and pieces of chopped newspaper or toilet paper inside such woven balls.
Even holders for bird fleeces and rags specially made for this purpose are sold. They are installed or hung next to birdhouses.
Material for the construction of birdhouses.
The MATERIAL for the house must have the correct characteristics of thickness and texture.
THICKNESS. Boards 2 cm thick. This thickness of a wooden board will better retain the heat of the house. After all, nests are built in the spring, when the nights are still quite cold and even frosty.
TEXTURE. As I already said, the boards should be rough (slab boards with unplaned bark are suitable). And if you only have smooth planed boards, you can stuff pieces of bark on them with nails and stick them on liquid nails (thick adhesive from spray cans).
Or create artificial roughness - scratch the inner wall of the birdhouse with a knife - make notches for the bird to cling to. Or nail pieces of bark onto the inner wall, several slats one after another like a ladder, or nail a grater or a piece of insulation (it is made of foam and it will also be convenient for the bird’s claws to climb on it).
You CANNOT make houses from glue boards (plywood, chipboard, fiberboard - these materials contain adhesive resins, they emit toxins that the birds may not like. I don’t know whether it’s true or not, but they say that resin pine boards are also not suitable for a birdhouse, which In the warm sun, the resinous board heats up and releases stinking resin, and that this is supposedly harmful to the birds. I haven’t checked it, I can’t presume to say.
Now I will give diagrams and drawings of simple houses. But I’ll immediately make a reservation that your designs can be completely different in shape and size. You are free not to adhere exactly to the outline from the project below. As you already understood from the photographs above, there are a variety of houses.
But the logic of the sizes must be preserved... And this logic is as follows.
What are the dimensions of a proper birdhouse?
The size of the window hole (called a tap hole) is no more than 5 cm in diameter. So that the crow cannot stick its head into the birdhouse and eat the chicks. And the cat's head didn't get in there either.
The height of the entrance window is at least 20 cm from the bottom of the house. So that the wind from the window does not blow on the nest of the chicks, and that the chicks are not near the entrance - because of the danger of meeting a crow's beak or the clawed paw of a cat.
The height of the birdhouse is at least 35 cm. It can be a little higher, but remember that if you make the ceiling too high, then such a high-ceilinged house will be harder for the birds to warm (warm air will go up and the birds below in the nest will freeze).
The width of the house (that is, the square area of its floor) should also not be very large. A spacious house is not considered cozy and a wide nest requires a longer time to build. The bird will be tortured to fill such a spacious house with twigs. Therefore, we try to stick to the bottom size of 15 x 15 cm (or 20 x 20). That is, if you are making a wide house, then put dry grass there in advance (the bird will only be happy).
As you can see, these dimensions are dictated by the logic of survival in the wild . And the right birdhouse is the one in which all these features are observed.
Well, now let's move on to the drawings and diagrams.
Here I have collected ways to make a birdhouse in the form of diagrams and drawings . You can choose your house model and estimate what parts you can assemble it. And remember, it doesn’t matter if your sizes differ slightly - we make them from available material and therefore the sizes will depend on our availability.
Here is another drawing of a birdhouse, although here the dimensions are given in inches. It will be easier for you to convert inches into centimeters if you ask your wife for a measuring tape for patterns - the one she uses to measure the circumference of her losing weight during a diet. On such a measuring tape, centimeters are written on one side and inches on the other. This way you can always see a quick conversion of any inch size to centimeter.
These drawings do not take into account one more CONDITION. In the Soviet birdhouses of our childhood there was always a clear rule: the front front wall (the one with the hole) should be tilted forward . This was done so that the starling could climb up such an inclined hill to the exit from the house.
To maintain this slope, you need to make 2 side walls from the rear edge straight vertically - and from the front edge obliquely (we see a similar principle of oblique side walls in the photo below). Only in this example does the birdhouse have a triangular side section. And in Soviet birdhouses there was such a slope, but at the same time there was also a normal bottom, so that there was enough space for the nest.
Below we see a drawing of real Soviet birdhouses from our childhood. True, the dimensions here are given in inches.
But if your house does not have a bevel on the sides, then to make it easier for the bird to escape, you can put an inclined board on the front wall on the inside of the house (it will perform the same function as a ladder).
Now let's look at birdhouses of another unusual shape - a rhombus. Here he is in the photo. The idea is certainly beautiful, the house turned out elegant and decorative. But from a practical point of view, it would be better for the birds if the window was located closer to the left or right edge - then the inclined plane of the wall would serve as a support for the bird to comfortably climb out.
drawback in this house is that the window is too low - there is no place for a nest - it turns out that when the bird puts grass and twigs there, the height of the chicks will coincide with the height of the window - and they will look straight out and any crow will pull it out with its beak and eat it without a twinge of conscience.
An intelligent feathered mother would never choose such a dangerous house for housing - and it will just hang in your garden, and you will wonder why the birds do not move into the birdhouse.
Here is a drawing of a similar house, but here the entrance hole itself is located much higher - it’s better that way. Or better yet, raise it right under the roof of the birdhouse. The bird will approve of this option.
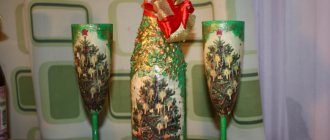
How to make decoupage birdhouse with your own hands: ideas, photos
Even a beginner can easily decorate a birdhouse using the decoupage technique. You will need the following materials:
- Preparing a birdhouse;
- Napkins for decoupage;
- Scissors, decoupage glue;
- Brushes, acrylic paint;
- Varnish;
- Sandpaper.
Step-by-step master class:
- Sand the birdhouse with sandpaper to ensure there are no rough spots on it.
- Then wipe with a damp cloth to remove dust.
- Apply a layer of paint and base. If necessary, apply a couple of layers for a more thorough coloring.
- Wait for the paint to dry completely.
- Now, from decoupage napkins, cut out rectangles for the sides of the birdhouse of appropriate sizes.
- Glue the blanks.
- Now all that remains is to glue the cut out elements onto the facade of the birdhouse. In this case it is a gnome, mushrooms, a ladybug and an inscription. You can choose whatever you like.
- At the final stage, all that remains is to open the birdhouse with varnish to protect it from moisture and dry it. Now the birdhouse is ready to delight passers-by with its elegant appearance.
Birdhouse decor using decoupage technique
Birdhouse decoupage: processing elements Bird house using decoupage technique
More ideas for birdhouses using decoupage technique.
Birdhouse: decoupage Beautiful birdhouses Birdhouse decoupage
What beautiful and unusual do-it-yourself birdhouses are there: possible birdhouse options, photos
You can find original birdhouses that are so unusual that you won’t immediately understand that this is a house for birds. In the shape of animals, with colorful stones, painted, in a rustic style.
Summer residents decorate their plots with birdhouses to the delight of themselves and their neighbors, but they are no less active in decorating parks. You can find entire towns made of birdhouses.
We have collected a selection of original birdhouses for your inspiration.
Treehouse Bird Town
Birdhouse with an unusual entrance
Birdhouse decorated with stones Birdhouse design
Drawings for birdhouses
For a more accurate and visual example, below are various variations of drawings and sizes of a do-it-yourself birdhouse:
- Gable roof of a birdhouse
- Birdhouse shed roof
- Birdhouse with slope
When choosing, you should pay attention to the available sizes in one version or another and to the complexity of the design.
Birdhouse name for the competition: list
Every year, many botanical gardens, zoos, kindergartens and schools hold competitions for making birdhouses. The purpose of the competition is to foster respect for nature and the environment, and care for birds.
In addition to the design of the birdhouse, its correct construction, as a rule, you need to come up with a name. One of the requirements of the competition is a card indicating the name. We have collected possible names of birdhouses that you can take note of or as an idea:
- Bird House;
- Teremok-breadwinner;
- Miracle House;
- Eco-lodge;
- Bird Cafe;
- A hut on chicken legs;
- Titmouse;
- Hotel for starlings.
An original name will help your birdhouse stand out from others.
International Bird Day is celebrated on April 1st. Let's give birds houses for housewarming.
Attaching the birdhouse
Having chosen a place to secure the birdhouse, which could be poles, trees or the roof of a house, you need to secure it correctly. Please note the following recommendations:
- It is important to attach the birdhouse 3 meters above the ground to prevent predators;
- to prevent moisture accumulation, it should be secured with a forward tilt;
- fastening to a tree is done using a rope, tightly pressing the body of the structure to it;
- fastening to a pole or other surface can be done with nails;
- the structure should be placed out of direct sunlight to avoid overheating and against the wind to preserve heat;
Important! If several birdhouses are made, they should be installed at a distance from each other, since proximity is unacceptable for many birds.