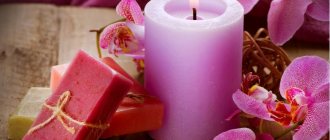
DIY twine decor is a simple and original technique for transforming old or useless household items into exclusive decorative elements. As a rule, all that such decor requires is twine and glue. And the rest is a flight of your imagination. An item decorated with twine can be decorated with lace, beads, sequins, buttons or rhinestones.
Bottles decorated with twine look very beautiful, with a touch of ethnic flavor. But you can turn an ordinary empty bottle into a piece of design art using other methods. How to decorate a glass container, what techniques and materials to use? You can find answers to these and other questions in our article.
Exterior painting of glass bottles and jars with acrylic paints
This technique also does not require large investments and will not take much time. The outside of the vessel is painted with acrylic paints using a brush. If there is no artistic talent, then a stencil is used. Exterior decoration with paints is done as follows:
- The container is pre-washed and degreased.
- A layer of paint, usually white, is applied with a sponge.
- On this basis, everything your heart desires is depicted - patterns, flowers, landscapes, inscriptions, congratulations.
- After the drawing has dried, it needs to be lightly sanded with fine-grained sandpaper. Then cover with one or more layers of varnish.
If a stencil is used for painting, it is attached to the glass using pieces of tape, and paint is applied with a brush or sponge. Allow it to dry, carefully remove the stencil, sand it, and then varnish it.
Decorative bottle for the kitchen with sand
Take a transparent glass bottle. Remove labels and sterilize. Prepare colored sand.
Instead of colored sand you can use:
- Colored salt;
- Cereals;
- Spices;
- Bright M&M's candies.
Operating procedure:
- Fill the sand in layers, lightly compacting it.
- If desired, you can get waves by adding more sand to one edge of the bottle.
- You can create a specific pattern by pouring sand through a tube.
- You can, after pouring the sand, pierce it with a knitting needle and get interesting transitions from one layer to another. Close the lid.
If desired, decorate the neck of the bottle with jute thread, hang or stick labels.
For a country home
From plastic corks, both mini-stands and decorative curtains depicting a sunset, or a sea wave, and entire art objects on the wall of a building or a fence can be made. Bright house paths are made from multi-colored bottle caps of the same diameter.
A huge field for the use of plastic bottles opens up in the garden. A system of vertical flowerpots, with a pipe watering system, will allow you to place seedlings, cute miniature flowers, arugula, lettuce, a variety of herbs or climbing plants. This way will save space and hours on care procedures. Or it will even create a living screen, giving more comfort to the gazebo, for example.
The remaining upper halves are used to interrupt early seedlings on the ground. The dome will retain heat and allow the sprouts to breathe.
There are also projects for the vegetable garden. To simplify irrigation, containers with perforated ends at a narrower end, located on the bed, will be made possible. An excellent stream breaker will come out of vessels of any size.
Engineering thought has come to the use of PET cylinders in the guise of a solar water heater for comfortable hygiene procedures on summer days.
Decent garden decorations are made from nondescript raw materials. Swift-winged dragonflies with rhinestones on their backs, magical butterflies whose wings are painted with stained glass patterns, and hardworking bees will never leave the flower garden. And touching hedgehogs will bring lavender, pinnate bristle or Japanese petunia on their backs.
Craftsmen very skillfully repeat the appearance of a wide variety of bird species: peacock, rooster, parrot, owl, pigeon, flamingo, ostrich. Characters from fairy tales and cartoons are great. Flowerbeds are transformed with bright spots of painted bottoms.
At any time of the year, beautiful hand-made chrysanthemums, poppies, bells, dandelions, and roses will remain in their place.
Types of decor and ideas for decorating glass bottles
Bottle decorating is an easy and inexpensive way to decorate your home with elegant decorative items. There are a lot of ideas for decorating bottles of different shapes and configurations. Creating designer interior decoration is incredibly simple. The materials that you will need for this are always easy to find at hand. And such miracle bottles turn out very beautifully, exclusively. Bottles are decorated using different techniques and materials:
- Decorating with paints;
- Decorating with twine;
- Decoration with salt and cereals;
- Using decoupage technique;
- Decor with fabric and leather;
- Decoration with flowers and fruits;
- Decor using mosaics;
- Decoration with beads, salt dough, coffee beans, newspapers, magazine clippings.
In fact, almost any available materials are used to design glass containers. The main thing is to use your full creative potential.
Other options for decorating with your own hands (painting, decoupage, interior decoration)
Painting on glass with acrylic paints.
Decoupage. You will need special napkins, which, after being applied to the bottle, are painted with heterogeneous patterns and decorated with floral motifs. At the end of the work, you need to give the surface an aging effect. It can be done by applying light, non-uniform paint to the folds of napkins or by coating with a special varnish.
Interior decoration. You can pour various cereals into the bottle, forming multi-colored patterns. For convenience, you will need a funnel. It is also allowed to add pieces of fruit or vegetables, but this requires the use of a preservative. You can use not only alcohol, but also saline solution and gelatin. There is no need to use vinegar, as it will give the food a white tint over time. First, fruits or vegetables are placed in a row, forming decorative combinations, then they are filled with a preservative and sealed. You can read about setting a summer holiday table by following this link.
Video: how to cover various objects with eggshells for decoration
Here is an option on how to make a real designer item from an ordinary shell:
In order for the resulting design to bring only positive emotions, it is necessary to choose an aesthetic bottle and use high-quality, preferably new, materials for decoration. When the work is carried out taking into account the harmony of the color palette, and the entire design is coordinated not only with each other, but also with the surrounding interior, the result will be excellent, whether coffee or semolina colored powder is used. You can learn about blue kitchens in this material.
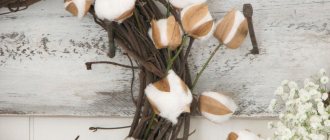
"The Bird of Happiness"
People are constantly coming up with new crafts made from twine, but there are crafts that have been created by people for a long time as decorations and amulets. They have survived to this day for a reason. These are very beautiful works, well thought out and elegant looking.
The famous “bird of happiness” can be considered one of these crafts.
For this work you will need:
- 40 pieces of natural-colored jute rope, 20 cm long;
- 40 pieces of natural-colored jute rope, 30 cm long;
- 1.5 meters of red rope;
- 1.5 meters of green rope.
Creating a bird begins with the head. Pieces 30 cm long are folded in half and tied in the middle with thread. The 4 threads of the head become the beak. They are wrapped in red rope.
You need to determine the size of the head and make a neck, wrapping it with red twine
Then it is important to divide the torso into 2 equal parts - lower and upper. Wings are inserted between these parts - segments 20 cm long.
The tail is separated with red thread and the body is wrapped in the form of a cross. The tail and wings are divided into strands, which are connected to each other using colored threads of both colors. Both the tail and wings are divided into 5 equal parts. Using scissors, you can shape the tail into a fan shape and curl the wings.
Twine cat
Tools and materials
- Bottle (for the base of the body) – 1 pc.
- Twine – 1 skein.
- Wire or thick wire (18 cm) – 1 pc.
- White yarn – 1 skein.
- Foam balls (large and small) – 2 pcs.
- Glue gun – 1 pc.
- Dark paint - 1 can.
- Black beads – 2 pcs.
- Tape – 1 pc.
- Scissors – 1 pc.
- Pencil – 1 pc.
Step-by-step production of the first “Cat” craft
Making the base
- The cat's body can be made from a bottle or skittles. To make a twine craft, use a glue gun to glue the twine around the base (thin rope will also work).
- Also cover the foam ball with twine.
- Glue the body and head together with hot glue.
Manufacturing of parts
- Tie an unnecessary wire or thick wire with twine - this will be the tail.
- For the nose, paint a small styrofoam ball with dark paint. Wait for the paint to dry and cut it in half.
- Take white yarn. Apply hot glue to the tip of the thread and wait until it hardens. Twist flat circles of white yarn (diameter 2 centimeters), securing them on all sides with hot glue. Make 8 of these parts.
- Cut out 2 circles of 6-6.5 centimeters in diameter from paper or cardboard. Using glue and twine, make a spiral on one side of the piece.
- Cut out 2 triangles from paper (4.5 cm sides). Round the corners. Cover both sides with twine and bend slightly.
Assembling the craft
- Give two circles of twine a slightly curved shape. Glue to the base from below where the paws are.
- Then glue 3 white yarn circles onto each paw.
- Shape 2 more circles with twine. Using hot glue, glue them in place of the cheeks.
- Glue a nose made of dark-colored foam plastic between the cheeks.
- Make eyes from the remaining two circles of white yarn, and pupils from black beads.
- On the cat's head, mark a place for the ears. Glue the ears, giving them the desired shape.
- Glue the cat's tail at the back and bend it the way you like.
- Tie a bow around your neck using a pretty ribbon or burlap. Further decoration of the doll depends on your preferences. DIY jute crafts are ready!
Video instruction
In the video instructions you will find interesting products made from twine with your own hands (master class on making a cat from twine).
Openwork flowers
Crafts made from twine can complement compositions made from third-party materials, and openwork flowers are among such decorations. Also, such curls, which have an unusual design and are light in weight, can become the basis for a pendant, earrings, or brooches.
Flowers are made according to the following algorithm:
- Crafts from bags: master class on knitting from plastic bags and the best handmade ideas (90 photos)
- Crafts from ice cream sticks: 100 photos of original ideas for using wooden sticks
- Crafts from paper and cardboard - 110 photos of the best simple patterns for children and beginner craftsmen
- The threads are cut into strips of equal length.
- If necessary, the twine is painted with stain.
- The strips are cut into segments of seven centimeters.
- Each piece is leveled and one end is left curled.
- Assemble a flower using wire with beads at the end as stamens.
Not only decoupage
Having mastered simple decoupage of bottles with napkins, you always want more. The smooth surface of the bottle does not provide texture, which can be used to achieve a more interesting effect. You can create an interesting surface with tights or stockings. A master class on this type of decor can be found on the Internet.
To do this, cut one part from a pair of tights, soak it in a mixture of PVA glue and water (proportion 1 to 1) and put it on the bottle. Lay out coattails, waves, any texture.
Leave a few spots flat to apply the napkin. Dry completely, prime with a special compound or acrylic paint. Now you can decoupage the bottles, tint them, bring your ideas to life, or leave them as is.
Related article: Making decorative boxes with your own hands: some interesting ideas (MK)
Another way to get texture: wrap the bottle with threads; colored threads are quite suitable for sewing of different thicknesses. Colored thread decor is also quickly obtained when using cotton yarn for knitting.
New Year's ball in a bottle
If you are not afraid to cut off the bottom of the bottle, then inside it you can make a beautiful snowy New Year's ball with figures, artificial snow or sparkles. Candlesticks with a candle inside are made using the same principle, but they need to be used carefully so that the glass does not crack from overheating.
To cut the bottom, you will need a dense and thick woolen thread, alcohol, a lighter, sandpaper and two containers of different sizes. Fill the basin with cold water and ice so that the bottle can be completely submerged. Wind a thread moistened with alcohol in several layers along the cut line and tie the ends.
Put on gloves, light the thread, take the bottle horizontally and continuously rotate it along the axis until the fire goes out. Immediately after this, put it in ice water - and if everything is correct, the bottle itself will burst along the line
All that remains is to carefully sand the edges with sandpaper so as not to get hurt
Fruit bowl
In order to make such an unusual plate you will need:
- PVA glue.
- Jute thread.
- Bowl for glue.
- An example bowl.
- Film.
Wrap the plate in film. Whatever container you choose, this is how you will get a jute plate for fruit.
Advice! Wear gloves to protect your hands from glue.
- Pour glue into a smaller bowl and place the thread in it for a few seconds. Once the thread is well saturated, remove excess glue from it.
- Wrap the plate randomly over the film, then leave it all to dry for about 10 hours.
- After drying, remove the film. Your plate will remain unharmed. In addition to this, you will get a new jute fruit plate. Using spray paint, you can paint your product in any color that suits you.
How to decorate bottles using improvised means?
Those who are thinking about how to beautifully decorate a bottle with their own hands do not need to look for expensive materials; it is better to start with something simple. In every home there will be traditional materials for needlework:
- VPA glue, “Superglue”, “liquid nails” or “Moment”;
- paints;
- bulk materials;
- threads, yarn;
- flap;
- leather scraps;
- ribbons and braid;
- newspapers and magazines;
- colored paper;
- thin cardboard;
- buttons;
- pins and paper clips;
- sparkles and stones;
- toilet paper;
- colored elastic bands;
- tourniquet, twine, rope;
- broken glass, mirrors, tiles, etc.
The material for decorating bottles with your own hands at home is selected based on the idea and available technology.
The simplest way is to decorate glass bottles by painting the inside or outside. To do this, you need transparent containers of different sizes. If you paint them the same color, they will look like a souvenir set. Such items can be combined in groups of 2-3, forming “duets” and “trios”. It is best to use decorated bottles as flowerpots for dry ikebana or artificial flowers.
Beautiful bottle design
Decorating bottles for the interior
TABLE. Main types of bottle decoration
| 1. | Painting the inner surface | Pouring paint inside with uniform distribution over the surface and removing excess |
| 2. | External painting | Traditional painting or aerosol spraying |
| 3. | Filling with bulk materials | Does not involve fixing the filler, the layers are formed at an angle, the container is filled tightly |
| 4. | Changing the surface texture | Pasting with shells, toilet paper, leather, newspapers, bulk materials |
| 5. | Volumetric decor | Artificial flowers, buttons, coins, beads, glitter, shells, pebbles |
| 6. | Textile decor | Yarn, threads, elastic bands, braid, ribbons, strips of fabric, lace |
Original decor of glass bottles
Decoration of glass bottles for interior
DIY bottle decor
To paint the inner surface, a little acrylic paint or interior enamel is poured inside a transparent bottle of an original shape. When rotated and tilted in different directions, the paint spreads evenly over the entire inner surface. After this, it is advisable to let the remaining acrylic paint drain from the finished bottle and leave it upside down until completely dry, so that there are no wrinkles or sagging.
Another method is external spraying of aerosol paint. Silvering and gilding look the most luxurious. The transition from silver to gold or another color looks original. This bottle decor is self-sufficient, but it can be supplemented with other elements - sparkles, beads, stones. This is another idea on how to decorate a bottle of wine with your own hands for your birthday.
A golden bottle looks luxurious; this technique is suitable for any occasion. In an empty container you can put a fir branch with traditional decorations for the New Year. An excellent budget option that allows you to do without buying a Christmas tree.
Beautiful bottle design
Decorating bottles for the interior
There are other ways to replace Christmas trees by using bottle decor instead. A composition of chocolates in green foil, mounted on a bottle in the shape of a Christmas tree, looks luxurious. Make sure that the treats are not soaked in glue. They can be taped from bottom to top in a circle, hiding the bottom rows. It is better to secure the top of the head with red or gold ribbons with a star or an angel, if this is decor for Christmas. Spraying with white paint is a great DIY winter decor for glass bottles.
Carefully cutting off the top or bottom of a glass bottle will give it new life in the form of a florarium or a lampshade. It's no secret that if there are cats in the apartment, it is difficult to grow rare succulents or other plants that animals sometimes eat as a vitamin supplement.
A composition of plants with fleshy leaves is covered with an evenly cut wide bottle or jar. This “trick” is not always successful, but the principle works when a bottle with ice water at the bottom is sharply immersed in boiling water to that level. Sometimes you need one sharp blow from the side, but often the crack goes on its own. The result is an even cut, like a ruler. The resulting container without a bottom is used as a cover for indoor flowers, under a lamp or a miniature composition with a landscape.
Original decor of glass bottles
Decoration of glass bottles for interior
DIY bottle decor
Wedding table decor
Bottles in the shape of the bride and groom are a traditional part of wedding feast decoration. Why look for new ones for this if you can already use the ones you already have. For decoration, take lace, fabric, ribbons, feathers, beads, flowers, toy angels - and not a single boring store-bought item can compare with this.
A bottle decorated with your own hands to decorate a wedding table is a traditional and beautiful solution. Moreover, such vessels can be not just decoration, but also traditional champagne for newlyweds, which is decorated to match the overall style of the wedding.
When decorating in this way, special attention is paid to the color scheme; it is necessary that it harmonizes with the overall color of the restaurant, flowers, and also the outfits of the newlyweds. Various materials are used for decoration:
- ribbons;
- paint;
- artificial and fresh flowers;
- rhinestones;
- glitter;
- beads and seed beads;
- felt;
- atlas;
- lace;
- threads
In order to bring a little originality and creativity into the ordinary atmosphere of life and your home, a little imagination is enough.
There is a classic design for wedding vessels - this is an imitation of the bride’s wedding dress and the groom’s suit.
When decorating a wedding hall or table, decor from bottles made in the same style is often used. This decoration looks very creative and beautiful at the same time. Bottles decorated with your own hands will be a wonderful gift for newlyweds, since according to tradition, these containers should be kept until the first anniversary and the birth of the first child.
Decorative vase - the basis of creativity
Making a basic model is very simple. You will need a bottle with a wide neck, hot glue and the twine itself. It would be good if the bottle had an unusual shape.
You need to cover the bottle with twine, starting from the bottom. Place the thread on the glue in a spiral, tightly, so that no gaps form. And then, on the basis obtained, you can give free rein to your imagination.
The photo gallery of twine crafts reflects some popular decoration ideas:
- snow-white lace, ribbon bows;
- beads, decorative stones;
- pattern woven from twine using macrame technique;
- coffee beans;
- shells;
- compositions of natural spices and aromatic herbs.
Skin
This material is always in trend, so don’t be upset when your favorite jacket wears out. It can serve as a good decorative element or turn into an original decoration.
Designer decoration of bottles with leather is a fairly simple technique that will help turn an ordinary container into a gift souvenir or an element of high-class room decor.
Decorating bottles with leather is an original way to give an old, unnecessary item a second life.
To work you will need:
- bottle, scissors, silicone glue gun;
- leather and decorative elements.
Stages of work:
- Cleaning and degreasing the bottle.
- Cover the entire surface with a large piece of leather, starting from the bottom.
- The neck should be covered with thinner leather, creating an imitation of folds.
- For decoration, you can cut out leaves, petals, flowers or thin strips from small pieces of material. An interesting idea is to decorate the cork with stripes that imitate weaving.
- You can complete the decoration with pearls or rhinestones.
What can be used for interior decoration
For high-quality results, it is recommended to choose bottles made of transparent glass. Before decorating, they should be thoroughly washed and dried so that the contents do not acquire an unpleasant odor over time.
The following methods can be used to decorate bottles internally:
- Coloring. A small amount of paint is poured inside the transparent bottle, after which the bottle is carefully twisted so that the paint is evenly distributed along the walls. You can mix several shades at once. Glass paint has a transparent structure; it is better to use acrylic.
- Filling with colored salt. Salt or sand, painted in various colors, is gradually poured inside the bottle. During this, the bottle is tilted, due to which layers appear, a multi-level pattern is created and salt of different colors does not mix. Colored sand is quite easy to find in stores, but coloring it yourself is not difficult (unlike salt). In addition, hand-painting will allow you to choose the desired shade; in stores, the color palette is limited to four basic ones.
- Placement of the ship model. A popular way to design bottles for men is to place a model of a ship inside it. The task is quite labor-intensive; first of all, you need to create a model of the ship or remake a purchased one. The mast with the sail is lowered, a thread is attached to it, and the ship is placed inside the bottle. The mast must have a hinge or spring so that when a light pressure is applied to the thread, the mast rises again and the sail straightens. Using tweezers, glue is applied to the hinge and parts of the ship. Following this, the thread is pulled out and the neck is clogged.
- A combination of cereals and natural materials. This option is similar to the technology of pouring colored salt; cereal is also poured into the jar in layers. To create an original composition, seeds and cereals should be filled with 1/2 - 2/3 of the total volume. Acorns and chestnuts are placed on top (if the neck is wide), dried flowers and the tips of ears of oats are inserted with tweezers. The entire composition must fit inside the bottle; it must be closed with a cork to prevent dust from flying inside.
- Decorative canning. Bright miniature vegetables, fruit slices, berries, beautiful seeds and even flowers are placed inside the bottle. Peppers, garlic, squash are laid in horizontal rows or diagonally. For long-term storage, the container is filled with almost pure formaldehyde, vinegar or alcohol. If everything is done correctly, the fruits do not lose their bright color and do not deteriorate for a long time.
Decorative bottle for the kitchen with vegetables
- Take a transparent glass bottle.
- Remove labels and sterilize.
- Prepare food. These could be vegetables, fruits or flowers. We recommend choosing different vegetables in bright colors.
- For example, yellow corn kernels, orange carrots, green capers, white garlic, onions, etc.
- Wash and dry vegetables, chop if necessary.
- Arrange the vegetables in the bottle in layers or arrange compositions. In this case, you can use a knitting needle.
- Prepare a preservative.
Option 1. Mix vinegar and glycerin in a 1:2 ratio.
Option 2. Mix a liter of water and a tablespoon of 70% vinegar.
Pour preservative over vegetables. If necessary, straighten the vegetables with a knitting needle. Close the lid tightly.
If desired, decorate the neck of the bottle with jute thread, hang or stick labels.
Cereals (semolina, millet, buckwheat, rice)
One of the interesting and original interesting ideas is decorating with cereals. In addition to a variety of cereals, you will need special corrugated paper, two types of glue: PVA and hot. To decorate a bottle beautifully, you need paint with a dispenser. The standard procedure for gluing a bottle looks like this:
- a beautiful bottle is selected and cleaned of fat;
- cereals are glued in the form of clearly defined zones, patterns or protrusions;
- Roses are made from corrugated paper by rolling. It is advisable to form them in different sizes;
- when all the elements are glued, you need to let them dry;
- the bottle is covered with paint. It should be applied evenly and everywhere.
How is bottle ribbon decoration made?
For work you will need
| 1. | Tools | Scissors, utility knife, soldering iron, large needle |
| 2. | Capacities | Two bottles of champagne of different sizes |
| 3. | Textile | Ribbons of dark color, golden, white, colored |
| 4. | Fasteners | PVA glue, liquid nails, textile glue |
| 5. | Decor | Hat, flowers, hearts, beads, sparkles, rhinestones |
Weaving starts from the neck; due to its expansion, it is the most difficult to arrange neatly. The ribbons are cut into small pieces, each subsequent fragment overlapping the top one. They should fit tightly, neatly, slightly stretched.
Decorating bottles with ribbons
Wedding bottle decor
Each underlying segment will be slightly longer than the previous one - due to the expansion of the neck of the container. It is most convenient to work with tape 2-2.5 centimeters. The next turn is measured directly on the bottle and carefully cut off with a small margin, which goes under the next fragment, as in the photo.
Beautiful decor of glass bottles with ribbons
Bottle decor with ribbons
Decorating glass bottles with ribbons
The pieces of satin ribbon are fixed with dot marks of glue, which should not bleed through the fabric. It’s better to try it on a training sample first so as not to ruin all the work. If you have no skills in needlework, it is better to master the technique of braiding the neck on any empty bottle. The neat weaving resembles a braid. Then pasting proceeds in the usual way - in a circle. The color of satin ribbons is combined, depending on the design task of decorating bottles with ribbons.
At this stage, care is taken to ensure that the back seam is as even as possible so that the edges of the cuts completely coincide. But it’s unlikely to work out perfectly, so the back sections are covered with a strip of the same tape used for the weaving.
Decorating bottles with ribbons
Wedding bottle decor
There may be options in making a skirt. The more magnificent the accessory, the more luxurious the decoration of bottles with ribbons. You can sew it yourself by sewing lace gathers, or purchase elastic with a frill or ruffled edge. Such an addition with an elastic band is easiest to put on and fix on the bottle, but it is advisable to keep the tension minimal.
The skirt of the “Bride” bottle is decorated with lush bows using the same ribbons. An additional decoration for the “Groom” is a bow tie and buttons that imitate a tailcoat or suit. But the main thing is to decorate the shirtfront beautifully with white ribbons. Buttons can be replaced with small hearts or pearl beads.
When the main stage of weaving is completed, they move on to decorating the top of the bottles. “She” may have a tulle, muslin or guipure cape (veil), a wreath of flowers or a hat. It traditionally has a top hat or a small hat. They are made from a plastic bottle by fitting a hole under the “top” of the bottle.
Beautiful decor of glass bottles with ribbons
Bottle decor with ribbons
Decorating glass bottles with ribbons
Additional decor - swan's down, a piece of white fur or grass yarn. It looks good on a white base, if it is decided to make the champagne bottles white, and the ribbon decor is made using the kanzashi technique, as in the photo.
Any idea is good if everything is done carefully and tastefully, the seams are hidden, the decor is in moderation. Additionally, it is worth working on making such additions to champagne as rings, angels, flowers, doves and hearts. Sometimes they use photos of the bride and groom printed on thin paper (glossy).
We offer you to master one of the options for decorating bottles with ribbons with your own hands - an accessible master class.
Decorating bottles with ribbons
Wedding bottle decor
Sewing instructions
Before making complex blankets with your own hands, it is worth practicing on simple bedspread models. To do this, you can sew a small blanket from squares of the same or different colors, connecting the fragments with machine stitching. The front part of the product is formed from denim blanks; a lining from large pieces of fabric or a solid cut is sewn onto the back side.
Stripes
The stripe sewing technique is the easiest way to quickly “assemble” a denim blanket with an interesting design or pattern. The first option is to use strips of individual squares. To form them, an equal number of fragments are cut out from denim material and lining fabric. Instructions on how to quickly sew a blanket from jeans:
- the flaps are sewn with the wrong side to each other into a strip;
- a seam 1.5 cm wide is obtained, it remains on the front side;
- form strips from all blanks - 10, 15, 20 pieces in size;
- the strips are sewn together, the lining is attached to the bottom;
- fringe is made on the seams on the front side with sharp scissors.
To obtain a seam with fringe, the fabric is cut along its length, departing from the seam by 2-5 mm. Pull out the transverse threads (by hand or with a brush), fluff the edges of the fringe. If the plaid is without fringe, the square flaps are sewn into strips so that the seams remain on the wrong side of the plaid.
Patchwork
Hand-made artists often resort to the patchwork technique when working with textiles. From old jeans you can make a creative blanket from round fragments. To work, you will need four to five pairs of denim pants, a set of sewing accessories and an unnecessary CD. Master class: how to make a blanket from old jeans using the patchwork technique:
- after preparing the material, you need to draw circles on the wrong side of the fabric, outlining a disk;
- An odd number of blanks are cut out from the samples and an inscribed square is drawn on each circle;
- all the blanks along the fold lines are swept together so that the machine stitching is smoother;
- All basted seams are sewn, and the circle allowances are smoothed and steamed;
- The allowances are sewn in a zigzag pattern inside the round blanks, the blanket is hemmed, edged or the lining is sewn on.
Watercolor
The originality of the “watercolor” technique consists in connecting denim blanks in a certain sequence, taking into account the color scheme. First, the plaid fabric is assembled from light fragments, placing them in the center, and closer and darker squares are sewn closer to the edges. Or do it the other way around - from the dark center to the light edges. Features of sewing a blanket:
- you need to try to select fragments according to shades so that the colors seem to “flow” into each other;
- alternation from dark to light color can be done to the middle of the blanket or in a spiral;
- the main task is to create a visual effect of a smooth change in color scheme.
The work requires patience and perseverance, since the technique is complicated by the selection of colored blanks. But the bedspread with its elegant composition blends seamlessly with the furniture upholstery. As you make the blanket, your watercolor skills improve.
Quick squares
For beginning needlewomen, the option of sewing using the quick square method is suitable; you need to learn how to create three-color squares. To sew such blankets from old jeans with your own hands, you need several pairs of denim pants of different colors, as shown in the photo. Cut two rectangles from two different materials and sew them together along their length. The seams obtained from the reverse side are smoothed and steamed.
The third blank is cut out of fabric of another shade - a rectangular fragment, the length of which is equal to the width of the strip from the first and second rectangle. Three blanks are sewn together right sides together to form a denim sleeve. The sewn sleeve can be cut into quick three-color squares and used as individual blocks for sewing a blanket.
https://www.youtube.com/video/CC4MP5Imm24
Patchwork products have always been in demand. And now, at the peak of the popularity of handmade items, such textiles will decorate any room. To sew a blanket, you need to work hard, but the resulting item will be exclusive and unusual. This type of work allows you to realize interesting ideas and creative solutions.
Step-by-step instructions for decorating with twine
Twine is a strong thread made from natural or chemical fibers (or a combination thereof). Decorating a bottle with twine is a fairly simple type of needlework. You can buy this kind of twine at any hardware store or shops for hand made craftswomen. A few simple manipulations, a minimum of tools, materials and an ordinary glass container turns into an original gift. It does not lose its practical purpose. This decorated vessel is used for different purposes:
- Container for cereals. Decorating a jar with twine, as well as a tag indicating the name of the products (salt, sugar, rice, buckwheat) is a great idea for decorating kitchen shelves.
- Vase. Simple wildflowers and exquisite roses will look good in handmade flowerpots.
- Interior decor element. Bottles decorated with twine are perfect for an Eco-style interior. Thanks to the designers who came up with interior design using natural materials and beautifully played with the idea of exquisite simplicity. All we have to do is complement their idea with cute little trinkets made by ourselves.
- A beautiful container for drinks. Homemade lemonade, liquid sorbet, juice - all these wonderful drinks will seem even tastier if they are served in a beautiful vessel.
To decorate bottles with twine yourself, you need to stock up on the following materials and tools:
- Bottle for decoration;
- A piece of twine;
- Acetone or alcohol;
- Moment glue or thermal glue;
- Scissors;
- Glue gun.
This type of needlework is not difficult. Even a child can do it:
- Wash. You need to start decorating bottles with twine after first washing them, peeling off the stickers and drying them.
- Degrease. In order for the glue to adhere well to the bottle, and the rope to adhere well to the glue, it is necessary to treat the surface with acetone or alcohol.
- Wrap. Next comes decorating the bottles with twine.
How to properly wrap a glass container with twine?
Decorating bottles with twine with your own hands is not done in any order. When “winding” bottles you need to follow several rules:
- You need to start from the bottom. Apply glue to it and simply roll the thread “snail” from the center to the edges of the bottom. The twine must be laid tightly and evenly so that it turns out neatly and looks beautiful. You also need to put a thread on the edge of the bottom so that the container does not lose stability.
- Then the bottle is decorated with twine from the bottom up to the neck. In this case, the rope should lie parallel to the bottom. If at least one layer “tilts,” then the rest will be laid more crookedly each time. Twine decor will be a disastrous idea.
- The neck is wrapped last. The thread must be secured well so that it does not unwind later. The twine decor is ready.
Advice. Do not glue the entire surface at once. It will be difficult for you to work. It is better to coat the glass with glue in stages, in parts. Then the glue does not dry too quickly and does not stick to your hands.
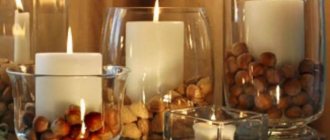
The decor of a container decorated with twine can be supplemented with pieces of lace, buttons, and fabric flowers. Using glue, twist circles from threads of different colors and glue them to the workpiece. You will get a wonderful vessel for a kitchen in the style of American “country” or French “Provence”. Decorating bottles with twine and coffee is another idea for designer decoration of glass containers. Coffee beans are glued on top of the threads. Here you can fully express your creative inclinations. Fragrant grains are simply “scattered” over the surface or glued in the form of an ornament, design, or composition.
What you need for jute filigree
To work you need:
- jute thread (twine);
- transparent glue;
- a pattern drawn or printed on paper;
- file, transparent film or plastic bag;
- awl, needle, knitting needle or toothpick (for rolling curls);
- acrylic lacquer;
- scissors and a stationery knife.
If the product is flat, then you will need another board to create a press.
Jute thread varies in thickness and this also needs to be taken into account at the work planning stage. For small products it is better to take a thin thread, for large ones - a thick one.
Additional materials include decorative stones, beads, lace, and accessories.
LiveInternetLiveInternet
Decorating bottles in any way is always an opportunity to give ordinary glass containers a second life, allow them to become part of the interior, and transform an ordinary alcoholic drink into something unique and inimitable.
.We suggest you start decorating bottles with twine or thick thread. Such products fit perfectly into the interior of a home in classic and country styles.
There are many options for decorating bottles - with acrylic paint, walnut or eggshells, coffee beans, decoupage napkins, semolina and even newsprint.
Empty bottles, decorated with twine, can serve as containers for pouring drinks during a home feast, be an unusual vase for a small bouquet, or simply be an element of room decoration.
And if you decorate a bottle of alcoholic drink, it will become a great gift or add to your own bar and will be its original showpiece
I need to do something with the top. I propose to make a small lid - a cap. It will simply be put on top of the bottle. The process of creating a lid is very similar to the process of making a round gift box or the bottom of a vase from twine
We measure a strip of cardboard about 3 cm wide and a length corresponding to the circumference of the throat in the place where the twine is wound.
We roll this strip into a ring; I used double-sided tape to secure it. You can also use regular glue.
Draw a circle on cardboard with a diameter equal to the diameter of the hole in the resulting cylinder and cut it out. We glue the circle using strips of double-sided tape to our cardboard ring. No tape, use thin paper.
Before proceeding with further work on decorating the bottle cap with twine, remove the protective strips from the tape. Now apply universal glue first to the center of the cap. Glue the end of the twine. And then in a circle we glue the entire surface of the lid.
HOW TO DECORATE A BOTTLE DECORATED WITH TWINE
To decorate this bottle with twine, I decided to use coffee beans and, in fact, the twine itself, which at the most opportune moment began to run out. Therefore, I present to you an economical option for decorating a bottle.
First we glue two waves on top and bottom. Then we twist these 5 rings from the twine, naturally with the help of glue.
Glue the slightly dried rings to the bottle at equal intervals.
Now it's the coffee beans' turn. We place one grain in the center of each ring and several grains of suitable size around it.
In general, this is where my splits ended. Therefore, I only had coffee beans left to decorate the lid.
And one more little trick: you should still write what kind of drink is inside. Let's make it in the style of a wax seal. To make it, we will need a candle, a glass, a small piece of twine, and brown wax crayon or acrylic paint.
Melt a piece of candle in a water bath. Next, either crumble the brown wax crayon into the melted paraffin, or leave it as is.
We make 2 holes in the cup opposite each other, and thread a twine bent in half through them. Pour wax into a glass and put it in the refrigerator.
After complete hardening, tear the glass. Using a wooden skewer we apply the necessary inscriptions. I decided to focus only on the name of the cognac “Nistru”.
I didn’t have a chalk, so I painted the finished print with brown acrylic paint. We hang this on our bottle. Now the original DIY gift for a man is ready! In my opinion, it’s very good and certainly non-standard.
You can decorate the bottle with circles, loops, braids, flowers made from twine or ribbons.
If you wish, attach coffee beans or beans, or compositions made of beads or beads to the bottle.
What styles do needlewomen design in?
Decoration with crystals
Necessary materials:
- Leg-split;
- Lace;
- Thermal gun;
- Large rhinestones or small crystals of the same color;
First you need to divide the bottle into 5 equal horizontal stripes, each of which will be decorated with a separate element:
- The first layer should be wrapped with thread using silicone glue;
- Next is a lace strip;
- The middle one includes the most painstaking work: gluing rhinestones. To facilitate the process, you can use rhinestones on the ribbon. In this case, you just need to cut a strip of stones of the required width and glue it to the glass surface;
- The fourth is lace;
- Fifth – twine;
You can leave an empty distance of 1-2 centimeters between the layers, so the finished product will not look sloppy. Another variation of this design is to reduce the layers to three, where the middle one consists of wide lace, and one strip of rhinestones is glued in the middle.
Decorating bottles with twine
Beautiful decor of glass bottles with twine
Idea for decorating bottles with twine
Satin ribbons for the kitchen
Required:
- satin ribbons;
- brocade ribbons (with the addition of shiny inclusions);
- glue “Moment”;
- additional decorative decorations.
To make the decoration successful and the bottle to become an excellent souvenir, it is advisable to take a product with gold foil without adding any inscriptions. The amount of tape used depends on the width of the material. To make bottle decoration easy and the result to be excellent, you need to decorate according to the following scheme:
- To implement each layer, you must first apply the tape to the required place without gluing, and then cut off the excess.
- Dots are placed on the surface of the bottle with glue. There is no need to use a lot of this substance.
- The tape is glued close to the surface and stretched. Each subsequent layer is adjusted in length.
- When gluing the tape, a kind of pigtail is formed at the joints. You should always cross the edges of the material in one direction to ensure an even pattern.
- When narrowing the tape towards the neck, make sure that it is absolutely even.
- After you have finished gluing the bottle with the base decorative layer, you can decorate it with any additional elements.
Video: how to decorate a bottle for a wedding with ribbon
How to decorate bottles using ribbons for a wedding:
The flat (wide) part of the bottle must be sealed with even strips. The result will be a sloppy seam. It is covered with a ribbon threaded across it.
About the material
Essentially, twine is a thin rope of increased strength, twisted from natural or synthetic threads. In the production of natural twine, jute, hemp, flax and cellulose (paper) fibers are used. For synthetic products, polypropylene, viscose and nylon threads are used.
https://youtube.com/watch?v=556PpXHp19Q
Crafts made from jute twine are especially popular. Although it has low elasticity, it is easy to make wicker and knitted pieces. The material lends itself well to coloring and combines harmoniously with other materials. It has sufficient strength and wear resistance, and most importantly, it gives the product a natural look.
Synthetic twines (cords) are waterproof, have increased heat resistance and are resistant to aggressive substances. They are not subject to rotting, and crafts made from them are not afraid of water. Some problems arise when coloring polymers, but you can use ready-made raw materials of different colors.
Making a bow: master class
You need to wind the rope around your container in such a way that the turns are completely even and touch each other. These steps must be performed until a certain width of the future craft is reached. Then you need to cut the thread, holding both ends, cover all the turns with a layer of silicone glue and let dry. After the required period of time for drying has passed, the product should be removed from the jar and slightly squeezed in the center, making a bow. Then, in the central part of the product, create a couple of turns from the same thread and secure them with glue on the reverse side. You can decorate your hair or any other things with a ready-made bow.
Vase made of rope and wine bottles.
An equally unusual craft that has practical significance can be a vase made from a glass bottle and twine. In addition to the materials listed, you will also need a glue gun.
Let's start creating this twine craft from the bottom of the bottle. To do this, its surface must be evenly covered with glue, and then twine must be wound around the container. The main thing is that the turns are uniform and pressed tightly against each other. The above steps should be performed until the top edge of the bottle neck is reached. The thread must be cut and the craft left to dry for a certain time. If desired, the finished vase can be decorated with rhinestones or dried flowers, or you can leave everything as is, it already has a beautiful appearance
Believe me, the attention of all your friends will be attracted by such twine crafts.
Decorating bottles with paints
One of the simplest ways is necessary. For decor, simply paint the bottle using your own tasteful colors. Stained glass or acrylic aerosols are best suited for these purposes. But spray paints will also work. After the work is completed, you need to varnish the top.
There are two types of bottle painting - inside and outside. We offer several ideas for making crafts using this Idea.
technique No1. Bottle painted on the outside and decorated with a newspaper "tulip"
This is a great opportunity to turn unnecessary wine bottles into original vases or decorative items for the kitchen and what. will you need a living room for this? simple The most materials that you can find on hand. Moreover, men will also be able to complete the master class. Any woman will say thank you if she gets rid of such unnecessary trash, turning it into an elegant work of art.
Materials and Blanks:
- tools, clean bottles;
- White spray paint (Oleum Rust paint works well);
- Tulip stencil;
- Newspaper pages sheets or old book;
- Glue for Brush;
- decoupage
Instructions:
- Step 1: Make sure the bottles are clean and have no labels on them. If this is not the case, then wash them thoroughly and remove all paper stickers from the glass. Dry well.
- Step 2. Paint the bottle white using a spray paint and leave it until it is completely dry.
- Find it. Step 3: stencil a tulip on the Internet, and print it. image use any other picture (or butterfly birds, for example). The main thing is that it fits in size.
- Step 4. Take a sheet of an unnecessary, old book or newspaper or magazine. Using a stencil, draw a tulip and cut it out.
- Using 5. With a brush step, apply glue to the “newspaper glue”, tulip it to the painted bottle.
- Step 6. Apply glue on top (a small layer) to fix it. Once the glue dries, there will be no traces left.
Idea No. 2. Bottle painted purple - “lace on the inside”
Glass containers look no less beautiful if they are painted on the inside. A purple vase, decorated with a lace ribbon, will set the mood in a lyrical way. A bouquet of lilacs will complete the handmade beauty of the vases.
Materials:
- Bottle (white);
- Purple paint;
- Wide white lace (ribbon, beige, brown - optional).
Instructions:
Carefully 1. Step wash the bottle, remove the label, remove the glue underneath. After this, boil it for 15 minutes. Step 2. When the vessel is completely dry, you need to pour paint inside. Bottle 3. Step rotate in different directions, turn at different angles so that the paint completely covers the inside part. Step 4. Turn the bottle upside down, place it over a container to drain excess paint.
good It is important to fix it. Step 5
After the first layer of paint has dried, you can apply the next one or several other layers. In layers from the desired result. When all the layers are dry, the craft is ready. Step 6. Decorate the blank obtained for the vase from the outside using Measure. cut a piece of lace of the required length, glue it around the bottle circumference. The decor can be supplemented with flowers from ribbons, fabric, beads, beads. Vase for ready flowers. Such a gift will be exclusive, it is made with your own hands.
New Year's decoration of champagne made of organza
From organza, a thin and at the same time rigid transparent fabric made from silk, polyester or viscose, you can make with your own hands the most delicate-looking decor for a bottle of champagne, which will resemble a real New Year’s “dress”. Decorating in this way is not at all difficult, but, on the contrary, it is even very interesting. Moreover, such beauty, which is depicted in our photo, will certainly charm you and you will want to decorate your festive table with it for the New Year 2022.
To work you will need:
- a bottle of champagne;
- organza of any color;
- a sheet of white thick paper A4;
- satin ribbon;
- decorative elements: rhinestones, beaded ribbon and much more, to your taste;
- scissors;
- scotch;
- hot glue.
Progress:
- At the beginning of the work itself, it is necessary to make “petals” from organza, from which we will subsequently assemble our elegant “dress”. And to do this, take a small square of organza, measuring 7.5 X 7.5 centimeters and fold it in half, but slightly beveled, to form four sharp corners. Then we fold our product again so that the right side, bent to the middle of the flap, is covered with its left part. We fix the base of the resulting volumetric “petal” with a drop of hot glue. We proceed in this spirit with the rest of the scraps, having made the required quantity.
- We take a bottle of champagne and, without removing the label, wrap it in a sheet of thick white paper, A4 format. To prevent it from unfolding, we secure it with two strips of tape.
- In order for the paper to fit tightly to the neck, it is necessary to cut its upper edge in a circle into strips 2 centimeters thick, to the point where the expansion of the sparkling drink container begins. After this, we should collect our strips on the neck, folding one on top of the other, and securing them with tape along the entire circumference. Having removed our paper frame, we trim it with scissors, cutting it to the very expansion of the container and once again carefully treat it with tape. The side of the frame will be a satin ribbon placed around the circumference with hot glue.
- We put the finished paper cover on our glass container. We take a satin ribbon and, having measured the required length, glue it tightly to the neck in a V-shaped manner, also capturing the base of the side of the frame. In this way we need to decorate the entire product, right to the very bottom.
- Let's start creating our New Year's “dress”. We fix the previously prepared organza “petals” on top of each other with hot glue, starting from the bottom of the product and reaching the very top - the neck, the border of which we also make from a satin ribbon, preferably golden in color.
- We decorate the finished “dress” with our own hands using beads, iridescent stones, rhinestones and, if desired, beautiful sweets.
In order to create several options for such elegant products, you should use your rich imagination, which we will help you expand with the help of our interesting photo ideas.
For the New Year 2022, you should definitely make such a craft, because with it your home will be significantly transformed and sparkle with bright, cheerful colors. And to complete such creative work without problems, you should watch our training video, which will provide you with detailed step-by-step instructions.
Master class on decorating a bottle of champagne with organza
https://youtube.com/watch?v=pW4oyrcMRs8
How to transfer a drawing to a surface
Experienced artists first draw a sketch of the image on the surface of the glass product with a pencil, then paint it with acrylic paints.
If you have no drawing experience, you can use the following techniques for applying an image to the glass surface of a bottle:
- Painting using a ready-made stencil, which is fixed to the workpiece. Today, making a stencil with your own hands is not difficult. To do this, you can create a decorative composition on cardboard by selecting a design on the Internet and printing it on paper using a printer. Then a stencil is cut out along the contours of the image, fixed to the glass and painted in the desired colors.
- You can make a sketch on paper and transfer it to the glass surface using carbon paper or a bold marker. Then you need to color the artistic plot along the contours. Arbitrary turns to give the effect of the composition can be applied without a sketch.
Simple drawings
To decorate a bottle, you can use simple techniques using rubber bands, tape and other improvised means.
Sequencing:
- It is necessary to paint the workpiece in one color at the request of the master. This will be the tone.
- After the paint has dried, electrical tape (adhesive tape) is glued to the sample at some distance from the bottom. You should get an even circle.
- Below the level of this circle, the glass is painted a different color.
- The desired pattern or any decorative composition is applied above.
In this way, you can make several more even circles and paint them with different colors. The adhesive tape can be glued to the surface in a spiral. Pearlescent dyes made on the basis of acrylic will look impressive. The surface can be additionally decorated with sparkles.
The elastic helps create curved shapes on the base, i.e. You can experiment by placing it on a glass container at different angles.
Complex drawings
There are many options for decorating glass products. Contour or dot glass painting techniques are often used. In this case, thick acrylic paints are needed, with the help of which volumetric dots and lines are formed. A bottle painted using this technology looks more elegant.
First, a sketch is made on the workpiece using a pencil. Then dots are applied with multi-colored dyes. But in this case, not brushes are used, but tubes of paint. To ensure that the dots are the same size, you must always press on the tube with the same force.
This method of painting on glass allows you to create openwork painting that looks like lace. After decoration, beautiful images are formed on the surface. The finished products resemble antique vases and can serve as an original gift for any special occasion.
Focus on details
By letting your imagination fly, you can create a truly magnificent DIY decorative element worthy of a creative exhibition.
It is thanks to the little things that a feeling of unique comfort will arise in your home.
This applies not only to bottle decor: small embroidered pillows, cute trinkets, embroidered fabrics, beaded trees, knitted blankets, painted ceramic objects.
You can always add a little warmth to your personal space without spending too much time. And even if it seems to you that you have no talent for needlework, just a few hours of work will show you how exciting this process is.
Decorating bottles with your own hands can be not only a fun creative process, but also a wonderful pastime for the whole family.
Handmade products are at the peak of popularity today. Even the most ordinary and, at first glance, unnecessary things can turn into an original, beautiful interior decoration. Glass bottles are a klondike for creative ideas that can turn into a bright item for a walk-around or serve as an original holiday gift. To decorate them you will need a small set of materials (for example, rope, lace, paint or cereal) and a little imagination.
Decorating bottles with twine
There are several ways to decorate a bottle. The interior design is suitable for bottles with transparent walls. For any method, you must first prepare the container for processing:
- remove stickers and labels;
- wash;
- dry;
- degrease with a special liquid or alcohol.
Below is a table with some simple options for interior decoration of a glass container.
| Materials | Execution principle | |
| Salt decor | Fine salt; Heat-resistant dishes; Acrylic paint; | Divide the salt into several portions and mix each portion with acrylic of different colors, mash with a fork; Place the resulting mixtures in an oven heated to 100C for 1 hour; Mash the “baked” salt with a fork and sift through a sieve; Pour the resulting colored sand into the bottle in layers using a funnel, alternating colors. Cover with lid and decorate as desired |
| Cereal decor | Black and white beans; Corn; | The essence of the work is very simple: you need to pour the grains into the bottle in layers as you wish. The nuance of this process is that small grains must be at the bottom, otherwise there will be no clear boundaries. |
| Decoration with paints | This method is as simple as possible and is perfect for bottles with embossed walls. It is necessary to pour the paint into the container and distribute it evenly inside. Fix the container in a vertical position upside down on a wire rack so that excess liquid flows out of it. After the first layer has dried, repeat the procedure again. |
External treatment can be used on containers of any color and size. It can be made in decoupage style or using improvised materials such as rope, threads, cabochons.
Bottle decor with twine
We use old jeans for decoration
The finished product looks as if it were completely covered in denim patches. Such a vessel is suitable as a youth gift for a birthday, graduation, as well as a decorative element in Provence, country, and rustic styles.
What you need for work:
- a transparent or colored bottle, preferably of the correct shape;
- denim or calico patches;
- clear nail polish;
- contour on glass;
- PVA glue or any suitable for textiles;
- brush.
Work process:
- the container is cleaned of dirt and labels;
- small shreds of any shape are cut, their edges are smeared with varnish to prevent crumbling;
- the flaps are chaotically glued to the base and dried for two to three hours;
- The outline draws “stitches” along the edges of the fabric, as well as any patterns between them.
There is another option - a barrel bottle. It will be an original addition to a marine or cowboy interior. You will need a thick bottle, like in pirate films, about ten wooden clothespins or 14-18 ice cream sticks, and walnut stain.
What do we have to do:
- denim is cut into long strips, two to three centimeters wide;
- the metal part is separated from the clothespins to make planks;
- the halves of the clothespins are glued to the bottle, covered with stain - something resembling a barrel comes out;
- Bundles are twisted from denim strips, and the structure is wrapped with them under and over clothespins;
- on top of the wooden planks, something like denim roses made from strands, metal rivets, and coins are glued;
- The lid is also covered with jeans with a rose, a bow is tied at the neck, a chain with a key.
The simplest gift decoration option is packaging with a pocket. A piece slightly smaller than the height of the bottle is cut from a denim trouser leg, and a denim pocket is sewn to its middle. The bottom is sutured, and a vessel is placed in the resulting bag. The neck is wrapped with lace or ribbon over the fabric. Depending on the purpose of the gift, a postcard, a chocolate bar, or a lighter are placed in the pocket.
Bottle decor with craft paper
If you decide to give a bottle of alcohol as a gift, there is a very quick and economical way.
- Take craft paper.
- The length should be 10-15 cm longer than the bottle. The width of the sheet should wrap around the bottle at least 2 times.
- Wrap the bottle.
- Fold 5 cm of kraft paper along the bottom of the bottle.
- Tighten a ribbon or jute rope around the neck of the bottle.
- Use the same rope to tie a tag with wishes or a flower.
- Form a bow from the rope.
Nicely straighten the paper above the tied rope.
Beads
To decorate a bottle with beads yourself at home, you will need white acrylic paint, a thin natural bristle brush, beads, a sewing needle and instant glue. A pattern in the form of lace elements is applied to the cleaned bottle with a brush: weaving threads with elements of flowers or snowflakes. You can also paint the bottle black, blue, green or another color before applying the design.
The decor of bottles with beads can be used 100%, or it can simply become part of the composition.
After the design has dried, begin decorating with white or colored beads. To do this, very carefully apply droplets of glue on the white drawn lines, and then use the tip of a needle to pry up the beads and place them in the droplets of glue. This is a very delicate and scrupulous work that requires attention and accuracy. After completing the application of beads, to better secure the elements, the entire bottle is coated with acrylic varnish.
Decorating bottles with beaded elements is easy and beautiful.
The finished souvenir looks very rich, elegant and sophisticated. Such a bottle can be turned into a luxurious lamp if you place a small battery-powered garland inside.
What beginner needlewomen need to know
Making a blanket or bedspread with your own hands is quite easy. The thing is that the way of connecting pieces of fabric is similar to a regular mosaic of patches. However, in order to get a high-quality and beautiful product, you need to strictly follow the sequence of work.
Diagram for assembling a denim blanket
The first step is to choose what exactly the bedspread will be made of and what tools are needed for this. This is done so that during the sewing process everything is in its place, and the person does not look for the necessary devices. After this, you should decide on the sewing pattern for the future product.
Approximate scheme for making a blanket
Experienced craftswomen recommend considering various schemes for creating a blanket from scraps and choosing the one you like best, or making your own based on them. Those who do this for the first time should choose the simplest schemes that do not require special skills from them. Such products will be no worse than professionally manufactured ones.
Suitable jeans need to be prepared - washed, ironed and pieces cut to the appropriate size