A DIY PVC pipe hanger is a budget-friendly and convenient way to store things. After the repair is completed, unnecessary scraps from plastic pipes are often left behind, which can no longer be used for their intended purpose. They should not be disposed of immediately because they are an excellent material for various useful crafts.
So, anyone who has at least minimal experience in joining such parts can handle making a simple hanger. In addition, this activity will appeal to all family members - the work is not difficult or dirty, even children can be involved in it. Below we will tell you what options for hangers made from PVC pipes you can assemble yourself.
DIY PVC pipe hanger
Assembly steps
First, we determine the dimensions of our future rack. Here are some recommendations:
- for storage rooms, the height of the shelf should be at the ceiling, the depth should be at arm’s length (to make it convenient to reach the item);
- if the rack can be approached from both sides, then its depth can be increased;
- for storing tools: height – 2 m, depth – 50 cm, number of shelves – 4, distance between them – 45 cm;
- for storing canned food, the step between the shelves can be reduced (up to 30 cm), and their number can be increased.
Typically the dimensions of the shelf are:
- 180x50 cm – with 4 shelves;
- 200x60 cm – with 3 shelves;
- 180x50 cm - with a high bottom shelf, the rest - in increments of 35 cm.
Of course, these dimensions are not absolute; they can be changed when making them yourself.
When this stage is completed, prepare the drawing. As a last resort, a diagram. But be sure to indicate the dimensions that need to be maintained during assembly.
When this documentation is ready, production can begin.
- Cut the profile into equal sections. If this does not work, bring it to the desired length by grinding the end of the workpiece.
- Clean off burrs and chamfer.
- If the pipes will be connected with fittings, the protective varnish must be removed from the ends of the workpieces. To do this, use sandpaper again. In addition, a rough surface adheres better than a perfectly smooth surface.
- Start assembly with the vertical posts. Then connect them with cross beams. Fasten the parts together in the desired sequence. The method of fastening depends on the material of the workpieces and the type of connections.
- Be sure to use a level - the product must be level. The more often the checks, the fewer errors.
- Using this method, assemble the entire frame.
- Install shelves. If the fastening is through, then the frame is assembled to the height of the lower shelf, which is then placed on the pipes. After this, grow the frame to the desired height.
- If the bookcase is high, secure the top crossbar to the wall with anchors.
- Once the shelving is assembled, paint it. Preferably in several layers.
The structure is ready. Both plastic and metal shelves are assembled using this system. A homemade rack does not have to be rectangular; it can also be made angular. The general assembly technology does not change.
And finally, an important tip. Load both factory and homemade shelves correctly. Place heavy things on the lower shelves, light ones on the upper ones. Periodically inspect the fastening points, because this is where destruction begins.
To learn how to make a shelving unit from pipes in a loft style with your own hands, see the following video.
Materials and tools
The amount of material will depend on the design features of the selected gate option. For our master class you will need the following set of materials:
- pipe with a diameter of 5 cm, up to 8 m in total length;
- tees and elbows of the corresponding diameter, 4 pieces each, rotated by 87 degrees;
- cord for weaving mesh;
- self-tapping screws for securing the mesh (several dozen);
- wire cut up to 2.5 m.
Also prepare some tools:
- shovel;
- jigsaw or hacksaw for metal;
- screwdriver;
- marker, tape measure (ruler);
- hammer;
- any lubricant to connect the elements.
Football goals for children.
Step-by-step instructions for constructing a hanger
Before you start building a hanger, you need to stock up on the tools and materials you will need for the job. In any case, you will need to purchase polypropylene pipes and fittings of the appropriate size, paint, if you want to make the hanger original.
In addition, you will need: a pipe cutter or metal saw, an iron for soldering pipes or special glue for plastic, a screwdriver or drill, and screws.
We will tell you what stages the process of constructing a hanger consists of, using the example of the two simplest designs.
If you don’t have a soldering iron for PVC products, you can use special glue for polypropylene. There are quite a lot of brands on sale, so choosing the right one won’t be difficult.
Option No. 1 – rack for outerwear
This product will definitely come in handy in the hallway, especially if space is limited. In addition, there are quite a lot of advantages of a plastic hanger.
Let's list just a few of them:
- mobility - such a structure can be easily moved from place to place;
- compactness – the product will not take up much space;
- accessibility - the design is made of inexpensive materials;
- ease of execution - even an inexperienced master can cope with the task.
Before you start building a rack for outerwear, you need to decide on its location in order to correctly calculate the size of the product.
To build such a hanger for the hallway you will not need a lot of time and materials. And if there are children in the house, then they will also be able to take part in the exciting process of creating an exclusive item.
So, for work you will need the following set of tools: a tape measure, a hacksaw or pipe scissors, sandpaper, special glue, sand or small pebbles, paint if you plan to paint.
The materials you will need to purchase are:
- polypropylene pipe with a diameter of at least 25 mm (it is better to take 32 mm) - 2.5 m;
- corners for pipes of the corresponding diameter - 10 pieces;
- tees - 6 pieces;
- pipe plugs – 8 pieces.
Having prepared everything you need, you can start working.
In order to simplify the process of assembling the structure, you need to distribute all the parts into groups: blanks for the base, for the branches (hanger arms) and for the rack. The first group will include: 4 elbow connections, 3 tees and 6 tubes of 12 cm each.
To assemble one branch you will need a 15 cm long tube, an angle and a tee, and there are three such branches in total. Tubes of 20, 30 and 80 cm will be used to assemble the rack.
Plugs are placed on the ends of the hanger legs, branches and the top of the rack. After assembling and gluing the product, you should wait at least 24 hours and only then start using it.
As you can see, there is nothing complicated in assembling a hanger rack.
Option No. 2 – hanger for children’s clothes
This product will require a little more materials and time to assemble. But your child will certainly appreciate this design. You can even involve your baby in the assembly.
This is how the children's clothes hanger will look when assembled. It does not have to match the dimensions shown in the photo. Its dimensions must correspond to the height of the child
As with the hanger rack, you will need a similar set of tools. The number of consumables will have to be calculated independently, depending on the location where the structure will be located and its height.
To assemble a children's hanger of the specified sizes, you will need to prepare: a pipe of the selected diameter, as well as appropriate tees, angles, adapters, plugs, glue for PVC pipes or an iron for soldering. To calculate the required amount of consumables, it is advisable to depict the project on paper.
By the way, it is not necessary to fill the base of this structure with sand or pebbles; it turns out to be light and stable, so the child is able to independently move it from place to place.
After waiting about a day, you can start using the product. Here you can hang not only outerwear, but also umbrellas, hats, and backpacks.
Recently, it has become fashionable to collect hangers for everyday clothes. They can not only save space, but also become an original design solution for the interior. Moreover, their creation does not require special knowledge or skills.
We have prepared a series of articles devoted to making various crafts from plastic pipes. We advise you to read:
- How to make a chair from polypropylene pipes with your own hands: step-by-step manufacturing instructions
- Screen made of plastic pipes: types of partitions + step-by-step manufacturing instructions
- DIY crafts from propylene pipes: homemade options for home
How to sew a wigwam for children?
Stock up on thin bamboo or ordinary sticks if you plan to install a wigwam in a residential area. Their optimal number for the most spacious hut is nine pieces. At the intended intersection, these rods must be secured with rope. The rods are not installed pressed against each other, but tilted 25 degrees so that a figure resembling a cone is obtained. Then you need to secure the base with additional sticks, tying them to each stand. To make the wigwam as tall as possible, you need to use longer rods. For a better quality tie, you can drill holes in them and pass the rope there.
At the next stage, you will need to decide on the covering of the building. For this, simple pieces of fabric or a specially sewn cover are used. To make the latter you will need a pattern for a wigwam for children. The sewing process is very simple and does not require any special skills. The segments of such a cover are in the shape of triangles. To calculate the required dimensions, measure the openings between the rods.
Step-by-step instructions for assembling a hanger
To construct a hanger, you need to prepare the following materials and tools:
- PVC pipes, adapters, corners of the required size;
- paint to give a special appearance;
- scissors and soldering iron for plastic pipes;
- fasteners;
- electric drill or screwdriver.
Let’s look at how to make simple floor clothes hangers with your own hands from plastic pipes with drawings, photos and master classes.
Small clothes rack
Assembling the hanger is easy, since the elements do not need to be adjusted. The number of certain parts directly depends on the size of the hanger.
Before starting work, prepare a clean place for installation. The pipes are marked and cut to size. For the item in question, the following pieces of tube are needed: out of 25 mm - 6 pcs. 12 cm each, 1 pc. – 80 cm, 2 pcs. – 20 cm, 1 pc. – 10 cm. Prepare 3 pieces of 15 cm each from a tube with a diameter of 20 mm.
The step-by-step process boils down to the following steps:
- All parts are inspected and, if necessary, the edges are sanded.
- Lay out the elements so that each group contains parts of one of the parts of the hanger.
- Using a tee, the tubes are assembled in pairs so that they are located on the same line. Two more such nodes are made in the same way.
- One of the assembled structures is placed perpendicular to the other two, after which the free edges are placed in the side holes.
- A 25 mm corner is placed on the formed legs. Then turn the edges down - these will be the legs.
- Adjust the central T-shaped structure, directing the free hole upward.
- To install the branch under clothing, a cross, a tube, an angle or a cap are connected into one whole. In the same way, 2 more units are made.
- An 80 cm tube is installed in the free hole of the tee. One of the branches of the product is mounted on the edge. Then one segment is fixed, then another. Having installed the last branch, place the tube at 10 cm. Complete the installation with a cap.
- Adjust the position of the branches, directing them in different directions.
- Plugs are placed on the edges of the legs.
- The hanger is painted outdoors in the desired color with aerosol paint, and then left to dry completely.
For outerwear
Such an item will be an excellent addition to any hallway, especially if the room is small. To correctly calculate the size of the hanger, you need to choose the installation location. When all the points are taken into account and the material is prepared, you can begin assembly:
- All elements are grouped for ease of installation.
- To assemble one branch, you will need a piece of tube 15 cm long, an angle, and a tee. 3 such parts are needed. To assemble the stand, prepare tubes 20, 30 and 80 cm long.
- Plugs are placed on the edges of the legs of the structure, as well as on its upper part and branches.
If a special soldering iron is not available, you can use plastic glue.
To understand the process of installing a tube hanger, you can refer to the video example.
For children's clothing
A children's hanger requires a little more time and materials, but your child will surely love it. The product uses the same tools as in the previous version. The number of required elements must be calculated independently, based on the installation location and dimensions of the product. For ease of material calculation, it is recommended to draw the drawing on paper.
Assembly is carried out by analogy with the design above. To make the hanger stable, it is not necessary to pour sand into the tubes: it is already quite stable. The light weight of the product allows even a child to move it to another place. If glue is used to connect elements, you should wait a day after assembly. This hanger can be used not only for outerwear, but also for hats, backpacks and umbrellas.
Hanger in several levels
In addition to the simple designs considered, there are options with larger dimensions. You can make a hanger yourself that will fit one person’s entire wardrobe. The following elements are prepared for construction:
- PVC pipes with a cross section of 25 mm;
- corners;
- T-shaped elements;
- shelf panel;
- aerosol paint.
The hanger is installed as follows:
- The pipes are marked, after which they are cut into blanks and sorted.
- The elements begin to be connected from below. To do this, fix the pipes in the tees, then in the turning corners.
- The tees are installed on the longitudinal pipes, and a transverse element is fixed on them, which will represent the first level of the product. Afterwards, the longitudinal pipe and the upper cross member are mounted in the same way.
- They put a panel for the shelf, which can be used for shoes or accessories.
- The finished structure can be painted if desired.
If the hanger is painted, the layer may fade over time. Therefore, the product should be updated periodically.
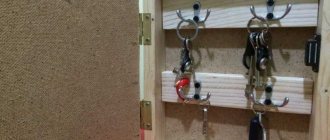
Plank model
The simplest model of such an accessory for the hallway is a bar on which hooks are nailed. The description was not colorful, but if you use exclusive material to make it, then the product will turn out exclusive.
If a wooden plank is used for the product, then it can be processed using different methods: sanding, painting, etc. Hooks for hangers can be made of real wooden hooks, metal hooks, door handles and other materials. They can all be the same or different, which looks very unusual.
To ensure that your child always undresses himself, he needs a funny hanger. In this case, you can look for children's hooks in the form of cartoon characters or favorite animals. Since children's things are not so heavy, any interesting plastic toys, for example: balls, cups, etc., can serve as hooks for the product.
Small rubber animals can be attached to the bar using superglue or special glue for rubber.
You shouldn't throw away old forks or spoons; they can be used to make excellent hanger hooks if you bend the end slightly. If old, unwanted skis take up space in the closet, then they can also be used as a hanger bar. It’s worth refreshing them a little with paint and nailing down decorative elements that will become hooks. Seeing such beauty, made yourself, your guests will envy you.
For those who do not know how to work with wood, but want to have an original product, there is a way out. In the store you need to buy a special decorative self-adhesive film that imitates a wall hanger and stick it to the wall. All that remains is to choose the material for the hooks and attach them to the wall.
You can find many fresh ideas, as well as master classes on making wall structures, on the Internet.
Small floor hanger made of PVC pipes
But light weight can be a problem. If you hang a heavy bag or coat on the device, the hanger may simply fall
Therefore, before making a drawing, it is important to provide a reliable support base. It must be wide enough or made of heavier, and therefore resistant material
Although there is a way to make the plastic base of the hanger stable - fill it with sand, sealing it with end caps.
The method of assembling a floor hanger from PVC water pipes is absolutely simple.
Of course, you can strengthen the joints with glue, but if you refuse to do this, then over time you will be able to assemble another practical and original product from the parts of the hanger.
Materials and tools:
To make a floor hanger from PVC pipes, you should prepare:
- PVC pipe with a diameter of 25 mm and a length of 200 cm.
- PVC pipe with a diameter of 20 mm and a length of 50 cm.
- Angle bends with a diameter of 25 mm – 4 pieces.
- Angle bends with a diameter of 20 mm – 3 pieces.
Then mark the plastic pipes and cut the parts to the required size. The 25 mm pipe must be divided into elements of the following sizes: 6 pieces of 12 cm, 1 piece of 80 cm, 2 pieces of 20 cm, 1 piece of 10 cm long. From a PVC tube with a diameter of 20 mm, prepare 3 identical parts of 15 cm each.
Manufacturing instructions
- Before assembly, inspect all parts for roughness and sharp parts at the cut points. Sand such edges using sandpaper.
- Distribute the workpieces into groups. Each should include parts for a specific part of the hanger. The stand will be assembled from 4 corners, three T-shaped connectors, and 6 tubes with a diameter of 25 mm, 12 cm each. For 1 branch of the hanger (there should be 3 such units in total) you will need: one T-shaped connector, a plastic adapter from 25 mm to 20 mm, a PVC pipe with a diameter of 20 mm, a length of 15 cm and an angle with a diameter of 20 mm. It is advisable to close the hole of the latter with a special plug-cap for pipes. One PVC tube 80 cm long, two tubes 20 cm each, one 10 cm and a cap will go to the stand.
Let's start assembling the hanger.
- Using a T-shaped connector, assemble 2 tubes in pairs so that they are located on the same line.
- Make 2 more of the same knots.
- Place one of the three identical structures perpendicular to the other two. Insert the free ends into the holes on the sides.
- Place an angle bend with a diameter of 25 mm on the ends of the resulting 4 legs. Turn the loose ends down - these are the legs of the hanger.
- Adjust the position of the center T-piece so that the free hole faces upward.
- To assemble branch pieces that can be used to hang clothes or other items, connect together a T-piece, tube, elbow, or cap (whatever works best for you or you have in stock). In order not to be mistaken, look at this detail in the photo below.
- In the same way, make 2 more of the same blank nodes.
- Place a tube 80 cm long into the free hole of the central T-shaped connecting piece. Install one of the branches of the hanger onto its free end. Next, continuing the vertical line, attach a 20 cm long PVC pipe. Then another branch and again a 20 cm pipe. Next, install the last branch, followed by a 10 cm piece of tube. Complete the assembly of the structure with a cap at the top point.
- Adjust the position of all three branches so that they point in different directions. This will add aesthetics to the entire structure, allow you to conveniently place things, and even distribution of the load will ensure the stability of the hanger.
- Place plugs on the ends of the 4 legs and branches.
- If you think that the structure is not strong enough, apply glue to the joints of the parts. After this, immediately check the position of all rotating parts. Once the glue dries, it will be difficult to correct mistakes.
- Paint the PVC pipe hanger with special spray paint. Leave the product until completely dry.
Manufacturing
A homemade bow made from PVC pipe is a structure of three main parts, the central part of which is the handle, and the peripheral parts are the string and the limbs.
Manufacturing process:
- We cut a piece of the required length from the PVC pipe; the most common size is 1.5 meters. This bow will be suitable for an adult man and a physically developed teenager.
- Using a ruler (tape measure), we find the middle of the workpiece, mark it with a marker and measure two segments of 5 cm in both directions from the middle. This part will be the handle, before continuing, you need to try on the handle. The palm should fit completely into this gap. If your palm is wider, then you need to increase the size to the desired size and make marks with a marker.
- Using a heating device, we heat one half of the pipe from the edge to the first mark at a temperature of about 150-180 degrees. We use foil to prevent the materials at hand from igniting. The pipe must be heated until it becomes plastic and pliable along its entire length under the influence of the hand.
- We place the heated pipe on the table, press the molding board against it with clamps, and place wooden blocks under the future bow handle.
Place wooden blocks under the future bow handle
- We wait until the pipe cools completely and forms. Externally, it should look flat at the edge with an increasing diameter towards the center. We have formed one arm of the bow, the second is done in a similar way. You need to try to keep the details the same.
- We also form the handle by heating and flattening in the direction perpendicular to the shoulders. You need to shape it by wrapping it in a thick cloth and squeezing it with your fingers, under your palm.
- To secure the bowstring, measure 8 cm on both sides of the edges of the shoulders, mark with a marker and make protrusions for attaching the bowstring. For this:
- We heat the final section to a pliable state;
- We bend it at an angle of about 90 degrees;
- We mark the future protrusion using a marker and a ruler and cut it out using a hacksaw;
- We process the protrusion with a file and sandpaper to remove burrs and form the finished appearance of the product;
- We repeat steps 7.1 – 7.4 and make a protrusion on the other shoulder.
We form the tip to which we will attach the bowstring
- We stretch the bowstring from the propylene rope. The tension force of such a bow is equal to 19 kg.
Multi-level pipe hanger
In addition to simple options for creating hangers, there are also larger models. In this case, we are talking about a product that will accommodate the entire wardrobe of the average person.
During the manufacturing process you will need the following:
- plastic pipes with a diameter of 2.5 centimeters and length: 100 centimeters - 4 pieces, 65 centimeters - 2 pieces, 48 centimeters - 4 pieces, 20 centimeters - 6 pieces, 5 centimeters - 8 pieces;
- connecting crosspieces – 10 pieces;
- corners for tapping - 6 pieces;
- plastic panel for shelf;
- spray paint.
Manufacturing process: step-by-step instructions
Step one: you need to mark the length of the pipes and cut them with a pipe cutter or saw. Next, all the parts should be sorted to make it easier to assemble the structure.
For convenience, you can place sheets with written dimensions next to the pipes.
Step two: assembly should start from the bottom, similar to the previous options. It is necessary to attach crosspieces to the pipes, and rotating angles on them, until the base of the frame is formed.
Hanger with compartments for shoes
Step three: next you need to install the crosspieces on the longitudinal pipes, and then attach the transverse part to them, which will be the first level of the hanger. Then the longitudinal pipes are again installed on the crosspieces, and then the upper transverse one.
The hanger is quite durable
Step four: then you should install a plastic panel down, which will serve as a shelf for shoes and other items.
The panel can be cut to your size at a hardware store
Step five: at the end the structure can be painted, but this step, as in previous cases, is not mandatory.
When spray painting a hanger, be sure to wear gloves.
Over time, the paint may fade a little and lose its original appearance. Therefore, it is recommended to periodically touch up the hanger using aerosol paint. This way the product will always look neat.
Chandelier manufacturing technology
Many may think that when using pipes and plumbing components, a chandelier will look rustic and even clumsy, but this is not so. With the right approach and careful execution, they create a work of art even from such simple materials.
Build process
For production you will need pieces of metal-plastic pipes, splitters, a ceiling socket, and cartridges.
Watch this video on YouTube
To begin with, they think about the design of the future product and the number of lamps that will be installed. In the center of the entire structure there will be a splitter, to which the pipes are connected and bent into the desired shape. Wires are passed through the resulting workpiece. Since the cord will pass through several end points, it is recommended to run parallel lines into each separate branch, connecting them only under the ceiling rosette, excluding breaks inside the chandelier.
Chucks are attached to each pipe at the ends, having previously connected them to the cable. Through a small piece, connect the socket to the splitter. Then the electricity is connected.
The finished product is painted and equipped with lampshades. The main thing is that the result pleases the inhabitants of the house.
Decoration
Unusual design can transform anything, even an ordinary one at first. To ensure that the furniture has a classic design, it is enough to cover it with artificial, natural leather or a substitute. In the case of wooden structures, you can preserve the original design of the material, making it more expressive with the help of stain or clear varnish. It is permissible to tint coat hooks with silver, gold or bronze paint, and cover the hangers with satin or velvet.
To decorate in a country style, it is permissible to use additional decorative components, for example, carving horns from wood. In order for the product to be made in a retro style, its color can be aged. When they want to decorate a hanger in a Provence style, they use decoupage techniques. Images of birds, flowers and landscapes are glued to the product. The final design depends only on your imagination. It’s not difficult to come up with something original yourself using glue, sequins, beads, ribbons, cords, etc.
Furniture items are an unusual saving option
Pipes can be used to produce furniture that is distinguished by its durability. Thanks to bold decisions, you can significantly save your family budget. Let's talk about the most popular types of furniture.
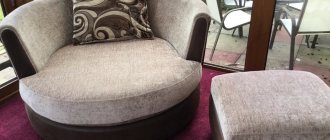
Chairs. Perhaps these are the most necessary pieces of furniture in the apartment. You can make chairs from the material: folding chairs, stools, armchairs and children's high chairs.
Two-story children's bed. An excellent solution for those who want to save money in the family and not buy an expensive crib. In addition, when children grow out of it, you can disassemble the bed and make other necessary products.
A small table with glass cover is an elegant solution for those who love coziness and comfort.
Rack. The design of many shelves will fit into any room and accommodate a lot of household utensils.
Tips for installing structures made of PVC pipes
When making a hanger or other products from plastic pipes, it would be useful to familiarize yourself with the recommendations of specialists:
- The connection of plastic pipes is carried out with a special glue, but it is not cheap and you have to spend a lot on large products. However, such glue can be replaced with a similar substance, which is intended for connecting plastic parts;
- most products do not stand out for their complexity, but a pre-made drawing will make assembly easier;
- When using glue to fix plastic elements, you should use gloves to protect the skin of your hands, as well as a mask. In addition, the assembly process is recommended to be carried out outdoors;
- The choice of plastic pipes today is quite wide and they all have different characteristics, which you should familiarize yourself with in advance. To increase the strength of the hanger, you can buy pipes with a metallized layer;
- to give the pipes different bends, they are heated in certain places, and then the desired shape is achieved. For this, for example, a hair dryer or hot water is suitable;
- To give stability, the pipes are filled with sand. If the product is large, fittings are sometimes inserted inside the pipes.
To minimize the number of scraps, check the marks several times before cutting a solid pipe.
Having understood the design and familiarized yourself with the drawings, photo examples and master class, it becomes clear that there is nothing complicated in creating a floor clothes hanger with your own hands from plastic pipes. The main thing is to set a goal, choose from a variety of ideas the option that suits you and turn it into reality, which is completely within the capabilities of anyone.
Let's sum it up
There are a huge number of different unusual ideas for making hangers from PVC pipes. The main advantage is that such a lightweight material is quite easy to work with, so both men and women can handle the assembly process without special physical training. Working with pipes is simple and allows you to use your imagination, because you can not just follow the assembly instructions, but at your own discretion modify the above methods, thereby creating unique designs.
Any apartment begins with a corridor or hallway, and these rooms leave the first impression of the entire housing, and it is this that is often the most objective. How to make a clothes hanger in the corridor with your own hands? Read in the special article.
Website about the dacha
01/11/2019 admin Comments No comments
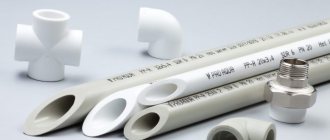
Homemade products from PVC pipes
It is unlikely that PVC pipes, which are used mainly for drainage and sewerage, are somehow connected in your mind with creativity and creative ideas. But it’s time to start thinking differently, because with their help you can improve your storage system, organize your workspace, decorate your home before the holidays, decorate a wine bar, make a frame for a bed, and even make a table lamp.
Homemade products from plastic pipes are easy and simple to make. But all sorts of useful little things last for a very long time, because plastic is not subject to corrosion and is resistant to various types of influences.
Shelves and racks are quite easy to assemble:
Country tables and chairs for outdoor use
Many people have a question: “is it possible to replace PVC pipes with polypropylene pipes?” You can use polypropylene pipes, only in this case we will also need a soldering iron.
Advantages of PVC pipes: - snow-white color; — pipes can be connected to fittings using glue, or without it at all; - if you do not use glue, the structure will be collapsible, and like a LEGO constructor, you can use fittings and pipes to assemble other structures. Of course, polypropylene pipes are deprived of these advantages
Camping folding chair
The author of the idea, who is very respectful of music, as well as art in general, proposed creating original furniture from scraps of plastic pipes and other building materials. So, using pipes in the form of legs and fixing glass on top, he got a magnificent coffee table. The basis for the chair was also parts of pipes folded in the shape of an organ, combined with a soft top made of dense bags with foam-paste crumbs inside. And how exclusive the bed turned out to be.
What about a crib? In my opinion, this is simply brilliant!
Children's 2-tier bed
The playpen can be filled with balls and the baby will have no limit to his joy. And the material for making this playpen is ideal - because the polypropylene pipes are soft and the child will not hit himself if he accidentally falls on them.
Basket for trash and dirty laundry
Clothes dryer made of PVC pipes.
Tell me, where do you dry your laundry and clothes at your dacha? And if you also have a swimming pool, then this design is absolutely necessary for drying towels. Tight ropes are somehow a thing of the past. A little work and here you have a clothes dryer made from scrap materials
holder for small items
Embroiderers are also not forgotten: an embroidery frame and a machine.
Please have a minibar at your service
Lovers of creative lamps outdid everyone:
Our smaller brothers are not forgotten either:
And here the sewer pipes came into use. And the cat can mouse at any time.
DIY bird aviary made of plastic pipes
Hanging swing for a summer house
Fences and enclosures made of plastic pipes
A trellis for grapes made of plastic pipes that will always have a pleasant appearance.
You can make hydroponics from plastic pipes; you can use any pipes (including sewer pipes)
Collapsible outdoor tents and tents made of plastic pipes
A greenhouse made of PVC pipes will serve you for many years, it does not need to be painted, and it will not rot or rust, as usually happens with greenhouses made of wood and metal.
It is most advisable to make a greenhouse from PVC pipes, giving them an arched shape, since this design eliminates sagging of the film and increases its service life. A homemade greenhouse made from PVC pipes can be covered with either polyethylene film or polycarbonate. Such greenhouses are not suitable for all-season use, but they are quite suitable for early spring and late autumn growing of berries, vegetables and herbs
Or make a pen for chickens
By attaching the wheels, we get very convenient carts.
Children's car made of plastic pipes
Carports made of plastic pipes
As you can see, plastic pipes can be used in any industry (and not just for their intended purpose), and where exactly to use them depends on your imagination.
Coffee table
Don’t think that this item in the interior will look ridiculous or massive. If you assemble it correctly, add decorative elements, and paint it in one or more colors, then this attribute will fit into any design.
Use your imagination and look for non-trivial approaches.At the first stages of drawing up drawings, you need to decide on the material for the countertop. It can be plastic, tempered glass, wood, steel. You can use the old surface of a disused table.
A glass tabletop is usually attached to the top of the plastic frame.
After this, the pipes are cut and connected using fittings. If you include jumpers in the design, this will make the coffee table more durable. The tabletop can be secured with self-tapping screws. A great idea is to attach wheels to the legs of furniture fittings. This will make this product mobile.
Carefully consider the size and design of the future piece of furniture.
General operating principle
Creating a structure of varying complexity consists of several stages:
- Selection of scheme and method of implementation.
- Purchase of materials and tools.
- Cutting pipes in the required quantity according to dimensions.
- Assembly of individual frame parts using soldering or fittings.
- Creation of a complete structure.
- Checking the result for strength.
You can choose the assembly diagram at your discretion. There are a huge number of them. The choice depends on the skills and desires of the master. After this, you need to buy materials and tools. And here the question may arise about which plastic pipes are best to take.
As such, there is no difference. Especially when it comes to small pieces of furniture. Polypropylene is more expensive than polyvinyl chloride. Therefore, if the appearance of PVC and the way it is assembled are suitable, it is better to use it.
Polypropylene is much stronger, but also more expensive. Homemade products made from polypropylene pipes can withstand serious pressure. This is due to the fact that these products have thick walls.
In the case of assembling large structures, it is advisable to use both materials simultaneously. It is better to use PP for the load-bearing part, and PVC for areas with low load (about
Connecting elements
Polypropylene or PVC is widely used in areas such as baths, kitchens, and toilets. But besides plumbing tasks, they can serve as an excellent basis for creating original pieces of furniture.
Quite often you can see something like this:
- shelves;
- awnings;
- folding chair;
- bunk bed;
- stool;
- swing;
- rocking chair;
- racks;
- hangers;
- whatnot;
- garden furniture;
- arches, etc.
Looking into your garage or storage room, you will probably find a lot of scraps from old plastic pipes that turned out to be unnecessary after renovation. And for some reason you were in no hurry to throw them away.
I think you just knew that sooner or later you would read this material, and there would be an irresistible desire to make something out of them. But what exactly is still an open question. I would like to start not with what to do, but how to do it.
We are talking about connecting elements together into the structures you need. When using plastic products, you must determine exactly what kind of material it is. The most commonly used are polypropylene and PVC.
If it is a polypropylene pipe, then you will need a special welding machine for the connection. I think many people know how much it costs. Buying a device for one-time use is a complete waste of money. It's good that there is a rental service. But even the presence of welding does not allow many home craftsmen to achieve what they want. Working with such devices is difficult and requires special training and extensive practice. If you have no experience, and there’s nowhere to get a welding machine, look for other methods.
An alternative to welding is the use of glue and fittings. Moreover, in the case of polypropylene, I advise you to give preference to compression fittings.
If it is PVC, then a connection with a socket and rubber seals, glue or fixation with flanges will do.
Special qualities of a mobile clothes hanger on wheels
Special qualities are characterized by a design that can be rolled around the room on wheels. So, while ironing clothes, it can be in one room, to transport the laundry it is moved to the closet, in the same way it can be on the loggia or veranda, and then move to the hallway so that you can use it when leaving the house or returning back . There is a wide variety of wheeled hangers, and they all have the following characteristics:
- ease of installation of the hanger without disturbing the floor and walls, unlike stationary structures;
- high mobility of the product, which we have already talked about;
- attractive external design;
- Possibility of use for different types of clothing;
- high capacity and density of clothing placement;
- saving space in a small room where there is no room for stationary furniture;
- things are easier to find and place than in a closed closet;
- the ability to easily move large quantities and weights of clothing.
Folding chair
On vacation or on a hike, a folding chair is not just a product for increased comfort, but a necessary item for relaxation. Metal models are popular. But they have many disadvantages. The first is the weight of the chair. It is uncomfortable to wear over long distances. Secondly, many metal parts can become rusty. What makes this item not durable in use.
It does not lose its performance qualities and retains its original appearance after a long stay on the street.
A good substitute for metal is PVC pipes. They are lightweight, have a solid base, and will serve the owner for a long time due to their resistance to atmospheric agents.
This chair is easy to care for; it tolerates washing and cleaning well.
How to craft this item:
- The height of the product can be standard for factory folding chairs - 35-45 cm. Prepare components.
- Cut out the fabric seat. It must be made of dense material that can withstand the load.
- Connect the plastic components together. You can use two screws for the folding element.
- Sew the fabric onto the top of the chair.
- Check the quality of the connected parts.
You need to start from the function that the furniture will perform.
Battery-powered clothes dryer without cord
We offer our readers another option for making a dryer, this time without a clothes cord and with a different, more reliable method of attaching it to the radiator. This device will help out in situations where you need to quickly dry baby clothes.
Such a dryer can have any number of crossbars (of course, within reason, since the mount will not support much weight). The manufacturing process is described in detail below:
For assembly you will need several pieces of plastic pipes with a diameter of 20 mm, a length no less than the width of the heating radiator. Their number depends on how many crossbars there will be in the product. You will also need four rectangular corners and fittings in quantities that also depend on the number of cross members. Two require 2 fittings, three require 4, etc.
To make a dryer with three crossbars, another pipe will be used to make four small pieces of pipe of the same length and four longer ones. The length of the latter will depend on the depth of the radiator and it must be calculated so that the near crossbar of the dryer is located behind the plane of the heating radiator
Mount the two parts of the structure so that the fittings are positioned strictly parallel to each other. Once both side carriers are ready, connect them with pre-cut crossbars
Warm up and put the crossbars on the fittings and the corner of one of the side supporting structures
Then place the second side structure on the crossbars in the same way. By the way, it is not necessary to measure precisely so that the angle between the branches of the fittings and the mount to the radiator is 90 degrees. Minor deviations are allowed that will not affect the properties of the product.
To help readers, we present a video about the manufacture of the above-described clothes dryer:
Using the operating principles described above, you can implement ideas for manufacturing various floor or ceiling dryers. In the photo below you can see one example of a drying device on wheels. Many other options can be found by searching the Internet.