Smoothly plastered walls are the dream of beginners and the reality of professionals. Nothing can replace years of experience, but you can achieve high-quality results on your own. The main thing is to know the basics of the puttying process. This article will talk about how to get a smooth surface after puttying and what is needed for this? In particular, the types of mixtures are considered and it is told when to choose which one, how to clean and prepare the wall for puttying, what methods of puttying there are, and what professionals advise.
What tool is needed for puttying?
To putty the walls yourself, prepare a minimum set of tools. What tools can you not do without?
1. Drill equipped with a special attachment - a mixer. As a rule, putty is sold in the form of a dry mixture. Water is added to this mixture in a certain proportion. Only with a special mixer can you mix the putty mixture perfectly. The output should be a homogeneous putty without lumps.
2. Set of spatulas . Be sure to choose a spatula of different sizes. In your work you will have to use both large spatulas (40-50 cm) and very small ones. After all, in problem, hard-to-reach places, it will not be possible to properly putty the wall with a large spatula. This is exactly what small spatulas are used for.
3. Rollers and brushes for priming walls . It is not advisable to skip the priming stage. After priming, the wall is covered with a thin film. This not only further increases its strength, but also ensures excellent adhesion of the treated wall to any facing materials (adhesion).
4. Rule . It will be needed in case of uneven walls when you have to apply putty in a thick layer. To level thick layers of putty, it is convenient to use a long metal rule.
5. Alcohol or laser level . Often the wall surface is very uneven. Before starting the initial puttying, test beacons are installed using an alcohol or laser level to check.
6. Sandpaper . If you want to get a beautiful surface that is pleasant to look at, use fine sandpaper for rubbing. For example, grouting with 240-grit sandpaper will allow you to get the perfect result. Use the finest sandpaper only when performing finishing putty. And at the stage of the initial initial putty, it is correct to rub the wall with coarse coarse sandpaper.
7. Manual skinner . Sanding will become much more convenient if you use a manual sander. This is a tool with special clamps on the handle for securing the skin.
8. And, of course, you can’t do without a container in which the putty is mixed.
List of tools that you may need when plastering walls. Photo — srbu.ru
Security measures
During work, you need to protect your skin and head from putty. To do this, you will need clothing that covers your body and a scarf or cap on your head. During mashing, care must be taken to ensure that dust does not get into the eyes, nose and mouth. Special respirators are sold to help protect the respiratory system. You can purchase goggles to protect your eyes. All this can be found in construction stores. If work is carried out at height, then care must be taken to securely secure the scaffolding and structures.
If the mixture gets on the skin, it should be washed off with water and then treated with cream. If dust from the putty gets into your eyes or respiratory tract, you should consult a doctor.
Puttying work is a rather labor-intensive process that requires some experience, but if you do everything competently and carefully, the result will be of high quality, and you can be proud of the repairs you have completed yourself.
Which putty is better to putty on walls and how to choose it
Classification of putties by composition: gypsum, polymer (acrylic) and cement.
Let's consider their disadvantages and advantages.
1. Gypsum putties are attractive at an inexpensive price, are easy to level, and do not shrink. The only drawback is poor resistance to moisture. Only this limits the scope of their use.
2. Cement putties have excellent moisture resistance, but have a significant drawback - a high degree of shrinkage.
3. Polymer putties . Undoubted advantages: excellent moisture resistance, do not shrink at all. Using polymer putty, high quality treated wall surfaces are obtained. The only drawback is the high price.
According to their purpose, putties can be divided into starting (leveling), decorative (finishing) and universal.
1. Characteristics of leveling (starting) mixtures: high strength, excellent adhesion, large grain size. Recommended: for leveling walls after applying plaster. Application thickness: 3 -20 mm.
2. For high-quality decorative finishing, it is advisable to apply finishing putties to the surface to be treated. With their help, you can get a perfectly smooth, even surface, hiding small flaws. The strength of the finishing putty is less than the starting putty, its processing is not difficult. Apply in a small layer up to 4 mm.
3. Universal putties combine the properties of decorative and leveling mixtures. They cost more, although their properties are slightly inferior to finishing and starting coatings. We recommend using it when treating walls without large flaws.
The modern market offers dry and ready-to-use putties. The low cost of dry putty and the possibility of its long-term storage are attractive.
Dry in bags and ready to use in a bucket of putty.
Ready-made putties are convenient to use. You don't have to use a mixer to prepare a homogeneous putty mixture. This saves time and virtually eliminates dust. But ready-made putties are much more expensive than dry ones.
Please note: ready-made putties shrink significantly. If a layer less than 2 mm thick is applied, ready-made putties cannot be used. They also do not boast a long shelf life. It is significantly less than dry construction mixtures.
Types of putties
Read also: Decorative panels for interior wall decoration: how to choose a reliable material (110+ Photos & Videos) + Reviews
Ready-made mixtures have the required viscosity, but are more expensive than dry ones
Depending on the composition, putty mixtures are:
- Oil-glue. They are considered an obsolete material that is not recommended for use due to the drying oil in the composition. The oily base soaks into the porous concrete and then appears in sloppy patches on the wallpaper.
- Gypsum cement. Dry mixtures for use are diluted with water and mixed. The coating turns out to be quite thick and is best suited for processing before wallpapering. Can be used everywhere: for interior work in dry and damp areas. For distinction, it is marked with the indices LR, KR, VH
- Water-dispersed. Such putties also contain cement and gypsum, but they do not need to be diluted. The mixtures are sold in plastic buckets immediately in finished form, already mixed with a polymer emulsion. Such products are characterized by increased smoothness and strength.
- Acrylics. The highest quality and most convenient to use formulations. Their only drawback is their high price. They allow you to achieve a perfectly even coating, so they are rarely used for puttying under wallpaper.
Preparing the wall surface for putty
The main thing is to make sure that the surface of the walls is absolutely clean. Be sure to remove stains of grease, paint or soot. Of course, there should be no falling layers of plaster, residues of scale, wax or parts of the formwork. Don’t even start puttingty on frozen ceilings and walls. This is strictly not recommended.
Before applying putty, coat the walls with a primer. This will ensure good adhesion (connection) of the putty solution to the walls. Prime the surface using a special roller. Try to apply the primer solution evenly, avoiding gaps. One layer is enough.
There are the following types of putty: finishing, lighthouse, starting. Let's look at the properties and scope of application in detail.
Starting surface putty
Putty is performed using coarse starting material. It's not difficult to find. When purchased, it is called “starting putty.” To remove large differences in walls, to hide grooves and holes, this putty is convenient to use. The thickness of a layer of such putty applied at a time can reach 1.5 cm. Allow the previous layers to dry completely. Only then proceed to applying the next layer of putty.
In order to obtain the highest possible quality of putty surfaces, a special painting mesh is installed on the wall, and the putty is distributed evenly over the entire surface. In this case, the walls are completely covered with putty.
The advantage of this technology is that when using a painting mesh, the putty fits perfectly onto the surface of the walls. And the surface itself becomes stronger and smoother. Moreover, the coarser the painting mesh, the smoother the treated wall surface.
Starting wall putty.
Calculation of the amount of putty
Read also: TOP 8 Best ceiling paints: priority on reliability and durability. Review of the most popular manufacturers
Calculation of the amount of material is done taking into account the area of the working room
The amount of dry leveling mixture for treating a room is calculated according to the following parameters:
- room area minus door and window openings
- primer consumption (usually indicated by the manufacturer on the packaging)
- number of layers (minimum 3: 1 starting and 2 finishing)
- application thickness (calculated for each layer)
- stock (10–15% of the result obtained)
So, to level the vertical planes of a standard room 5 by 6 meters, with ceilings 2.8 m high, two windows and a doorway, according to average calculations, you will need 5 bags of dry mixture (25 kg each).
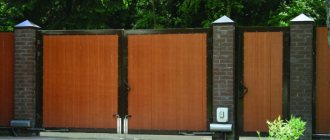
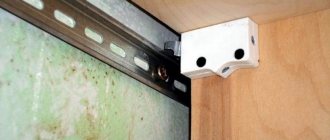
Lighthouse wall putty
The materials are no different from the starting putty. The only difference is that beacons are used. A lighthouse is a wooden, plaster or metal strip that is set strictly vertically, checking the verticality with a level. The beacons are attached to the walls using some kind of gypsum mixture; it dries quickly, after which you can proceed directly to puttying.
The same applies to alignment along horizontal lines. In this case, a rule will come in handy for leveling the putty layer. By following these recommendations, after starting work, a flat surface is obtained. To ensure the quality of the work, you can check it with a level. This type of finishing is used quite rarely. Reason: its cost is significantly higher than the starting putty, although visually they are almost the same.
Puttying walls along beacons. Photo — vipconstruction.kiev.ua
Final wall putty
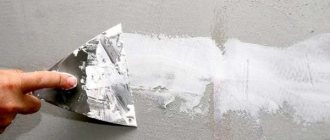
After completing the starting or lighthouse putty, proceed to the finishing putty. It is done with finishing putty mixtures. It is this putty that gives the wall surfaces perfect smoothness. The smallest cracks or pores are eliminated. It is important that the finishing putty completely coincides in plane with the previously prepared surface, so it must be applied in a very small layer.
If the starting or final putty is done poorly, you will not be able to correct the situation with the finishing putty. Therefore, first try to make the surfaces of the walls perfectly smooth. Only then proceed with the finishing putty. Its main goal is a beautiful smooth wall surface.
The finishing putty is carried out under special lighting, this allows you to see the smallest irregularities. Photo — vipconstruction.kiev.ua
Mixture application techniques
Despite the fact that the method of applying the mixture was indicated above, the home craftsman should know what types of finishing work exist. There are three main techniques for plastering walls. The first is the classic one, during which the putty is applied to the wall manually. Its main advantage is the ease of processing wall joints and hard-to-reach places. The master feels the small irregularities better and eliminates them with the help of additional layers of putty. The main disadvantage of the method is that processing walls takes a lot of time and physical effort.
Manual application and leveling Source obzorkuhni.ru
Puttying cracks in walls
To hide cracks in the walls, we recommend using gypsum mixtures for putty. The material santegypsum is much more elastic in work, but hardens much longer. Advice from competent specialists: at first it is recommended to slightly widen the crack, slightly increase its depth and thickness. To increase the roughness, you can scratch it with a knife or other sharp object along its entire length. Then carefully treat it with a primer. Only after this should you begin to putty.
Repairing cracks for putty.
How to apply putty on walls
1. If you use dry putty, you need to properly prepare the putty mixture.
Cooking sequence:
- pour a small amount of water into the container;
- add putty;
- mix with a simple spatula;
- To obtain a homogeneous mixture, use a drill with a mixer, gradually adding water if necessary.
Please note: the readiness of the putty should be determined by consistency. It should become elastic and stick slightly to the spatula. If the putty mixture flows, it means it is runny. Add dry mixture little by little to correct the situation. If there are clumps in the putty, it means the putty is too dry. Add water little by little, stirring thoroughly to achieve perfect homogeneity.
2. Apply starting putty. It is convenient to use a large spatula. Apply the putty in medium portions, spreading evenly over the surface. Hold the spatula at an angle of about 30 degrees. The putty is applied diagonally in one motion. Recommendation: to avoid transitions and bumps, each subsequent layer should be applied overlapping.
Attention: when making the starting layer, mix the putty in small portions. This will avoid the appearance of dried-out dry particles, which will reduce the quality of work. Don't be too alarmed by unsightly stripes from the spatula. The stripes are perfectly hidden with finishing putty.
3. To process smooth corners, we recommend using a corner spatula. Working technology: first, using a small spatula, apply a small layer of putty along the entire height of the corner or slope. Then carefully level the surface with an angle spatula. The putty layer should dry well within 24 hours.
To putty corners you will need a special corner spatula.
4. Once the starting putty has completely dried, proceed to the finishing putty. A large and a small spatula are used for work. Using a small spatula, apply putty in small portions onto a large spatula. Then apply the putty mixture evenly to the surface. The layer thickness is about 1.5 - 2 mm.
5. Before you putty on a wall for painting or wallpaper, wait until the previous layers have completely dried. The starting and first layers of finishing putty must be completely dry. This approximately takes about 12 hours. Then you can apply the finishing putty.
6. Once completely dry, proceed to final sanding with sandpaper.
Attention: before applying each next layer of putty, it is advisable to treat the previous one with a primer.
Expert advice
To smoothly putty the walls, you need to adhere to the following expert advice:
- remove old finishes;
- prime the surface and let it dry;
- work with two spatulas: narrow and wide (putty with the second, put the mixture on the spatula first);
- keep the spatula at an angle to the surface;
- the uniformity of the layer should be maximum;
AttentionTo avoid streaks, apply the mixture in a thin layer; move the spatula not only in one direction, but also make semicircular movements.
- You cannot stop in one place, the putty must be spread quickly;
- If necessary, repeat the work until you achieve a flat surface.
To achieve an ideal result, you need to follow the recommendations given in the article. By choosing the right type of mixture, preparing the surface well for work and following the instructions, your walls will be the smoothest.
How to putty walls for painting and wallpaper
The walls are first leveled using several layers of putty. If the wallpaper is thick, it is advisable to apply putty in two layers. When using thin wallpaper, we recommend applying three leveling layers of putty. This will allow you to paste the wallpaper on a flat surface without wrinkles or bubbles.
Video. Puttying walls under wallpaper
Painting walls requires more careful preparation. The paint does not hide even the slightest unevenness. Therefore, to level the walls, it is necessary to use finishing putty.
The puttying procedure is carried out in five stages:
- apply the first thin layer of leveling putty with a spatula;
- for large unevenness, use another 2-3 layers;
- allow the putty to dry;
- perform finishing putty to eliminate minor defects;
- After complete drying, rub the wall with sandpaper to obtain a perfectly smooth surface.
Preparatory stage
Read also: Latex paint or acrylic: what is the difference and which one is better to choose for different types of work (Photo & Video) + Reviews
A properly diluted dry mixture is homogeneous in consistency.
When using a ready-made composition, the step of mixing the putty is skipped, and for dry mixtures proceed as follows:
- 2.5 liters of clean water are poured into a 7-liter container.
- Gradually pour the mixture into the water in a thin stream until a mound forms above the surface of the water.
- Put a mixer attachment on the drill and quickly mix the mixture until it has a homogeneous consistency without lumps. It is recommended to stir for at least 2-3 minutes
- The composition is allowed to stand for 30–60 seconds and a second batch is made. After this, the putty is ready for application.
If, when stirring, the mixture turns out to be thick or liquid, it is not recommended to add either dry material or water. It is best to knead a new portion, taking into account previous mistakes.
The preparatory stage also includes the processing of construction tools: the spatula blade is wiped with a clean, lint-free material, the buckets are washed and wiped dry.
Lumps from previously used mixtures are removed from the mixer attachment. If this is not done, future work with the new composition will be greatly complicated.
The walls to be treated are cleaned of the remnants of previous finishing: wallpaper, paint, plaster.