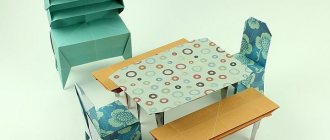
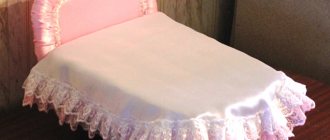
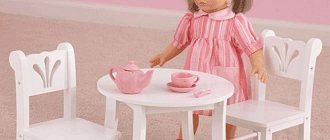
It is impossible to imagine playing with dolls without a certain set of furniture. And, of course, the bed is an indispensable attribute of a doll’s life. What to do if you can’t buy toy furniture? Your own imagination and skillful hands come to the rescue. This is exactly what is needed in order to cope with the task of making a bed for a doll out of a box.
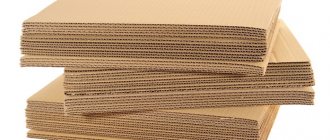
Making a crib for a doll will not take you much time. But what you will definitely have to tinker with is choosing the appropriate model. The main selection criterion in this case will be the material. The most popular option is cardboard. Every home has a couple of unnecessary shoeboxes or a couple of sheets of packaging cardboard (like the kind that household appliances are packaged in). Having decided on the material, you need to choose a model. It could be:
- classic single bed;
- ottoman bed;
- sofa;
- bunk bed.
But, before you start making furniture, take measurements from the doll for which the bed is intended. To the obtained values, add 3-4 cm to the length and width.
What materials can it be made from?
Do-it-yourself beds for dolls are made from different materials. They can be either less durable or durable, reliable, and last a long time. If only a bed is made for a doll, preference is given to simple materials, but if a series of furniture is planned, reliable and strong elements are used. The same principle applies if, after the older child, younger children play with the doll and furniture.
What materials can such furniture be made from:
- paper;
- colored paper;
- cardboard;
- whatman;
- old boxes;
- shoe boxes;
- Styrofoam;
- expanded polystyrene;
- plywood;
- wood;
- plastic;
- foam rubber
What you will need when creating furniture:
- glue;
- scissors;
- self-tapping screws;
- stapler;
- staples;
- simple pencils;
- markers, fabric;
- yarn;
- paints.
For simple options, paper, whatman paper, and glue are used, and the finished product is decorated using colored pencils, markers, felt-tip pens, and oil pencils.
When making furniture with your own hands from plywood or wood, you use self-tapping screws, a stapler with staples, and a mattress is made from foam rubber. They also sew fabric bed linen for miniature doll beds.
Manufacturing technology
This section will describe three options for making beds for dolls. The options made from cardboard and boxes are simple; they are made together with the child. A popsicle stick bed requires more time, perseverance and precision, but the appearance of the finished product will be beautiful and colorful.
From cardboard
The easiest way to make a doll bed from cardboard is a detachable one. You can involve a child in making such furniture, since the work is very simple and does not take much time. Another advantage of making such furniture is that if there is no necessary space for storing doll furniture, it can be disassembled. When folded, several sheets of cardboard take up little space.
To understand how to make a bed for a doll out of cardboard, you should understand what materials are needed to make this furniture:
- cardboard;
- decorative materials to choose from.
What tools are needed to make this furniture:
- scissors;
- stationery knife;
- a simple pencil;
- a sheet of white A4 paper for making a pattern - several pieces.
How to make a doll bed:
- The bed model described below has dimensions of 13*20 cm, and is more suitable for a baby doll than for a Barbie doll. But the sizes can be varied according to your wishes. The side walls each consist of two parts. This provides additional reliability for fastening parts;
- In total, seven parts will be required: headboard, footboard, 2 side parts on 2 sides, bed base. You need to make patterns on a white A4 sheet. Using a pencil and a ruler, draw a base of 13x20 cm. The dimensions of the footboard are 13x4.5 centimeters, the headboard - 13x7 cm. These parts are also cut out of paper. It is necessary to draw two side parts measuring 6x8 cm and 2 parts measuring 6x6 cm. If desired, the dimensions of the side sides can be made different;
- Each part is cut out of paper, applied to a sheet of cardboard, outlined with a simple pencil and cut out. After this, a cut for fastening is made on each part. 4 cuts are made on the base of the bed. All of them will be carried out along the long side, so the cuts are made from the side of the head and foot. On the side where you plan to install the headboard, you need to make an incision at a distance of 1 cm from the edge of the base. The depth of the cut should be 5.5 cm. Exactly the same cut is made on the other side. Exactly the same cuts should be made at the foot of the bed, but 3 cm deep. The base of the bed is ready;
- on the part that is attached to the side of the doll’s legs, it is also necessary to make two cuts on the side, the length of which is 13 cm. The cuts are made at a distance of 1 cm from the edge of the cardboard blank. The depth of the cut is 1.5 cm. Exactly the same cuts are made on the headboard;
- Next, the side parts are processed. The large side should be cut in two places. On the side measuring 8 cm, at a distance of 1 cm from the edge of the six-centimeter side, it is necessary to make cuts 1.5 cm deep. At the other end of this part, it is necessary to divide the six-centimeter side into two parts - 3 cm each. It is necessary to make a 3.5 cm cut along the division line. The same should be done on the second part of the same dimensions;
- the smaller side, 6x6 cm, is cut approximately the same way. One cut is made in the center of one of the sides, but with a shallower depth - 2 cm. On the adjacent side, located at an angle of 90°, it is necessary to make a cut 1 cm from the edge with a depth of 1.5 cm. The second side is also cut;
- For a beautiful and neat look of the bed, the protruding edges are trimmed with scissors. All parts are connected along the line of cuts. All together they will hold each other. All sides are first attached to the base of the bed: both large and small. Then the headboard and footboard are placed into the deep cuts. No bending is carried out. After this, the bed is decorated using any methods.
By teaching your child to fold and unfold such a bed on his own, you can create an additional element for him to play with. Having made a mattress from foam rubber and bed linen from fabric, the child will learn to fold and make the bed himself.
Drawing
Details
From the box
When making furniture for dolls from a box, they use an old shoe box in which they are not stored. It is desirable that the box is in good condition, but if this is not the case, then its appearance is corrected by pasting it with colored paper, whatman paper, or white paper, which is then painted by hand.
What materials are needed to make a bed for dolls with your own hands:
- cardboard box;
- glue;
- White paper;
- colored paper.
What tools are needed:
- pencil;
- ruler;
- scissors;
- stationery knife;
- measuring tape;
- the doll itself.
Work order:
- The approximate height of the doll and the space it occupies when lying down are measured. Taking these dimensions into account, the size of the base is selected. Since the doll bed is very small, it is difficult to change the dimensions, so they are determined in advance;
- adding a few centimeters in length and width, you get the size of the bed base. Using a ruler and pencil, you need to outline the sides of this size on the cardboard box. Then you need to add a few centimeters along the length of this part on both sides. They are designed so that when the cardboard is folded along these lines, the legs are formed on which the bed will stand. This entire side with two fold lines must be cut out of cardboard using scissors and a knife. The cardboard is folded along the fold lines designated in advance;
- Now side parts, a headboard, and a small wall near the doll’s legs are made for the bed. The height of the cardboard piece that is glued to the headboard should be twice as large as the bed leg formed by folding the base;
- the part that will be on the bed near the doll’s feet should be 1 cm higher in height than the bed leg formed by the fold line. The length of the side parts should coincide with the base of the bed. Their height can be different; it can either cover only the space under the bed, or form low sides. The height of the side walls is selected depending on personal preference;
- All these parts are attached to each other using ordinary PVA glue. After gluing, it is advisable to leave the cardboard blank for at least one day so that it hardens and strengthens properly;
- then you need to use white paper to paste over all the parts of the bed. This will strengthen the workpiece and make it neat and beautiful, smoothing out all the lines of cuts and folds. White paper is used for pasting. It is torn into small pieces by hand, and then glued to the surface of the bed on all sides so that there are no gaps left. Paste the cardboard in two layers. After this, it should dry completely;
- A bed made in this way for a Barbie doll is decorated with your own hands using colored paper. Using parts of different sizes and colors, they create furniture with a unique color scheme.
Drawing on the lid of a shoe box
Cutting out the part
Glue the ends together with glue
Dome top details
The parts are glued together
Assembly of all parts
We attach a rectangular stand to the bottom of the product
From ice cream sticks
Popsicle sticks are used to create the most luxurious furniture for dolls. To make the bed strong, it is advisable to use a glue gun. To make the simplest bed you will need only 18 sticks.
Before use, wash the sticks with running tap water and a detergent that will remove stickiness. The sticks are thoroughly dried on paper towels and wiped dry before starting work. For better adhesion of parts with glue, the sticks are degreased using alcohol, vodka, acetone for nails or solvent.
Stages of making a bed:
- one stick is cut in half into 2 parts;
- stack 2 times 5 sticks in a row. They form a small wall, similar to a fence;
- across these 5 sticks, glue half of the cut long sticks, slightly below the middle of the height;
- do the same with the second batch of 5 sticks;
- Now these two parts are connected using two more sticks. Two sticks are glued on both sides to the halves of the cut sticks. Thus, the frame of the future bed is obtained without a base, but with a ready-made headboard and footboard. During gluing, it is important to place the parts evenly;
- The 5 remaining sticks are placed and glued to the base of the bed. After the glue has dried, the bed is decorated with decor and bed linen is laid.
Necessary materials
Marking sticks
Headboard of the bed Fastening the headboards
Frame
Making a tiny doll ottoman
For small dolls, you can make an ottoman bed out of paper. But even in such models, the bed must be made of cardboard.
Materials:
- 4 sheets of A4;
- PVA glue or “Moment”;
- stationery scissors;
- ruler;
- a simple pencil;
- a piece of cardboard;
- a piece of fabric and padding polyester for sitting.
Instructions:
- On paper we draw 2 rectangles of the required size for the bed. Let's cut them out.
- We bend the short edges 0.5 cm down.
- Draw the same rectangle on cardboard and cut it out.
- We cover the cardboard part with paper blanks.
- We cut the A4 sheet horizontally into 4 parts.
- We twist the rectangles into tight tubes - these are the supports of the crib.
- Glue the supports to the stock.
- We cut out 2 rectangles from the fabric to the size of the bed, and sew them together.
- We put the padding polyester in the case and carefully sew it up.
- We put the mattress on the crib - the craft is ready.
Decor variations
The first decorative element for a doll bed is bed linen. Manufactured furniture is decorated with colored paper, buttons, beads, beads, ribbons, colored cardboard, dried flowers, sparkles, stars and so on.
The best option to decorate a bed for dolls made of cardboard is to make patterns with paints. Children are involved in this part.
As can be seen from the material described above, creating unique furniture for children's dolls requires time, effort, skill, materials, decorative elements, and tools for work. Any parent can create a bed for dolls with their own hands. Girls should be involved in the work of creating furniture for her doll. The work will develop fine motor skills in the child, speed and clarity of work, knowledge of numbers, and will involve fantasy and imagination. The child can decorate the furniture he has made himself. All work is carried out under adult supervision.
Variety of models
A doll's bed should be environmentally friendly, safe and attractive for a child. Such items are distinguished by their reliability, ease of use, and bright design. Models can look exactly like real furniture, or they can be made in fancy shapes: oval, round, triangular. Among the varieties of products are:
- classic;
- single and double;
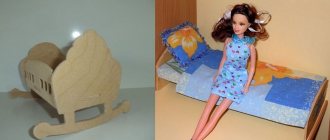
- rocking chairs;
- two-tier structures.
The beds are complemented by a bedside table, storage drawers, changing table or canopy. Doll furniture differs in the structure of the frame. There are options with a headboard, supporting walls, panels, with and without legs. The sizes of the beds depend on the doll’s parameters:
- classic bed for toys up to 52 cm - 55 x 35 cm;
- single for a doll up to 50 cm - 52 x 28 cm;
- traditional for toys up to 65 cm - 67 x 32 cm;
- cradle for dolls up to 52 cm - 53 x 30 cm.
- two-tier model for toys up to 50 cm - 50 x 28 cm, 48 x 28 cm.
- cradle for dolls up to 55 cm - 56 x 30 cm.
A doll bed made of cardboard or paper must be made large so that it can support the weight of the toy. Large models are made from solid wood.
Classical
Single
Double
Rocking chair
Bunk
