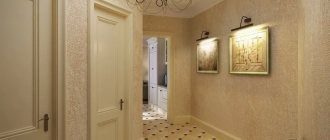
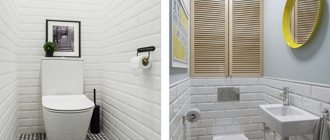
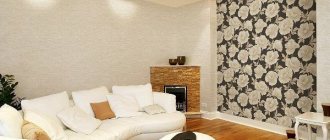
Ceramic facing tiles are successfully used both for finishing interior walls and floors. The priority is considered to be excellent technical characteristics of the material and beautiful appearance. When decorating a hallway, there are some features that should be taken into account during the installation of tiled or porcelain tiles. A wide selection of finishing materials and their color range opens up great opportunities for designers when decorating a room, as beautifully illustrated by the photos in the article.
Seamless tiles with a concrete effect in the hallway
Material properties
High-quality floor tiles in the hallway must be durable. The coating must withstand mechanical damage, for example from being hit by a heavy object, and there should also be no scratches on it.
In international practice, it is customary to evaluate the wear resistance of tiles according to classes. Ceramic tiles for hallways marked REI 4 and REI 5 are the most wear-resistant. Such tiles are not afraid of not only mechanical damage, but also exposure to chemicals.
The water-repellent properties of tiles can be assessed with the naked eye. The chip of a tile that is not afraid of water should be smooth, without pores, and red in color.
Decorative tiles for the hallway can also be grades R10 and R11, these are tiles with a low slip coefficient.
Features of heated floors
There are certain advantages of having a heated floor under the tiles:
- environmental Safety;
- favorable temperature conditions;
- increased surface area due to the absence of heating radiators;
- The warm tiles feel good on your feet.
The disadvantages include the complexity of the work and the need to carefully level the surface before installation. Also, during repair of the heating system, all tiles will need to be completely removed.
Types of tiles
Floor tiles in the hallway can be made from several materials, each of which has its own characteristics.
Ceramic tile. Such tiles tolerate temperature changes well, are easy to clean, and are not afraid of chemical influences. The only drawback is its fragility; the tiles crack when struck by a heavy object, for example after a cane umbrella falls.
Porcelain stoneware. It is made from a mixture of sand and granite chips. Such tiles are very strong and durable, are not afraid of impacts, and can imitate parquet boards or natural stone. This is one of the most expensive types of tiles.
Clinker tiles. Very durable ceramics, differs from conventional firing method. It comes in glossy and matte. It is characterized by high strength and high price compared to ceramics.
Quartz vinyl. This type of tile has appeared in construction stores quite recently. Externally, it is similar to laminate, but more flexible. Laying tiles in the hallway is carried out using the locking method or using special glue.
Dye
This option is distinguished by its simplicity and accessibility, ease of application to the surface to be decorated. It is quite durable, can be wet cleaned, and comes in a wide range of colors.
The disadvantages of this finishing material are the long drying time and the unpleasant odor during the painting process, which can cause allergic reactions.
Useful tips
To choose high-quality tiles for the floor in the hallway, follow the advice of specialist tilers:
- Choose tiles that are not afraid of mechanical damage and exposure to aggressive detergents;
- Use waterproof smooth compounds to grout the seams; all the dirt from the street most often accumulates on the seams;
- You should not choose tiles that are too light; remember that household members in dirty shoes will constantly trample around in the hallway;
- The floor tiles in the hallway should be embossed or covered with a non-slip coating, otherwise you will often slip on them when walking home in wet shoes.
Nuances of choosing wall coverings
From the variety of materials offered for wall decoration, in the hallway you need to choose those that have the following characteristics:
- resistance to damage;
- wear resistance;
- ease of care;
- moisture resistance;
- strength;
- aesthetic appearance.
There are a huge number of variations in wall design using different types of coatings; after studying various photos of wall decor in the hallway, you can choose the option that best suits your tastes and preferences and implement it in your apartment.
Before purchasing the type of coating you like, analyze the design features of the room being decorated, its microclimate, your financial capabilities, the compliance of the selected materials with the overall interior design, the smoothness of the decorated surface, etc.
In order to figure out how suitable this or that wall covering will be for your hallway, let's talk in more detail about each.
Color solution
Both too light and too dark shades of tiles are not suitable for the hallway. On a light one, every speck will be visible, and on a dark one, scratches and dust will be clearly visible.
It’s better to opt for intermediate options or combined tiles for the hallway. The most suitable colors would be beige, gray or brown.
Cool shades of tiles will make the hallway feel more spacious. Contrasting combinations will make a small corridor even smaller.
The color of the tiles on the floor can be in harmony with the flooring in the rest of the house or, on the contrary, deliberately contrast with it to emphasize zoning.
Decorating the hallway with decorative stone
The walls of the hallway are what catches the eye of any entering guest. Every day the hallway is the very first thing that greets you at home. Therefore, the entrance to the house must have a certain style and be in harmony with the rest of the design of the apartment or house. Which of the many cladding options will be chosen is up to you. We will just reveal a few nuances, knowledge of which will protect you from possible mistakes:
- Often there is not enough natural lighting at the entrance to the apartment. By using materials in warm colors, you will avoid creating a gloomy room.
- Decorating a small corridor with decorative stone and small tiles will visually increase its size. Large elements will visually weigh down an already small space.
- The problem with a wall that has a geometrically complex location can be solved by using flexible stone. The sheets cut and bend well, which makes it possible to cover even rounded corners.
Decorative stone in the house Source catalog6.ru.net/
- Decorative stone is considered a self-sufficient material. You should not add unnecessary decoration (paintings, shelves, photographs) to it. It will be better if the wall remains free.
- The textured surface is highlighted by installing additional vertical lighting. The maximum effect is achieved by using rays propagating from bottom to top.
- You can create an optical illusion and enlarge a small hallway space using the opposite mirror wall.
- The natural warmth of wood will be an excellent complement to the coolness of the stone. Both types of material, when used in the same room, merge into a single harmony.
In warm colors Source krrot.net Natural stone tiles on the floor Source www.keramis.com.ua
Shape and size
Since the hallway is often small in size, it is more rational to use small-sized tiles; it will be easier to lay them, and the cost of trimming will be less than for large tiles.
Large tiles also have their advantages: in large corridors they lay the floor much faster, there are fewer seams on the surface, which means less dirt will accumulate.
In spacious hallways, a combination of tiles of different sizes is acceptable.
Laying artificial stone with your own hands
Before starting work, you need to decide on the quantity. It's not as simple as it seems. If you look at the collections, you will see that they mainly consist of fragments of several sizes and shapes. The exception is ceramic stone and collections that imitate brickwork. Once you know the sizes of the fragments, you can estimate how approximately you want to arrange them.
Outline the proposed finishing boundaries on the walls. Now you can more or less accurately calculate how many “squares” of decorative stone you need. Add about 10-15% to the resulting figure for trimming and possible changes in the process. This will be the required quantity for finishing.
Pre-layout
Craftsmen who have experience working with decorative stone first “figure out” where to place which fragments and how to rotate them. You can make the layout on the floor, you can do it in design programs (if you know how to work with them), you can try to draw a plan on graph paper or a piece of checkered paper. The main condition: it is necessary to maintain proportions and not forget about the seam. It can be very small - this type of installation is called seamless or continuous, or it can have a thickness of up to 1 cm or even a little more.
Lay out the tiles, choose colors and shades
Many people skip this stage when decorating walls with decorative stone themselves, hoping that everything will become clearer during the work. Of course, this is possible, but keep in mind that the glue sets very quickly and there is very, very little time for rework. It will be easier to work according to the plan.
Surface preparation
Walls made of any material can be finished with artificial stone, but they all require preliminary preparation. If the walls were previously decorated with something, all the finishing is removed, leaving a bare wall with plaster. Gluing decorative stone onto old wallpaper is a waste of time and money: the finish will simply fall off. Some very light collections can be glued to wallpaper, but these can only be fragments - a few tiles. And then, no one will give a guarantee that the wallpaper will not tear and everything will not collapse.
The easiest process for preparing walls is if they are plastered. Just cover them with primer. Its type is selected depending on the material (gypsum or cement). Then you can begin the actual finishing.
Decorative stone is laid on smooth walls
If the walls are made of brick, building blocks, or any other similar material, they are first primed and then plastered with a suitable plaster. It is also possible to level the walls with plasterboard. But at the same time, you greatly limit yourself in choosing a finishing stone - you will need to choose from the lightest collections, and this is mainly a decorative stone made of gypsum.
If the walls are wooden, they are first coated with waterproofing impregnation, and after drying they are treated with a primer. Then a painting mesh is nailed to the surface and only then plastered. When choosing plaster, it is advisable to choose those that “breathe” and will not interfere with the wood’s ability to regulate humidity. With glued tiles this will be problematic, but finishing a hallway with decorative stone is usually fragmentary - the tiles are glued only in some places, and the rest of the surface will remain vapor-permeable.
What to glue on
Most manufacturers of decorative stone advise using special adhesive compositions designed specifically for working with this material. They come in three types:
- for lightweight finishing stone weighing up to 30 kg/m2;
- for heavy from 30 30 kg/m2 and above;
- for low temperatures (even +5°C).
The glue should be diluted in small portions, strictly following the manufacturers' recommendations. It is better to stir with a drill with an appropriate attachment - this makes it easier to achieve homogeneity.
Glue for decorative stone can be ready-made, but it costs more
You can also glue it with good quality tile adhesive, but it must be really good - you will have to hold a decent amount of mass. The third option is for liquid nails. This method works great on drywall; on plastered surfaces it is better to use an adhesive solution.
Gluing technology
Walls plastered or lined with gypsum board are coated with a primer. While it dries, dilute a portion of glue. When laying, it is important that the rows of finishing stone are laid horizontally. To achieve this, you can apply markings on the wall. This can be done using a paint cord, or you can draw with a pencil using a bubble or laser level.
Laying decorative stone in the hallway begins from one of the corners. Some collections have special corner tiles - they are easier to work with. If there are no such fragments, you will have to decorate the edges with “end” fragments. They are in some collections - their edges are also painted. These same elements are used last in a row, where it is necessary for the ends to have a decorative appearance.
Corner elements in decorative stone
Before laying, the back of the decorative stone tile must be inspected. There may be remains of cement laitance - this is a thin, light-colored foam-like coating. It needs to be removed. This can be done using a stiff brush.
If the air temperature is high or the humidity is low, the back of the stone is moistened with water. Then a layer of glue is applied with a regular spatula, leveled, and the residue is removed using a serrated spatula (with a tooth of 4-5 mm).
Apply glue using a regular spatula
Remove excess with toothed
The fragment is pressed against the primed surface, moving it slightly from side to side, close contact with the wall is achieved, and the fragment is placed in the desired position. You can tap the surface with a rubber mallet for better adhesion.
For better adhesion of the stone to the wall, you can use a rubber hammer
This option of laying finishing stone on the walls requires a significant amount of time. It is used when you need to lay only a few tiles or along the edges of a large fragment. If you need to lay a significant volume, it is easier to apply glue to the wall, and also remove the excess with a notched trowel. And press the tile moistened with water to the glue on the wall.
The second technology for laying decorative stone on the wall
Otherwise, the entire sequence of actions does not change.
If the masonry is seamless, the next element is installed closely. If a seam is necessary, the distance between the tiles is fixed using plastic or wooden wedges of the same size; pieces of drywall are also suitable. If the seam is small, you can use plastic crosses.
Large crosses are also suitable for decorating walls with decorative stone
Wooden blocks of the same size determine the thickness of the seam
When working, glue may be squeezed out from under the tiles. If it gets on the front surface, it must be removed immediately. Concrete finishing stone can be cleaned with a damp cloth, gypsum finishing stone can only be cleaned with a dry cloth. The glue sets very quickly, and then removing it without damaging the surface is almost impossible.
Squeezed out glue is removed immediately
Based on this principle, the planned volume of finishing is laid out. When the glue has set (indicated on the package), you can begin filling the seams.
Grouting joints
A special compound is used to fill the seams. In color it can imitate masonry mortar or be contrasting with the color of the finish.
The composition is diluted with water to a paste-like state (the proportions are indicated on the packaging), placed in a special syringe or a tight bag with a corner cut off. The paste is squeezed out between the seams. Depending on the type of finish, the seam is filled almost completely or only halfway (up to 5 mm can remain to the edge of the tile). The result is either a relief masonry or a more even one.
Filling a seam with a construction syringe
While the grout has not set, take a special jointer and level the seams, giving them a convex, concave or flat shape.
Texture
The texture of the tile greatly influences its visual perception, but it is worth remembering the technical characteristics of different types of tiles.
Glossy. Gloss always visually expands the space and makes the hallway brighter. However, glossy tiles will have to be washed all the time, and they are also very slippery.
Matte. This tile design in the hallway looks noble and calm. Water stains are not visible on such tiles and they do not slip. Dirt can accumulate more often in rough surfaces.
Textured. Relief tiles are more difficult to maintain, but with their help you can easily imitate other materials, such as brick or wood.
Combining tiles with other coatings
To zone the space, combinations with other materials are used. In order for the transition from one area to another to be smooth and harmonious, it is necessary to properly design the joints. The seam can be straight or curly, depending on the materials used.
You can combine tiles with parquet, linoleum, and carpet.
The area at the entrance, covered with ceramics, may be higher than the rest of the floor, but not more than 5 cm.
The combination with laminate gives a decorative effect and at the same time divides it into 2 zones: the entrance and the one where you can walk barefoot or in slippers.
Design options for the interface between laminate and tiles:
- A flexible profile is used.
- Decorative flexible strip with a wavy edge.
.
A connecting profile along the edge with carpet and linoleum is also used.
In this case, not so much aesthetics are taken into account as the safety of the structure. A reliable option would be to seal the seam with silicone to match the color of the lining or use a cork condenser.
The floor is selected in the style of the general layout of the house or individually for the hallway. In any case, you must be guided by the features of the style.
Tiles and linoleum
This type of docking is cheaper and less problematic. Linoleum can be cut in different ways, for example, in a wave or in a semicircle. To combine space and eliminate floor differences in the hallway, a metal threshold is usually used.
The photo shows ceramic trim on the threshold and laid linoleum in the rest of the corridor.
Parquet and tiles
Parquet is the most vulnerable floor covering. It is definitely not possible to use parquet flooring in the hallway. It is very soft and scratches easily. Absolutely all objects, including heavy and hard ones, enter the apartment through the front door. Hence the rule:
If you use parquet throughout the apartment, then at the entrance to the corridor you must create a tile area.
The good news is that parquet goes well with level 1 tiles. Both materials are glued together; both do not require a buffer zone at the joint. Thus, the parquet and tiles fit perfectly next to each other, and the seams are filled with mortar.
Some take risks and make the floor in the hallway from natural wood.
Tiles and laminate
Absolutely pointless option. We have already found out that there is no point in using tiles in the entrance area and laminate in the rest of the apartment, because laminate will withstand everything without problems.
The most important thing is that the laminate cannot be joined to the tile level. The tiles are fixed with glue; the laminate must be laid loosely, with gaps in front of the wall. This is an important technological aspect.
Rule: we make the joint in the narrowest place, preferably under the door.
Tiles and laminate don't go together. No matter how hard you try, the joint will look bad.
The grout for the floor in the hallway should be very dark.
If you really want to create a tile island in your hallway, at least make it a normal size to keep dirt out of the joint. It is better to tile the entire area up to the door or arch or not lay it at all.
The best option is to lay either only tiles or only laminate throughout the entire corridor.
Pros and cons of combined flooring
Elegant combination of different materials on the kitchen floor
A popular modern trend is the visual division of the kitchen into a dining area and a cooking area. When solving the problem of combined floors, you should pay attention to the combination of floor coverings.
The main advantages of the combination of materials:
- the opportunity to make the kitchen more comfortable;
- it’s easy to keep the food preparation area clean and have a more aesthetically pleasing and comfortable surface near the dining table;
- proper zoning of the kitchen space;
- practicality and hygiene;
- protection against premature wear of materials in those areas that can withstand maximum load.
The disadvantages of this combination include:
- the difficulty of choosing materials from which a harmonious combination can be obtained,
- the need for additional processing of joints,
- asymmetry of the room with poorly thought out placement of different surfaces.
If combining laminate with traditional porcelain tiles is not difficult, it is necessary to provide for a combination of tiles and linoleum at the stage of leveling the surface.
Tile laying methods
There are several standard methods for laying tiles:
- Laying in even rows. This type of installation is the simplest technically. Even rows of tiles in the hallway interior always look appropriate;
- Laying diagonally. Usually the tiles are laid at an angle of 45 to one of the walls; you can choose a different angle;
- Offset or brick laying. You can move the tiles by half or more;
- Modular. A decorative pattern is laid out in the center of the hallway, the rest of the tiles are laid out evenly around.
Features of wall decoration in the hallway with tiled or ceramic tiles
The high-quality decoration of the interior of the hallway largely depends on the choice of the type and shape of the ceramic material, as well as on the selection of the overall design.
How to choose the right tile for the wall, what to combine it with correctly? What is the advantage of decorative tiling? Home renovation always involves the purchase of materials, thanks to which you can beautifully decorate a pre-designed interior design. Modern industry offers the potential buyer many options for finishing materials that allow you to radically transform the room, fill it with comfort and homeliness, light and air, visually expand or narrow the room. Decorating the hallway walls with ceramic tiles is not the most common, but it is an option that has a number of advantages.
Tiles and interior style
Tiles are great for their versatility and suit all interior styles, but there are a few types of flooring that look best in certain styles.
The loft-style hallway tends to use simple materials. Imitation of natural stone or aged tiles also look good in a loft.
An entrance hall in a romantic Provence style requires the same delicate tiles. In photos of such designer hallways, small, light-colored tiles with a floral pattern often appear.
For a modern style, the use of almost any tile is acceptable. Tiles with imitation parquet and hexagonal honeycomb tiles look original.
In a classic interior, the floor should have natural stone or wood. Imitation ceramic tiles can easily replace expensive materials.
For a minimalist hallway, glossy plain tiles without seams are suitable.
Modern manufacturers offer many types of tiles, differing in texture, color, pattern and size. Choose exactly the covering that will make your home cozy and beautiful, starting from the threshold.
Wallpaper
Wallpaper continues to be a classic of the genre when decorating any room in an apartment. And this is not surprising, the different quality of the paintings allows them to be used in any room, regardless of its purpose, and the varied colors, designs, patterns, textures of such a coating will easily fit into any interior.
Decorating with wallpaper makes it possible to embody all sorts of ideas and fantasies on the walls of the hallway; it allows you to combine several types of canvases that differ in shades and textures, which allows you to create your own unique style.
For finishing the corridor, it is better to give preference to non-woven, vinyl or liquid wallpaper. Paper-based canvases are not suitable for this room, as they cannot be wet cleaned.
As for non-woven fabric and vinyl, they will perfectly hide existing surface unevenness, and, like liquid wallpaper, they are durable, resistant to mechanical damage, and easy to clean.
Photo of tiles in the hallway
Methods of artistic finishing
Regardless of the materials chosen, the color of the hallway can be easily created with the help of artistic painting, a combination of several textures or materials. Popular solutions include:
- imitation of a brick wall;
- creation of frescoes;
- use of textured plaster;
- finishing with natural stone;
- laminate;
- mirror panels.
Imitation brick wall
The popularity of the loft style leads to the emergence of various ways to imitate a brick wall in the hallway. Classic brickwork is coated with light-colored paint, creating a laconic interior.
Imitation of a brick wall in a light tone
An easy way to create “brickwork” is to cover the walls with PVC panels that imitate classic brick. This option is suitable for owners of apartments in houses with thin walls who want to complete the finishing quickly.
Textured plaster coated with varnish imitates brickwork more authentically. Installation requires surface preparation, but it tolerates the installation of additional decor well and increases sound insulation in the room.
Owners of spacious premises will benefit from decorative facing bricks used to lay out the walls. This option creates an authentic loft-style interior and requires large financial investments and lengthy work.
Loft style
Apartments in the “old stock” or classic lofts converted from industrial premises do not require additional materials. It is enough to clean the layer of plaster, coat the brickwork with varnish, and install several forged lamps.
Advantages and disadvantages of a “brick” wall
A current, inexpensive and durable way to give the hall a touch of loft style has a number of disadvantages. Carrying out a high-quality imitation of a brick wall requires special materials and knowledge; such a finish without an abundance of textiles looks rough and requires regular cleaning.
An inexpensive and durable way to give the hall a touch of loft style
Imitation brickwork occupies a central position in the hallway; it is recommended to decorate it in neutral light shades. Forged lamps or wooden decor placed on the wall will help make the hallway feel cozy. You can imitate brickwork using panels, decorative plaster or thin facing bricks.
Fresco decoration
Artistic wall painting will suit fans of palace interiors, Empire and Art Deco styles. Visually, this decoration looks catchy and unusual; floral ornaments, landscapes, and patterns are chosen for frescoes.
Fresco decoration
The walls are painted over a layer of wet plaster of various shades. A universal option is gray or white walls with a contrasting pattern.
Textures of finished frescoes
- The traditional option is a surface with a rough relief; up close the image looks a little blurry. This type of decor requires careful leveling of the surface and moderate use of accessories.
- Frescoes with imitation of painting on fabric look like thick handmade damask wallpaper; portraits and images of buildings look good on this texture.
- A fresco with the effect of cracks, characteristic of ancient buildings, will give the room a vintage flavor.
Advantages and disadvantages of frescoes
The original solution gives the room a vintage style, complements the palace interiors, and does not require additional decor. The disadvantages of frescoes include their high price, the need to prepare walls, and the difficulty of combining with other interior styles.
Gives the room a vintage style
Spacious rooms are decorated with frescoes; it is recommended to choose an abstract theme:
- landscapes;
- still lifes;
- ornaments.
This decoration becomes the accent of the hallway and involves the use of neutral colors in the interior. It is better to place the image on a free wall so as not to overload the room.
Decoration with textured plaster
Owners of narrow hallways with poor lighting use textured plaster with reflective particles. The material creates a more expressive texture than conventional wallpaper, while decor options are limited by the owner’s imagination.
A simple decoration option is to use glitter, granite chips, and color in the composition. The finished walls have a light shade, a pronounced texture, the surface shines and reflects light.
Decoration with textured plaster
Curly rollers or ready-made stamps create a single ornament on the entire surface of the walls. To create a bright interior, the design is shaded with paint or glitter. Venetian plaster imitates marble textures of various shades and, in combination with frescoes and stucco, gives a touch of a palace interior.
Advantages and disadvantages of textured plaster
The material visually levels the surface, allows you to imitate various surfaces, and create harmonious patterns. The disadvantages of plaster are:
- high price;
- exposure to moisture;
- long finishing works.
The material visually levels the surface.
Treating the hallway walls with textured plaster creates an original interior and allows for abundant use of decor. Unlike wallpaper, the pattern on plaster does not need to be joined; it is possible to combine several layers of material. Pronounced texture or glitter creates a festive mood.
Stone finishing
Natural or acrylic (artificial) stone is used for continuous wall decoration or for placing accents in the decoration of the hallway.
Cladding the hallway with stone creates a laconic interior in an industrial style. The material is supplemented by:
- massive accessories;
- abundance of lighting;
- large mirrors.
Stone finishing
Stone trim on doorways, corners and baseboards looks softer. The combination of textured plaster with white natural stone creates a country style.
When choosing a stone for cladding, the rule is followed: the more pronounced the relief, the smaller the size of each slab.
Advantages and disadvantages of stone finishing
Cladding with stone panels gives the hallway interior a monumental feel; the material is durable and suitable for most finishing styles. The disadvantages of stone finishing include its high price, labor-intensive work and the heavy weight of the material.
Gives the hallway interior a monumental feel
With the help of stone panels, accents are placed in the interior of the hallway: they frame doorways, mirror panels, and baseboards. The entire cladding of the room creates a monumental interior in an industrial or vintage style. Individual stone elements go well with bright accessories and neutral plaster.
Wall laminate cladding
Wooden panels are installed on a free wall as an accent to the hallway interior. It is recommended to choose wide boards with a pronounced wood texture; the remaining walls are decorated with plaster or wallpaper for painting.
Wall laminate in the hallway
Traditional herringbone laminate installation visually expands the space, while parallel installation increases the height of the ceilings. It is recommended to avoid short, narrow boards that require additional lighting.
The rough surface of the wall laminate looks softer, while the parquet varnish coating gives the interior a vintage touch. A glossy surface reflects light better and looks more elegant.
Advantages and disadvantages of wall laminate
The bright texture of natural wood creates a modern, unusual interior; the material is environmentally friendly and matches most colors. Installing laminate requires preparatory work, the material is sensitive to changes in temperature and humidity, the rest of the finish should be neutral.
The texture of natural wood creates a modern, unusual interior.
Narrow panels, lined with glossy or matte laminate, zone the corridor space. Shades of natural wood are combined with warm colors, auxiliary lighting and decorative mirrors.
Finishing with mirror panels
Mirror surfaces visually expand the space of the hallway, increase illumination, and give the room coziness. The joints between the panels are decorated with aluminum profiles or grout with glitter.
Narrow high mirror panels are placed in the center of the hallway, used as a decorative element, replacing a traditional mirror.
Finishing with mirror panels
The free part of the wall or the corners of the room is laid out with small mirror panels, dividing the hallway into functional zones. Cladding the upper part of the walls significantly increases the height of the ceiling and gives the interior an “airiness”.
Fans of minimalist modern interiors and high-tech style use rectangular panels, lovers of vintage styles choose oval shapes and distribute mirrors throughout the room.
Advantages and disadvantages of mirror panels
The eye-catching unusual material is easy to install, visually enlarges the space, and can be combined with any shade of decoration. Mirror panels require careful care, are subject to mechanical damage, and have a high price.
Visually increases the space
The placement of decorative mirrors in the interior expands the space and divides large hallways into functional areas. Large panels look like a single canvas, the joints of small elements are decorated with decor.
