Modern ceiling cornices are designed for attaching various curtains, curtains, tulle, and at the same time are practically invisible behind their fabric. Most often, curtain rods are made from high-quality polyvinyl chloride (PVC). The design consists of a hollow tire with several working lines. If you decide to install such a device in a room, read the instructions on how to attach a ceiling cornice.
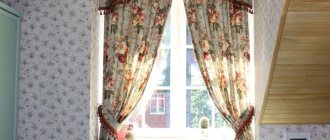
Plastic ceiling cornice
Note! An important parameter for plastic tires is the weight of all fabrics, and if heavy curtains are used, the structure may break simply because it cannot withstand their weight.
Attaching ceiling cornices
Choosing a plastic cornice
Preliminary measurements of the mounting location
When choosing a design, you need to proceed not only from its appearance, which, of course, should be combined with the interior design of the room, but also from the way to attach the ceiling cornice.
Since installation takes place on walls or ceilings, the correct choice of mounting option must be made at the initial stage.
Before choosing a design and studying the recommendations on how to secure ceiling cornices, take measurements of the parameters of the window opening and decide which curtains you plan to hang.
To ensure this step is correct, consider the following points:
- Attaching the cornice to the wall should not interfere with the opening of the window. To do this, it is enough to place it 5 cm above the window opening.
- The distance of the cornice from the wall should allow the curtains hanging on it not to touch the window handles, the ledge of the window sill and the radiators.
Important! If you plan to use multi-layer curtains, then take all measurements from the layer closest to the window.
For ease of use, select the length of the curtain rods so that when you move the curtains apart, you can completely open the window opening. It is believed that the distance from the ends of the cornice to the window slopes should be 30-40 cm.
Of course, depending on the location of the window, the width and density of various curtains, as well as your preferences, this value should be clarified.
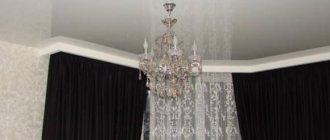
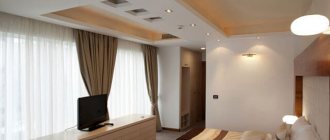
Cornices attached to the ceiling
How to choose the material and design of the cornice
For heavy curtains, use curtain rods made of durable plastic and metal. Fasten such structures through the holes in the tire.
If you know how many layers of fabric you plan to use, then choose a tire with the same number of working tracks. For example, if these are thick curtains, tulle and lambrequin, then you need to figure out how to attach three-row ceiling cornices.
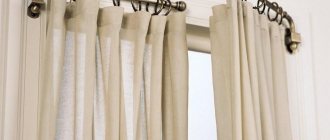
Curtain fastening
There are different types of curtain mounts, which are selected depending on the model design, fabric density and design ideas:
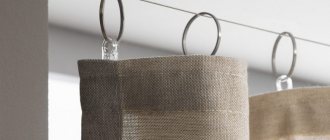
- The most traditional and familiar are hooks made of durable flexible plastic. Today there are a huge number of them. They can be used to hang curtains in a variety of ways. There are models that are attached to the curtain tape at one end, and inserted into the groove of the profile structure with the other. Rod models have a slightly different mount. One end of the hook is connected to a ring that is put on the bar, and the other to the curtain tape.
- Unlike hooks, clothespins hold the curtain with teeth that provide a tight grip on the fabric. They are attached to the cornice using rings.
- Curtains can also be attached using eyelets, loops, ties and drawstrings.
Instructions for installing a cornice to the ceiling
- Knowing the length of the cornice, cut it to length using a square and a hacksaw. Assemble the structure by placing curved pieces or hook caps on the ends of the cornice if the cornice is straight.
Cutting the cornice using a hacksaw
Hole for mounting the cornice
- Drill a special hole in the middle of the cornice using two drills with different diameters. Start drilling a hole in the face of the structure with a large drill bit, the diameter of which allows the head of the fastener to hide flush in the surface of the cornice. As soon as this condition is achieved (the drilling depth will be equal to the height of the fastener head), drill the hole using a thinner drill bit.
- Drill the same holes along the entire length of the ceiling cornice. Moreover, the heavier the curtains, the smaller the pitch between the holes should be.
- Attach the cornice to the ceiling so that the symmetry axes of its structure and the window coincide in the vertical plane.
- Make a mark on the ceiling through the central hole in the cornice.
The process of installing the ceiling cornice is completed
Installation diagram of a wide cornice
- Using a hammer drill and a concrete drill of the required diameter, drill a hole in it, insert a dowel into it and fix the cornice with one self-tapping screw.
- Align the cornice and make other marks on the ceiling to attach it, then drill the corresponding holes.
- Fix the structure with dowel nails, and the main problem of how to secure the ceiling cornice is solved.
- It is even easier to install plastic cornices on wooden ceilings. It is enough just to make the markings correctly and secure them with ordinary self-tapping screws.
Important! To securely fasten wide cornices, make holes in them in two rows.
What will be needed for installation?
To install a ceiling cornice with your own hands, you need to prepare all the materials and tools necessary for the work. To install the structure, you will need a ruler, pencil, building level, electric drill (hammer) or adhesive.
The design of the cornice can consist of several elements. It includes a profile. This is the section of the cornice on which the rows for fabric are located. The profile is most often made in white. Variants are also possible. For example, you can find on sale a profile for a ceiling cornice in beige or cream color.
The design may contain curves. They are installed on the sides of the cornice, giving the image completeness. Straight plugs are used if the cornice occupies the entire width of the wall.
Connectors are used in complex structures. They allow you to combine 2 profiles. At the places of such connections, the curtains will open and close without hindrance.
An important element of the cornice are the stoppers. They are installed on the ceiling profile on both sides at a certain distance from the edge. They prevent the hooks from falling off the bar. There are also hooks on the slats (curtains are put on them).
Installation of a plastic ceiling cornice or any other product is carried out using different types of fastening. Hardware can be supplied as a set, but more often they have to be purchased separately. You can also additionally buy a decorative strip that will enhance the appearance of the cornice.
Instructions for installing curtain rods on brackets
You already know how to attach a cornice to the ceiling, and installing it on brackets is even easier, since these elements already have mounting holes. The process is almost identical to the one presented above, but there are some nuances.
Let's look at how to attach ceiling cornices to a wall.
- Carefully assemble the entire structure.
- Attach it with brackets to the surface, and mark through their mounting holes the places for installing fasteners.
- Drill holes in the marked positions and install dowels in them.
- Screw the curtain rod into place using self-tapping screws.
Recommendations for installing a cornice to a plasterboard ceiling
If you use only light tulles as curtains, then you will not have any problems with how to attach the cornice to a plasterboard ceiling structure.
Use a lightweight cornice and install it using the technologies discussed above.
Otherwise, it is necessary to install structures to plasterboard ceilings if the curtains are heavy and multi-layered. In this case, from the very beginning, decide exactly where the curtain rod will be fixed. In these places, install wooden mortgages, which will ensure reliable fastening of the cornice to the ceiling surface.
It is convenient to make markings on a cornice that has already been purchased in advance. Fix the mortgages in the form of timber to the base ceiling in the place where it is planned to be installed.
In this case, take into account the dimensions of the element:
- the thickness of the beam should be less than the distance between the plane of the main floor and the drywall;
- the values of the length and width of the mortgage must be greater than the same parameters of the cornice.
Instructions for installing a curtain rod on a wall
It happens that people first make repairs in a room, and only after its completion they begin to think about how to attach the cornice to the ceiling surface. In this case, the embedded supports are not installed.
Well, there are not many options left, and mounting to the ceiling is no longer considered. Now it's time to learn how to attach ceiling cornices to the wall.
Mounting methods:
- Use brackets, selecting them according to the width of the cornice and connecting them with self-tapping screws.
- Attach a mounting wooden beam to the wall under the ceiling and attach the cornice to it. Please note that this structure will still need to be decorated somehow.
Attaching the ceiling cornice to the wall
Advantages and disadvantages
Advantages:
- The ceiling cornice creates the effect of high ceilings in the room due to the lack of horizontal division.
- With the help of such a curtain rod and matching curtains, you can decorate the room, draping the space from floor to ceiling.
- Curtains on the ceiling cornice cover the wall completely, leaving no gaps, cracks or unclosed holes.
- Variety of designs - cornices can be completely different, you can choose invisible, neutral or having a decorative strip/face molding (it should match the interior of the room and it is this that supports the chosen style in the window design).
- The curtains on the ceiling cornice move very quickly and easily.
- There is an option for curtains with control (mechanical - pull the chain to open the curtains; automatic - press the remote control buttons to do the same).
- The ceiling cornice can have the length that is required for each specific room (one product reaches 4 meters, but several cornices can be connected using special tools).
- Ceiling cornices are very flexible, which is why they can be intricately bent and hung in this form on the window. This is done using a special lock.
Ceiling cornices have many advantages.
Flaws:
- An inconvenience during installation is that your hands must be raised to the ceiling at all times.
- It is inconvenient to drill into ceilings.
Methods for installing cornices with suspended ceilings
Install the mortgages before calling a surveyor, who will mark their location on the drawing. This will allow the fabric to be strengthened during production by gluing it at the places where the cornice is attached.
During the installation of the stretch ceiling, you will need to glue small rings to the places where it is attached to the mortgages. Make holes in them, with the help of which you can mount the cornice to the beam.
Installation diagram of a cornice to a suspended ceiling
The second method of attaching a cornice to the ceiling surface involves creating a small niche near the window.
Let's look at this process:
- Fix the mounting beam to the ceiling at the distance required to install the cornice.
- Attach the tension fabric to this beam, without reaching the wall.
- Install a ceiling cornice in the resulting niche.
Installation diagram of a cornice in a niche