Among all the numerous types of wall decoration, PVC panels are one of the most budget-friendly. But in terms of performance characteristics, these materials meet most of the rather stringent requirements of modern consumers. Let's look at how to attach plastic panels to the wall, as well as the features of choosing and using such a finish.
How to attach plastic panels to the wall
Brief characteristics
Before making a final decision, each developer must know all the objective parameters of the selected material, because this is the only way to be sure that during operation there will be no disappointment in the chosen finish. We will look at both the positive and negative sides of plastic panels, since some of them have a direct impact on installation technology.
Types of plastic panels
Glue mount
On walls with a perfectly smooth surface, plastic panels should be glued like tiles. However, it should be borne in mind that in this case it will no longer be possible to dismantle the panel without damaging it.
Special adhesives are produced for this operation, but general-purpose adhesives such as “liquid nails” or “Moment” are also suitable. You can also use polyurethane foam sealant (non-expanding), but the use of hot-melt adhesive is not allowed.
Installation of the cladding is carried out as follows:
If necessary, the panel is cut to length, after which the protective film is removed from it. If the film was removed earlier, you need to remove dust from the plastic with a damp sponge and wait until it dries. You can cut the panels with a hacksaw or jigsaw. Glue is applied to the reverse side in spots every 25 - 30 cm. The part is pressed against the wall
If “liquid nails” are used as glue, you need to immediately remove the panel from the wall after carefully tapping it and let the glue dry for 5 – 7 minutes. After this, the part is finally glued. Before gluing the next panel, its locking part must be lubricated with sealant. In the case of adhesive installation, the corners are formed with simple corners, that is, those that do not have grooves for installing panels
They are also glued using glue or silicone sealant.
Finally, floor and ceiling skirting boards are installed around the perimeter of the room. They can be glued or secured with dowels.
Advantages of PVC panels
There are quite a lot of them, these are objective data that you can trust.
- Light weight. The additional load is so insignificant that it is not taken into account during the design of the building. Finishing can be done on fragile surfaces; the coating is not afraid of minor temperature fluctuations in the linear dimensions of the room.
- Manufacturability. Plastic panels are very quickly mounted on metal or wooden frames. The former are more expensive, the latter are much cheaper. When it comes to quality and durability, there is no practical difference. An important advantage is that the panels can be installed on uneven and unplastered walls. Finishing masonry materials to level them requires a lot of time and money. Another quality related to manufacturability is that when decorating walls with PVC panels, there is no need to use special expensive devices and tools. The complexity of the installation is accessible to beginners.
Fastening the panels does not require much effort - Low cost. It is important to know that not only panels have a low price - the cost of installing them is also much cheaper than finishing walls with other materials.
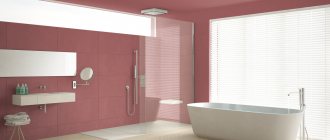
- Moisture resistance. This is a significant advantage if there is a need to finish walls in rooms with high humidity. Moreover, the material does not react at all to direct contact with water.
PVC panels are often used in bathroom decoration
What to buy before covering the ceiling?
As a rule, white or beige panels are chosen for the ceiling. This is due to a long tradition, the ceiling symbolizes the sky and the light from the sky, and the light one is almost white. It also creates the effect of increasing space - the room seems taller. However, in stores you can find ceiling panels of various colors, with patterns, geometric shapes, and with relief texture. You can also find glossy, matte and even imitating brickwork.
Ceiling panels can be suture or seamless. With seamless panels, when assembled, the side borders are practically invisible and the entire ceiling appears to be one whole. But still, if you look closely, you can see the joints, and this causes a kind of discomfort. To avoid this, they came up with panels whose joints are masked with their own texture or pattern. The ceiling turns out striped. To avoid it becoming too banal, alternate wide (10 to 20 cm) white stripes with inserts of short stripes of a different color or shade. The most common inserts resemble silver or gold plating. You don't have to choose different colors yourself. The panel itself, which is about 25 cm wide, already has a striped pattern.
For all work you will need some tools:
- laser or water level (necessary for marking a horizontal line);
- hammer drill with a Pobedit drill (drill holes in the ceiling to attach the frame);
- screwdriver (attach the screws in the panel to the frame);
- segment knife (also called an office knife, it can be used to cut panels lengthwise);
- jigsaw or hacksaw for metal (for cutting panels across);
- ring drill (or “crown”, for holes for ceiling lights);
- liquid nails (for gluing the last panel);
- roulette;
- marker.
Tools for installing a plastic ceiling
Any plastic ceiling panels are mounted on a spatial frame. Its material can be different, but only two are used everywhere - a metal profile (the same as that used when installing drywall) and a wooden one. It is not advisable to use wooden blocks in areas with high humidity, such as bathrooms and toilets. This is due to the fact that wood can swell from moisture, and then the ceiling panels on such a frame can “sink.” In kitchens or living rooms, a wooden frame is quite suitable. Many craftsmen also use wooden frames in bathrooms, citing the fact that the metal profile will rust from moisture, and the wooden blocks are not so large that they change much in size, and this requires as much moisture as if the block itself had been placed directly in water.
Attaching plastic panels to the ceiling always comes last. The walls and floor should already be ready in the room. If the bathroom has tiles, then to install PVC panels it is necessary to leave space between the top row of tiles and the ceiling itself. This is due to the fact that attaching the frame to a ceramic surface is extremely inconvenient. Holes in the tiles are drilled with special drills and there is always a risk of splitting them.
Disadvantages of PVC panels
Each building material has its drawbacks, and panels are no exception.
- Low physical strength. The panels are made of thin plastic and have a hollow structure. They hold static and dynamic forces very poorly. Moreover, the damage cannot be repaired; the coating has to be completely replaced.
- Evaporation of harmful chemical compounds. There is a particularly high concentration of unlicensed goods. In addition, during combustion, toxic smoke is released, a person loses consciousness even after two or three breaths.
- Negative reaction to hard ultraviolet radiation. Under the influence of UV rays, the intermolecular bonds of polymer plastics are significantly weakened and they become brittle. Even with little effort they crack.
The panel can be damaged by a sharp blow.
Unfortunately, the domestic market for building materials is oversaturated with fakes. Low-quality PVC panels are almost completely devoid of real advantages, and the negative sides appear even more noticeably.
Advantages and disadvantages
Advantages of finishing the kitchen with plastic:
- Low price, PVC costs 2-3 times less than tiles or wallpaper;
- Resistance to moisture - steam, condensate, water;
- Easy care, just wipe with a damp cloth, wash or clean with household products. There are no pores on the surface, which will not lead to the formation of mold;
- Fire safety. PVC is a self-extinguishing material that goes out immediately if it catches fire;
- Simple, quick installation that does not require special skills or tools;
- Large selection of designs - different colors, glossy or textured patterns, imitation of natural materials;
- With proper care, the finish will last for several decades.
Variety of design options
The disadvantages include:
- Instability to elevated temperatures. Protected PVC panels can withstand a maximum temperature of 450 degrees, and standard ones can melt from the touch of a hot frying pan;
- Mechanical stress can cause them to crack and wrinkle, and cleaning with a rough brush will damage the top layer;
- PVC is a non-toxic material, but, like any plastic, it is not entirely environmentally friendly, since its decomposition period takes several hundred years.
Tips for choosing
Universal advice is to ask the seller for a package of accompanying documents. But it always works: either the seller does not show invoices and certificates, then substandard goods are sold under the guise of one batch of good goods, or the consumer is embarrassed to defend his rights. There are several external signs by which you can most likely distinguish a counterfeit from a licensed product.
It is best to buy PVC panels in large construction stores, where all products are licensed
Table. The main differences between high-quality and low-quality panels
| Name of criterion | Quality panels | Low grade panels |
| Number of stiffeners | 29 pieces at perfectly equal distances from each other | 20 pieces, you can notice the unevenness of the step by eye |
| PVC thickness | 2 mm | 1.5 mm |
| Linearity Options | All surfaces are smooth, the planes do not have depressions or bumps | Traces of shrinkage are clearly visible on the surface. Excessive shrinkage is explained by the use of low-quality secondary raw materials for production. |
| Mechanical strength indicators | The panels bend and can withstand relatively heavy physical loads. After removing the stress, the panels completely restore their original performance. | The strength of the panels does not allow them to bend; the thin side strips for fixing the lamellas are very fragile and often crack when driving in staples. The plasticity of the panel surface is minimal. |
Good quality panels have a uniform pattern, straight cuts, stiffeners are located at the same distance from each other
Decor
Manufacturers produce wall panels with decor. The design is applied to plastic using offset printing, thermal printing or lamination.
Thermal printing.
The design is applied using a hot silicone roller. The design is not secured with varnish and is therefore susceptible to damage. Thermally printed panels are recommended for use in rooms and corridors.
The stability of the pattern depends on the method of its application (photo No. 4)
Offset printing.
More stable compared to thermal printing. Ultraviolet paints are used to apply the design. The top of the drawing is covered with several layers of protective varnish. Offset printed panels are resistant to mechanical damage and detergents. Suitable for finishing bathrooms and kitchens.
Lamination.
A painted PVC film is applied to the base. The surface of the panel is embossed. It reliably imitates the surface and texture of wood. The surface is resistant to moisture and detergents. Suitable for finishing bathrooms, kitchens and living rooms.
!
Advice:
It is better not to use laminated panels for finishing the apron, as they have an uneven texture. They are harder to wash.
The wood texture is clearly visible on laminated panels (photo No. 5)
Panel fastening methods
The technology of finishing walls with panels provides three methods of fastening, each of which has its own strengths and weaknesses.
- On glue. Special compounds with high adhesion to plastic surfaces are used. The advantages of the method are that there is no need to prepare a special sheathing. Disadvantage - the wall surface must be flat; differences of no more than five millimeters can be eliminated with glue.
Gluing PVC panels to the wall - For clamps. The most expensive method, currently almost never used. The panels are attached with special clamps to the metal profile sheathing.
Mounting on clamps - On wooden slats. According to all characteristics, it is considered the optimal method, the lamellas are fixed with a stapler (less often with nails and screws), the method is universal. Advantages - the ability to level the plane of the wall, minimal cost, manufacturability.
Fastening panels to slats is the most convenient way
In this article we will give detailed instructions for attaching panels to the wall using wooden slats.
Formation of suspended ceilings from PVC panels: photos of structures and technology
The moisture-resistant properties of polyvinyl chloride panels are also useful for arranging suspended ceilings.
This material is used for arranging ceilings in various rooms:
- kitchen;
- toilet;
- shower, sauna or bath;
The process of arranging a ceiling made of plastic panels in a bathroom
- hallway;
- balcony or loggia.
In most cases, in the photo of ceilings made of PVC panels in the kitchen, you can see a material that imitates 10 cm wide lining. This finish allows you to easily install spotlights in a suspended ceiling structure.
Other design options for lamellas can be used for decoration:
- imitating wood or natural marble stone;
- matte or glossy;
- plain or covered with ornaments;
- decorated with printing or thermal film.
Before making suspended ceilings from PVC panels, it is necessary to calculate the materials. The calculation scheme in this case is very simple, since there are no window or door openings on the ceilings. Material reserve – 15% of the required quantity.
The ceiling and walls of the kitchen-living room are lined with plastic eurolining
Stages of work production
None of the professional builders begins work without prior preparation. What activities are included in this list?
- Careful inspection of the premises. Pay attention to the condition of the walls, the purpose of the room, microclimate parameters and operating conditions of the building. Decide on the fastening method, prepare tools and devices taking into account the fastening technology.
- Counting the number of panels and additional elements. In addition to the surface area, you need to know the footage of starting, connecting and end profiles, baseboards, internal and external corners. Some manufacturers of plastic panels produce universal profiles, but in practice they do not live up to consumer expectations; professionals do not recommend using them.
Accessories for PVC panels - Preparing rooms and surfaces for installation. It is necessary to remove construction debris, furniture and other objects that interfere with the master’s free access to the site.
- Installation of panels. It also consists of several stages, each of which has a significant impact on the final quality of the work.
How to calculate the number of PVC panels
If you have made the final decision to install plastic panels, we recommend that you study the instructions and advice from professional builders.
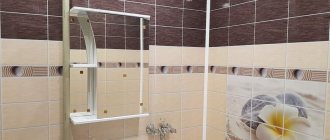
How to install wall panels in a bathroom
It is recommended to choose panels that do not have a very pronounced textured surface. Otherwise, fungus and mold will appear on the material, which will be difficult to remove. Additionally, textured surfaces make cleaning more difficult.
Here, too, one cannot do without careful preparation of the foundation. It is carried out in the same order as already described above. With the frameless fastening method, glue is applied only to completely dry surfaces. The compositions are distributed using a point method, observing a step of 25-35 centimeters. The last stage includes wall mounting of the panel. After this, the interior of the apartment will be transformed. At the corner junctions of the panels, plastic corners can be secured with silicone. The last to be installed are the baseboards on the floor and ceiling. To do this, use self-tapping screws or special glue.
Step-by-step installation instructions
The installation process is divided into several stages, pay due attention to each of them.
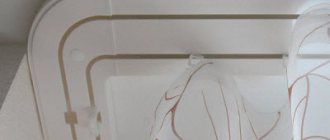
Step 1. Installation of the sheathing. The structure is made of wooden slats with a cross-section of 20×40 mm, the walls are lined with foil polypropylene foam insulation 4 mm thick. By using this layer, it is possible to reduce heat loss from the premises and provide additional sound insulation. Additionally, the foil reliably protects the wooden elements of the sheathing from the negative effects of high humidity.
Lath lathing is mounted on top of foil insulation
During the manufacture of the sheathing, the following rules should be followed.
- The slats are fixed to the wall with self-tapping screws or dowels; the specific choice depends on the material of manufacture.
- The sheathing must have a perpendicular direction to the location of the plastic panels. In our case, they are vertical; the slats should be fixed horizontally.
- The distance between the elements of the sheathing is no more than 50 cm; the thinner the lamellas, the smaller the distance should be. The fact is that the lamellas cannot withstand significant forces and, under their influence, are greatly deformed, and this causes a violation of the fixation strength.
- Before starting work, the horizontalness of the wall is checked; if necessary, wedges are placed under the slats to level the position. Each wall is checked with a bubble level.
The slats are fixed with self-tapping screws.
At the bottom, the slats are nailed at a height of no more than five centimeters from the floor; not only panels, but also baseboards will be fixed to them. The same slats are installed at the top for attaching ceiling decorative elements. All window and door openings around the perimeter are also covered with lathing; this is a mandatory installation requirement; the slats should not sag.
Slats are also placed around the perimeter of the openings
Practical advice. For wet rooms, it is strongly recommended to impregnate the wooden elements of the sheathing with antiseptics; they quite effectively protect them from the negative effects of moisture. The specific names of the impregnations do not matter; they all meet existing requirements.
Step 2. Installation of the first panel. This is a very crucial moment; if the starting lamella is incorrectly laid, the accuracy of finishing the entire surface of the room is disrupted.
- Replace the inner or outer corner depending on the location of the first panel.
- Push the lamella into it and very carefully check the vertical position using the level.
- Secure the panel with a self-tapping screw with a press washer, a nail or a stapler. The latter option is preferable to the former; it is much simpler, lighter and faster.
Attaching the first panel
Step 3. Installing row panels. After attaching the first one, you can easily put the next ones in place. If the lathing is made according to the requirements of the instructions, then no problems should arise during installation work. The panels are snapped into a special groove along their entire length, and the connection to the sheathing is made in a similar way.
The edge of the panel is inserted into the groove and snaps into place
Step 4. Finishing windows and doors. In these places the panel must be cut. This is done in several steps.
- Take exact measurements, draw on the panel the area that needs to be cut.
- Using a sharp mounting knife, carefully cut the panel along the contour, do not allow burrs, work carefully.
- Using a hacksaw, cut off the selected section of the lamella and remove it. Experienced craftsmen often use a grinder instead of a saw; it speeds up the process much more. But for this you need to have practical experience; if you lack it, you can not only completely ruin the panel, but also get very serious injuries.
Cutting the panel
Place the prepared panel in place and attach it. If everything is done correctly, it will fit the first time, no final adjustment is required.
Installing the finished panel in place
Step 5. Installation of the corner profile. This element is used to improve the appearance of the wall. The wide side is inserted under the panel, the narrow side is located on the front surface. Next, the profile is fixed on one side with self-tapping screws and press washers. Continue inserting panels into the attached element and completely finish the adjacent wall of the room.
Installation of the final profile
Step 6. Installing the last panel. Most often, it needs to be cut to width; this is done with an ordinary mounting knife under a metal ruler or wooden strip.
The last panel can be cut if necessary
Carefully snap it into the groove of the previous lamella, constantly monitoring the position.
Step 7. Installation of the F-profile. It is used at the junction of slopes with panels and covers uneven open honeycombs. The profile is placed on the skin and pressed until it stops.
A profile is installed around the perimeter of the openings
This completes the wall paneling. Check the strength and correctness of fixation again.
Kitchen apron: spacer fastening technology
So-called kitchen backsplashes are often made from tiles. But the technology of laying tiles is quite complex, and not everyone can do it. Modern plastic is in no way inferior to tiles in appearance, but installing PVC panels is much easier.
The spacer fastening technology is different in that it allows you to avoid elements such as:
- special fasteners;
- adhesive composition.
- use of sheathing material.
This option is suitable for kitchen owners with a small area. One panel sheet is enough to cover the entire work area. Step-by-step instructions include the following steps:
- A specially selected panel is installed on the tabletop with its lower edge. The material is cut out.
- The upper part goes behind the hanging cabinet. The main thing is that the sheet is securely pressed against the wall. Fasteners in the form of staples will improve the final fixation.
- The lower part of the panel near the table top is fixed with a plinth. For the floor, it is recommended to choose the most durable and massive option possible.
Installation of plastic panels in the kitchen
Such elements are very beneficial to use for kitchen aprons. These areas have previously only used ceramic tiles, but installation of such materials requires experience. In addition, the tiles are installed for many years, and the panels can be changed at any time, this can be done using simple technology. It does not require the use of fasteners; the low height of the apron makes it possible to save installation time.
An apron made of plastic panels looks no worse than tiles
How to install slats?
- Accurately measure the distance between the tabletop and wall cabinets.
- Add 2-3 cm to it and cut the required number of panels.
- Place the lower end of the lamella on the desktop, bend it slightly and place the upper end under the hanging bedside tables. They need to be tilted; after installing all the slats, the bedside tables are put in place.
- Screw the plinth onto the table.
Installing an apron made of plastic panels
This simple installation technology allows you to remove outdated panels at any time and put new, more fashionable and beautiful ones in their place. To guarantee, the lamellas can be glued, but this technology does not have any noticeable advantages. But there are several disadvantages: the complexity of the technology, the impossibility of performing repair work and increased cost.
The nuances of installation on walls over the sheathing frame
Before covering, it is recommended not only to clean the surface, but also to use waterproofing and coatings based on antiseptic agents. To create the sheathing, wooden blocks are used, but such structures should not be used for rooms with high humidity. Before use, the wood is thoroughly dried and treated with protective compounds.
The construction of sheathing begins with markings. You also need to correctly determine the lower level for installing skirting boards. The most protruding part of the wall is taken as a guide. To control the upper and lower levels, you should use a level.
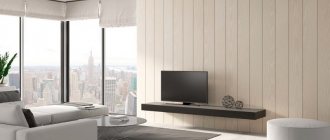
Design ideas
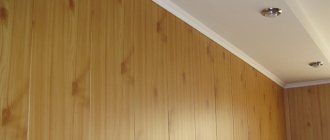
High-quality, textured lining that imitates wood is practically no different from the real thing. Plain slats with bleached pine needles can be used to decorate the walls and ceiling - completely or partially. For example, decorate a wall near the dining table or a work area near the kitchen unit.
Wall decoration with plastic slats near the dining table
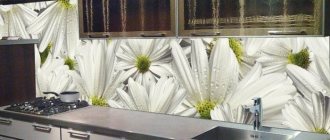
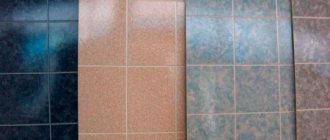
To decorate the apron, you can use plastic with imitation brickwork. The work area, decorated with white bricks, looks good, which is visually indistinguishable from the classic hog tiles.
The wall in the kitchen looks stylish, decorated with plastic sheets imitating marble. Suitable for a minimalist style, especially in combination with a tabletop of the same print.
In order not to spoil the interior when working with plastic, you need to avoid some mistakes:
- Flashy designs like photo wallpapers can deteriorate any design. You can use a small ornament or imitation of natural materials;
- A wall completely covered with plastic looks unnatural;
- A glossy surface with reflections looks unnatural; it is better to choose a matte one;
- Sheets or tiles attached to unleveled walls will not make the kitchen interior more beautiful. Although they are easy to install, the result will be better if you prepare the surface first.
Color and pattern
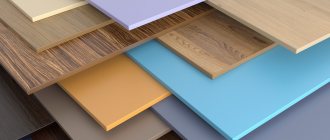
Plastic panels for kitchen renovation are available in a large selection of colors, textures, and prints, so it is possible to implement different design ideas:
- Plain - stylish, practical, look like a painted surface;
- Imitating natural materials - stone, marble, wood. The better the design, the more natural the kitchen finish looks;
- Repeating print - an identical image that imitates different types of materials during assembly, for example, ceramic tiles;
- The most popular is finishing the kitchen with plastic panels that imitate brick, which are appropriate for any design solution;
- The material and composition form a single picture - landscape, still life.
To decorate a small kitchen, choose light plastic panels with small patterns; for a spacious kitchen, choose dark colors with large prints. A glossy surface visually increases the space, while a matte surface does not affect the visual size.