Today, polyurethane foam has become an indispensable assistant in all ranges of construction work, including finishing in apartments. Using it, you can install new doors with high quality. The main thing is that the foam you choose has good performance characteristics, since the quality of installation, service life and fastening strength depend on them.
Household or professional foam. What to choose?
Household foam has a low price, although its parameters may be no different from professional foam. For household foam, a regular gun is suitable, but for professional foam you need to purchase a special one. Despite the extra costs, there are some advantages. When using a mounting gun, foam consumption is saved by almost 2 times. It's up to you to decide what savings will be for you. If you plan to use foam to install all interior doors, metal-plastic windows and other interior elements, a set of professional polyurethane foam and a special gun will justify the cost.
When choosing any of the two types of foam, an inexperienced buyer is faced with the problem of the weight of the cylinder. On the one hand, more weight means more foam. But on the other hand, less weight means cheaper price. In the first case, there is a high probability of a minimum amount of compressed air, which means that little foam will come out. In the second case, the amount of foam is initially small, so it may not be enough for installation work. Everything needs a balance (750 ml of foam: 250 ml of gas), which is followed by the brands Penoseal, Cyclon, KimTec, Makroflex.
If your main criterion is the degree of expansion, then it is worth knowing that for household foam this figure reaches 60%, while professional polyurethane foam increases up to 300%. When reading the characteristics on the cylinder, remember that manufacturers indicate the maximum value.
Advice from DoorExpo: if you carry out installation work in cold weather, you need to buy winter polyurethane foam, which does not lose its properties in the range of -18°C/+35°C. Remember, the lower the air temperature, the lower the air temperature.
How foam works
Aerosol foam for installation is a sealant. When interacting with air, the substance instantly forms polyurethane foam. Coming out of the container, it fills holes, seams and joints due to its increase in size (up to 20-40 times). It is because of this property that foam is used to fill cavities in the most difficult to reach places. Before use, it is important to take into account the secondary expansion of the foam, so you should not fill the cracks completely, as the door will be under strong pressure. This can lead to deformation of the door leaf and, as a result, disruption of the door movement. Some polyurethane foams (for example, Macroflex) have a long-term secondary expansion, so just a few days after installation the door will need adjustment.
The resulting foam mass freezes and hardens within 24 hours. This is facilitated by the moisture content in the air. That is why it is recommended to moisten the installation sites to speed up this process. Henkel Makroflex Rapido, llbruck 2K, Soudal lSoudafoam 2K have fast-acting properties. When using this foam, after 10 minutes you can cut off unnecessary parts from the outside.
You can avoid the difficulties of choosing foam and installation problems by ordering door installation from our company.
Nowadays it is impossible to imagine installing doors or window frames without the use of construction foam. This is the same yellow porous substance that crunches when you squeeze it and is difficult to wash off.
Thanks to the foam, it is much easier to fix the doors, and the installation process takes 20-30 minutes. But not all foam is the same and not all types are suitable for installing doors. Let's take a closer look at how different types of foam differ, how to foam a door correctly, and how a special foam gun is useful.
They installed an iron door - the jambs freeze. Can they be foamed inside?
IMHODom › Forums › urgent question › We installed an iron door - the jambs are freezing. Can they be foamed inside?
This topic has 76 replies, 40 voices, last updated Max 2 years/years, 3 months. back.
- Berlinka
They installed a street door, a sandwich, everything was fine. The door stands on foam.
Two shortcomings - no quarters were made in the wall for the door
and the iron jamb turned out to be empty (it didn’t even occur to me to look, I kept staring at the door - and now I looked into the lockbox - it’s empty)
There were no major frosts yet, but frost formed along the bottom of the jambs. I am seriously afraid that the door may simply freeze and I won’t open it.
- drill holes every 40-50 cm - and foam all the internal cavities through the tube?
- make wooden trim inside and outside...??
- do some work on the vestibule so that the door is not so much on the street.
Please advise what to do first...
And like other iron doors, the jambs are also empty. I just never thought about it before......
Air conditioners for baths.
- Dewdrop
They installed the door for me, when they arrived the frame was already pre-foamed. It is easier to remove the door along with the frame, foam the frame around the perimeter from the inside and put it in place
- Owner of the Establishment
It is good to insulate iron jambs with felt. In different configurations)
- Rainbow
A heating cable is also laid around the perimeter inside the box. The thing, I think, is not cheap to operate, it actually heats the street, but there is a 100% guarantee against freezing. door stores offer a cable with a control unit. funny - you open the door, and her rib is warm
— no quarters were made in the wall for the door.
don’t be upset: for hardware in its pure form they are not needed. Although I don’t know the design of your door. Take a photo. I don’t really know them anymore, because an iron door, in my understanding, is literally not associated with the concept of “warm”.
You can, of course, foam the box, but the bridge of cold will not go away from it.
IMHO. Insulate the outside of all iron parts (box and sheet) in contact with the atmosphere. Think about how. Possible materials: isolon, EPS. And you can already snuggle up a little under the “quarter”...
It is good to insulate iron jambs with felt.
)))))))))))))))))) Tough. Felt in such places died long ago as a class.
A heating cable is laid around the perimeter inside the box. The thing, I think, is not cheap to operate, it actually heats the street, but there is a 100% guarantee against freezing.
This option is also possible. The better you insulate, the more practical the operation will be.
- Berlinka
I'll try to take pictures tomorrow
Air conditioners for baths.
- Stepanovka
There is also such a problem.
There are several areas near a metal entrance door where condensation or frost appears more often than others. These include door handles, cylinders, peepholes, and the flap part of a metal door (the so-called cold bridges, where increased heat transfer occurs). This is due, first of all, to the concept of thermal conductivity of the materials from which the metal entrance door is made.
For example, consider part of the door - the vestibule. For solid doors it is made of wood, for plastic doors it is made of plastic, and for metal doors it is made of metal. Wood, plastic and metal have different thermal conductivities, and in order for a metal door in its hinged part to have the thermal conductivity of the hinged part of a “solid” door, it must be 200 times thicker than a wooden one! Instead of 4 centimeters, the thickness of the vestibule should be 8 meters
The principle of operation of polyurethane foam
Foam consists of quickly hardening elements, which after hardening turn into a dense substance. To harden the foam, you need access to oxygen and a static temperature.
Polyurethane spray foam is a type of insulation that is used inside a home to insulate walls, ceilings, and the underside of roof decks. It is more effective than traditional insulation because it expands to reach hard-to-reach areas, ensuring a complete seal.
It retains heat, dampens sound to some extent, and strengthens the connection.
Polyurethane spray foam insulation is a two-part solution: a mixture of isocyanate and a resin, which is the adhesive (sticking agent) that distinguishes one manufacturer's product from another.
Criterias of choice
When choosing installation material, pay attention to the following characteristics:
- Primary expansion - shows how much the mixture will increase in volume in the first minutes after spraying. For high-quality foam, this figure should not exceed 30%.
- Secondary expansion is an increase in mass in volume during the process of polymerization (solidification). The lower this parameter, the less the doorway will deform.
- The volume of foam at the outlet determines the material consumption (how much one cylinder will last). For professional products, the yield reaches 65 liters, for household products it does not exceed 40 liters.
- Adhesion is the ability of the mixture to stick to different surfaces that need to be foamed. For high-quality installation, high adhesion is required, which directly depends on the density of the sealant.
- Viscosity - determines the heat and sound insulation properties of the mixture. The higher the viscosity, the less heat and extraneous noise will penetrate through the doorway.
- Degree of shrinkage - the material should shrink minimally and hold its shape well. The acceptable parameter is 5% after secondary expansion.
- The rate of hardening determines the efficiency of construction work and the possibility of correcting sealing joints.
Acceptable standards for the basic characteristics of polyurethane foam are given in the table:
| Technical Parameter | Norm |
| Consumption | For 1 linear meter of a doorway with a seam depth of 5 cm and a width of 2 cm - ⅕ part of a 65 liter cylinder. |
| Drying time | Initial polymerization – up to 3 hours, final – no more than 12 hours. |
| Adhesion | From 0.19 to 0.48 MPa in relation to concrete surfaces. |
| Fire resistance limit | Up to EI360 – withstands heating from direct fire (temperature up to +1000 °C) for 6 hours. |
| Best before date | From 12 to 18 months. |
These are average indicators that depend on the installation conditions of interior doors. For example, material consumption increases at low air temperatures, and adhesion on brick, concrete and wooden surfaces will be higher than on plastic ones.
Important! Before use, the bottle of foam must be kept at room temperature for 12 hours, and before spraying, shake vigorously for at least 20 seconds.
Which brands of polyurethane foam have the best characteristics:
- Penosil – the line includes drugs for professional and household use;
- Soudal - sealants work well at low temperatures and have low expansion;
- Tytan - foam has high thermal insulation properties and is consumed economically;
- Illbruck are professional products for summer and winter use with high fire resistance.
How to choose foam
We have examined in detail the principle of operation of foam, now let’s look at how they differ.
Compound
As mentioned above, all foams are made on the basis of isocyanate and resin with an adhesive component (construction adhesive, viscous primer). The composition may be one-component, but such types are not popular.
When purchasing foam, you need to ask the seller about a specific situation, describe to him the door or window, wall material, and finishing. He will offer the desired option (usually the most expensive - universal).
Areas of application
Foam is used for:
- thermal insulation. It has a porous structure, so it retains heat and dissipates it more slowly;
- soundproofing. Due to its porosity, it transmits less sound in both directions. Since foam is not a professional soundproofing unidirectional material, the audibility between the wall treated with foam will be poor;
- protection from dust and debris. Here the foam works as it should, because dust cannot penetrate through a continuous layer;
- strengthening Some types of foam provide sufficient strength comparable to some building materials (gypsum, crab reinforcement).
Flammability degree
As a rule, all one-component foams burn well and ignite quickly. Two-component mixtures burn more slowly due to heterogeneity. There are non-flammable foams, but they are extremely difficult to find. To prevent the foam from catching fire, you need to treat it with a special solution.
Application temperature
This is a factor that affects the final strength and hardening time. If you take summer foam and use it in winter, it will harden, however, the characteristics will be far from the declared ones.
Depending on the time of use, the foam can be:
All-season foam is a universal solution that has average strength characteristics.
Properties
Main foam parameters:
- porosity;
- density;
- hardening speed;
- spray and expansion speed;
- texture;
- fluidity.
All these characteristics are different for each manufacturer, so two foams with the same composition can behave differently under the same conditions, since in addition to the main components there are auxiliary ones that are not indicated in the composition.
Installation of platbands
After the box is installed and the joints are sealed with foam, it’s time to attach the trim. They are nailed down. If these are frames made of fragile material, then drill holes in them before installation. This will prevent them from cracking.
All that remains is to remove the protective film and we can assume that the work of installing the door leaf is completed.
Fastening platbands
How to properly foam the gap between the box and the wall
- First, you will need to seal the installation site with masking tape if the finishing has already been done.
- Wedge the door, checking the levels. If the door frame is tilted, the doors will open on their own and swing due to the tilt.
- When everything is insulated and the box is in place, you need to fill everything with foam.
- It hardens in 20 minutes to an hour. Do not use a hair dryer for drying, because oxygen must penetrate inside so that the foam fills all porosities and “inflates from the inside.” Foam components draw air inside and high temperatures will interfere with the process.
- When the foam has hardened, you need to cut off the remains using a stationery or construction knife and remove the masking tape.
- Done, now you can remove the wedges, and fill the space that has formed with foam, if desired.
Installation of interior doors
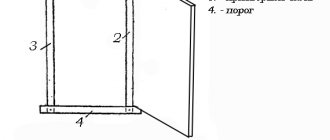
Door manufacturers offer a wide range of products. The door is immediately equipped with a door frame. All you need to do is take measurements of the doorway and go to the store. Remember that there must be a gap between the wall and the frame for the foam, which guarantees the reliability and strength of the structure being installed.
Interior doors
Installing an interior door is easy if you follow the instructions. Working with a door leaf requires preparation, so the first thing you need to do is purchase a set of tools, which includes:
- roulette;
- level;
- hacksaw;
- perforator;
- hammer;
- mount;
- screwdriver;
- knife.
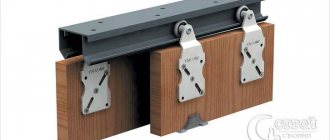
Hardware elements for door installation:
- door hinges;
- lock with handle.
To install the interior fabric you need to complete several steps:
- dismantle the old door. To do this, remove the door and disassemble the door frame;
- assemble a new door frame. To assemble it, remove the racks from the packaging and fasten them together with self-tapping screws. Assemble the box with rectangular or beveled corners of the posts;
Box installation
- install door hinges on the frame. To secure the hinges, you will need tools such as a cutter, a screwdriver, an awl, a thin drill and a drill. Sometimes a circular saw and pencil are used to secure the hinges;
It is important! Remember that large hinges are installed on the frame, and small hinges are installed on the door. For greater precision in installing the hinge, place the door and make the necessary notes. When placing hinges on the door leaf, pay attention to which direction the hinges are turned. According to the rules, the hinge hinges should face the front side. All that remains is to fix the hinges, aligning the holes.
Door hinge insertion
- Place the frame in the doorway and secure it with wooden wedges. But installing the box is not enough; you also need to align it vertically and horizontally. As a result, the box must stand so that the door is motionless in three positions: open, closed and half-closed;
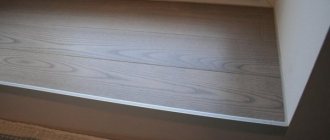
It is important! Remember that the “foam” gap between the frame and the wall should be 1-2 cm. This distance will be enough to secure the door frame and not damage it.
- the gap between the wall and the box is filled with foam. To find out how to do this correctly, pay more attention to this point.
Foaming gaps
Results
Polyurethane foam is a convenient and lightweight tool for installing window doors and other critical structures. Main important points:
- it may consist of one or two components. Its properties, price, and operating parameters directly depend on this;
- To install the door, you need to fix it correctly, check the angles and levels;
- It is not necessary to use a gun, however, it will help to easily dose the foam and make the connection more accurate;
- Commercial all-purpose foams should be avoided as they will not provide the desired effect. If you perform the installation in the summer, use summer foam, in the winter, winter foam.
Our offer
Sika is pleased to offer you an extensive catalog of mounting foams for interior work, installation of doors and other structures. We sell professional formulations that are easy to use and have the necessary set of performance characteristics. Products are offered at competitive prices. We sell with delivery and process incoming orders promptly. The company invites legal entities and construction organizations to cooperate. Individuals can order products through the company's dealers. Contact us to find out more and get help with product selection.
How to clean surfaces?
Chemical agents will help remove sealant from contaminated surfaces:
- Foam cleaners are produced in the same line as sealants and are suitable for both cleaning the gun and cleaning surfaces.
- Solvents – Acetone, White Spirit, Solvent 646 – effectively cope with fresh stains.
- Dimexide - a pharmaceutical product destroys the structure of polyurethane, removing it from various materials.
To soften the dried layer, you can use vegetable oil, water and vinegar. As soon as the sealant layer becomes pliable, it is cleaned off with a spatula or wiped with a rag.
Important! Test the chemical on an inconspicuous area that needs to be cleaned. If the surface is not damaged or changed color, you can safely use the product.
Wooden surfaces that are not coated with paint or varnish can be cleaned with a solvent. The sealant is carefully scraped off the varnished door with a knife and polished with sandpaper. Then the product is re-painted and varnished.
Remove foam from linoleum, laminate and parquet with a sharp object and remove residues with a special cleaner. The product should not contain acetone, otherwise matte marks will remain on the floor covering.
Do I need to trim dried caulk?
Dried foam spoils the appearance of the installed door, so the resulting sagging is removed after hardening.
This is allowed to be done no earlier than 24 hours after completion of installation. To work, you will need a construction knife with replaceable blades. The sagging is removed so that an even right angle is formed, and the level of the foam is level with the level of the walls.
If putty will be used for further processing of the seams, use a knife to slightly delve into the sealant, cutting off a few millimeters of thickness.
Working with the cylinder with the valve down or in a horizontal position
The bottom of the cylinder should be directed upward, so the propellant gas will put pressure on the contents. This will ensure a high yield of material. This rule is often violated with household foam.
Working with a household cylinder
Working with professional polyurethane foam
For household foams, a disposable tube is used. All work must be completed in one go. You can install a mounting gun on professional foam.
With professional foam, the most common mistake is when holding the container in a horizontal position. This often happens due to uncomfortable working conditions. For example, when the cylinder rests on the ceiling. In this case, you can install a thin flexible tube at the end of the gun, which will allow you to hold the cylinder upside down.
Is it possible not to use fasteners?
Additional fastenings will not be required if you use only foam and wedges from scrap materials for installation. Pieces of thick cardboard or strong wood chips are suitable for these purposes.
Spacers are installed in the space between the wall and the door block in three places - at the level of the lock, upper and lower hinges. By analogy, wedges are placed on the opposite side of the opening.
The foam is applied in a thin layer on the outside and inside of the room. The spacers are removed from the gaps a day after foaming.
We foam the door frame. Some tips
Now we will tell you about some techniques that can be used to temporarily fix the frame when installing interior doors, as well as when foaming the door frame in the opening.
This door opens into the room. Usually, if it is impossible to create a gap between the canvas and the box, then wedges and stands are placed and foamed. In this case, the door leaf needs to be open, that is, a passage is needed. The need for this arises quite often. On the right side, the gap narrows; the door pillar needs to be fixed in this position:
After we foam and the foam dries, the box will remain in this position. What is needed for this? We take a hammer drill and drill at such an angle so that the casing covers our holes, since we already have a ready-made surface, the wallpaper is pasted:
We drilled the holes, then take a dowel, a self-tapping screw, and a key.
In this case, this is the key for tightening the cutters. You can take a piece of direct suspension or some other suitable washer. We insert the dowel and tap it.
The key is required to engage the groove.
Like this, here it rests against the wall. Let's pull it up. The key fell into the groove and also holds quite well. The gap has become uniform, and we can easily foam.
After drying, unscrew the screw and cash it in.
The next point: in this case, the stand was bent. To temporarily align it in a plane, tighten the self-tapping screw and wedge it with a wedge.
Now we have a smooth junction.
Let's start foaming. When foaming, of course, you need to use a gun.
We use professional foam “Tytan 65”. We've been using it for about a year now and are quite happy with it. What are its advantages? It has a small percentage of expansion plus quick setting, that is, it quickly sets when sticking and hardens quite quickly. Now we’ll tell you how to foam it so that the box is squeezed out minimally or not at all.
We foam from the side of the extension along the very edge, we start from the bottom not to the entire width, but foam only the edge:
We put almost a minimal layer. It's better to keep it minimal. And so on throughout the perimeter.
Here, they frothed it all around the perimeter from the extension side. What does this give? This gives rigidity, giving rigidity to the box.
In the future, it will be possible to stick wedges into the foam and thereby temporarily fix the addition. Now we go to the other side and foam in the corners 10–20 centimeters down from the corner and to the side.
The same is true in the area of the strike plate.
This amount of foam will not press the box. We do the same below.
We foam, we try not to foam too much, the foam will expand a little later anyway. We foam about 20–25 centimeters:
Also on the other side:
Here we do it differently. We foam about 20 cm below the canopy and all the way to the corner, and from the corner another 20 centimeters.
We work carefully so as not to stain the wallpaper. Same thing below.
Here, too, 20 cm from the canopy up and down:
Let's show you what the finished door looks like after drying.
Now our foam has dried up. Showing the foam layer:
This door also opens on its own. Here it is, wedged:
Here it is foamed:
There is quite a large layer of foam here, about 4 cm.
The opening is too big. In these places, you can then either use additional jumpers of about three centimeters each to add foam, or completely.
There is no great need for this, because there will be enough rigidity as it is. Now let’s show the gap: it remains uniform, and the foam does not compress the stand:
You can wet the wall and the box. Some people do this, we don't. That's all. We hope this method will help you in your work.
All rights to the video belong to: Putting Doors
Preparing the work area
Since it is possible to correctly replace an interior door only if a certain sequence of work is followed, all stages should be considered in more detail. You need to start, of course, with preparing the surface. If you had a door installed in the opening, it must be removed.
First, remove the canvas. Then you need to remove the trim from the door. How to do this will depend on the way they are attached. If the structure was installed using glue or using the tongue-and-groove method, it is enough to lightly pry the elements and pull them to the side. It's a little more difficult if the trim is nailed to the box, in which case you can use an ax to pry it up and tear it off the base. After this, you need to carefully remove the door frame. It is recommended to remove all fittings, namely the lock and hinges; they will also need to be replaced.
First of all, you need to dismantle the old door
To simplify the process, use a grinder and a crowbar. Saw the box in half and tear its parts from the wall in the opening. This is not difficult to do, but you need to minimize the destruction of the walls in the room.
If serious damage cannot be avoided, preliminary alignment of the sides will be required.
Stages of work
The foam is used step by step like this:
- The surface is cleaned of small debris, if any.
- The surface is degreased (acetone).
- The surface is moistened (sprayed with water using a brush or spray). Foam hardens faster and better if the surface (or air) is wet.
- If the room is cold, place the balloon in warm water.
- The cylinder is opened, inserted into the gun (or a tube is put on it) and shaken.
- The end of the tube is inserted into the slot, and the foam is supplied in portions, 5-10 cm along the length of the slot, moving from bottom to top.
- After complete hardening (after 25-30 minutes), the protruding pieces are cut off with a construction knife.
Safety precautions when working with polyurethane foam
Polyurethane foam is a chemical composition located in a container under pressure. Therefore, you need to work with it, observing safety rules:
- Do not drop or heat the cylinder.
- Do not use the cylinder near hot surfaces or open flames.
- The work is carried out with gloves (if the foam gets on the skin, it will be difficult to clean it off).
- You need to keep a sponge and a rag on hand to clean off the composition if it gets into an “unwanted” place.
Removing foam from contact with “unnecessary” surfaces
Polyurethane foam sets quickly on the surface, so if it gets somewhere other than the desired gap, it will be difficult to clean it off.
Methods for cleaning different surfaces:
- Leather. If the composition has not hardened, it is removed with a sponge, and the remains are washed with acetone or a solvent. If it is frozen, it is cut off and scrubbed off with a scrub.
- Textile. The uncured composition is collected with any hard object (a piece of a board will do). The frozen pieces are cut off, and small residues are washed off with a solvent. In both cases, a stubborn stain may remain on the fabric.
- Plastic window sills, frames, slopes. The fresh composition is removed with a sponge, the remains are washed off with a cleaner for plastic surfaces. The dried layer is cut off, the remains are washed off.
- Linoleum, laminate. Fresh foam is removed with a hard object (spatula, piece of board), the remains are collected with a sponge soaked in cleaner.
To prevent such situations, in addition to the skin, it is necessary to protect the surfaces around it. It is advisable to cover them with plastic wrap, rags or newspapers.