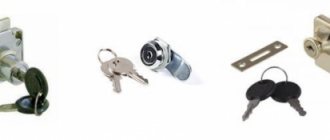
Hinged compartment doors , if you think about this phrase, it actually sounds somehow absurd, but this name has become firmly established in the everyday life of furniture manufacturers.
A compartment door is a panel with upper rollers and lower support wheels, which slides along guides. The swing door does not slide anywhere, but opens, swinging open due to the hinges. Thus, as a result, we have a door that is made of the same profile as compartment doors, but it swings open using special mechanisms.
You can visually see how a sliding compartment door differs from a swing door in the photo below:
Preparing the tool
Before installing sliding wardrobe doors, you should ensure that you have the necessary tools. Prepare the following for work:
- Drill and drill bit 5 mm;
- Screwdriver (screwdriver), hexagon number 4;
- Mounting level;
- Special kit for fastening to the required material (chipboard, concrete, plasterboard);
- Double-sided tape.
Be sure to make sure that all elements of the door kit are present, otherwise the installation will not be possible.
We act according to the rules!
How to properly hang a door on a wardrobe? It is worth starting by measuring the width and height of each opening and frame, checking the level of the roof, sides and panel that will serve as the floor. You should also measure the thickness of the cabinet walls, since over time, distortions may form in them. Compensation for distortions is possible thanks to overhead hinges that are easy to adjust. It is important to ensure that during installation all structural elements are located at the same depth. Installation of loops is carried out in the following order.
- The hinges are applied to the place where they will be attached, holes are marked and drilled to a depth of 20-30 mm.
- The holes are made both at the ends of the sidewall and on the door itself.
- The hinge halves are fixed using furniture screws.
- The door is hung.
Installation of guides
Installation of wardrobe doors begins with work on the guide elements. There should be two of these in a set - upper and lower. Let's start installing the top guide.
Using a ruler, we measure steps of 500-700 mm and use a special drill to drill mounting holes at the selected points. You should use a metal drill with a diameter of 5 mm and try to make the holes as neat as possible. Next, install the guide in the cabinet opening and mark the places for fastenings with a pencil. The guides are most often attached directly to the ceiling - we use dowels or other fasteners (depending on the material), after which we fasten the guide element with self-tapping screws. It is recommended to flare the upper part of the hole a little so that it is possible to hide the heads of the screws that are screwed in.
The installation of guides under sliding doors for a wardrobe should be carried out using a level - be sure to maintain the accuracy of the geometry and the same indentation along the entire length of the element, otherwise the doors will be installed crookedly, which will not only worsen the appearance, but may also make their movement difficult or impossible.
Please note that the top guide is not subject to loads and is not a support. It simply supports the structure in a given position and directs the movement of the rollers in the right direction. The weight of the door will be distributed over the lower element, the installation of which we will proceed to next.
Correct installation of sliding wardrobe doors involves precise installation of the lower guide element, since the ease of movement (opening and closing) depends on this. We proceed as follows:
1. Choose the right position.
- Apply the guide to the surface;
- Select the correct horizontal position using a level.
2. Adjust the vertical.
- We install one of the doors in a future location;
- We insert the rollers of the upper edge into the stream of the upper guide;
- We lift the rollers of the lower edge and insert them into the stream of the lower edge.
3. We carry out markings.
- Using a level we build the correct vertical;
- We mark with a pencil the places for fastenings and outline the part itself along the perimeter;
- We remove the door.
This way we get a marked place for mounting the lower guide element. Before you install sliding doors with your own hands, you should remember that the installation of the bottom guide can be done in two ways: using dowels and screws, as well as using strong double-sided tape. Each of these options has its own characteristics.
We follow the stages
Whatever door you hang - in a doorway or a closet, you need to do it in accordance with a number of steps. Only in this way will the hinges be cut neatly and accurately, and the door will serve stably and properly. So, if you are installing a new structure, you will first have to start assembling the box. To do this, the side and top posts are cut out and connected with self-tapping screws.
When assembling the frame, you need to leave a gap of at least 5 mm - thanks to it, the doors will not be subject to friction and cycling after installation. Once the box is ready, you can install the hinges. But there are some nuances here too. For example, it is important to understand how much weight a door has - the number of hinges that will be required during its installation depends on this. The box can be attached in two ways. The first involves the use of foam if the door is lightweight, and the second - anchors, which is advisable for large structures. All holes can be carefully closed with decorative plugs.
You can handle most of the work yourself, but since hanging a wardrobe door is not so easy, it is better to entrust this work to professional craftsmen.
Source: autogear.ru
We use double-sided tape
This option is much simpler than the first. First, thoroughly clean the surface on which the tape will be glued from dirt, dust, grease and possible burrs. We clean it carefully so as not to accidentally erase the marks that were made with a pencil. We expose the sticky side of the tape and apply the guide to the floor in exact accordance with the markings. We press the element along its entire length for a while.
Before installing doors in a wardrobe, or more precisely when choosing a method for installing the lower guide element, you need to remember an important nuance. If you need to preserve the coating, that is, you don’t want to drill holes in it, you can use tape, but there is only one attempt at gluing it, since it will be impossible to tear the good material off the surface. Be extremely careful and attentive, and do not make mistakes when marking.
Features of working with a coupe
Each type of cabinet from a design point of view has its own characteristics, which is reflected in the need for correct hanging of hinges. Most often, furniture has hinged doors, but wardrobes are no less popular. When equipping it, the following types of loops are most often used:
- inset, having a facade and clearly visible ends of the sidewall of the frame;
- overhead: in this case, the facade is located on the hinge side and is superimposed on the ends of the side parts;
- angular: attached at an angle of 90-135 degrees relative to the holding unit;
- partially overhead: can be mounted in the form of two facades on one partition.
Pivot mechanism for sliding wardrobe doors
You know exactly what a compartment door looks like. So, the hinged compartment door looks exactly the same. It just opens like regular swing doors. The need for such a system arose because the openings were too narrow, where it was impossible to install two sliding doors.
The pivot door opens using a mechanism fixed to the door handle profile. Which in turn is recorded in the pivot track. The track is attracted to the lower and upper horizontal strip of the opening. If the floor and ceiling are level, then you can do without planks.
The mechanism itself is simple - an aluminum sleeve is inserted into a hole made of hard plastic. For this reason, there are restrictions on the width and weight of the door. You should not assemble high glass or mirror doors wider than 500 mm. Once I managed to catch one :), during installation.
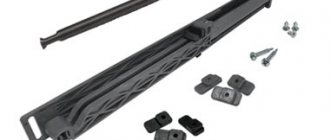
Components of a hinged coupe door
- Track (upper and lower) 2 pcs.
- Mechanism (top and bottom) 2 pcs.
- Magnetic stopper 2 pcs.
Hinged coupe doors calculation
Very often I made mistakes when calculating the height. When the door turned out to be large, I reduced the leveling strips leveling the floor and ceiling to the level, when it was small, the system made it possible to adjust the mechanism up to 25 mm, although the gap appeared terrible. Only upon closer examination did I notice what my mistake was.
Height
To calculate the height of a hinged compartment door, you must first purchase a pivot track. The fact is that there are two types of them and it is difficult to predict which one you will get. The difference between them is 5 mm, which is significant for this mechanism.
Look at the photo and notice the difference. With the track on the left side, subtract 21 mm from the height of the opening. With a track on the right side - 25 mm. It's all about the curved base of the track on the left side, on the right the base is flat. The height bend is 2 mm. The track below and above is a difference of 4 mm.
In order not to remember the numbers, you should understand where they come from. Screw the mechanism to the profile and put on the track. The distance from the end of the profile to the outer edge of the track will be the size separating the height of the door from the opening. Because mechanism on top and bottom × 2.
What depth should be built into the closet for such a door? For sliding doors it is usually 8 cm. Will it be possible to save on the required depth if you use hinged doors instead of sliding ones? Thank you
For pivot doors, the filling is minus 50 mm if the cabinet is straight.
Dmitry, what if it’s corner? And how is the guide attached, how far from the edge?
Hello! Depends on what degree of angle. Mainly in fact, so that the profile does not shuffle when opening.
I had problems adjusting the sash height. The screw does not tightly tighten the strip and sash. I can't figure out what the problem is. Could you give me some advice?
Source
- ← beer pipe in apartment fake
- pigment for facade plaster →
Types of sliding systems
To decide on the design of the door block, you need to know the main differences between sliding systems. There are four groups of them:
- Coupe. The simplest type of mechanism. Easy to do yourself without complicated tools.
- Radius. It is impossible to assemble such a structure without experience and specialized tools.
- Cascade. The complexity of the system is not inferior to the radius.
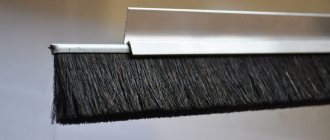
- Harmonic. The simplest hinged door, sliding on top rollers. The disadvantage is poor vapor and sound insulation.
All sliding systems are based on rollers and a guide profile, but differ in the way the sash moves :
- Along the wall. The best option is to make compartment doors yourself. Disadvantage: free space is required on the wall adjacent to the opening.
- Driving inside the partition. It is more difficult to make such a design. The advantage is saving space along the wall.
- Retractable. The principle of operation is similar to a system where the sash moves along the wall, but special fittings allow it to change its position. Disadvantage: it’s difficult to make and expensive.
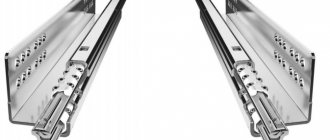
Any sliding system consists of a set of rollers, guides, and rails. The mechanism differs in the material of manufacture :
- Steel. For an interior door, a system made of this durable material is chosen. The mechanism is designed for heavy loads. Disadvantage: loud noise.
- Aluminum. Guides from this material are chosen if you need to make a lightweight sliding partition from polycarbonate, plastic, or glass. Advantage: quiet operation.
- There is even a plastic mechanism . It is usually used on accordion folding doors. The frameless device is attached to the frame of the doorway. The sash moves on the upper rollers.
An aluminum guide and steel rollers are often used. This mechanism is inexpensive, but long-lasting.
Required materials and tools
To make a sliding door yourself, you will need carpentry and plumbing tools :
- electric drill, screwdriver;
- a milling machine, but if you don’t have one, you can use a chisel;
- wood hacksaw;
- level;
- screwdriver, open-end wrenches for adjusting the rollers of the sliding system;
- pencil, ruler, tape measure.
If you decide not to buy a kit, but to make a compartment door yourself, the materials you will need are guides, rollers, and fittings . To fix the top rail, prepare a beam with a section of 50x50 mm . The length of the workpiece is equal to twice the width of the sash. You will need a door frame, trim, anchors, and screws.
Features and installation procedure
To properly make a compartment door between rooms, you need to know when to install a sliding system :
- When choosing the “in the wall” , the mechanism is installed during the rough finishing work of the room. For the niche, a false wall is made of plasterboard. It is important to provide for fastening the embedded beam in the opening in advance. The guide rail is fixed to it.
- If the sash goes behind the wall , the mechanism is installed after finishing. Before starting work, check the condition of the walls adjacent to the opening. They must be strictly vertical without bends, slopes and parallel to each other. Identified deficiencies are corrected, otherwise the coupe will not work correctly.
Other types of furniture hinges
Card, piano, and hinge hinges are rarely used for installing cabinet doors. They do not have three-level adjustment and do not lock the door in the open and closed position. An additional fastener is needed. Today they are more often used as an additional decorative element. For example, antique.
Mezzanine
For installation of horizontal overhead panels that open upwards.
Mezzanine
Self-installation of sliding interior doors
Recommendations on how to make a sliding door with your own hands, if the mechanism was purchased separately from the door, consist of the following points:
- The sash is leaned against the opening, where a mark must be made with a pencil on top of the wall. A horizontal line is drawn 7 cm above it. The beam will be located here. The horizontality is checked with a level so that the canvas does not move spontaneously.
- A guide rail is attached to the bottom side of the beam with self-tapping screws. The fixation step is 15 cm. The beam is fixed to the wall with anchors where the mark was made. Rollers are inserted into the rail, and the ends are covered with shock absorbers.
- For smooth opening and better operation of the mechanism, a second guide rail is installed from below. It is cut into the end of the sash or the lower lintel of the frame. The second option is worse due to the formation of a threshold.
- The brackets (the main fastening of the rollers) are fixed to the upper part of the canvas with self-tapping screws. With their help, the sash is secured to the roller carriage, moved completely to the open position, and the location of the lower guide element is measured.
- The canvas is temporarily removed. Depending on the choice of system, a roller or guide knife is fixed to the lower jumper of the box.
- When hanging a sash, a guide knife or roller is first inserted into the rail from below. The brackets are connected to the carriages. Next, use a wrench to adjust the bolts, ensuring the door is horizontal.
- After checking the functionality of the system, side racks are made to serve as a stop for the open and closed door. Then they hide the entire mechanism with extensions and platbands.
Checking the door
After the hinges are installed and the door is hung, you need to check its functionality. If you suddenly hear a creaking noise when opening or closing, lubricate the hinges with some compound - machine oil, grease, technical petroleum jelly. If the hinges are cut too deeply, do not despair: this situation can be corrected by using a rubber gasket, thick cardboard or hardboard.
If the canvas ends up being too low and therefore scratches the floor, you need to raise it. To do this, a washer is placed between the hinge canopies, after which the entire structure is raised. As you can see, hanging a door is not as difficult as it seems, especially if you approach this process responsibly and pay timely attention to each defect.
We install cassette-type sliding doors in a pencil case
For a cassette door you need to make a pencil case. Depending on the width of the opening, one or two sashes are installed. In the second option, two pencil cases are assembled on opposite walls. The cassette is installed instead of the partition. The structure is a hollow false wall. If the opening is located on a load-bearing wall, it cannot be dismantled. The cassette is simply attached. The septum thickens, but there is no other way out.
The production of the pencil case begins after laying the floor covering. The false wall frame is assembled from a profile or timber. The guides are attached to the floor and ceiling. 2 rows of racks are fixed to them. If the cassette is adjacent to a load-bearing wall, then it is enough to make 1 row of racks. An embedded beam is provided for the top rail. The depth of the pencil case corresponds to double the width of the sash. A gap of 5 mm is maintained between the end of the blade and the guide rails. The thickness of the pencil case exceeds the sash by 2 cm. Usually this value is 8 cm. Installation of the sliding system is the same as for a door that slides behind the wall.
Choosing loops
To choose the right number and types of loops, you need to take into account the dimensions of the fabric, as well as the location of these same loops. If the structure is double-leaf, then both doors are mounted on hinges on both sides. To hang a door with one leaf, correct calculations are required.
- Depending on the location of the door, you need to choose either right-handed or left-handed hinges.
- The size of the loops depends on the weight of the structure itself. For a double-leaf door, two hinges per leaf are sufficient, but a single-leaf door, as it is heavier, requires more hinges. Most often, a single-leaf door is secured with three hinges.
- Be sure to check the hinges when they are open, as many products have a bent hinge.
- The color scheme of the fittings should match the color of the door itself.
How to make compartment doors with your own hands?
Complete installation of compartment doors from scratch involves not only the installation of the working mechanism, but also the manufacture of the leaf. To make a sliding door with your own hands, step-by-step instructions look like this:
- The door leaf is made 2–3 cm larger than the opening in height and width. It is better to make the sash frame from timber. The elements are connected using a tongue-and-groove locking method. For cladding, it is advisable to use lightweight materials: MDF, plywood, fiberboard, plastic. You can insert glass, laminate and even a mirror.
- When the sash is ready, the installation of the sliding system begins. The beam is attached to the upper guide rail. Measure and install the lower guides. Hang the canvas and adjust the mechanism. A homemade compartment door is made at will, opening behind the wall or going into a pencil case.
The installation principle of sliding systems is the same. The only difference is the way the sash moves. For a novice craftsman, it is easier to make a compartment with an opening behind the wall.
Source: dvernoiguru.ru
Adjustment and Leveling
At this stage, you need to work at the construction level - determine the correspondence of the frame parts to the door leaf. To do this, the level is applied to 3 planes - to the two sides and to the front. They should be as even as possible. That is, there should be no gaps or deviations between the frame and the door leaf.
Alignment begins with adjusting the vertical gap. To do this, pressing the facade against the frame, tighten the fixing screws on the strip. Then close the door and check the possible angles of inclination with a building level.
By adjusting the screws, all gaps between the facade and the frame are eliminated. For example, if the upper corner is tilted to the right, tighten the screws on the upper hinge and loosen the screws on the lower one.
Then they begin to adjust the doors according to their height. Two self-tapping screws located on the “ears” of the strike plate are responsible for this. To begin with, loosen the screws on all hinges, raise or lower the canvas (depending on the situation). Then tighten the screws until they stop, holding the facade in the desired position.
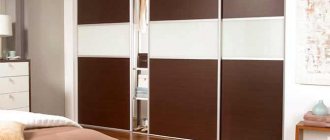
With the help of external decoration, it is fashionable to make the closet invisible, or it can be the main decoration of the room
Sliding doors
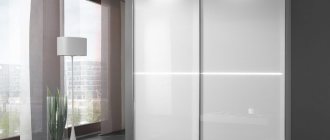
Front doors are the main decorative part of the built-in wardrobe. But from a functionality point of view, this is the most important element. Therefore, the design of doors must be taken as responsibly as possible. So, if your closet is located in a narrow corridor, a passage area or just a small room, it is advisable to choose sliding doors (compartments, pencil cases, sliding doors on an external guide). Unlike conventional hinged ones, they do not require additional space when opening, but move to the side along the surface of the cabinet.
Unfortunately, sliding doors are a bad option for cabinets built into shallow niches. The thickness of a regular door with all decorations does not exceed 5 cm; any sliding doors will require twice as much space. The minimum depth of a wardrobe is 40 cm (and even then, with end rods), so if you have a niche less than 50 cm deep, it is better to refuse sliding doors. And in a compact dressing room, where every centimeter counts, it makes sense to do without doors altogether.
Sliding structures have their drawbacks associated with the door not fitting tightly. But, if sound insulation for a closet is not important, then the lack of a reliable lock can be a problem (for example, if you don’t want small children to scatter your wardrobe all over the apartment from time to time).
The main disadvantage of sliding doors compared to swing doors is the high price, not only of facades with a mechanism, but also of their installation.
The most common sliding design for a closet is sliding doors on internal guides. Depending on the location of the drive rollers, they can be suspended or floor-mounted (thrust). Floor-mounted ones are more reliable and quiet, but require maintenance: you need to make sure that the bottom rail does not become clogged with dust. Doors that hang only on the upper rollers are a less durable structure, but self-sufficient. Assembling the door may include the use of frames, or it may do without it when the rollers are attached directly to the leaf. The second method is only suitable for wood and chipboard.
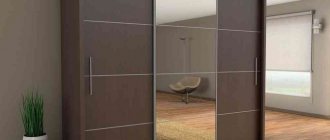
The facade for a wardrobe can be made of different materials - wood, slabs, glass, mirrors, plastic. It can be prefabricated and combine all these materials.
Where is the coupe going?
The most popular arrangement of sliding doors is when they are mounted inside the cabinet along two (less often, three) parallel guides: some of the doors slide on one, and some on the other. Doors in such a system will always overlap each other: the minimum “overlap” when closed is 2 cm. With an odd number of leaves, the doors are distributed along the guides in a checkerboard pattern, and with an even number, they can be joined.
There is only one drawback to this scheme: due to the fact that when opening the doors overlap each other, you will not be able to open the entire cabinet at once. Moreover, if the doors are planned to be of different sizes, “dead zones” may form - hard-to-reach places. Therefore, the opening mechanism and the dimensions of the doors need to be thought out simultaneously with the internal layout of the cabinet.
Another option for sliding doors - on an external guide - is used much less frequently. Here they go beyond the cabinet and move along the wall. This scheme is suitable mainly for furniture built into a niche, otherwise the doors will hang in the void. Along the wall, on the sides of the cabinet, you need to provide free space where the door will slide. This system looks quite impressive (you can make fashionable “barn” doors), but it is suitable for a not very large closet with two doors. But there are no “dead zones”.
An interesting option is to use such a door on half of the built-in wardrobe (as in the photo). Then you won’t need additional space along the walls.
Difficulties of work
Many people are interested in the question of how to hang a compartment door if there are internal drawers next to them. In this case, shelves and drawers located on the inside should be somewhat shorter in depth than the external elements. During installation, you should also pay attention to the fact that dead zones may form at the intersection of the frames. If drawers get caught in them, then it will be impossible to open them and they will lose their functionality. In general, experts do not advise installing sliding doors yourself, since each sliding system has its own characteristics, the door is rigidly tied to the frame, and therefore you can simply ruin the furniture.
how to make a wardrobe with your own hands
In order to make a wardrobe as cheaply as possible, its parts need to be ordered not from an organization that manufactures furniture, but from an organization that sells aluminum profiles for making doors for wardrobes. As a rule, door assembly can also be ordered from the same organization. On average, the cost of assembling one door costs 350 rubles.
Ordering doors already assembled, because assembling the doors yourself is quite difficult, both physically and psychologically. In addition, self-assembly of doors, as a rule, will not be without mistakes, which, at best, will result in a bent profile, and in the worst case, broken glass or a mirror.
Therefore, it is better to entrust door assembly to professionals.
In addition to the doors themselves, do not forget to order:
– upper and lower profiles;
– Schlegel (one door requires 5 meters of Schlegel);
– stoppers (the number of stoppers corresponds to the number of doors).
What to tell the manager
– Internal size of the wardrobe. It is different for different schemes: cabinet height minus 112 mm, cabinet width minus 32 mm.
– Number of doors and their filling (chipboard, glass, mirror or combined).
Select your city
“Supplier not found”
If you have information about who inexpensively makes wardrobe doors in Barnaul, please write us his contact information using “feedback”
“Klass Coupe Wardrobes”
Phone: + Address: Borodinskaya 46/50 trading house builder pavilion 24-A Website address: www.vl-klass.ru
Phone: +, 239-89-23 Address: st. Cherepanova, 3, of. 15 Website address: www.ldsp-service.ru
Phone: + Address: r.p. Gorodishche st. Kommunalnaya 1 Website address: www.max-gk.com
Phone: + Address: st. Front Brigades 15, hangar 12 Website address: www.art-to.ru
Phone: + Address: st. October Revolution, 16 a Website address: www.mebel-start.rf
Phone: 8-9030-61-34-61 Address: not specified, check by phone Website address: www.kupe116.ru
Phone: + Address: Komsomolsky Ave., building 1, building 1 Website address: www.valmon.ru
Phone: + Address: Dmitrovskoe highway, 5 km from the Moscow Ring Road, Gribki village, MTF, 13G Website address: www.eurodsp.ru
Phone: Address: not specified, please call for details Website address: www.tiscreen.ru
Phone: + Address: st. Borskaya, 17 Website address: www.alum-stek.ru
Phone: Address: Varshavskaya str. 5, building 3 Website address: www.factory-galatea.rf
Phone: +; 286-97-25 Address: st. Vladimirovskaya 1a; st. Vatutina, 99r Website address: www.global-sib.ru
Phone: + Address: address not specified, please call for details Website address: www.antgroup55.ru
Phone: , 220-51-98, 223-94-39 Address: Razvedchikov St. 32 Website address: www.rondoperm.ru
Phone: + 7 (863) 2905599 Address: 253 Stachki Ave. Website address: www.vladislava.ru
Phone: + 7 (846) 3-417-417, 8-937-99-409-70 Address: st. Stara Zagora, 202/1 section 18. Website address: www.papakarlo-63.ru
Phone: + Address: st. Voroshilova, 2 Website address: www.kupe-doors.ru
“Neva Furniture Corporation”
Phone: 4 Address: st. Prof. Kachalova, 9 Website address: www.nmk-mebel.ru
Phone: Address: Sofiyskaya, 54 Website address: www.bezskolov.ru
Phone: cell. 8-952-884-3333 Address: Irkutsk Trakt, 74 Website address: www.sacura.tomsk.ru
Phone: Address: st. Cooperative, 33 Website address: www.shkafy-kupe-ufa.ru
Phone: + 7 (4212) 777-140 Address: st. Krasnorechenskaya 97a Website address: www.ligakupe.narod.ru
Phone: +7(963) 0809407 Address: st. Udarnaya, 7a of. 1 Website address: www.akademstyle.ru
You might be interested in:
When using materials from this site, a link to the site “recipemebeli.rf” is required as a source of information.
Source: xn--90ahaabsue0ahz9b.xn--p1ai