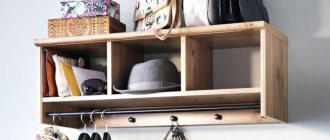
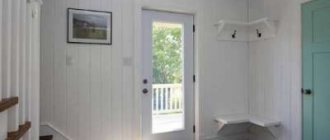
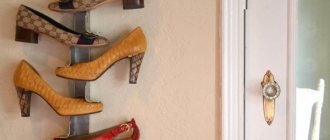
For residents of small apartments, the issue of placing shoes in the hallway is a very pressing issue. Families with children know what it means to have shoes scattered throughout the apartment. The problem is no less pressing for those who like to select a variety of accessories to complement their look. To maintain order in your home and conveniently arrange each pair, it is not at all necessary to buy expensive shelves from the assortment of furniture stores. You can make convenient devices for storing shoes from available materials, if you show your imagination. Here are some examples for inspiration.
Buy or make it yourself?
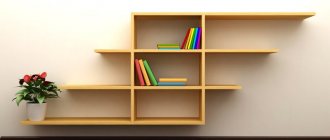
Buying ready-made shelves for walls is not a problem. Nowadays you can find all kinds of products in stores, among which you can almost always choose the one that will fit perfectly into the interior and will be in perfect harmony with the environment, but at the same time remain comfortable and functional.
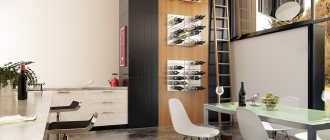
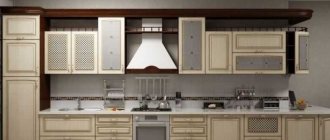
Wall shelves for kitchen
But often shelves are made with your own hands. Why? It's simple. The fact is that not all cities have such a variety of furniture stores that will allow you to find exactly that dream shelf. Also, some variations of furniture products can cost incredible amounts of money, especially when it comes to designer products. In addition, making a shelf yourself is quite simple - sometimes it turns out to be even easier than finding an option that is ideal for the room. So the creation and further use of a homemade product is completely justified. Plus, it saves money. And with due desire and effort, a handmade shelf can practically become a work of art.
On a note! In some apartments, the size of the product may play a decisive role. And a homemade shelf in this case is an ideal option. It can be adjusted to the parameters that are necessary.
Corner shelf on the wall
Making shoe shelves
When choosing material for a shoe rack, you need to take into account all the factors - how it will be used, what size it should be, and whether it will be a permanent or temporary option. It is also recommended to evaluate your skills and abilities in advance and figure out whether you can make a shelf with your own hands.
Advice! It is best to spend a little more time, put in a little more effort and make a shelf out of wood. It will last a long time, will be quite durable, comfortable, and if it is covered with protective compounds or at least simply varnished, then it will not even be afraid of water. This is the best option for making a shoe rack with your own hands.
Let's see what kind of shelf can be made from a sheet of plywood.
Step 1. The first thing you need to do is select and draw a diagram of the future shelf, immediately marking it with dimensions and parameters. In accordance with these parameters, it is necessary to mark a sheet of plywood 18 mm thick for cutting into individual parts.
First, a design diagram is created
Scheme of the future shoe shelf
Step 2. Next, according to the markings, you need to cut a sheet of plywood. It is more convenient to use a jigsaw, but you can also do this with a handsaw. It is best to work with protective gloves and a respirator. The latter will help protect the respiratory system from wood dust.
Cutting plywood
Step 3. According to the diagram presented above, you should get two large walls and several shelves. Next, on the walls you need to mark the places where the shelves are attached.
Finished parts for the future shelf
Marking the walls
Step 4. Next, at the ends of the shelves you need to drill holes for screwing in screws (it is best to use durable furniture ones). Then you need to start screwing the shelves to the walls using a screwdriver.
Now you can start screwing the shelves
Pre-drilled holes
Step 5. After the shelf is completely assembled, it needs to be sanded. You can use a sanding machine or just a block with a sheet of sandpaper attached to it.
Sanding the assembled shelf
Step 6. Next, the side parts of the shelf need to be painted with stain and allowed to dry.
Stain is applied
Step 7. Now you need to sand the shelf again using sandpaper to remove the excess layer of stain. This will allow the natural wood grain to show through.
Re-sanding the shelf
Step 8. The final stage is to cover the entire shelf with clear wood varnish and let it dry. After this, the shelf can be used for its intended purpose.
Applying clear varnish
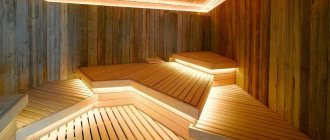
Shelf for a bath hanger
Selection of materials
The main material for the manufacture of storage systems is wood, its derivatives (MDF, chipboard), PVC pipes, metal, metal profiles and even thick cardboard and laminate. Also suitable for work are pallets - wooden pallets used in construction. In some models, materials are combined. For example, the frame of a shelf (overshoe) can be made of metal tubes, and the shelf-beams can be made of wood or plywood.
Made of metal
By analogy with the previous option, you can weld a metal shelf with your own hands. Only specialists can handle it. The result is a rigid, reliable, durable structure. Various decorations are allowed. The only drawback is that metal is much more expensive than wood. The material does not tolerate mistakes. Therefore, we recommend that beginners look at other options.
Popular ideas
After getting acquainted with the types of shoe racks, you can move on to studying those options for homemade shoe stands that are most popular among the population.
Wooden cabinet
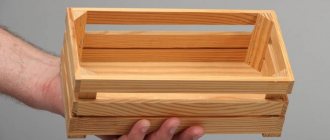
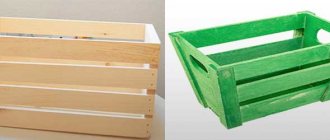
The advantage of a wooden cabinet is its ease of manufacture. The structure consists of 4 boards connected with furniture screws and thin planks fixed to the facade. It is recommended to paint or varnish the finished product.
Pallet stand
The versatility of pallets has made them a favorite material among craftsmen. They are also suitable for creating shoe stands. To make such furniture, you need:
- disassemble a couple of pallets;
- file the planks to the required parameters, sand them;
- collect several “mini-pallets” at the rate of one product per pair of shoes;
- treat the made boxes with an antiseptic, coat them with varnish or acrylic paint;
- stack “mini-pallets” on top of each other.
Model "Staircase"
This model of shoe rack looks like a ladder, hence the name. Its advantages:
- compactness;
- originality.
To make such a stand, it is equally acceptable to use a factory-made ladder and a homemade one. When making it, it is important to monitor the slope of the steps, otherwise the shoes may stain the wall.
Shoe rack made of profile pipe
The metal model is labor-intensive to create. Only a person who has welding skills can make a shoe rack from a profile pipe with his own hands. Despite this, this product has many advantages:
- small dimensions;
- aesthetics;
- durability;
- good ventilation;
- ergonomics;
- resistance to mechanical stress.
PVC pipe shelf
To create a PVC stand, you need to stock up on PVC pipes. The required diameter is 300 mm, the optimal length is considered to be 250 cm. The prepared material should be cut into ten pieces 250 and 300 mm long, respectively.
The next step should be to wallpaper each section. After this, you need to create the base of the shelf from 4 blanks, and glue the required number of pipes on top (their number depends on the desired capacity of the structure). When the glue has dried, the shelf can be used.
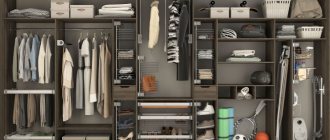
Model "Closet"
For some, the idea of creating such a shoe rack on their own may raise doubts, since this is a very labor-intensive task. In reality, everything is not so gloomy. First you should check the availability of the necessary materials and tools. You will need to buy chipboard, fittings and fasteners. You also need to check whether the farm has:
- screwdriver;
- screwdriver;
- bit set;
- awl and drills;
- corners.
The manufacturing process consists of a number of steps:
- Frame assembly.
- Installation of internal parts.
- Rear wall installation.
- Securing the opening mechanism.
- Installation of shoe boots.
- Installation of facades and remaining fittings.
Cardboard stand
To create a shoe rack out of cardboard, you need a box of a suitable size. It is cut into two parts, having previously sealed the bottom. Using another box, strengthen all the walls. Next, the shelves are cut out and secured to the body. The finished product is decorated with decorative paper or film.