It often happens that after repairs, scraps of wallpaper, linoleum, boards, ceiling plinths and much more remain. But what to do with these things, because it’s such a shame to throw them away? Of course, do handmade (from hand made, which means to do with your hands)!
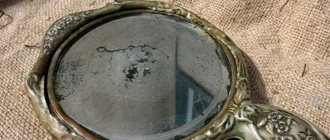
Nothing decorates the interior and pleases the soul more than homemade decorative items. Today we will talk about such a necessary household item as a mirror. A mirror is a reflection of the soul, so it must be beautiful. And now we will tell you how to do this.
Rules and features of decor
There is a wide selection of ceiling skirting boards on the market. From the simplest in design to elaborate ones that imitate stucco. You can choose any one that will fit the design and paint it in the desired color. You will get an excellent frame, and with a unique design.
We select the decor according to style. If the room where you plan to hang the mirror has a modern design, you can paint the frames in a bright color and add pop culture elements in the form of stickers. A mirror decorated in an antique style, with scuffs, without frills and bright details, will look harmonious in a classic interior.
General provisions
Frames have been used to highlight the contents of paintings for hundreds of years. Beautiful design allows you to highlight and present a work of art in a more favorable light against the background of the wall and surrounding furniture.
Incredibly beautiful frame made of ceiling plinth for a mirror
DIY frames from plinth for photos
DIY frame from ceiling plinth for TV
Frame made of plastic skirting boards with tapestry
Preparatory stage
Ceiling plinths differ not only in design, but also in the materials from which they are made. The most affordable ones are skirting boards made of polystyrene foam (expanded polystyrene). They are inexpensive, sold at any hardware store and do not require special skills to operate. Their main disadvantage is that they are fragile. They are easy to damage during operation and further use.
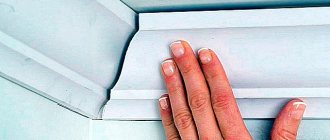
Use ceiling plinth for the frame.
Polyurethane is a more durable material. It bends perfectly, is easy to cut and is resistant to external influences. Ceiling plinth made of plastic (PVC) is convenient to use due to the variety of textures. They often imitate stone or wood, which is convenient and eliminates the need for additional decoration.
Making a frame will require less financial investment than purchasing it.
Wooden plinth is often used in the manufacture of frames, but working with it requires skill and experience. Gypsum is used to make skirting boards with a variety of finishes. They are heavier and suitable for decorating stationary mirrors. But a specialist must work with it.
You are free in your imagination and can create a unique product.
A metal baseboard will fit well into a modern style, for example, hi-tech. A frame made from it will be heavier, and it will also be difficult to work with, especially for a beginner. Once the plinth has been selected, we proceed to measurements. Let's decide on the size of the mirror and the future baseboard.
Preparing materials
To create a frame for a mirror from a regular ceiling plinth, you will need some more materials:
- plywood;
- glue;
- putty;
- paints and varnish;
- other items for decoration.
Plywood is convenient to use as a base. A mirror is attached to it using glue or special clamps, and then a homemade frame.
The plywood will serve as the base for the mirror.
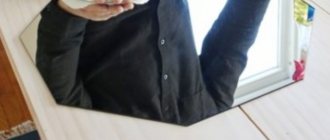
You need to think in advance about how to fix the future mirror on the wall. To do this, we will make holes in the protruding parts of the plywood and pass the cord through them, or use special fasteners.
If you are working with a floor mirror, then skip this step.
Required Tools
To work with ceiling plinth you will need:
- marker or pencil;
- miter box, if available;
- ruler, square, protractor;
- a knife and a hacksaw for metal, it will allow you to make a more even cut, unlike a hacksaw for wood.
What will you need?
During the work, you may need different materials and available tools. This depends on the type of frame being made. The main material will be ceiling plinth made of polystyrene foam. The foam plastic analogue is not suitable for frames; it is not dense enough and can break under light load.
Good frames are made from polyurethane plinth . It is wear-resistant, has optimal flexibility and cuts perfectly. Its only drawback is the high price.
In addition to the baseboard itself, you may need:
- cardboard, ruler, sheet of A4 paper;
- universal polymer glue (PVA, “Moment”, “Dragon”, hot);
- sharp stationery knife (scissors or hacksaw);
- construction (gypsum or acrylic) putty and spatula;
- brush, varnish, acrylic (water-based) paint;
- nylon thread;
- pencil or marker for marking.
In addition, you cannot do without a miter box - a special carpentry tool for perfectly cutting the plinth at the desired angle.
Frames can only be made from ceiling plinth. Some products are glued to wooden frames and mounted on a thick cardboard base. Therefore, not only the necessary tools and materials differ, but also manufacturing technologies.
Some people use plywood or boards 4-8 mm thick in their work. It makes a practical basis for framing photographs or paintings. When working with this raw material, you cannot do without a jigsaw or saw. Other available materials include a sponge (foam rubber sponge) for paints and newspapers.
This is interesting: Wallpaper for a children's room
Step-by-step instructions for making a frame from ceiling plinth
- First, glue or clamp the mirror to the plywood.
- Next, measure the length and width of the mirror and mark them on the back of the baseboard.
- Then cut pieces of the required length at an angle of 45°. For this we use a miter box.
- The result will be four parts; they should connect at right angles. A square will help check this.
- Glue the frame to the plywood using liquid nails or other glue and let it dry.
- We putty the resulting frame to hide joints, chips and irregularities, wait until the coating dries.
- Let's start with the decor.
You can decorate the frame in any way.
How to make it without a miter box
The easiest way to work with ceiling plinth is with a miter box, but if you don’t have one, you can make do with improvised means. To do this, remember the geometry lessons at school.
Carry out all work carefully.
The miter box is used to cut the baseboard at an angle of 45°, but you can do it manually. This is where a protractor comes to the rescue. With its help, it is easy to measure the required angle and then cut the material. Measurements using this method will be the most accurate.
Creating a product from scrap materials will not require any special expenses and can become real family fun.
Even if you have nothing at hand except a pencil and a piece of paper, there are some tricks. If the edges of the sheet are not damaged, then all four corners will be 90°; by folding this angle in half, we get 45°. Even when the paper is damaged and unsightly, it will come in handy.
Fold the sheet in four, carefully ironing the folds, where there will be a double fold, you will get a right angle of 90°. If you fold it in half, you get an angle of 45°. A square will also be useful. In this case, simply apply it to the baseboard and cut it off.
Using a marker and ruler, make a pattern around the circle.
A compass can also help. To do this, after obtaining an angle of 90°, place the tool at the corner point and draw a circle. At the place where it intersects with the sides of the angle, mark the points. We draw two more circles from each point, they will intersect at the point that we connect to the corner. As a result, we get two angles of 45°.
How to do it?
It’s not difficult to make a picture frame from ceiling plinth with your own hands. You can make a decent frame from the ceiling plinth yourself in different ways. Depending on the type of product you will have to:
- strengthen the back wall of the frame;
- prepare blanks for the future frame;
- assemble the frame and process its joints;
- paint the frame and glue it to the base.
At the very beginning of the work, it is necessary to measure the painting or photograph for which you plan to frame it. You need to prepare your workplace , after which you can start working.
We offer a universal option for making frames that can be placed on the wall of any room. This type of frame has a backing and is suitable for framing paintings and photographs of various sizes. The work consists of creating the base and decorating it.
Step-by-step instructions consist of a number of sequential steps.
- Measure the size of the photograph (painting), give an allowance for the frame itself (exactly along its width), and cut out the backing from thick cardboard.
- Take the plinth, measure it to size and cut it using a miter box or a hacksaw at an angle of 45 degrees.
- They carry out a “fitting” and, if necessary, trim the corner joints.
- The parts are glued together, and after drying, gluing defects are masked using putty or silicone sealant.
- Excess material is removed immediately, without waiting for it to dry. It will be more difficult to remove it in the future.
- After drying, they begin priming the frame with diluted glue, which is necessary for better adhesion to the paint.
- When the primer has dried, begin painting the baseboard. Depending on the desired effect, it is decorated with a brush or a foam sponge (sponge).
- After the paint has dried, the frame is coated with a layer of varnish.
- Take the selected image, straighten it, and then pin or glue it to the base.
- The parts of the base with the image and the frame are combined into a single structure. The product can be hung on the wall.
You can make a frame without a base . Such products are now in great demand among those who use them to create collages from the frames themselves. The technology for their implementation is even simpler. The main difficulty will be in cutting the skirting board perfectly at the correct angle. The manufacturing technique itself is extremely simple:
- prepare a plinth of the required size with allowances for cutting edges;
- determine the dimensions of the frame, and then cut off the excess length of all 4 parts;
- the parts are glued together, then dried and, if necessary, the flaws are corrected with white putty;
- after that they are painted and decorated in accordance with the design idea.
Depending on the type of product, it is made with hangers or supplemented with holders for placement on a table, shelf, or rack.
Decor ideas
How to make a frame for a mirror from a ceiling plinth to suit a certain interior style? Decor will help you cope with this task. If you already have an idea of what the future mirror should look like, great. But sometimes there are no ideas, but you want to decorate the room.
You can make a frame of any color.
Then you need to carefully consider the space in which you plan to place the mirror. Pay attention to the prevailing colors, textures, or maybe, on the contrary, there is some item that you really like, but it does not yet fit with the rest of the space.
Modern trends in interior design allow the use of bright colors and rough textures. It is better to paint the ceiling plinth frame in your favorite shade or leave it without decoration if it is made of metal. An additional decoration for the mirror for a child or teenager will be a variety of bright stickers with characters from popular films, comics and cartoons.
For a large floor mirror, you can make a massive, heavy frame.
A classic interior is characterized by pretentiousness and pomp. A white or black frame with a pattern highlighted in gold paint, artificially aged and worn, will fit perfectly here. A plain frame will fit into any interior, the main thing is to choose the right color. It can be an inconspicuous part of the decor or a bright accent.
For rectangular and square mirrors, make a frame from wood or ceiling plinth.
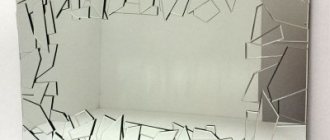
For more experienced craftsmen, complex frames made from ceiling plinths are suitable. They can be multi-level, made using additional parts. For example, mosaics or sea stones and shells.
Beautiful examples
We offer several examples of beautiful design of ceiling plinth frames, made with your own hands from leftover building materials and improvised means:
- an example of designing frames for interior decoration in the style of a rural outback;
- laconic frames for decorating the wall in the bedroom;
- vintage frame with flowers, made in white;
- picture frames made to match the moldings;
- frames to accent the walls of the dining room;
- photo frames as living room wall decoration elements;
- laconic panel frames for decorating a recreation area.
The following video shows how to make a picture frame from ceiling plinth.
This is interesting: Scandinavian style bathroom 13 photos
Useful tips and tricks
If you have never worked with ceiling skirting boards before, it is better to practice before you start creating a frame. The most difficult thing in this matter is to cut the baseboard correctly. It is important to do this evenly and at the right angle so that the joint is not noticeable.
It is better to start with simple frames and use foam or polyurethane baseboards. They are easier to work with and inexpensive. Therefore, if something goes wrong, it is easy to buy a new baseboard and start over.
Use quality paint for the baseboard frame.
Making a frame for a mirror with your own hands from ceiling plinth is quite simple. To do this, you will need simple tools and materials that are found in many homes, and can be easily purchased if necessary. Ceiling plinths are made of foam, plastic, and metal.
Choose based on your preferences and means. In any case, a successfully decorated frame will harmoniously fit into the interior and will look neat and expensive. With a little effort, you will have a unique mirror that will decorate the room and add personality to it.
What to consider?
When making your own frame from ceiling plinth, you need to take into account several nuances. Remember: regardless of the type of baseboard, it has a relief. It is not enough to cut it at an angle of 45 degrees; you need to know how to hold the plinth correctly, otherwise you will not be able to achieve perfect joints. This is not a problem if there is a miter box in the house, but when there is none, the situation is different.
In this case, you need to hold the plinth perpendicular to the floor while cutting (it needs to be placed on its edge). In this case, the cut on the front side is slightly narrower than at the base of the baseboard. To do a quality job, you need to practice cutting corners before cutting. Correction risks the fact that instead of a rectangular frame, you may end up with a skewed trapezoid with angles of different sizes and gaps at the joints.
If the plinth has a certain pattern, the size of the frame may differ from the desired one, because you will have to adjust the pattern in the corners. If this is not taken into account, the pattern will not match and the aesthetics of the frame will suffer. If the plinth is geometric in shape without a pattern, only the recesses need to be adjusted. Therefore, the cut must be the same; its angle cannot be changed.
Frames are made in different ways, but to make them well, it is better to use a template. You can use either a base or paper with a lined cutout for the inside of the frame. This will avoid distortion when gluing parts and adjusting joints. As for the joining seams, they should be minimal.
To ensure a high-quality frame, use a plinth of identical width. Even in a store it may differ by a few mm. You need to choose the same molding from the same batch, comparing them with each other. Different widths may affect the joining and joining of the pattern. If the molding is different, it will not be possible to connect it without visible defects.
Mirror frames in the photo
Paper photo frame
Do you have a desire to do handicrafts, but no ideas on how to materialize your dream? Take a look around. There will probably be remnants of wallpaper from renovations in the house. You can use them to build a magnificent three-dimensional frame for a photo.
Do you know the art of origami? Then you can make more complex versions of products that are assembled from several sections. It is worth involving children in such an exciting activity. Give them a home workshop on how to create a photo frame. For origami, you can take the most inconspicuous paper and subsequently decorate it at your discretion.
Is there nothing in the house but newspapers? But they, too, may well be put into use. By the way, this material is the easiest way to create unusual photo frames. You can work with newspapers using a variety of techniques. For example, they can be rolled into tubes, from which frames for photographs are then woven.
Photo frame made from newspaper tubes
Wooden photo frame
You can always use frames to update your interior, especially since you can make them yourself absolutely suitable for your home.
Of course, you can buy wooden frames in a store, but the price for them there will be several times higher.
Using the presented master class, you can make a similar frame with your own hands. You just need to stock up on the necessary material.
To work you will need:
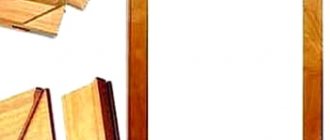
- boards of different shades;
- scissors;
- hot glue gun (you can use transparent “Moment” glue);
- base frame (finished frame or cardboard);
- sackcloth;
- wire;
- self-tapping screws;
- decorative nails.
The manufacturing process is shown in the photo below.
Photo source: www.masterklass-krasivo.ru
Light photo frame made of twigs
An easy-to-make photo frame made from dry twigs will be a wonderful and original gift or an unusual room decoration.
The frame is made literally from scrap materials.
To work you will need:
- dry twigs;
- organza ribbon of any color;
- regular tape;
- double sided tape.
The manufacturing process is quite simple and straightforward.
First you need to fold four bundles of twigs that are approximately equal in thickness, and lay them perpendicular to each other.
Then tie the branches with an organza ribbon. The frame is ready.
Now you need to attach a photo or drawing. To do this, the finished image needs to be covered with tape on both sides so that there are allowances at the edges.
The last step: you need to attach the photo to the frame with double-sided tape.
Photo source: www.masterklass-krasivo.ru