by Alexey | Crafts Vintage Decor Workshop Furniture Accessories | Thursday, October 12, 2017
| Follow Make-Self.net on Facebook and be the first to read our articles. |
Mirrors are one of the best decorative elements for any home. They are universal, fit into any interior and visually increase the space. Take a look at 11 projects , maybe they will inspire you and you will make your own unique mirror that will decorate your home and be pleasing to the eye.
How to make a floor mirror yourself
Creating such a design with your own hands consists of 2 steps:
- It is necessary to cut a mirror of a certain size.
- A wooden frame is made.
What materials and tools will be required
In addition to the finished mirror, we need wooden material to create a frame. One of the following options will do:
- Oak. Very durable and high quality wood, resistant to damage.
- Pine. This material is soft, but much easier to process. In addition, pine is cheaper.
- Plywood. The best choice. The perfect balance between price and quality.
To create, you need the following tools:
- Tape measure and pencil.
- Drill and set of drills.
- Jigsaw.
- Screws.
- Fastenings.
Attention! If necessary, other tools may be used.
A little bit from the mirror story
In ancient times, reflective surfaces were obtained by polishing flat stones. Later, metals began to be used - bronze and iron, silver, brass and gold. Grinding and polishing resulted in excellent reflective surfaces. True, such objects later faded and became unsuitable for use.
The first glass mirrors began to be made in the middle of the 13th century, but they turned out to be concave due to the technology of their production. Glass vessels were blown, molten tin was poured into it, then the cooled glass was cut or skillfully broken into pieces. The reflection turned out to be quite good, but still distorted.
At the beginning of the 16th century, French craftsmen coated flat glass with mercury and glued tin foil on top. This technology was developed further when Venetian merchants managed to bring French craftsmen to the island of Murano, near Venice. Such products were more expensive than paintings by the great Raphael.
Modern technologies use silver or aluminum to create mirrors. For amalgam, a mirror or phenolic composition and acrylic paints are prepared. Sometimes chrome or gold is used.
The main film that gives reflection is isolated in the following ways:
- Chemical - in this case, the metal is released from a salt solution;
- Physical - the metal is melted and sprayed or applied by evaporation in a vacuum at high temperatures.
Glass for mirrors is made using special technologies that provide for its distribution by grade and purpose.
central part
In order to make the central part, decide on the dimensions of the mirror and plywood (base). You can buy them at any hardware store. In addition, at your request, they will cut out a mirror and a panel of the required size, so that you do not have to do it yourself (now we are talking about plywood, since cutting out a mirror requires special skill). And if you already have a piece of plywood, you can cut it using a circular saw.
Based on the dimensions of the front panel, calculate the length of the bars. You need to prepare two in length and two in width (to frame the product around the perimeter).
3 zodiac signs that can’t take “no” for an answer How to renovate a home if your spouse’s tastes don’t match: designers gave advice 20 applicants made it to the finals for the lead role in filming a movie in space
Drill holes near the corners to join the pieces into a rectangle, then glue it to the plywood using wood glue. Wait for the glue to dry.
Point three: danger in the toilet
Taking care of one’s own hygiene is the personal responsibility of the guest, as is believed in almost all hotels. Of course, the room’s bathroom, shower, washbasin and toilet will be sparkling clean, but will they be disinfected? Of course not.
The number of harmful microorganisms hazardous to health in the toilet and bathroom of a hotel room can terrify any doctor, microbiologist or other specialist working with various pathogens. Moreover, the notorious E. coli is far from the only “enemy” that lies in wait for hotel guests.
A 19th-century clay house is up for sale: its interior is fascinating (photo)
Mom taught me how to cook delicious “wet” manna with chocolate fudge (recipe)
A friend decided that I bought white curtains, and I hung sheets on the windows: photo
If, when entering the bathroom or toilet, you do not notice a specific odor that remains after using disinfectants, take care of your health. The easiest way to destroy dangerous microorganisms is steaming with boiling water. As a rule, all hotel rooms have a kettle, so why not use it?
Models
Let's look at the most attractive modern models of floor mirrors.
Psyche
A convenient rotating model in a simple style, usually an oval-shaped mirror. Between the two decorative posts there is an axis on which the mirror is mounted. The design feature allows you to change the angle of the mirror surface , which is very convenient when using. These adjustable mirrors come in single and double-sided versions, with the other side usually having a magnifying effect. The psiche model is well suited for dressing rooms.
On a stand
The most stable model, the mirror sheet is firmly fixed to the stand. Large, functional, full-length models, with a cabinet on legs, numerous shelves, and drawers for storing various small items.
A mirror on a stand is suitable for a hallway. Can be folding with closing doors.
Attached
A mirror canvas standing on the floor without support in a massive frame is placed against the wall. The frames are made with beautiful original decor. Such wall-mounted and movable mirrors are used as an element of design solutions in the living room or bedroom.
Large full-length screen mirror
Convenient to use in a studio apartment to divide the space into functional zones.
An excellent use for such a mirror is to create a small dressing room in a small apartment.
Full length fitting room
Thanks to the special design, you can change the height and angle of the mirror surface. Allows you to see the reflection at full height .
Mobile on wheels
The popularity of a portable floor mirror is due to the ease of moving it to a new place.
Full-length models on wheels are very convenient in all rooms such as a dressing room.
Interior styles
Mirror models in the design of various styles.
Loft
Square, round, rectangular mirrors or canvases of other shapes with different sizes, decorated with wooden, metal frames or laconic iron baguettes, painted in non-trivial colors, will perfectly emphasize the brutality and stylishness of the loft.
The photo shows a narrow floor mirror in a thin black frame in a loft-style bedroom.
Classic
For this luxurious interior, rectangular and triple symmetrical canvases in gilded, silver or bronze baguettes, faceted models or products decorated with stucco would be appropriate. This decor will be the ideal finishing detail of a classic style.
Provence
The overall picture of the French style will be perfectly complemented by vintage reflective surfaces, in patterned frames with the effect of artificial aging and scuffs, products decorated with forged elements and floral paintings, or mirrors with frames that match the natural color scheme of the interior.
Scandinavian
Nordic design embodies beauty, lightness and simplicity, so excessive luxury and provocative accents are not appropriate here. An excellent solution for a cold, but at the same time very cozy Scandi interior would be round, rectangular, square mirrors, tinted canvases or hanging models with a minimalist design.
The photo shows a spacious Scandinavian-style living room with a round mirror located above the sofa.
Modern
In the aristocratic and creative modern style, a large number of reflective models, decorated in ornate frames or curved, wavy, figured and arched mirrors, which will become an integral decor of this slightly asymmetrical design, are especially welcome.
Baroque
Here, large or oval mirrors are often used in massive frames, decorated with stucco, carvings, gilding or complex patterns with mythological or plant motifs.
Modern
Models with the simplest and most uncluttered metal, plastic, wooden frame or chrome elements, in any color range, will favorably emphasize the simple and practical interior elements of the modern trend.
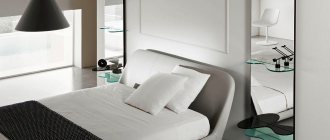
The photo shows a floor mirror with a laconic beige frame in a modern-style bedroom.
Oriental
A mirror is a very important accessory that shapes the style features of oriental design. Rectangular, oval, shaped or arched products in wooden, openwork metal or bone-inlaid frames will significantly change the appearance of the room, add subtle notes to it and will be fully consistent with this direction.
Art Deco
This style involves a peculiar play of images; mirrors with unusual geometry, in brass, copper or gold frames, would be appropriate here. The hallmark of Art Deco is the mirror model in the shape of the sun.
Eco style
Natural motifs and environmental themes of eco-design, which is currently quite popular, will perfectly complement round, rectangular canvases in wooden, bamboo and jute frames or products with an interesting streamlined shape, framed with natural materials.
Minimalism
To add even more aesthetics, practicality and harmony to a minimalist interior, mirrors decorated in simple and laconic ways, such as plastic frames or frameless canvases, will help.
Protective film
For rooms with high humidity, temperature changes, and the possibility of contact with an aggressive environment, the industry produces mirrors with protective film. It protects the mirror coating from oxidation and chemical influences.
Aluminum oxide is used to cover the mirror surface ; this film protects the mirror from aggressive environments, but does not withstand mechanical stress. Modern protective coatings are made from silicon oxide. Such coatings are more durable, protect against atmospheric factors and mechanical stress. The silicon oxide protective film itself is reflective.
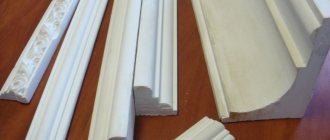
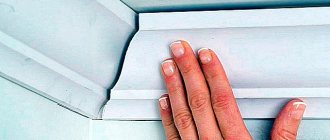
DIY wooden frame for a mirror
Wood looks great in almost any interior. This is a very popular and time-tested natural material. Wood products have excellent performance characteristics and an attractive appearance. Therefore, wood is ideal for use in homemade mirror decoration . Square or rectangular household items are well framed with ordinary wooden borders, but you can and should experiment with round and oval mirrors.
Mirror sun made of branches
The so-called sun mirror will look original for any interior . It is made using blocks or twigs of wood, a plywood frame, a primer, special glue, aerosol, sandpaper, and a glue gun.
How to make a sun mirror:
- To begin with, twigs are glued with wedges along the entire perimeter of the frame, alternating long and short, so that it looks like rays from the sun.
- Each block must be held for 15-20 seconds so that it sticks well.
- After waiting for the glue to dry, you need to remove any remaining residue with sandpaper, then apply a primer and leave for 1 hour.
- Then you need to cover the frame with paint or varnish.
Decor with dry branches
The twigs can be replaced with wooden clothespins. So, a few minutes - and the decorative sun frame is ready!
Mirror frame made of clothespins
Detailed master class on manufacturing
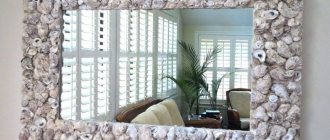
The decor of the mirror frame is carried out using natural materials, fits organically into the interior, does not get boring, and serves as a beautiful decoration.
- Decorate the frame separately, then insert the mirror. The baguette will be alternately covered with dense rows of rope and shells on top, followed by varnishing.
- Cover the table with newspaper and prepare all the necessary tools.
- To use seashells, they must first be cleaned, degreased, and selected by shape and size.
- The purchased material can be immediately used for crafts; the found ones need to be soaked overnight in a solution of bleach (1 tbsp of product per 1 liter of water), rinsed well, dried, and sharpened edges.
- Glue the twine to the frame starting from the inner edge, moving along the perimeter to the outside. The rows fit tightly together without gaps.
- Glue shells onto the dried frame. Lay out a pattern of shells on the table, take one at a time and attach it to the base from the center to the edges.
- The decor looks neat if small details are laid out in the center and large ones on the sides.
- Unusual elements (starfish, spiral shells) can be glued on top.
- Cover the composition with several layers of varnish, insert a mirror, and hang it on the wall.
Process with mirror building
This process will require several hours and a free bath. After this, you only need to decorate the resulting product:
- the glass is processed, cut to size, and the edges are cleaned;
- wash and dry thoroughly;
- degrease the surface with potassium hydroxide;
- placed in a container with distilled water, which helps prevent dust and dirt from appearing on the surface.
- prepare a mixture of 30 milliliters of water and 2 grams of silver nitrogen, stir, then add ammonia (100 ml.) and 100 milliliters of water dropwise;
- the mixed mixture is left for 20 minutes;
- only 5 milliliters of formalin will remain, which adds completion;
- carefully and evenly distribute the existing mixture over the glass in the bathroom
- it will take no more than five minutes, then the excess is washed off with water and the mirror is left to dry.
Note. Finally, in order to increase the quality, you should apply dark paint to the mirror side of the product.
The final drying of the mirror will take time, there is no need to rush here. It is better to start creating a frame or other decoration options during this period.
The silvering process should be performed at a temperature of no more than 25 degrees; in other cases, the mixture may not work well and may not be fixed optimally. In addition, the room should, of course, exclude high humidity and other interfering factors that can create certain inconveniences. Even if at first this process seems difficult, in fact pouring a little solution onto the surface and drying the glass (in natural conditions or with a hairdryer, for example) is not difficult.
Original ideas
There are a lot of ideas on how to make such a mirror with your own hands. It all depends on your imagination. Among the most interesting ideas are:
- Cut it into some shape (for example, in the shape of an animal). Install the frame using wood.
- Frame it with wood and mount it in the lamp frame. It's called a Hollywood style mirror.
- Make a large wooden frame. Install shelves with cosmetics on it. It looks beautiful, and cosmetics will not take up extra space on the nightstand.
- Winnie the Pooh style. To create such a design we need a small round mirror. The frame for it will also be round, but in the upper part there will be 2 bulges, shaped like bear ears. You can make ears of any animal.
- In vintage style. Such mirrors came from France. The idea is to make a large and beautiful frame with different patterns, such as flowers. Such mirrors were used in ancient times by the royal family.
- In the shape of a window. You need to make it in such a way that it resembles a window in appearance. To do this, long but narrow wooden sticks are glued to the mirror. Window shape as desired.
- Pottery Barn. The shape is a bit like a Rubik's cube. But the length of the mirror is greater than its width. To create such a design, you can use sticks, as in the previous step. Miles cut out several pieces of the same shape and size and connect them together, like parts of a Rubik's cube.
Attention! You can make a floor mirror without a frame. Wooden legs are made for this. Small holes are made in them. Then the mirror needs to be inserted into these holes.
Decor options
To decorate the finished product, you can use various methods and techniques of decoration from scrap materials. The most popular techniques are decoration with cords or twigs, plaster, stencils, and scrapbooking.
| Variety of decor | Step-by-step description of the work |
| Cord | Weave a flat braid. Glue the mirror decor onto the plywood backing using liquid nails. Place rope around the perimeter. Add decoration - knots. Make a pendant. A white cord or any other light shade looks best |
| Decoupage | Cut out bright color or black and white pictures from newspapers, magazines, old children's or adult books. Arrange the drawings on the mirror frame made from the ceiling plinth so that they make an interesting collage. Fix the finished pattern with glue. Treat the finished product with colorless varnish to make it more resistant to external influences. In order to use the decoupage technique, you must have impeccable artistic taste and a sense of composition, otherwise the finished decor may turn out rough and tacky |
| Decor from twigs | Cover the glass with masking tape to prevent it from getting dirty while working. Make markings on the back of the mirror frame with your own hands. Use a glue gun to secure it to the back of the decoration. The composition of the branches depends on the tastes and preferences of the master. Next, the product is painted. This frame decor looks very elegant and resembles an elegant cobweb. The branches should be thin, with a beautiful color and shape. |
| Gypsum | Dilute gypsum powder and pour it into pre-prepared non-standard molds for making stucco molding. If you don’t want to do this, you can purchase ready-made decorative elements at a hardware store. Make a sketch on the working surface of the wooden frame, laying out the parts on it, but without gluing them. If the location suits you, you can begin fixing. The final stage is painting, but white bas-reliefs also look impressive |
One of the easiest ways to decorate is to use stencils. They are attached with masking tape, and paint is sprayed on top. Finished mirror frames are varnished.
The decor should be harmoniously combined with the overall appearance of the finished product and the interior design. Scrapbooking and decoupage will look strange in a room decorated in a high-tech style, and decor in the form of branches will only suit an interior in the Provence trend.
Before you start making a frame for decorating mirrors, you need to evaluate the interior with a critical eye and choose exactly the configuration of the product that will fit well into it; a new item should not look like a foreign element.
How to make a mirror with your own hands?
A mirror is the most necessary attribute in a person’s daily life. When properly executed, it can become an exclusive attribute of any interior. An item created with your own hands gives the interior a special irresistibility. For those people who do not have the opportunity to buy a mirror with the desired design or size, we will tell you how to make a mirror with your own hands.
Mirror - an object with a smooth surface designed to reflect light
Floor mirror yourself: step by step
The whole work involves making a frame for the mirror, which will also serve as a stand. We need a ready-made mirror. If its size is too large, you can use a glass cutter and cut out the excess part.
You can make a floor mirror yourself as follows:
- Take a sheet of small plywood. Using a jigsaw you need to cut out 3 shelves. Their size will be about 100x200 mm.
- The plywood needs to be placed face down and measured 200 mm from the top edge and 100 from the left. Let's put a mark here. We repeat this step 2 times, stepping back 10 cm from the mark already made. In the places where the marks are installed, you need to make holes for installing screws.
- Each shelf must be measured 50 mm from the edge of the long sides. We make marks in the middle of the thickness of the shelf.
- Now you need to check the markup. We attach the shelves to a sheet of (large) plywood. The marks must match the holes. We make holes in the shelves for installing screws.
- Now the shelves need to be screwed on.
- We lay the structure so that the shelves face up. We install mirrors in the central part of the plywood. There should be a distance of about 50 mm from the edge of the plywood sheet to the edge of the mirror.
- Now you need to mark the places where the fasteners for the mirror will be installed (you can choose the places as you wish, but it is important that there are as many fasteners as possible).
- Drill holes in the places for fastenings. Screws are suitable as fastenings.
- The last step is to secure the mirror with fasteners.
- The structure is ready.
Making a mirror with your own hands is very simple. You need to choose an idea and do what you want.
For a smaller room
Even in a small room there is a place for a tall mirror; it is only important to make a reliable stand for it.
You will need:
How to do:
1. Cut out four pieces 30x30 cm.
2. Glue two of the resulting parts with wood glue and leave to dry, clamping them in clamps.
3. Repeat with the remaining two pieces.
4. Cut the pieces to a size of 29x26 cm.
5. Find the center of the upper (narrow) edge, measure 4 cm in both directions, put marks. Place marks 8 cm from the bottom edge on the sides. Connect the marks (you will get a triangular shape with cut corners).
6. Cut the workpiece along the resulting lines.
7. Sand corners if necessary.
8. Find the middle of the top edge of the part. Draw a vertical line 20 cm long from it.
9. Extend this line to such a size that a mirror + two layers of felt fit into the slot. If the thickness of the mirror is 0.3 cm, then about 0.6 cm may be needed. Make sure that the slot is in the center of the part.
10. Cut 4 pieces of felt measuring 3x17 cm. Glue them inside the slots.
11. When the glue is dry, insert the mirror. If it doesn't fit tightly enough, take it out and insert it again, after spreading glue on the back.
Source
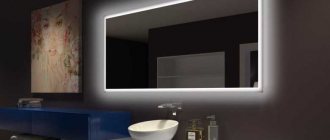
Backlight
Illumination has practical and decorative significance:
- additional lighting is necessary for cosmetic procedures;
- LED ambient lighting creates a romantic atmosphere in the bedroom;
- the mirror reflects the light that it emits, expanding the space;
- It looks beautiful as a decoration and does not take up much space.
With a wide variety of floor mirrors, everyone can buy one that they like , is suitable for the price, and fits perfectly into the interior. Using the advice of the article, even a beginner in the art of design will create unique comfort and coziness in his home with the help of mirrors.
Modern ideas
The raw material for frames can be not only wood. It is possible to use chipboard, MDF, OSB. Each person's work requires such elements as corners, screws, and glue. Don't forget about tools such as saws, slicers and hacksaws. Any hacksaw can be replaced with a miter box.
It is especially good in situations where the material is thick. All owners need to know that a drill, tape measure, pencil, and a metal corner are required for the work.
In some types of work, elements such as a jig for drilling holes or oblique screws may be needed. For decoration Decorative plaster is often used as decoration.
Sometimes anti-fragmentation film will also be ideal. It will be able to tightly protect the surface from suddenly formed cracks and other chips. A similar film should be applied to the amalgam. Of course, dealing with such film is not easy.
DIY mirror in a bright striped frame
If your interior has an abundance of white, it won’t hurt to add a bright accent. So, for example, against the backdrop of snow-white walls, a mirror in a multi-colored striped frame, which can easily be made at home, will look simply amazing and fresh.
To do this, it is not at all necessary to buy cans of paint of different colors. A great idea is to use decorative multi-colored tape, which is much simpler, more practical and neater. The width of the tape can be the same, but still different stripes will look much more interesting when decorating the frame.
Now it's a matter of small things. We cut strips of the required length and paste over our frame, leaving the ends on the back side.
Cut off all excess with a special knife or scissors. To prevent the edges of the tape from sticking out (even from the reverse side), smooth them with glue.
Definitely, now such a mirror will dilute your light, monochromatic interior, making it more iridescent and modern.
Choosing an idea for creativity
Designing a mirror yourself has become so fashionable that it is difficult to list the options that have accumulated in practice:
- Framing with wooden or multi-colored plastic clothespins is both cheap and practical, it is possible to clamp notes;
- Tubes rolled from colored magazine pages and glued around, painted to match the wood;
- Cut out fabric patterns pasted onto the edges of the mirror and frame;
- A frame covered with spices, herbs and other products: pasta or coffee beans, peas and beans, seeds and nuts;
- Aluminum wire finishing;
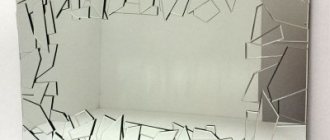
- Decoration with pieces of mirror with translucent coating;
- Decorated with leather rollers with padding polyester inside;
- Plaster stucco for classic, baroque or retro style;
- Small old toys painted the same color pasted onto the frame;
- Cover the frame with shells or pebbles.
Cost of materials and labor
approximately 5 hours to purchase, deliver, manufacture and hang the finished product, including cleaning in the workshop.
The cost of materials for making a full-length hanging mirror with a wooden frame with your own hands is no more than 600 rubles: timber, dowels, screws, sanding paper and wood glue. A mirror, depending on the size, thickness and edge treatment, costs on average from 600 rubles/1 sq.m., i.e. a mirror measuring 180x60 cm will cost approximately 800-1000 rubles, and the finished product will not cost more than 1600 rubles .