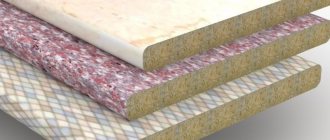
Planks for countertops are installed to protect the end cuts from damage and moisture, and to aesthetically connect elements at corners and lengths. You can purchase strips for kitchen worktops made of metal and PVC of various shapes and sizes in the MAERSS store on favorable terms.
When installing kitchen countertops, the end cuts are installed with special fittings - strips made of metal or, less commonly, plastic. A practical and aesthetic option is aluminum strips for countertops, which can be of different sizes and shapes.
Corner joining of tabletops
The corner tabletop can be made in two different versions, which fundamentally affect the joining of the tabletops.
First option . This is a corner tabletop without a segment. That is, two sheets of countertops are taken and placed on the kitchen cabinets at right angles.
Easy docking
The second option for rotating the tabletop is rotating through a segment. It is more bulky and is done if the kitchen furniture includes a corner kitchen cabinet.
Tabletop segment
How to install?
Connecting (joining) strips for countertops in black or white are the simplest option that does not require special skills for installation. The joint is treated with sealant and a strip of the appropriate size is inserted.
As a rule, the metal profile already has holes for self-tapping screws that secure the structure. It is also easy to install aluminum end (overlay) strips for the countertop. Corner structures will require more care. The main thing is to choose the right accessories.
We offer to buy planks for countertops in the MAERSS online store in Moscow on favorable terms. In the catalog, high-quality products from trusted manufacturers are presented in an assortment, which allows you to select fittings of the required configuration, color and size. You can make a purchase with prompt delivery across Russia right now on the website.
Joining countertops at an angle without a segment
The joint of the tabletops should be tight, with a minimum gap between the ends of the tabletops. This is difficult to achieve if the end of the tabletop has an oval and rounded front edge.
A simple option is to use a special corner connecting element. It costs about 170-190 rubles and quickly solves such a connection.
A more aesthetic option, with the claim to create a single surface of the tabletop, is an option called “euro saw”. It is suitable for chipboard countertops with any front edge.
Splicing method
When planning a kitchen renovation, with the replacement and installation of furniture, it is important to foresee the choice of a moisture-resistant countertop in advance, as well as perform proper installation.
Do not forget that even high-quality surfaces can lead to swelling of the countertop, which will require it to be replaced or repaired. And this is not an easy task.
When a kitchen consists of 2 elements, it is important not only to hide the joints, but also to ensure their tightness. And along the entire length of the joint. If moisture seeps in there, it will have unpleasant consequences.
The essence of simple splicing is as follows. You will need to fit the parts to each other, align if necessary, then coat with sealant and install in place. Such a joint turns out to be almost invisible. But it is better to additionally use zip ties. This way the elements will hold on to each other more reliably.
The simple splicing method has several advantages:
- ease of implementation;
- connection speed;
- no tools required;
- attractive finished appearance.
But there are also obvious disadvantages. Especially if it is a corner connection.
- Fragility
. The sealant loses its protective properties over time. Moisture begins to be absorbed, the tabletop swells and also becomes unusable; - Does not withstand heavy loads
. You cannot place anything heavy at the joint. May not stand it; - Levelness requirements
. The parts to be joined must be perfectly straight. Any deviation will affect the result.
If you ask experts about how to connect the countertops together, not a single competent craftsman will recommend this method. Although for some reason it is still used.
Docking with a segment
A tabletop segment is essentially the top table for a segmented base cabinet. The standard dimensions of the segment are 900 by 900 mm, with a width of 600 m. Along the front, the edge of the segment can be straight or semicircular.
Related article: Professional painting of facades
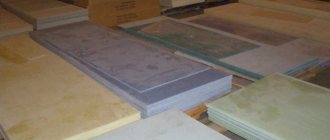
Since the ends of the joining of the table tops are sawn off smoothly, wood glue is used for joining. If such fastening seems insufficient, use special metal connectors for countertops (see photo).
By the way, similar parts are used for household trimming of countertops.
Eurozapil
The next option is joining using a Euro saw. In general, Euro-cut tabletops have already been discussed in detail. But some points are worth repeating and also clarifying.
The joining is carried out after the end parts have been previously processed according to the patterns. This is the euro saw. To process elements, you need a high-precision milling machine. This creates a locking connection. And here the screed is actually no longer needed. During assembly, a minimal seam remains, the thickness of which does not exceed 1 mm.
This method has its advantages:
- low processing costs;
- no additional materials are needed;
- attractive appearance;
- on stone panels, as well as in motley and dark colors, the joint is invisible;
- The sealant additionally protects against moisture.
But the euro saw also has a downside.
The disadvantages include the following:
- It is not recommended to use a euro saw near the sink to prevent moisture from getting there;
- on light-colored countertops, the euro-cut will be visually noticeable;
- Euro-sawing can only be done in production conditions where there are patterns and machines;
- It is almost impossible to make a Euro saw at home.
Also keep in mind that the Euro-joint is suitable for furniture installed in rooms with smooth walls. If you deviate even slightly from 90 degrees, a gap will immediately appear. And this is considered unacceptable for a Euro saw.
Joining tabletops through a connecting element
You can join chipboard countertops through a connecting element. To connect the tabletops through a special connecting element you need:
- Treat the open cut of the tabletop with acrylic sealant to prevent water penetration. The sealant is applied with a rubber spatula in one or two layers.
- The connecting element is attached to one of the ends of the tabletop. To protect against water ingress, sealant can be applied to the element shelf before fastening.
- The second tabletop can also be sealed (video 2).
- If necessary, the tabletops are pulled together (video 1).
Connection methods
There are several options for how to connect the tabletop to each other.
This need usually arises in a corner kitchen, in U-shaped sets, as well as in long surfaces where the length of one panel is not enough.
As a result, straight and angular connections, which can go at 90 or 45 degrees, have to be made from 2 or more elements. Depends on the specific situation.
Today I propose to find out how to connect the countertops together, and also take a look at the main pros and cons of the solutions.
The connection itself can be:
- straight;
- corner.
In both cases, the following methods can be used:
- without strap;
- with connecting strip;
- using a euro saw.
Now we will consider each method separately, after which we will draw the appropriate conclusions.
If you are interested in learning in detail how to make a connection without a strip or without a joint, at an angle and with direct contact, then I will compile separate detailed materials for you.
Now let's go through the methods in general terms.
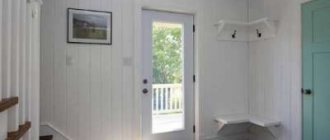
Purpose of the plinth
There is another name for plinth - it's molding . The product is designed to perform a number of functions, for example, it closes a joint, protects the wall from moisture or debris, and also complements the kitchen design, because a countertop without molding does not look so aesthetically pleasing. Let's consider each of the functions performed separately.
Accessories for kitchen furniture
Disguise
The resulting gap between the wall surface and the tabletop looks unsightly, so it must be covered with a decorative plinth. In addition, during installation, the ends of the tabletop may be damaged or minor defects may appear on the wall at the junction. All this can be easily eliminated by installing molding.
Skirting for kitchen countertops
Moisture protection
In the process of preparing various dishes or washing dishes, splashes of water or small particles of debris always remain on the countertop, which can get into unprotected joints. Over time, debris will accumulate there, creating an unpleasant odor, and if water gets on the back surface of the kitchen furniture, it can cause mold to appear. To prevent all these troubles, installation of skirting boards is required.
Skirting boards cover joints from moisture penetration
Creating an Attractive Look
It is difficult to argue with the fact that the installed plinth performs various functions, including decorative ones. Thanks to the correctly selected molding, the kitchen set takes on a complete look. Therefore, decorative products need to be selected not only by size, but also by external qualities. In construction stores you can see a large number of products from different manufacturers, so there should not be any problems with choosing a skirting board.
Skirting board for table top
Note! When choosing, you must take into account the quality of the product, because the service life of the skirting boards will depend on it. Secondary criteria include the material of manufacture and the type of molding construction.
Types of countertops for kitchen cabinets
When is additional fixation necessary?
The countertop in the kitchen sometimes takes on very significant loads. When slicing food, it only requires sufficient area and a flat surface. But often we also load the table with small household appliances. Microwave, oven, portable dishwasher, coffee maker, mini-bar - all these items in the kitchen often “settle” on the table, and here you will need to secure it well.
You should not discount the neat appearance of the kitchen - an unfixed countertop can sometimes move, forming a noticeable gap in contact with the wall. Not only does this spoil the picture a little, but also food particles will accumulate there. It is useless to attach a decorative plinth to such a moving surface. And if the design of the set is such that the tabletop has freely hanging ends, instead of a reliable working surface you become the owner of an analogue of a children's swing. So it’s better to attach the top plate even on the cabinets to the wall so that it doesn’t “play.”
Sometimes the only way to increase the functionality of a small kitchen is to make additional surfaces with your own hands where you can place equipment or process food. You cannot provide support for such tabletops from below, but fixing them on the wall is quite possible. And of course, you can’t do without this if there is built-in appliances hidden under the work surface - a refrigerator or a washing machine. By the way, the washing machine can also be placed on the wall - there are new models that are quite compact.
Installing countertops in the kitchen: important points
To ensure that the product fits correctly and lasts a long time, it is placed only on the fully assembled lower part of the kitchen set. All cabinets are mounted and installed in place. Then they are placed so that they are equal in height. This is very easy to do if you adjust the screw legs of the furniture. The correctness of the work done is checked at the building level.
The upper part of the cabinets should form a common plane located strictly horizontally. Once this result has been achieved, all the cabinets are collected into a common block. To do this, they are tightened with special fasteners. Holes are drilled in the walls of the products through which the ties pass. There must be at least two such connections for every square meter. The base for the table top must be perfectly flat. To level out even the smallest differences, it is worth covering the ends of the cabinets with vinyl sealing tape.
Instagram kukhni_mechty_spb
Before installing the countertop, it is necessary to level the lower cabinets and level them
Another important point is the choice of the type of apron for the kitchen. It may be different and this will have to be taken into account when working. The protective coating can be solid, that is, located from the ceiling to the floor. Most often, in this case, ceramic tiles are chosen. You need to be prepared for certain difficulties with the design of the joint. The base should fit as tightly as possible to the wall, so most likely it will need to be trimmed.
This is necessary if:
- the wall is “piled up” back;
- the tile has a pronounced relief surface;
- The cladding is glued unevenly.
In any case, you will need to process the end of the slab so that it follows the shape of the wall. It is best to do this using a belt sander. This way you can avoid chipping.
You will have to act somewhat differently if you choose an apron that covers only the space between the upper and lower tier of the headset. Most likely, no pruning will be required here. In any case, it is recommended to secure the base. The easiest way to do this is with corner-type brackets. If this is neglected, over time the unfixed product may sag and a crack will appear. Even if there is a plinth on top, it will not cover it. The defect will become clearly visible.
Instagram sborkamlyginini
Before installing the countertop, you need to decide on the type of kitchen apron.
- Decoration Materials
Laying boar tiles on a kitchen apron: installation rules and bright design ideas
Pitfalls of self-installation
Those who want to try their hand at assembling furniture need to understand that only professionals can get a guaranteed good result. If this is your first experience, the result may not be the best. Those who already have the skill of working with MDF, chipboard or veneered wood have a greater chance of success. These are rather capricious materials.
Mistakes during operation can ruin them. It will be impossible to return the coating to its original appearance, which will lead to unnecessary expenses. If you intend to install a difficult-to-install panel, such as glass or stone, it is better to immediately contact professionals. Let us list the main difficulties in working with various materials:
- Natural wood. If handled carelessly, dents or chips may occur. True, in most cases they can be sanded and restored to an attractive appearance, but this is a job for a master.
- Wood boards. Inaccurate cutting will result in chips that cannot be disguised. There is also a high probability of mechanical damage.
- Stone, artificial or natural. The heavy weight of the coating makes installation much more difficult, this is especially true for the latter. In addition, without special skills it is impossible to make cutouts for the sink and hob, as well as cut the blade.
- Metal. It is quite simple to install and dock, but dents and scratches may appear during processing. However, they can be removed.
Instagram sborka_kuhni_ikea
You can only install countertops made from easy-to-install materials yourself. The rest is best left to professionals.
- Kitchen
Which countertop to choose for a white kitchen: 4 universal colors and 6 popular materials
Docking strip
See also:
Which dish dryer to buy in a closet, how to install it yourself
You can also connect a countertop in a corner, that is, in a corner kitchen, using a special strip. Namely, a T-shaped aluminum strip.
To do this, the ends of the tabletop must be pre-treated and a layer of sealant applied. The plank is inserted between two parts of the tabletop and covers the seam.
The method has several advantages:
- the splicing is strong, reliable, and also durable;
- the seam is effectively protected from moisture;
- this connection can be used near the sink, as well as in areas of high humidity;
- even if the panels are not cut at an even angle, the plank will still hide this gap;
- suitable for kitchens with uneven walls;
- a simple technology that you can apply with your own hands.
As for the shortcomings, I would call them conditional.
The first disadvantage is the protruding element above the joint surface of the two countertops. That is, it will not be possible to make the connection invisible. But this is not always an urgent need. Sometimes the plank, on the contrary, makes changes to the design and also acts as a decorative element.
The second drawback is the limited choice of colors for the connecting strips. It is not always possible to match the countertop perfectly. But this can also be used wisely. For example, play in contrast.
The disadvantages are really conditional, since they do not affect the durability, quality, and strength of the seam in any way.