High-tech and minimalism styles continue to be actively used in the manufacture of furniture and the creation of interiors for residential premises. However, more and more often we hear that these trends have no soul - they extol technical perfection and utilitarianism too much, leveling people.
In the age of worldwide networks and general digitalization, many want to see “furniture with a human face.” Partly this is the need for comfort and warmth, partly it is nostalgia for the times when grandmother’s chest of drawers and grandfather’s closet were companions of a carefree childhood spent in the village. Therefore, today aged furniture is produced both in factories and at home.
Why is the effect of aging furniture done?
As already mentioned, antique furniture looks very elegant in the interior. Buying such a decorative item is not affordable for everyone, since truly authentic antique items can be very expensive, and it is not always possible to find them.
Artificially aged furniture with a vintage look will add interesting notes to the interior design of your home.
And self-aged furniture is inexpensive and not difficult to make. Moreover, the advantage of this design is that it is essentially new and durable, it just looks like an object from another era.
To properly age furniture with your own hands, you need to know several important secrets of this art.
But a real vintage one will be very fragile and will have to be handled carefully so as not to damage it. Therefore, many resort to the artificial method. Aging furniture is not only a beautiful process, but also very exciting.
Toning with waxes
You can also give furniture and accessories an aged look using waxes. A particularly visible effect will be obtained if the surface has protrusions and indentations or if the surface itself is quite textured. Select wax depending on the desired effect: if you want to see a more pronounced result, take one that is more contrasting.
Laichah: You can combine several different types of wax when tinting to get a more interesting result.
- Decoration
For retro lovers: how to decorate an interior in the style of the sixties
How to age furniture at home
There are a lot of techniques on how to age furniture at home. Each of them looks beautiful in its own way and requires a special approach. The most popular and frequently used ones will be presented. There are those that will require a lot of time and effort. And those that take place in just a few hours.
You can do furniture restoration yourself.
At the same time, everyone will be pleased with the end result.
Important! Some of the methods involve the use of chemicals and are highly flammable, so it is important to follow safety precautions. Vapors from them should never be inhaled, and it is better to protect your eyes with special glasses.
Colorless paints may contain light colored pigments.
Craquelure
One of the simplest and most effective techniques. It doesn't require any special skills. Craquelure is the name given to artificially created cracks. The surface is cleaned and washed if necessary. Then it is thoroughly dried.
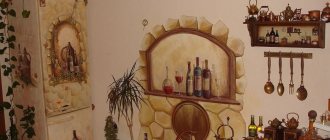
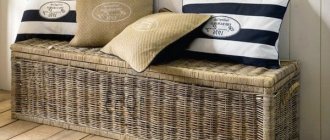
Classic, Provence and vintage interiors are unthinkable without vintage furniture or decor.
To create this effect, the first layer of dark paint is applied to the entire surface of the furniture. It should dry well. The second layer is matte light paint. She also needs to dry.
After which a layer of craquelure varnish is applied, it creates a cracking effect. If you want, you can go over it locally with not very hard sandpaper. The last stage is to fix the result with furniture varnish.
White paint can be applied in unusual ways.
Golden web effect
The method is a little more complicated, but no less beautiful. To begin with, the surface of the furniture is unevenly painted and dried. For the first layer it is better to use dark acrylic paint. Then, using sandpaper or any other device, you need to sand the areas of future abrasions.
Aging furniture is not an easy task.
Afterwards comes the stage of applying furniture wax (must be thoroughly rubbed) and a thin layer of light paint. Each layer must dry. Next, shellac (varnish resin from insects) is applied. It is applied carefully and in a thin layer (2 times, dry each time). If the surface is slightly cracked, it's time to start sanding.
The paint will have to be rubbed into the wood.
The penultimate step is rubbing dry powder (gold, copper) paint with a sponge. If desired, you can use bitumen varnish. And the last step is protection. For this purpose, colorless furniture varnish is used for the entire surface.
The effect of wear and fading paint
This effect is created by two-layer painting and sanding. Everyone chooses their own shades, but this technique looks more harmonious when using light tones. If you have white paint, you can simply add color to it and use it.
The scuffed effect can be achieved using special tools.
It is important to say that each layer must dry thoroughly before the next one is applied. The first layer will be the base color. The second is a specially prepared shade. Each color is applied with a clean brush.
Prepare the necessary tools for the job.
Next, coarse sandpaper is used to locally sand the surface. This creates a worn effect. You need to fix the result with furniture varnish.
Subtleties of brushing
Brushing - aging is complex and time-consuming, but the end result is worth it. It is carried out in several stages: staining, painting and varnishing. You may need a grinder, chisels, sandpaper and stiff metal brushes.
Furniture repairs must be done in a workshop.
Important! The method only works well on a wooden surface.
The surface is moistened with water and some of its fibers are combed out using metal brushes. Dust or any other dirt should not enter. After everything is thoroughly dried, debris is removed. Using a chisel, small wormholes are made.
Stock up on rollers for painting furniture.
Everything is polished with a sisal cord roller. Wax/oil is applied. A special composition with varnish and powdered pigment creates gray or golden tints to give an aged look. Stain is used to create contrast in the design.
You can use an old dried brush.
It is applied in a thick layer, but all excess is removed with a sponge. Abrasions are added with micro-grain sandpaper or a sanding machine.
Dry brush technique
The technique is only suitable for flat surfaces. If you have confidence in your abilities, you can try it on an ornament, but with caution. You will need acrylic paint and a paint brush with long, uneven, bristly bristles.
To age furniture, you should start with preliminary preparation of the product.
The aging method is simple since you just need to dip the brush in the paint (necessarily undiluted) and apply it to the surface with light movements. It is important to do this with a light hand so as not to paint over all areas.
Note! To achieve the desired retro result, it is important to apply a minimal amount of paint. Some excess can be removed with a dry cloth, but this is done very carefully so as not to damage the resulting pattern. The paint is applied along the fibers of the material.
Aging with stain
The stain should be water based. The first layer is the base layer. It darkens bends, edges and cracks. Next, using a wet sponge, wipe the abraded areas. You can use sandpaper. The second layer is stain (white spirit). The structure should dry for a day.
White spirit must be used very carefully so as not to damage the furniture itself.
Afterwards, shellac primer is rubbed into the wood pores (with a sponge or brush). Antique wax is applied using steel wool. Each layer is applied only along the fibers, and not across. If you want to make the shade matte, you can use a rag, but
Physical damage
The method involves causing “mutilation” to furniture. It is safest to use it on wooden products. Physical damage is caused to the item. You can hit it with a hammer and scratch it with nails. Often the wood is deliberately peeled off using water and several millimeters of wood are removed.
Aging furniture using staining.
A mallet is also made from plywood and self-tapping screws, which is used to knock on furniture. This way you can simulate damage from pests. The main thing is not to overdo it, otherwise there will be nothing left of the product.
Vintage details
Vintage details can be stenciled designs. This is done carefully and carelessly, creating the effect of slight abrasion. And if you want to create a texture on a flat surface, you just need to add filler (quartz) to the paint.
Vintage details will give the furniture an antique feel.
Liquid metals with oxidizing agents are often used. They lay out various beautiful patterns. Moldings are also a great option for decorating furniture with a vintage piece. Craftsmen who know how to draw will be able to create interesting and elegant drawings using paste for three-dimensional decor.
If you use a brush to apply paint, you can create a special scuffed effect.
No. 3 Painting method using a candle
Worn white paint, through which in some places you can see the wood itself in its natural color, is wonderful when restoring antique furniture or creating new ones, but in the same style.
In the photo below you can see an example of such painting of wood with wonderful designer pens laid out on it.
Instructions:
- Take a clean wooden board (no matter sanded or not) and a candle. Rub the candles onto the surface of the wood in several places. You need to press quite hard on the candle so that a clear trace of wax or paraffin remains on the wood.
- After this, paint the wood with white paint and let it dry completely.
- Wipe the dry painted surface with a rag, applying some pressure. In those places where there was a trace of a candle, the paint will come off the surface.
Below is an example of a white wood floor painted using this method. It is worth noting that when using this, it is better to apply a layer of protective varnish on top of the paint for more durable use.
A quick way to age furniture
There are several fastest ways to “aging” furniture. The first one has already been described - this is the dry brush method.
It is important to follow the correct drying technology.
- The second is rinsing. It will be done quickly and easily. Used primarily for wooden furniture. You will need several tools: water, a brush, a rag and paint of a suitable shade. The wooden surface is painted and, without waiting for complete drying, the whole thing is carefully wiped with a rag. Creates a light rinsing and rubbing effect.
- The third is firing. You will need a gas burner for quick effect. In addition, a metal brush is used. The surface is first treated with a metal brush, then fired. The process should be done quickly to leave light marks rather than heavy burning. The tree should not burn, but just scorch a little.
Use special products for aging furniture.
Very important! The procedure with fire is carried out only with special protective gloves and a mask. Otherwise, you may injure yourself.
Glazing
Using paint to age a countertop opens up a wide variety of options.
Main technologies:
- After abrasive treatment, the countertop is painted. If it doesn’t wait for it to dry, the paint layer is removed. This treatment emphasizes the contrast between the hard and soft tissues of the wood.
- Using two shades of paint enhances the effect. The first layer of paint is completely dried, then a layer of paint and varnish material of a different color is applied and immediately treated with a rubber spatula, trying to emphasize the natural pattern of the wood.
The finished transparent surface is coated with varnish, preferably transparent, this enhances the visual effect. The lower bright layer shines through the upper, translucent one.
For what styles is this technique used?
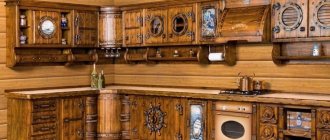
The interior with antique furniture is decorated with extreme care. If you enter an item incorrectly, you can ruin the entire design. This type of room decoration is used only in historical styles, such as country, chalet, Provence, vintage, shabby chic and in some cases classic, hi-tech and minimalism.
During the arrangement you can use several rules:
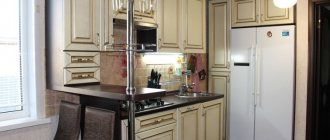
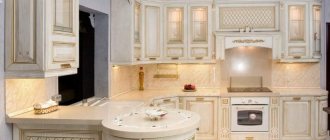
- Classic style looks better when using furniture made of valuable wood (oak, ash). A suitable technique is patination. Patination produces a matte surface that looks great in a classic-style interior.
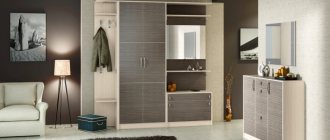
- High-tech and minimalism, although more modern styles, also use aged furniture. Large echoes of antiquity are not used, but only small and almost invisible ones that complement the room and give it elegance. Dark shades are preferred.
Pay attention to the little things!
You can age furniture with your own hands very simply and do not require any special skills. The main thing is to follow all the steps of the process and follow safety precautions.
Antique painting of products
The aging effect manifests itself when dark areas peek through light paint, and vice versa.
A popular method of aging wood is painting furniture products. Benches, cabinets and tables are usually painted. All kinds of chests of drawers and bookshelves look original. Preliminary preparation of the tree occurs as in the previously described techniques. You can speed up the processing process using a drill and a grinding wheel. When choosing paint, choose a washed out, fuzzy color. Professional carpenters recommend using paint that is used for interior wall and ceiling painting.
Painting aged wood in several layers
Before painting the product
- Remove the fittings.
- Remove the top layer of coating with sandpaper.
- Clean the working area from dirt and dust particles with a soap solution.
- The treated surface is dried.
- Carefully lower the roller into the paint and paint the product.
Surface painting begins with difficult-to-work furniture parts
It is recommended to start painting in an inconspicuous area to understand the entire process. You need to paint, forming wide and even strokes to prevent drips. Paint the corners carefully. The second layer of paintwork is applied only after the first layer has completely dried. Objects begin to age after varnishing. Aging occurs in this way:
- take fine-caliber sandpaper;
- sandpaper is used to process furniture parts that are susceptible to abrasion (corners, protruding elements).
The erasing process is controlled by a master.
Options for aged furniture in the photo
Preparatory work
Before you paint old furniture with your own hands, you need to do the following preparatory work:
- We clean all the parts. If remnants of the previous coating are found on the tree, they must be removed. We dismantle small parts;
- Grinding. The paint will not lie flat on the surface unless it is first sanded, removing any bumps or swellings that have appeared over time. You can watch how to remove the remnants of past decor in the available videos on the Internet;
- We remove dirt and dust accumulations;
- Apply an antiseptic primer. It is necessary so that during operation the tree does not begin to rot;
- If the furniture is in good condition and no chipped parts are found, then putty is not needed. Otherwise, you need to fill the chips with a special mixture for wood;
- Dry the cleaned and primed parts for several hours.
Clean the surface Sand the coating Remove dust and dirt
Apply primer
Advice from the experts
You should choose four colors of paint: two bright ones, gray and basic white.
Use natural conditions for drying. Apply the next layer only after the previous one has dried.
Wax is applied to areas that are frequently touched and touched, creating a frayed appearance.
Putty creates volume, texture and relief, as if the product had been coated with paint many times.
When using the method of artificially aging furniture, 3-5 layers of paint are enough.
MORE: What rope should I use for packing?
After painting, the product is thoroughly sanded, removing excess paint.
Conclusion
Using fashion trends and color combinations, you can turn modern furniture into antique or vintage items. You don’t have to spend money on purchasing an old wardrobe or chest of drawers. Having chosen the appropriate method, you should try to “age” the necessary item yourself, turning it into an antique item.
How to paint wooden chairs?
To paint wooden chairs, you can use different types of paints: latex, acrylic, water-based. To achieve the best results, spray paints are ideal: the paint is applied evenly, without drips, and you can get a uniform color change.
When painting with acrylic or latex paint, it is best to use high-quality brushes of different widths, and a roller is ideal for painting a large seat.
If you plan to paint the chair with woodworking paint only, the paint should be applied evenly in 2-3 thin coats to a thoroughly polished surface.
Despite the seemingly simple painting sequence, it is best to entrust the restoration of your favorite chairs to professionals who will take into account many nuances when painting wooden objects in your interior.
From the wall - into a stylish set
The owners of this brown “wall” took it to their dacha, and then decided to try their hand at remodeling it into modern furniture.
The chipboard covering was cracked and peeling off in places, so it was completely removed. The cabinet frames were dismantled and re-attached with Euroscrews. The parts were sanded, puttied and painted. The tabletops and legs were made from old boards, and the door layout was re-nailed.
Moldings were added to the front of the cabinet, making it unrecognizable. The result was three sets for different rooms: two bedside tables for the living room, a wardrobe for the bedroom and another set of three cabinets.
And here you can watch a detailed video about remaking a bookshelf from an old wall. The owners turned it into a TV stand.
Self-adhesive film
This method of restoring a kitchen set has become truly popular, and all thanks to its many advantages:
vinyl film is inexpensive, so updating facades will not break your pocket; The range of self-adhesive films is huge, you can find options with imitation wood of any species, stone or leather
There are films depicting landscapes, with interesting designs, etc., with a smooth and embossed surface; Almost everyone can handle installing the film - just be careful during the measurement process and directly during gluing; vinyl film is not afraid of temperature changes and moisture, which is very important for the kitchen. It will be easy to care for such a surface; if any part is damaged, or you again want to change the situation, the film can be easily removed.
The downside is the low durability of the film, only 3-4 years, but the low cost and ease of replacement smooth out this drawback.
The procedure for gluing kitchen facades is quite simple. The main thing is to follow the following recommendations:
- choose a film of a suitable color, taking into account your preferences for the new kitchen interior. It is not necessary to take a material with imitation wood - you can take a plain, light-colored film, and then you will be able to make a small kitchen larger and make your dreams of creating a minimalist interior come true;
- It is best to remove the kitchen facades - this will make the work easier. The fittings must be dismantled in any case;
- measure the parameters of each removed facade;
- the film must be glued to a clean, dry surface, i.e. facades must be thoroughly cleaned of stains of grease and dirt. This can be done with a soap solution or using dishwashing detergent. After this, you need to remove the remaining detergents and wipe the facades dry;
- If the facades are seriously damaged, you will have to spend some time on repairs. The peeling edges at the ends must be glued. The holes must be sanded, then filled with acrylic putty, sanded again and primed. If there are large potholes, then it is better to glue a patch of plywood or veneer in their place;
- In accordance with the measurements taken, the film must be cut. Experienced craftsmen recommend adding 4-5 cm of allowance in places where the film will bend. If there is a large design on the film, then when cutting it is necessary to control that it is positioned correctly. It is better to cut with a stationery knife - this way the edge will be as smooth and neat as possible;
- Take the first piece of film, start removing the protective layer of paper and apply the film with the adhesive side to the facade. Controlling the evenness, gradually peel off the protective layer and stick the film;
- You can roll the film with a rubber roller or a plastic scraper. This removes any remaining air. It is necessary to smooth out from the center to the edges. If there are any air bubbles left, you can pierce them with a needle and roll the surface again with a roller;
- If suddenly you notice that somewhere the film is glued crookedly, then within 5-6 hours the situation can be corrected. The film can be re-glued, but not more than 1-2 times, since then the glue will simply lose its properties;
- when all the facades are pasted over, you can screw them back on;
- You can use old fittings, or you can replace them with new ones, which fit better into the updated style.
If the shelves are dirty to such an extent that no detergent can remove them, then they can also be covered with film. The operating principle is still the same. The film can be chosen to be close to the original color of the shelves.
Stage 4. Add putty
Putty is a wonderful thing. Not only can it cover up dents from self-tapping screws, extra cracks, etc. It can also create volume and texture, achieve relief and the effect that a dozen layers of thick paint have already been applied to the item. It was at this stage that we realized why we needed aprons and medical gloves (as well as shoe covers): the easiest way to apply putty turned out to be with our fingers, so even the most careful ones would not remain clean.