Moving always involves transporting furniture. To avoid the inconvenience of moving and transporting cabinets, it is easier to disassemble them and then reassemble them in a new location. This procedure is also necessary when renovating a room. A modern wardrobe is easy to disassemble - the fasteners can be removed quickly. But furniture made during the Soviet era has outdated fittings and will require some skill.
Let's talk about the features of disassembling cabinet and built-in cabinets with your own hands. We will tell you how to pack disassembled furniture parts, as well as how to properly throw away an old wall with the least expense and in accordance with the law.
How to disassemble an old Soviet cabinet?
Wardrobes of the 70s and later periods of the last century were assembled mainly on eccentric ties, wooden dowels and screws. If you need disassembly and subsequent reassembly for moving, follow the instructions:
Stage No. 1: Shelves, drawers, handles
- Prepare the tools: rubber hammer, set of screwdrivers, screwdriver, chisel.
- Clear the floor near the cabinet so that it can be placed.
- Remove the shelves that rest loosely on the shelf supports.
We take out removable shelves first - Remove the fixed fasteners from the other shelves and remove them.
- Pull out the drawers.
- Use a screwdriver to unscrew the screws of the crossbar supports. Take all this out of the wardrobe.
- Using a screwdriver, unscrew the hinge screws on the doors of the building and mezzanine.
- Remove the cabinet fronts and place them carefully to the side.
- Unscrew the door handles.
- Inspect the mezzanine fasteners from the inside at the top of the cabinet body.
- Remove the plastic covers from the mounting sockets.
Stage No. 2: Fasteners and mezzanine
Depending on the type of fasteners, remove them with the appropriate tool:
- The connection on the eccentric coupler is dismantled by turning a screwdriver inserted into the cross slot of the eccentric counterclockwise. The cylinder is removed by prying it off with a flat screwdriver. You can then quickly separate adjacent panels of the cabinet body.
An eccentric coupler is the most popular type of furniture connection. - Disassemble the fastening in the form of a metal arc and a screw inserted into its slot, placed in a cylindrical recess of the panel, using an awl or a piece of thick wire. Insert the point into the hole of the screw and unscrew the pin. Remove the bracket and separate the panels.
- If they do not come apart when pressed with a chisel, tap one of the plates with a rubber hammer. The dowels will come out of their nests. Gently grab the pliers and pull out the wooden dowels;
- Remove the screws from the metal sockets. If the thread does not give way, loosen it with pliers.
- Using a wide chisel, pry the bottom of the mezzanine box, separating it from the cabinet lid, and slightly move the mezzanine to the side. It takes two people to remove it, especially if it is a 3-door wardrobe.
- Carefully lower the housing, freed from filling elements, with its front part on the floor.
Stage No. 3: Back wall, hinges, frame
- Use a chisel to pry up the plywood back wall and lift up the nails. Press the wall back down and remove the nails with pliers.
- Remove the plywood and the connecting strip, if any.
- Remove the fasteners in three corners of the box. Remove the released panels.
- Now disassemble the remaining fastening.
- Place the bottom with the support frame facing up. Remove the frame by unscrewing the screws.
- Also disassemble the mezzanine.
- In the Soviet wall, carefully remove the glass doors, freeing them from the hinge clamps. Then remove the loops from their sockets.
- All of the above also applies to Estonian-assembled furniture.
During disassembly, place the removed accessories in bags. Include sheets of paper with marks of parts belonging to them.
Disassemble the corner cabinet without changing the position of the cabinet. Due to geometric features, such furniture is stable and does not need to be tipped over to the floor.
Preparatory stage
Before you start disassembling the furniture, prepare a container in which all fastening elements (corners, screws) will be stored - this will allow you to avoid an unpleasant incident in the form of missing parts during subsequent installation, and it will also be a good idea to write down all the operations performed step by step.
The first step is to remove things, pull-out shelves and drawers from the closet.
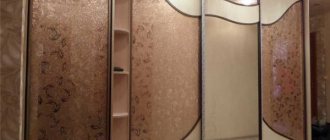
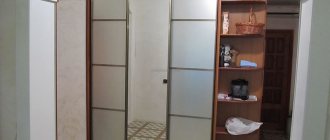
If there are mirrors or glass surfaces on the facades, care must be taken to ensure their safety during movement or transportation.
How to disassemble a wardrobe?
Before you begin disassembling a wardrobe with sliding doors:
- prepare packaging material for transporting disassembled furniture. These are bubble or simple polyethylene film, PSBS (foam plastic), corrugated cardboard, foam rubber and tape. Make room for disassembling the wardrobe body in a horizontal position;
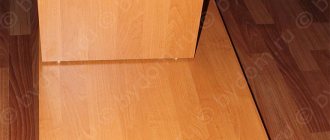
- drag the cabinet into a spacious room if it is located in a narrow corridor. To avoid damaging the surface of the floor covering, place an old sheet or other material under the furniture supports. Pushing the body from the side, pull the material of the cabinet in the desired direction;
- you can use the old method of moving furniture: place potato halves under the legs, cut side down - the cabinet will easily “move”;
- After the preparatory work, proceed to disassembly.
Expert opinion
Alexander Didenko
Furniture assembler at Mabaks
If you will be assembling furniture in a new place yourself and there are no factory instructions, so as not to forget anything, first draw a plan, mark the order of disassembly on it with numbers and apply the same numbering to the parts with a washable (alcohol) marker, a construction pencil or stick stickers . You can also take pictures of the entire process and details on your phone.
Step-by-step instructions for disassembling a wardrobe
- Remove the sliding doors. Push the curtains up and move the lower door wheels out. Remove the supports from the top guide bar.
- Place the doors separately on the floor.
- Using a screwdriver, unscrew the stoppers and closers in the lower guide rail.
- Remove the upper and lower guide bars.
- Unscrew the bottom and side roller mechanisms with a screwdriver.
- Remove the duralumin frame of the door panels (horizontal and side profiles).
- If you have to reassemble the wardrobe, you do not need to follow steps 3 - 6.
- Using a wrench, remove the confirmations and remove the shelves.
- Also empty the interior cabinet of drawers. To do this, unscrew the screws of the ball guides.
To remove the drawers, bend the guide stopper - Remove the screws in the crossbar supports and remove all parts.
- Place the cabinet body face down on the floor. Pre-cover the floor with film or a piece of fabric.
- Remove the screws and washers on the back wall of the fiberboard. Remove the cardboard sheets and the connecting strip.
- Separate the two adjacent panels of the case by unscrewing the confirmations. Then detach the other two adjacent planes.
- Use pliers to remove the dowels from their sockets.
- Sort the fittings and fasteners into bags with appropriate labels.
- Pack panels, shelves, doors. Now you can transport the disassembled cabinet.
Expert opinion
Alexander Didenko
Furniture assembler at Mabaks
Dismantling kitchen furniture also begins with dismantling the facades. Boxes of cabinets and cabinets can be connected using glue and dowels. A chisel and a rubber mallet are suitable for this work.
Dismantling a built-in wardrobe concerns only the filling and doors (sliding or hinged design). Dismantle the compartment facades in the same order as in the previous case. Remove swing doors from the vertical posts of the opening by unscrewing the awnings. Dismantle and remove the cabinet filling in the same sequence as when disassembling the wardrobe. Now all that remains is to pack all the pieces of furniture for moving or move them to another room in case of renovation.
Necessary tools for disassembling furniture
To easily completely or partially disassemble certain pieces of furniture so that they can fit in small doorways and narrow corridors of the house, it is recommended to prepare the following tools:
- Screwdrivers. Buy a set of screwdrivers because different parts are screwed on with different size screws.
- Spanners. You will need a variety of wrenches to remove the bolts and nuts that will hold the pieces together.
- Hammer. It is advisable to have a small hammer available. But it must be used very carefully, as it can easily damage a piece of furniture. Ideally, you need a rubber hammer.
If you have a furniture instruction manual at hand, it is worth checking it to see if any specialized tools may be needed.
Important: all bolts, nuts, screws and other small elements from each piece of furniture should be placed in bags so that not a single piece of furniture gets lost.
How to pack a disassembled wardrobe for moving?
For high-quality packaging you will need sheets of cardboard, film for painting, tape, foam rubber or polystyrene foam. You can pick up empty used boxes from any store for free. So let's get started:
- Cover all panels and shelves with corrugated cardboard to prevent abrasions on the laminated surface of furniture parts during transportation.
- Fold long slabs first, then smaller panels.
- Cover glass or mirror sheets with bubble polyethylene film or foam strips.
- Wrap all stacks with two layers of covering polymer film for painting work. Pre-wrap the ends with foam rubber or corrugated cardboard.
- Secure the plastic cover with tape along both the length and width of the panels.
- Wrap drawers and cabinet bodies with film with foam or foam padding at the corners.
- Place bags of accessories in one box.
- Do the same with packing the back walls.
- Now, all this can be taken out and put into transport.
Foamed polyethylene and corrugated cardboard
Leg gluing and complete repair
The legs of a wooden chair can be glued with fresh glue that meets the specified characteristics. You should also stock up on a hammer with a rubber tip, sandpaper, a press and a chisel. Simple repairs are carried out in several stages:
- You should pull out the loose leg and clean the remaining old glue from the part where the product is loose.
- Fresh glue is applied to the leg, inserted back into the seat, and then sealed.
- It is necessary to place a press on the seat, remove the remaining glue and hold the parts to be glued for the time indicated on the glue packaging.
When asked how to glue a chair that has cracked in other places, you should first carefully disassemble the damaged parts. Repairing a chair with a drawer (frame connecting the legs of the chair) is considered difficult, since all the parts are glued and connected with a tenon groove. After disassembling the loose parts, it is necessary to clean the seams and apply glue to the joints. If the seam diverges, just drill a good hole and inject glue with a syringe.
If it is impossible to pull out the loose element, you should stretch the frame further and inject the adhesive into the groove. For strong stability, a narrow wedge can be inserted into the trunnion socket and secured with glue.
How to properly throw out a closet?
If the furniture is so decrepit that you decide to throw away the cabinet, then there are two options:
- Take out the entire wardrobe.
- Disassemble the cabinet for disposal.
Take out the entire wardrobe
You can move the cabinet without disassembling it by renting two lifting belts and inviting an assistant. That's what movers do. Carrying bulky furniture using belts is not particularly difficult. The technology can be mastered in a short time. If your home has a freight elevator, this will make the task much easier.
You can’t just put old furniture near the entrance or trash can. There is a specially designated place for bulky waste in each locality. Usually this is a solid waste landfill or simply a landfill. Residents of private houses were luckier. Burning waste in your own fenced area is not prohibited.
Disassemble the cabinet for disposal
In this case, arm yourself with a pry bar and a hammer. You can tear the doors out of their hinges by pressing them away from the body with a mounting spatula. Insert a pry bar into the cracks and separate the panels. Using a hammer and spatula, remove the filling elements. Collect everything disassembled into bags and take it to the garbage container site. Make sure this is not prohibited by your building code. Otherwise, use a waste removal service.
The management company is responsible for the removal of large-sized rubbish.
Taking furniture dimensions
Should you disassemble all your furniture when moving? Of course no.
Furniture disassembly is only necessary when the item is too large to safely fit through doorways and hallways in the home being vacated, or when it is too heavy to move as a single unit.
Sometimes a furniture block may be too long or too tall to safely maneuver around sharp corners or climb down stairs without accident. In all these cases, the furniture must be disassembled to avoid damage or personal injury.
You need to measure the dimensions—height, width, and length—of the larger pieces, then measure all the doors and hallways in the house, and finally compare those measurements to determine the next packing and moving steps.
Smaller pieces of furniture, such as chairs, coffee tables or nightstands, will not need to be disassembled at all, just pack them properly or protect the surfaces.