Every apartment needs at least a minimum set of furniture to create coziness and comfortable living conditions for a person in it. And this minimum set necessarily includes a sleeping place. Many people choose sofas as a place to sleep, but if the living space allows, it is better to use a bed for this purpose.
It will ensure the highest quality sleep. However, beds are now quite expensive, and purchasing a mattress will increase the financial cost of purchasing one. A homemade bed made from furniture board can significantly help save money . Moreover, making it, as it turned out, is not at all difficult.
Bed made of furniture board
What is a furniture panel?
Homemade beds can be made from various materials, but it is worth noting that most of them use wood and its derivatives as raw materials. This is a natural material that is easy to work with and fully meets all environmental requirements for beds.
One of the wood derivatives is furniture board, which can be bought in a store and used to create home furnishings with your own hands. What is it and how does it differ from the more familiar chipboard or plywood?
Furniture board
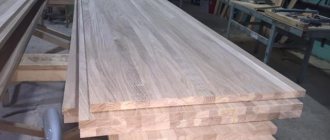
So, a furniture panel is a sheet material in the shape of a rectangle or square . To make it, wooden blocks are used, which are planed and glued together during production. The width of one bar can vary between 1-5 cm. The thickness is 18, 28 or 40 mm. The length of each shield varies from 80 cm to 3 m. There are other size variations.
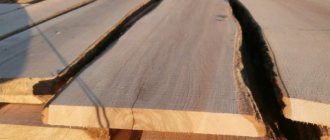
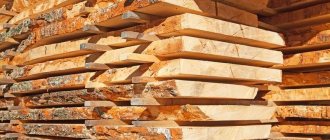
Basically, furniture panels in Russia are made from coniferous trees, but there are also oak and birch. Any of them are suitable for creating homemade beds and other furniture products.
Types of furniture panels - birch, ash, pine, larch, oak
On a note! Furniture board is considered one of the best analogues of chipboard.
The first furniture panels appeared quite a long time ago, but the technology for their production has remained virtually unchanged over the last century. Previously, the bars were simply compressed using clamps, but now pressing is done with special presses - that’s all the difference. High-quality compounds that are safe for humans and nature are used as glue for joining bars. Shields began to be mass produced starting in the 70s of the 20th century.
Furniture board - sheet wood material
Since quite a lot of analogue materials have now appeared, furniture panels are used mainly only in the following cases:
- if it is necessary to comply with high environmental safety standards;
- to create hypoallergenic products;
- for aesthetic purposes - furniture made from furniture panels sometimes looks very beautiful;
- if necessary, get durable and high-quality furniture, since it will last longer than the same furniture made from MDF. And it’s much easier to repair it;
- if you need to obtain a cheap but high-quality product, because the panels are created from wood waste.
Furniture made from furniture panels is inexpensive.
Furniture panels are sold in stores, packaged in a special film. Thanks to it, it is convenient to transport and store. Now it is a good material, actively used in the production of various furniture. It can also be used to decorate metal entrance doors, as an overlay on them.
Oak furniture panel
Decoration methods
In order for a homemade children's bed to acquire a complete look after assembly, it is decorated in various ways. The first step to giving the product an aesthetic appearance is putty, which is carried out as follows:
- all cracks at joints are coated with the composition;
- After drying, the treated areas are carefully sanded using sandpaper.
The assembled crib is treated with stain. This is done not only for design purposes: the product protects the product from excess moisture. On top of the stain, apply 2-3 layers of varnish or wood wax. A crib made for a small child is impregnated and covered only with natural products that do not contain toxic substances. In addition to this method of decoration, there are other varieties. To give the product a finished look, the crib is covered with upholstery fabric for furniture:
- details for all elements are cut out;
- process these parts;
- decorated in such a way that the fabric lies flat and there are no folds or creases.
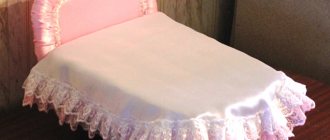
One of the types of decor for a baby crib is decorations in the form of capes made of thin fabric. They are designed to protect children's sleep from external influences. Before you make a canopy over a crib, you need to get acquainted with its purpose and fastening rules:
- it will protect the child from drafts, so in summer a light fabric is enough, in winter it should be denser;
- the canopy will protect the baby from unnecessary prying eyes;
- protects against annoying insects in hot weather;
- will protect from too bright light.
It is easy to make with your own hands. The fabric is strung on a thread and spread out over the baby's crib using various types of fastening (along the perimeter of the bed, in the middle, at the head of the bed). Children over 3 years old should not hang a long canopy with poor fastening over the crib, since the child, when he begins to move actively, may become entangled in the fabric and fall.
Stain coating
Advantages and disadvantages
This material has both advantages and disadvantages. So, its advantages include its relatively low cost. For example, furniture board costs much less than the same chipboard. But he is more afraid of moisture. By the way, in the bedroom the air humidity is usually moderate, so it is quite possible to use a furniture panel to make a bed without fear for the fate and condition of the product in the future.
Advantages of furniture panels
If we compare furniture panels with natural solid wood, the latter has higher strength characteristics. But to make a solid wood bed, you will have to spend more money. And the furniture panel, thanks to the high-quality connection of its individual elements, still has fairly good strength. However, it is easier to work with it than with wood, due to its special pliability.
Furniture board has a number of advantages
Also furniture panel:
- able to influence the level of humidity in the room;
- hygienic and looks very beautiful;
- not dangerous to humans;
- can be used for many years.
Most often in the store you can find furniture panels made of pine, which is considered an ideal inexpensive option among other coniferous species. Furniture made from such a panel is often placed in the bathroom or kitchen, as well as in offices and other various rooms.
Pine furniture board
On a note! Pine furniture panels can also be used for the production of interior doors.
If we talk specifically about pine boards, they are considered durable, high-quality, and environmentally friendly. Can also be used for interior decoration. They are inexpensive compared to other shields.
Finishing with OSB
Finishing work is extremely important, because it is they who form the overall appearance of the structure, walls, structures individually or as a whole. Therefore, here too our experts recommend using the material we are considering!
OSB can be used externally and internally, as it is a moisture-resistant material that can be additionally protected by impregnation, antiseptics, and cheaper painting.
But, to tell the truth, after finishing the OSB surfaces, a rather unexpected effect appears... it’s just that everyone is used to using it on construction sites, and even moreover, hiding it from view as much as possible. For example, on an OSB roof under roofing materials, in a house - under decorative trim, in a utility room - behind boards or clapboards. But the material allows you to save money, so if you are working on an inexpensive project, pay attention to this. Painting OSB can create quite an interesting look!
Varieties and classifications
A furniture panel may differ not only in the type of wood from which it is made, but also in other parameters, ranging from size to types of joints and a number of other aspects. So, first of all, I would like to note that there are shields:
- solid lamella . Such shields are glued together from bars only along the width. They have a look close to natural wood. Often used for the manufacture of facades and visible elements of interior items;
- spliced _ Such shields can be spliced both along the width and length of the bars. They are cheaper, but are more durable than the first option. Typically used to create not only furniture, but also stairs, window sills and other products.
Types of splicing of furniture panels
In neither case do the panels have cracks, defects or other wood defects. The difference in the price of the two types is noticeable, but small and amounts to about 20%.
Shields also have their own classification. Based on this, you can choose the most suitable option in terms of strength and durability.
Table. Classification of furniture panels.
| Class | Characteristics |
| Extra | This is the best furniture board of high quality. It has a so-called solid-lamella fabric, and the bars themselves are very carefully selected taking into account textures and colors. The surface is uniform, smooth and beautiful, there should be no defects. This is the most expensive option for furniture panels. |
| A class | This is a high-quality furniture board with color-matched bars and a smooth, uniform texture. It is slightly inferior in quality to Extra shields, but overall does not have serious deformations. |
| To class | The shield is made from bars spliced along the length and is of worse quality than previous options. There is no clear selection of elements in terms of color and texture. |
| C class | Such a shield usually has quite a lot of flaws, it is uneven in color and texture, and there may be knots on it. The material is not used in its pure form; it must be laminated or veneered, coated with various decorating compounds, etc. |
There are several types of furniture panels
Shields, depending on the type of fusion, may have different sizes, but in general they do not differ from the previously selected standards, which are specified in GOST 13715-78 . Products are manufactured only on the basis of this document. The standard sizes of solid panels vary in thickness and can be 20, 27 and 40 mm, the width of the sheets is 1 m, the length is 2 m. As for jointed panels, their thickness can be 14, 20 and 26 mm, but the width is this is equal to 1210 mm, and the length can be different and vary within 5 m. That is, changes can affect the thickness of the sheet, which simplifies the choice of material.
Varieties, types of furniture panels - photos
On a note! You should not always think that low quality sheets are not suitable for creating furniture. Here everything will depend largely on the final project. Perhaps the material will subsequently be sheathed or painted, then you can buy panels of worse quality. But if the material will not be covered with anything, then it is better to take those shields that have a beautiful texture and surface.
Constructions for cottages made of OSB
When considering OSB for a summer residence, you need to focus on a wide variety of processes and objects. Sometimes, this building material can be used in the most unexpected places. But more often, its purpose is already predetermined!
Today, the slab is cut and cut for the installation of various racks, boxes, gutters, which is very necessary in the household.
But it is worth noting the role of the material in the creation of decking, platforms, and even in the production of scaffolding, which is often used by craftsmen in the country.
Processing capabilities
Furniture panels can be subjected to various processing methods. These include:
- cutting , that is, cutting into smaller or shaped elements according to the customer’s measurements;
- gluing , when several shields or parts thereof can be joined together;
- brushing or aging wood . This is a fashion trend, and often the panels are artificially aged in order to fit the overall style of the interior;
- Grinding will make the surface of the shield perfectly smooth and even, and get rid of minor surface defects.
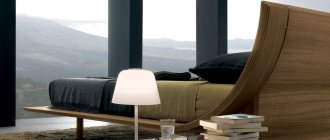
Bed made from furniture panels
Furniture panels can also be subjected to other processing and decoration depending on the wishes of the craftsman.
Small architectural forms from OSB
This is where the topic becomes even more interesting, because the general list of small architectural forms that every summer resident loves necessarily includes arches, canopies, gazebos, and more complex structures. This slab can be used anywhere, because we have already said that it is a fairly high-quality and easy-to-use building material.
Let's look at the use of OSB using one example - let's study the construction of a gazebo.
So, there are several main stages where OSB can help us:
- Construction of the foundation of the gazebo. Here, formwork or a general foundation boundary is built from OSB if the whole site is to be poured;
- Next, we build the walls of the gazebo using the frame method to make it warm and inexpensive. To do this, we use timber, insulation and other materials that we already know about from articles on the construction of gazebos, but also OSB, which is used for cladding. By the way, it can be both external and internal!
- Next, the roof structure, where the slab will serve as the basis for laying the roof. Here you can also start from inexpensive materials, use middle-class soft roofing, TechnoNIKOL and the like!
- But the most important thing is inside the gazebo. This includes OSB flooring, wall paneling, and possibly furniture creation!
- I would definitely like to draw your attention to the fact that OSB can fully participate not only in the construction of houses, gazebos and outbuildings.
- Be sure to remember that garages, workshops, and also a lot of utility buildings, warehouses and other structures are often built at the dacha if you are planning a business!
How to make a bed?
Creating a bed from furniture panels is a fairly quick and simple process, and anyone who has at least minimal carpentry skills or wants to master them can handle the task. First of all, you will need to decide on the desired appearance of the bed and, based on this, make a drawing or diagram with all the necessary parameters of the product. This will help calculate the required amount of materials.
Drawing of the future bed
You also need to buy not only furniture panels in the required quantity, but also fittings for them, as well as paint and varnish and other finishing materials. By the way, even at the stage of purchasing shields, you can immediately cut them to the required dimensions - many companies provide such a service for quite little money.
On a note! It is recommended to cover the finished bed with a decorative composition, which will extend the life of the wood and prevent it from losing its beautiful appearance. Also, even before assembling the bed, it is advisable to treat the panels with protective compounds that increase the wood’s resistance to rot and insect attack.
In general, to make a bed you may need the boards and plywood themselves, bars for creating stiffeners, screws and bolts, and metal corners. Of course, you need to get a jigsaw, screwdriver, drill, etc. You can buy a mattress for the bed in advance and, based on its size, make a bed.
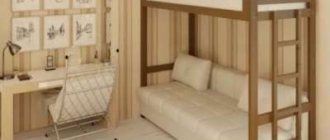
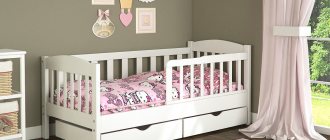
Decor options
The good thing about a house bed is that it can be easily decorated with a canopy. By sewing two or three different sets of fabric curtains, you can change the appearance of this piece of furniture beyond recognition.
If she stands opposite the window and bright sunlight wakes up the child earlier than necessary, a canopy made of dense opaque material will come in handy. If the cape is only to decorate the bed, you can choose any material you like.
A narrow long curtain woven using the macrame method can also serve as a decorative element. It will also make your sleeping area more comfortable.
If desired, a short canopy can be styled to resemble a tiled roof. This decoration option is suitable for beds where there is only a triangular frame and no wooden floor.
However, you can do without fabric curtains altogether. And so that the structure does not look empty and boring, it is worth decorating it with soft toys, garlands of paper letters that make up the child’s name, hanging a dream catcher or a beautiful trinket with tassels or pom-poms from the top beam.
You can create an atmosphere of mystery and at the same time comfort by wrapping the vertical supports and cross beams with an LED garland with star-shaped bulbs and hanging three-dimensional clouds cut out of paper from the ceiling. The design will be complemented by wallpaper depicting the night sky.
Older children who often read in bed in the evenings will love the lighting option shown in the photo below. Before putting it into practice, it is worth treating the wooden parts of the bed with a fire retardant (a special liquid that prevents fire).
Making a house bed with your own hands is quite simple. In addition, the family budget will not suffer much, even if you buy not only lumber and consumables, but also tools. This is also a creative process, and all family members can participate in it, spending time together doing a useful activity.
Instructions for creating a bed
Let's look at how to make a bed from plywood, furniture boards and bars with a beautiful figured backrest.
Step 1. You need to cut out a pattern for the headboard from a large sheet of paper (it’s best to take old wallpaper). It should be neat and even and meet the wishes of how the headboard should look. The pattern must be attached to a sheet of plywood and traced with a pencil.
The pattern is outlined with a pencil
Step 2. Next, using a jigsaw, you need to cut out the headboard and sand its edges with sandpaper or a sander, rounding them a little.
The edges of the headboard need to be sanded
Finished headboard
Step 3. Then from foam rubber you need to cut out a part of the same shape as the headboard itself, with a small margin, and glue it to the plywood. It is best to make a second part and make the back soft on the reverse side. After this, you can cover the headboard with fabric, making sure that there are no folds. Along the perimeter of the backrest, you can fix and decorate soft materials with decorative nails, repeating the contour of the headboard, stepping back a few centimeters from its edge.
Decorative nails are driven around the perimeter
Step 4. Now you can assemble the bed frame. In this case, all the elements were sawed in advance in the store, but you can cut them out of a furniture panel at home, focusing on the diagram. The frame consists of two side and one end boards; the back will be located at the head. For convenience, you can also make an additional side of the box on the side of the headboard, which will then be attached to the headboard and will not be noticeable. The frame must be joined together using furniture corners and self-tapping screws. For beauty, it can be covered with foam rubber and fabric in the same way as the headboard. From inside the frame, you need to secure a block along its entire perimeter, which will serve as a support for the orthopedic base and mattress. The block must be secured so that the mattress is slightly recessed into the bed (for example, 10 cm).
Assembling the bed frame
Step 5. Now you need to attach the headboard to the bed frame using bolts. Also at this stage, you need to install an additional support beam in the middle of the box, which is fixed using corners on the bed box and must have additional wooden supports below (for the reliability of the product).
The headboard is attached to the frame
There are additional supports at the bottom
Another photo of the process
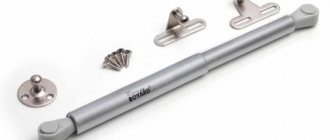
Step 6. You need to attach and secure the bed legs. In this case, they were purchased at the store, but you can also use homemade ones. They can be fixed at the corners to previously screwed pieces of plywood.
Next, the bed legs are attached
Ready-made legs are used
Step 7. All that remains is to lay the slatted base on the support beams, and place the mattress on top, and the bed is ready. You can sleep on it without fear, as this design is very reliable.
Slatted base installed
Ready-made bed from furniture board
Video - DIY wooden bed (blocks and furniture board)
Video - Cute bed made from furniture board
Many people believe that such a bed will be creaky and of poor quality. But in fact, if you approach your work wisely and with special care, all troubles can be avoided. You should take care of the reliability and high quality of the connections and should not use nails when assembling, then you will not have to worry about unpleasant sounds or the collapse of the structure. In general, beds made from furniture panels are very reliable and durable, and there are a great many variations in their creation.
Making a soft headboard
Beds with upholstered headboards look like a million. You absolutely do not need to spend exorbitant amounts of money on purchasing such a bed, because you can make it yourself.
A bed with a soft headboard is an excellent solution for interiors in Art Nouveau, Art Deco, and Neoclassical styles. A soft headboard can be a good decoration for almost any homemade bed
We will look at the most complex method of making a soft headboard in the form of a carriage screed - in other words, capito. To do this, prepare glue, foam rubber, upholstery material, buttons, silk thread and a stapler with staples.
Manufacturing stages:
- Choose beautiful buttons covered with fabric. If you wish, you can cover the buttons with material yourself.
- Mark the slab. Draw parallel and perpendicular lines, mark the vertices of the diamonds. Drill through holes at the tops of the diamonds, 2-3 mm thick.
- Cut a piece of foam rubber to the desired size and use glue to attach it to the stove. If necessary, excess foam rubber is trimmed with a sharp knife.
- Make marks on the foam rubber where the buttons will be located. To do this, take the awl through the holes in the plywood or chipboard, pierce the foam rubber with it and mark a dot with a felt-tip pen at the puncture site.
- Cut holes of small diameter in the foam rubber in the area of the marks. They should be clear and round.
- Apply a layer of padding polyester to level the surface. Secure it with a stapler. Using your fingers, tear through the area where the buttons will be placed.
- Place the fabric/leather on the headboard. Secure it with a stapler. For better tension of the material, use a strip that is nailed to the inside of the product. When working, pay special attention to the corners.
- Using an awl, pull the buttons with silk ropes inside. Tighten each rope one at a time and secure it with staples.
After these rather complex procedures, the headboard is placed above the bed. The most important thing in the work is the accuracy of the markings and the correct tension of the fabric/leather, especially in the corners.
Country furniture made of OSB
Perhaps this is one of the few additional materials for wooden pallets, on the basis of which you can make country furniture with your own hands. Fast and practical, but most importantly, it's inexpensive!
Furniture for a summer house is known to everyone.
These are stools, tables, chairs, benches, beds, armchairs, cabinets, cabinets, racks, various shelves... and the most interesting thing is that such furniture can be used not only for household purposes.
By adopting the idea of creating a frame from inexpensive materials, you can even make a cool country sofa. For this you need wooden beams, OSB, as well as specially sewn mattresses or pillows. Today everything is real!
As you can see, thanks to the recommendations of specialists and the advice of those summer residents who have already tried similar ideas, you can achieve a reduction in the budget for construction or design of the site and buildings, and at the same time not lose in quality. Many interesting projects based on OSB have already been completed, but we would also like to ask you to share your ideas, and perhaps show us and the readers of the site the finished result!
Back using carriage screed technique
A carriage screed is the most beautiful way to decorate the head of a bed. This technique was used several centuries ago, and still does not lose its relevance. This decoration option is suitable for bedrooms designed in classical styles: baroque, rococo, renaissance.
The pattern itself on the carriage screed can be made in the form of squares and diamonds. To fasten the ornament, rivets or buttons covered with fabric are used. You can also use beads and crystals.
Materials and tools
To make a carriage screed we will need the following tools:
- drill;
- sharp knife;
- Crochet hook;
- scissors;
- furniture stapler.
Prepare the following materials:
- lumber for the headboard (furniture board, plywood, chipboard);
- foam rubber (you should make an allowance of 30 cm on the sides);
- padding polyester;
- buttons (pre-covered with textiles);
- universal glue;
- strong lace or rope (thick enough to fit into the eye of the needle);
- wall fastenings and screws.
How to do it?
Now you can proceed to the manufacture and assembly of the headboard:
- We take prepared lumber (in our case, a plywood sheet) and give it a shape (it can be rectangular or even fancy).
- We cut the foam rubber to the size of the headboard (do not forget about the allowances).
- We mark on the foam the places where the buttons are attached, for example, in a checkerboard pattern.
- Using a sharp knife, we make holes in the foam rubber for the buttons.
- We place the foam rubber on the plywood and use a pencil to mark the places where the buttons will be attached.
- We drill holes in the plywood with a drill.
- Now you need to glue the foam rubber to the lumber, carefully making sure that the holes match everywhere.
- We lay a small layer of synthetic padding on top. We make an allowance of 5 cm on each side.
- We lay the prepared fabric on top, with an allowance of 10 cm on each side.
- We turn the plywood over and fasten the textiles to the headboard with a furniture stapler.
- Now we take the buttons and thread a rope 15 cm long through them. In total, you will need about 60 buttons.
- Take a crochet hook and thread it through the prepared hole in the plywood. We feel for the hook in the front of the fabric and make a small hole with nail scissors.
- We hook the rope with the button and thread it through the hole.
- We pull the cord and firmly attach it with a stapler on the back side.
- We fasten all the fasteners using self-tapping screws and hang the soft headboard on the wall.