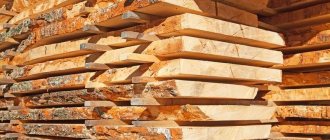
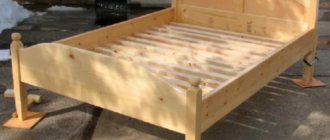
In the modern world, real wooden furniture made from solid wood, and not from artificially created materials, is highly valued. However, boards and beams, being a natural, “living” material, crack or deform over time under the influence of such external factors as changes in humidity and air temperature, and the influence of sunlight. And the wider the board, the more pronounced these processes are.
The array is subject to cracking and shrinkage
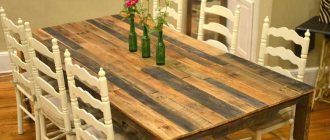
Furniture panels - wide panels glued together from wooden slats - are almost completely free from such shortcomings. They are indispensable in the production of furniture elements such as tables and cabinets, the individual parts of which have impressive dimensions. In particular, they are used to make very high-quality countertops, which, if properly processed and followed operating rules, last for decades without losing their aesthetic and consumer properties. And if necessary, they can be easily restored.
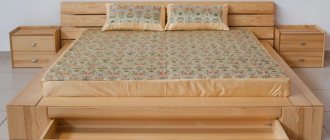
Table made of furniture board
From this article you will learn about what types of furniture panels there are and what parameters are used to choose them in order to make a desk or dining table with your own hands. You will also find examples of their manufacture in it.
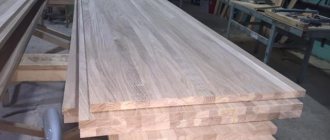
Furniture panels
Why treat a chipboard countertop?
Everyone has probably heard that water is the main enemy of particle boards.
Therefore, proper processing of chipboard countertops has a decisive influence on its service life. In addition, not only the durability of the kitchen, but also the health of its owners depends on the quality of sealing of the ends, cuts and seams.
The lamination process thus performs two functions:
- increases the strength properties of the slab and its water resistance;
creates a barrier layer that prevents air pollution in the apartment by harmful substances.
The fact is that the binding component of the wood fraction in chipboard is phenol-formaldehyde resins, which during operation emit formaldehyde, a substance harmful to health, into the air.
As a result, the original material produced by the manufacturer is laminated chipboard, which is characterized by both moisture resistance and 1st emission class, that is, absolute safety for the environment.
However, in the process of making a tabletop, the blades are cut and various technological holes are cut. Here you have a “gate” that works simultaneously for entry and exit. As they say, “welcome moisture” and “goodbye formaldehyde.”
This is why it is so important to carefully insulate all exposed areas of the laminate.
Equipment needed for work
To construct a country table with your own hands, you need to take a minimum amount of materials and tools; moreover, most of them are quite affordable and can be found in almost every home. So, what should you prepare in advance:
- material to be used as a base. Many modern craftsmen prefer wood. The main advantage of wooden benches is that they are completely safe from an environmental point of view. In addition, their appearance is very aesthetic. To make things easier for yourself, you can take new boards. When purchasing lumber, make sure that it is sufficiently dry; wet wood should not be used for work. You need to keep it for several months in a well-ventilated room, and only then start working. If you follow this advice, then a table made of timber with your own hands, made and installed, will serve for a long time. Of course, you can make a table from stone or metal, but this will require a lot of investment and effort, time and money. Stone, as the main material, is durable and reliable, however, it is much more difficult to process;
- fasteners (nails and screws);
- drawings of garden benches and a table for a summer house with the indicated proportions. You can find ready-made options or create furniture diagrams yourself. Choose a project or make an original layout based on the options presented on our website. If you are planning to create a high-quality and aesthetically pleasing table in your country house with your own hands, then the drawings will definitely be useful to you;
- sandpaper. If you have a grinding machine, this will significantly speed up the work process and help make the garden table perfectly smooth;
- varnishes and antiseptics for wood processing. They are needed so that a table made of boards can be used for a long time. If you use the products presented according to the instructions, you will receive a wooden outdoor furniture piece that will not lose its functionality due to moisture or insects.
Why is a wooden countertop not scary?
On the one hand, smooth, warm wood with a beautiful natural structure is an excellent material for furniture production. Easy to use, environmentally friendly, always fashionable and relevant. Moreover, the tabletop is not a heavy wooden buffet that is impossible to move. It is not necessary to make all the furniture from wood; a completely reasonable modern solution would be to make only the tabletop and, perhaps, some other individual parts from this material.
But many are afraid of how wood may behave, they are afraid of fungus, cracked varnish...
But professionals think differently: “A wooden countertop is not a problem if you apply reasonable, adequate care to it. There are not many materials used for countertops in non-professional kitchens that are not afraid of any impact and do not require maintenance, says Andrey Lyamin-Borodin, builder, general director of the online repair ordering service PriceRemont
. “All materials age during use, but the peculiarity of wood is that it can age gracefully.”
So what are we dealing with? Mikhail Vychuzhanin, a specialist in wood finishing, defines the advantages and disadvantages of wooden countertops as follows.
- environmental friendliness of the material;
- beauty and variety of wood texture;
- unlimited product parameters: almost anything can be made from wood in any way;
- easy to update;
- the ability to perform any milling of the edge of the tabletop.
- more careful care is required;
- restoration will be needed after some time;
- relative high cost of the material and work with it.
Deciding on the design and construction of the table
The fewer skills, the less it costs to be tricky with the design. The design and diagram are simpler, think through and imagine each step in your mind. Be sure to make a preliminary sketch and drawing.
The clearer you are about what exactly you want to get as a result, the less likely you are to encounter unexpected difficulties during the work process. The required minimum of drawers and shelves, fewer shaped elements and complex connections.
Complex designs will take more time and materials.
We'll leave the design details for next time, when we have more experience.
Features of a wooden table top
Wood is an excellent material from which furniture is made. Inexperienced and little-informed people in this matter worry about the possibility of fungus, mold, and cracked varnish. Professionals think differently. In their opinion, a wooden countertop is no worse than its analogues made of artificial stone, for example.
Wooden countertops are not inferior in quality to furniture made from other materials.
Using the necessary and proper care, the tree will please the eye for a very long time. There are practically no materials used in the kitchen that are weakly subject to wear and tear. The peculiarity of wood is that it can age gracefully. In order to save money, you can make only the surface of the working area from a natural component, which will combine well with individual decorative elements.
Alternatively, only the surface of the working area can be made of wood.
Features of the material
Wood can be called the best material for making kitchen furniture. Its main advantages:
environmental friendliness;
- good thermal insulation;
- natural and attractive appearance;
- variety of possible forms;
- ease of restoration work.
But wood has no less disadvantages:
- it gets dirty easily;
- may catch fire;
- it is easy to scratch;
- A table top made of wood is quite expensive.
Where to begin
A home craftsman who decides to assemble his own furniture board should take care to have on hand:
- belt and surface grinder (you can use sandpaper screwed onto the block, but this will lengthen the process);
- clamps or homemade devices for tightening boards;
- plywood and thin slats for holding the lamellas together;
- tool for measuring length;
- thicknesser stand with clamp;
- milling machine;
- lumber;
- electric plane;
- circular saw;
- pencil;
- hammer;
- drills;
- glue.
Rice. 1. Blanks for furniture panels
Then you should decide on the dimensions of the future wooden panel. To ensure that the result does not disappoint, follow these recommendations:
- the length and thickness of the workpieces must be greater than the final parameters;
- boards made of only one type of wood are included on a separate sheet;
- You can only use workpieces that are dry and smooth, with a minimum number of knots;
- The ratio of width to thickness for lamellas (unjoined pieces) is taken as 3x1 (the internal tension of the wood with such an aspect ratio is not enough to split the slats).
Rice. 2. Furniture panel
It is necessary to take into account that during drying, wood warps in different directions. It occurs most intensely in the tangential direction (along the tree rings), and is 2 times weaker in the radial direction (along the core lines).
Rice. 3. a) the core is connected to the core; b) the sapwood (the outer layer immediately below the bark) is bonded to the sapwood; c) and d) we use blanks with curling noticeable to the naked eye (random arrangement of wood fibers), we orient them along the lines of annual rings.
Pros and cons of wooden surfaces
Have you not yet fully decided whether to opt for a wooden tabletop, or is it better to turn to other materials? Especially for this case, we have prepared a brief overview of the pros and cons of wooden options.
Main advantages:
- environmental friendliness;
- stylish and current appearance that does not go out of fashion;
- warm surface;
- cozy texture;
- the ability to fit into any interior style;
- durability (with proper care).
Key disadvantages of wooden countertops:
- quite easy to scratch;
- flammable material;
- high price;
- require regular careful surface care;
- do not accept aggressive household chemicals and abrasive detergents.
Installation
Installation of a kitchen from furniture panels in stages. First, assemble the lower cabinets. All elements of the cabinets are pre-cut to size and processed. The bottom, back wall, sides, doors and parts for drawer cabinets are sanded.
The elements are connected using dowels or confirmations. To avoid mistakes, holes are cut out at the ends. The process is quite complex; accurate calculations and measurements are important. Then dowels are inserted into the prepared holes, and the parts are connected.
The back walls can be made of plywood or fiberboard. They are attached to the finished box with staples or small nails. When the cabinets are completely ready, you need to check the accuracy of installation. Next, install the fittings - hinges and runners for pull-out shelves and drawers. This task is performed using self-tapping screws and a screwdriver.
When installing a countertop from a panel, you need to double-check that the parameters of the slots for the sink, hob and other built-in appliances are correct. When placing hanging cabinets at the preparatory stage, you need to make markings for future fasteners and drill holes for anchor bolts. During the installation of facades and built-in appliances, doors and shelves are mounted on fasteners.
Prepare facades Install countertops
Assemble first the lower, then the upper cabinets step by step
Finished kitchen
Which wood to choose for the countertop?
Here is the answer to the question of what types of wood and wood characteristics are worth paying attention to.
“When deciding on a wooden countertop in the kitchen, please forget about MDF, chipboard and veneer. Only natural wood, advises Artyom Lepyoshkin, General Director of the House of Interior Solutions Dynasty
. It's not a matter of harmfulness, but of the properties of the material. The countertop is exposed to aggressive human influence every day: crumbling, cutting, whisking, spilling and spilling are a common occurrence in the kitchen. The surface must be durable, smooth, resistant to cuts, moisture and temperatures.
The classic option is oak or beech: strong and durable wood species. Some choose teak and mebrow. More affordable options: pine, walnut, ash, birch. We prefer larch: you will have to pay more, but it will also last longer. The peculiarity of larch is the very high density of wood; the growth rings are located along the trunk with small intervals. It easily tolerates mechanical damage and deformation, and can withstand high compression and pressure loads. It contains gum, a natural antiseptic that protects against rotting and damage by mold. Ideal for the kitchen. Larch gives off and absorbs moisture when humidity changes.
The manufacturing method also affects durability. A solid wood tabletop is more likely to warp than a laminated wood tabletop assembled from several plates. This method increases flexibility and elasticity.”
“You should pay attention to such points as: the age of the wood, the method of its extraction, storage conditions, the region where the material was brought from,” adds Mikhail Vychuzhanin
. He considers oak to be the best type of wood for making countertops. — The stronger and harder the wood, the longer your countertop will serve you. There are countertops made from solid birch, cherry, and walnut.”
FAQ: answers to common questions from beginners ↑
It is necessary to measure the room at different heights: at floor level; in the area of the working surface (850...900 mm from the floor); at the level of human growth. This is necessary to identify any unevenness in the wall. It is also better to measure the height at several points - to detect the curvature of the floor and ceiling.
Important! Horizontal measurements to objects located in the kitchen (counters, pipes, windows, etc.) must be taken from one corner, taken as the base. What computer programs are suitable for a beginner to independently develop a kitchen drawing? What computer programs are suitable for a beginner to independently develop a kitchen drawing?
What computer programs are suitable for a beginner to independently develop a kitchen drawing?
The simplest design program is PRO100. Intuitive and easy to understand: Astra Furniture Designer, bCad furniture maker, KitchenDraw, WOODY, IKEA kitchen planner (excellent for standard furniture sets), AutoCad, 3D-constructor, Basis.
Why do kitchen unit drawings with dimensions always contain a gap near the walls?
When designing kitchens, especially corner ones, it is very difficult to predict how perfectly the furniture will “fit” into the given dimensions of the room. No one is immune from the mistakes of builders who leave uneven walls after their work. A small gap of 5-7 cm helps furniture makers install the set without major alterations - if the sizes do not match, the furniture can be moved within these limits, and upon completion of the work, the remaining gap can be covered with a part in the color of the facade.
What distance should be between household appliances in the kitchen?
It is best to leave at least 500...600 mm between equipment.
Is it possible to install a washing machine in the kitchen?
Yes, sure. The main rule: the distance from the washing machine to the nearest kitchen cabinets should not be less than 3 cm on each side.
How many centimeters should there be between the lower and upper tier of kitchen furniture?
The optimal distance is 60 cm. The exception is the cabinet for the hood - here you need to rely on the recommendations specified in the technical data sheet of the device.
In what order is it better to arrange household appliances on a kitchen drawing?
For right-handers, the most acceptable option is: refrigerator, sink, stove. In this case, the housewife moves from left to right: she takes food out of the refrigerator, cleans and washes it, then cuts it (between the sink and the stove), and then cooks, fries, and stews. For left-handers, it is better to use a mirror arrangement of household appliances: stove, sink, refrigerator.
Why is it believed that furniture with legs is more durable than those whose side parts of the body are lowered directly to the floor?
Kitchen cabinets with adjustable legs can always be leveled relative to the floor. In addition, if various types of emergencies occur (neighbors above are flooded, a faucet breaks, etc.), only the lower base is damaged, replacing which is less expensive than updating the side parts of the cabinet.
What should the back wall of kitchen cabinets be made of?
In what units of measurement should the dimensions of kitchen units be indicated on the drawings?
Only in millimeters.
Where should the outlets be located?
Layout of sockets for household electrical appliances:
Socket layouts
Recommended outlet locations
Is it possible to install a countertop 40-50 cm deep against one of the walls in a corner kitchen?
No problem. The only condition is that this part of the kitchen unit should not have built-in household appliances or a sink. All kitchen appliances have standard sizes designed for a 60 cm countertop.
Are standard kitchen drawings with dimensions better or worse than designer designs?
There is no clear answer. For a standard kitchen, you can use a standard set of furniture, but for rooms with redevelopment, an individual calculation of the kitchen set is really necessary.
Creating a drawing is a difficult and time-consuming process. But step-by-step planning, clear measurements, correct placement of furniture and equipment, as well as strict adherence to instructions and advice from professionals will certainly be crowned with success. A linear sketch of a direct location or a 3-D drawing of a corner kitchen with dimensions and details is the first step towards the kitchen set of your dreams.
How to cover the tabletop
Having decided on the material, you need to understand that the optimal surface for the table will only be natural wood. In no case is veneer, MDF or chipboard used. Particular attention is paid to the age of the tree, its place of growth, and storage conditions.
Natural wood is the best option for making countertops.
It is important to know that a laminated wood surface will be more elastic and flexible than the same surface made from solid wood. The type of raw material is also important. Care methods must necessarily include treatment with special protective agents. What is the table covered with? It can be varnish, wax or oil. There are three options for covering the table surface: varnish, wax and oil.
We recommend: Turnkey repairs, pros and cons.
Practicality or durability
In order not to make a mistake in your choice, you should keep in mind some features of tree species. Harder ones, such as oak or beech, will last longer. However, their cost is much higher.
Hardwood furniture will last longer.
Among the democratic ones, pine, birch, ash or larch are perfect. Speaking about the latter, we should note a number of advantages. Its surface is quite dense and resistant to various types of damage. The presence of gum in the composition prevents the growth of fungi and mold, as well as rot, which is very important considering where it will be used. Larch is also capable of absorbing or releasing excess moisture.
Larch is also optimal for countertop material.
Oil, wax or varnish
Avoiding the harmful effects of water, temperature, acid and alkali will help extend the life of a wooden tabletop. Here the question immediately arises of how to cover a wooden tabletop so that it lasts a long time.
Among those available, processing using the following means is suitable:
- oil;
- wax;
- varnish
Surface treatment with oil, or rather its impregnation, is the optimal way to protect wooden products. It provides a kind of barrier that repels water from the surface. Oil absorbed into the top layer of wood will prevent it from getting wet when in contact with water. Oil compositions are not washed off, but require frequent use. At the moment, you can choose different compositions that match the color.
Oil protects wood from moisture.
Wax is a natural and environmentally friendly material. The effect of its use is similar to oil. But in addition to protecting against water, the wax coating also protects against minor mechanical impacts (scuffs and scratches). However, there are also disadvantages. A wax coating wears out quickly and requires updating and polishing more often than an oil coating. Before this, the old layer is cleaned off.
The wax coating requires regular updating.
Using varnish on a wooden tabletop is a radical method. It protects wood from water, minor mechanical damage, and exposure to ultraviolet radiation, while the structure of the tree itself does not change. The color of the surface remains the same, and a natural exchange of moisture also occurs, preventing the appearance of fungi and mold.
The varnish protects the surface from all contamination.
This coating also protects against temperature influences without flaking or cracking. To remove the varnish coating, the tabletop will have to be scraped.
Oil: advantages and disadvantages
Adherents of eco-design and the most natural interiors often opt for oil. This has several aesthetic advantages:
- the warmth of the wood is preserved;
- as well as pleasant tactile sensations from touching it;
- The surface texture is further emphasized.
This coating option also has practical advantages:
- minor abrasions and scratches are less noticeable on oil-impregnated wood (compared to a varnished surface);
- in case of serious contamination and damage, you can carefully remove the coating area and reapply oil to it;
- vegetable oils are an environmentally friendly, safe coating for countertops; you can safely place food on the coated surface;
- It is quite possible to update the oil coating yourself (working with varnish will require much more serious skills).
Photo: Instagram my_biscuit_heart
The key disadvantage of coating wood with oil is the lack of reliable protection against prolonged contact with water.
Of course, if you accidentally spill something and wipe it up immediately, nothing bad will happen. However, if you leave the liquid on the countertop for a longer period of time, the area may darken.
Also, oil does not protect very reliably from mechanical influences, but in combination with wax it is not so much inferior to varnish.
Varnish: advantages and disadvantages
An alternative coating for wood is varnish. It also has its own aesthetic advantages:
- the ability to create a glossy, semi-gloss or matte surface of your choice;
- get a perfectly smooth coating to the touch.
Varnish has many practical advantages:
- more reliable (compared to oil) protection of wood from moisture;
- greater protection of wood from mechanical damage;
- the ability to choose a tinted coating or add a special pigment that makes the wood pattern more expressive.
However, there are also disadvantages. The main thing is that all small scratches and chips will be quite noticeable on the varnished surface. But it won’t be possible to update just a section of the countertop: you’ll have to re-cover the entire area.
It is also not recommended to varnish surfaces that come into direct contact with food. However, modern manufacturers offer many options for environmentally friendly varnishes to circumvent this drawback.
Stylish models in the photo
Recently, countertops made of light wood have become popular. This countertop has a softness to it that gives your kitchen a fresh, elegant and stylish look. Ideal for bright white kitchens, this wood choice has a unique charm. The warm yet minimalist look can make any space feel friendly and cheerful - perfect for a family kitchen!
To make a large kitchen feel even bigger, choose a subtle shade of warm wood to highlight the open space. If your kitchen is very bright, a wooden countertop will make the entire space more harmonious.
A distinctive feature of a wooden tabletop is that it can be easily combined with other materials. If your kitchen has a more contemporary style, light wood countertop models will stand out against metallic silver appliances and bare brick walls.
- Do-it-yourself stone tabletop: step-by-step master class with photos! preparatory work, drawing creation, materials and tools
- What sizes can the countertops have? standards for chipboard and other materials
- How to embed a sink into a kitchen countertop: the correct DIY installation process
- Do-it-yourself vibrating table: design drawing for the production of paving slabs, step-by-step assembly
- Workplace in home bedroom
- DIY table for a circular saw
- Epoxy resin table: types, instructions for making with video (50 photos)
- Bar counters for the kitchen: photos 50 examples
- Schoolchild's workplace: how to organize it for your child
- How to cut metal using a grinder
- Options for making shelves for the garage with your own hands
- Ventilation grilles for window sills
- How to paint wood with stain and varnish it
- How to make a garden swing from wood?
- How to update old tiles in the bathroom
- How to glue fiberglass correctly?
- Disadvantages of polypropylene pipes in home heating
- Children's room interior: 111 photos and 7 ideas
- Children's design (50+ photos)
- DIY garage accessories: all the most useful things
- Homemade Russian stove on the street under a canopy
- Wall cornice: how to hang, photo
- DIY LED phytolamp for seedlings
- How to check grounding
- Making a hand-held or stationary circular saw with your own hands
Read with this
- Do-it-yourself stone tabletop: step-by-step master class with photos! preparatory work, drawing creation, materials and tools
- What sizes can the countertops have? standards for chipboard and other materials
- How to embed a sink into a kitchen countertop: the correct DIY installation process
- Do-it-yourself vibrating table: design drawing for the production of paving slabs, step-by-step assembly
- Workplace in home bedroom
- DIY table for a circular saw
- Epoxy resin table: types, instructions for making with video (50 photos)
- Bar counters for the kitchen: photos 50 examples
- Schoolchild's workplace: how to organize it for your child
- How to cut metal using a grinder
Factors of wood damage
If the room has high humidity, poor ventilation and a comfortable temperature for the growth of bacteria (depending on the type - from 15 to 65 ° C) and moldy fungi, any wooden surface is at risk.
This is how a kitchen cutting board can turn black.
Do not forget - and this applies mainly to the kitchen - that aggressive solutions (acids and alkalis) change the chemical composition of wood and thereby worsen its appearance and strength characteristics.
Another factor of damage is direct sunlight. But here the situation is ambiguous: on the one hand, ultraviolet light has a pronounced bactericidal effect. But in addition to destroying bacteria, it almost instantly begins to destroy the unprotected surface of the tree. It becomes silver-gray in color and loses strength.
Finally, do not forget about possible (and in the case of a cutting board, inevitable) mechanical damage. They put a hot frying pan on, scratched it with a knife - they ruined the tabletop or board.
It may seem subjective, but we are for butter. Yes, the varnish coating looks beautiful, dries quickly and is inexpensive.
But the varnish coating has disadvantages, which in the case of countertops and especially cutting boards will emphasize the advantages of oil:
- The varnish is not recommended for use in rooms with high humidity.
- The varnish can hardly withstand temperature changes: and this happens often in the kitchen.
- The varnish coating is easily damaged even with slight impact - a scratch on oiled wood is much less noticeable.
- Damaged varnish cannot be restored in a separate area - you will have to completely remove the coating and apply a new one.
Any defects on the varnish become immediately visible.
What is a furniture panel
As many types of wood are used in production, there are so many varieties of furniture panels. This means their prices are different. In addition, it should be noted that when the conversation turns to furniture made from furniture panels, the price is often influenced by the density of the wood used. And the higher it is, the more expensive the final product. For example, for ash it is 4.1 kgf mm², for oak and beech it is 3.8 kgf mm².
The production of furniture panels is not the most complicated process.
- For this, edged boards or bars of certain sizes are used.
- All this is dried to a certain moisture concentration, usually no more than 20%.
- The raw material is then calibrated to the required dimensions.
- Grooves and tenons are cut into the furniture panel elements.
- Gluing and joining is carried out. After which the semi-finished shield is sent to the drying chamber.
- The finished material is sanded on all sides and then tinted to the required shade.
The strength of the product is created by the adhesive composition and gluing technology, which is produced under pressure. That is, the elements of the product fit together. It is in this form that furniture panels are supplied to retail trade and furniture production workshops. Everything else is done independently.
Disadvantages of wood as a component of kitchen furniture
The kitchen is characterized by strong temperature changes and high humidity, which has a very serious effect on wood, in contrast to the same stone and especially high-quality plastic. At the same time, if we talk about the countertop, it is also necessary to note the impact of fats, detergents, knives and the like found in the kitchen. The above-mentioned plastic and natural stone again win in this regard.
Finally, a high-quality work surface made of good wood can be significantly more expensive than plastic, although cheaper than natural stone. Well, don’t forget the danger of fire.
Types of oils by drying
Oil dries more slowly than varnish because it penetrates into the wood and the varnish polymerizes on its surface. But oils are different: depending on the composition, there are completely drying and non-drying ones.
For initial impregnation of wood, a linseed oil coating is most often used. Adding tung oil to it speeds up the drying process. In this case, tung oil perfectly replaces metal driers (a substance that is added to the oil to speed up drying).
G-Nature natural countertop oil uses this exact combination. It also contains rosin as an excellent antiseptic and wax to give the surface a matte shine after polishing.
Ways to protect your kitchen work surface
The working area of the room in which food is prepared is exposed to various liquids, so in order for it to serve for many years, it must be protected from water.
There are several ways to do this:
- Use oil to treat objects made of wood, which is absorbed into the material and prevents the fibers from swelling when wet. The following industrial products can be used for wooden surfaces: OSMO TopOil, Belinka, Adler Legno or many others. To treat the work area together with this substance or even instead of it, use a special wax. But it is necessary to remember that such a product will have to be renewed over time, that is, applied again.
- Treat it several times with a special varnish for wood surfaces. If desired, a little pigment is added to it so that the deep fibers of the wood become darker, and the cooking surface itself acquires expressiveness.
We recommend: How to properly make a pipe box in the bathroom
Oil coating for kitchen units
Oil protects furniture from not only moisture, but also from chemical, natural and household influences. This industrial product is largely colorless and can be plant-based, mineral-based or synthetic.
These coatings differ from each other in the drying method:
- It dries completely, hardens after drying, it cannot be washed off with water and the original appearance of the treated furniture is preserved for quite a long time.
- It does not dry at all or dries only half and saturates the wood quite deeply. It is made using natural ingredients. It is removed using mechanical force.
Before applying such a product, the surface to be treated is thoroughly cleaned of all contaminants and dried. If necessary, old paint or varnish will have to be removed. And if there are defects, they must be leveled with a special putty and then sanded with sandpaper.
The oil is applied using a brush or cloth that does not leave lint, it is applied along the entire length of the fibers. The very first layer should dry for twelve hours, then a new layer is applied. Their total quantity in this composition depends on the method in which the product itself will be applied. If a brush is used, two treatments will be done. And when using a rag, you need to do three or four layers. After the composition is completely absorbed, the entire treated area should be wiped well with a soft and clean cloth.
The presented coating has a number of positive properties:
- Does not change the color of the surface for working with food, emphasizes its “pattern”.
- It leaves the original natural exchange of moisture in the surface and prevents the appearance of fungi, so the original appearance of the treated area does not change for a long time.
- If the outer part of the object for such treatment is exposed to elevated temperatures, then the product does not delaminate and does not flow.
- Furniture oil is environmentally friendly, so contact of food ingredients with a surface containing the described composition will not harm human health.
- Oil hides small scratches, worn areas and stains left by cookware.
- If there is a need to renew contaminated areas, you can remove only part of this coating, and then reapply it to the desired areas.
- The oil is well suited even for aged wood containing pores, as it is deeply absorbed, gives it elasticity and prevents it from drying out.
What do you need for work?
So, the simplest version of the table that you can make at home is a wooden one.
And to work with wood or its derivatives, the following tools and materials may be required. Jigsaw or hacksaw for wood. The latter is not so effective when it comes to creating large-sized furniture, since the work will proceed slowly. But to create a small coffee table, a hacksaw is quite enough. Although working with a jigsaw is definitely more convenient and faster.
Sandpaper of various roughnesses or a sanding machine. They are necessary for processing the edges and surface of wood, which without it will simply be prickly and unpleasant. Before covering the product with paint or varnish, it must be sanded to perfect smoothness.
Random orbital sander
Varnish and paint. The wood must be covered with paints and varnishes, otherwise it will quickly darken and become dirty. The varnish will allow you to preserve and brighten the natural pattern of the wood, and the paint will allow you to give the table the color that you would like to see. The compositions can be applied with a brush or roller; the paint can be sprayed from a spray can.
Primer for wood. This substance must be applied if you plan to paint the product. Otherwise, the paint will simply be absorbed into the wood, and the color of the table will turn out unsaturated. You will also have to spend a lot of the paint and varnish composition itself.
Fastening material and fittings. Self-tapping screws, screws - all this will be useful when installing the table
So it’s better to stick with self-tapping screws, which require a screwdriver or screwdriver to screw in. You may also need some accessories - for example, wheels or some decorating elements.
Do not forget that before the main work you need to draw a clear diagram of the future table and estimate its dimensions. The drawing will help you avoid making mistakes in the future, and will also provide the ability to calculate the required amount of materials to manufacture the product. So it won’t hurt to arm yourself with a sheet of paper and a pencil, as well as a square, a ruler, and a tape measure.
Drawing of a simple coffee table
Caring for your cutting board
No matter what material the kitchen countertop is covered with, it is better to cut food not on it itself, but on the surface of the cutting board. The raw materials for creating a cutting board can vary. Kitchen boards can be made using plastic, special glass or wood (most often chosen because it is a natural antiseptic).
A new cutting board needs to be soaked, for which oil is suitable. This impregnation will protect it from liquid, food and bacteria getting inside it.
The oil layer of the board should be harmless to health and resistant to various damages. If you use sunflower or olive-based oil to cover the cutting surface, it may deteriorate after some time, and the board will need to be thrown away. Products based on coconuts or flax are expensive, but will not allow the cutting surface to become unusable.
Mineral-based oil is a good option for coating a cutting board. To do this, wipe the cutting board with it, wait until the composition is absorbed, and wipe it with a dry cloth. The procedure must be repeated once every thirty days.
Beeswax can be added to this cutting board coating to add density to the coating. Wax will increase resistance to moisture and prevent aging of the cutting board. After applying the oil and wax, you will have to let the product dry and then polish the outside of the board until it shines.
You should also remember to disinfect the board for cutting ingredients for preparing dishes. You can disinfect cutting boards using these methods:
- hot water and detergent containing surfactants;
- vinegar;
- hydrogen peroxide;
- chlorine-containing bath cleaning products.
Material processing
To extend the life of the countertop, it must be properly treated. The tabletop can be protected from moisture with wax or special furniture oil. The product can be painted with colorless furniture varnishes, which will not hide the natural color and texture. To create the effect of antiquity, stain will come to the rescue. In the future, you can keep the tabletop in good condition with the help of furniture wax; when used, all small cracks are filled and all defects are erased. It is important to note that in order for the furniture panel not to deform, it must be treated with wax or varnish on all sides.
Blank gluing technology
To minimize warping during drying, we select and lay next to each other boards with an optimally similar arrangement of annual rings. We mark them in any noticeable way, for example, by drawing a figure. Then, this will help you not waste time searching for the required lamella (unjointed workpiece). The ends of the workpieces must be smoothed before gluing.
Further procedure:
- Place the lamellas in a pack, coat the ends with glue (blanks placed in a plastic bag stick together more slowly).
- We tighten the glued wood with large clamps. You can use a clamp (a device assembled from scraps of blanks). The tightening moment is achieved by wedges driven between the stop and the end of the lamella. Or clamp boards between metal shelving brackets. The principle is the same - adhesion along the edges is made using wooden blocks and wedges.
- Thorough drying of the woven fabric. To make the surface even and smooth, plan the shield, sand it and remove excess glue.
Rice. 4. Slat joining
Rice. 5. Connecting wooden elements
It is permissible to use different methods of connecting lamellas. A shield made without glue can provide a powerful interface. To understand this, explore the options illustrated below.
Rice. 6. Furniture panels
Manufacturing examples
To make a table, you will need some tools. Their set depends on the model of the product and the type of furniture panel. In some cases, a hand tool (hacksaw, screwdriver, sandpaper) will be sufficient; in others, you cannot do without electrical woodworking devices.
The same applies to fasteners. Some models involve the use of confirmations, self-tapping screws and furniture ties, while others are assembled using glue and wooden dowels.
People who are well acquainted with carpentry hardly need to be told about the secrets of designing and manufacturing wooden furniture. Therefore, we chose simpler models that even a beginner can do.
Table with four legs
This is a very simple but versatile model.
We make our own kitchen table
Such a table can be either a dining table or a work table, easily fitting into the interior of a kitchen, children's room or office. To make it, you will need one furniture panel for the tabletop, four small-section bars and four supports, which can be used as ordinary planed timber, metal furniture legs or carved wooden balusters for stairs. The choice of supports depends on the purpose of the table and its style.
You also need to stock up on several types of sandpaper of different grain sizes, fasteners and compositions for decorative finishing.
Everything you need to make a table
Advice. A special oil can best preserve the natural beauty of wood and the pleasant sensations from touching natural material. Unlike varnishes and impregnations, it does not contain harmful volatile substances.
Step 1. Cut out a tabletop of the required size from a furniture panel. This can be done with a regular hacksaw or jigsaw, but it is better to use a circular saw and cut along the guide so that the end is even.
Future countertop
Cutting off the required size
Step 2. If the thickness of the tabletop is insufficient and its large area, reinforcement is necessary in the form of bars with a cross-section of 40x40 mm screwed around the perimeter. We measure them to the size of the sides of the table and file the ends at 45 degrees using a miter box.
Preparing the bars
Cuts at 45 degrees
How to use a miter box
Step 3. We fasten the timber along the perimeter of the tabletop from the bottom side, using self-tapping screws or placing them on dowels with glue. To do this, drill out symmetrically located grooves in all parts to suit the diameter of the dowels, coat them with glue and connect the elements, tightening them with clamps while they dry.
The beam is attached to the tabletop with screws
Advice. If you reinforce the tabletop with blocks of the same wood, fit well and sand the joints, it will look thick and massive.
Step 4. Mark the fastenings for the legs on the back of the tabletop.
We recommend: Do-it-yourself fence made of brick and corrugated board with pillars: how to make and build
Trying on site
Step 5. Using a screwdriver or drill, drill holes for fasteners. In the case of metal legs, these are screw nuts. Beams and balusters can be secured using metal corners or using the blind hole method, driving self-tapping screws through the supports into the tabletop at an angle. And strengthen the fastening by screwing the legs to the reinforcement bars.
Fasteners
Drilling holes for fasteners
Screw-in nuts
Tightening the nut
Step 6. Install all four supports.
Installing the leg
Step 7. Turn the finished structure over and carefully sand the tabletop, gradually moving from coarse sandpaper to softer sandpaper. You can first chamfer the perimeter to round off sharp corners.
Sanding the table top
Step 8. Cover the product with the selected protective and decorative composition in several layers. Each layer should be allowed to absorb and dry, and before applying the next, remove any raised fluff with soft sandpaper. The same must be done with wooden legs.
The table needs to be varnished
Tabletop after varnishing
It’s not for nothing that we called this table model universal. Depending on the size and configuration of the supports and the shape of the tabletop, it can serve different purposes and suit different styles. For example, it can be adapted to a laptop workplace.
Adaptation of a tabletop for a workplace with a laptop
Such equipment requires free access of air for cooling, many additional gadgets with and without wires are connected to it, and it itself needs to be connected to the electrical network. And on the table, in addition to the laptop itself, there are often necessary things - a phone, a notepad, office supplies, etc.
If you slightly modernize the tabletop of an already assembled table, your workplace will always be in order, and working at it will be comfortable and pleasant. To do this, you need to mark the surface of the tabletop and use a router to make grooves and through holes in it.
Working functional table
No wires get in the way on this desk, pens and pencils don’t roll off to the floor, and your phone is always at hand without interfering with your work. There was even a place for a coffee cup, which is difficult to drop with an awkward movement, since it stands in a special recess.
Table with wide legs
Such minimal designs consist of only four parts: one tabletop, two side supports and one rear lintel. All of them are cut from furniture board.
Table with wide legs
Fastening can be done in different ways. The most basic one is using metal corners and self-tapping screws, the length of which should be less than the thickness of the shield. In this case, assembly takes literally a few minutes, but the appearance of the table leaves much to be desired.
Table assembly
A product assembled with the help of furniture euroscrews – confirmats – looks much more aesthetically pleasing. Holes are pre-drilled for them: through holes in one part and recessed in the end of the other. A hole is made under the head of the euroscrew, countersunk, to recess it into the array and close it with a plug.
Confirmat furniture
The most labor-intensive, but also the most inconspicuous method of assembly is with dowels. At the same time, for reliability, the holes for the dowels are filled with wood glue.
Connecting parts with dowels
The walls of the pencil cases located on the sides can also serve as supports for the desk. This is a more complex, but quite accessible design for independent implementation. The most important thing in it is to make an accurate drawing and not to miss when transferring the dimensions of the parts to the material. But the principles of assembly, processing and decorative finishing remain the same.
Desk with cabinets
If you decide to set your sights on a non-standard product of a complex configuration with shelves, add-ons and drawers, we advise you to first study the proposed video and watch the master at work.
Video – Desk
A table made from furniture board with your own hands will cost much less than similar solid wood furniture purchased in a store. At the same time, it will be exactly the way you intended it, bringing not only benefits, but also joy from the work done.
Timber is an excellent building material from which walls and partitions are erected and used as support beams and columns. It is also used in furniture production: most often it is used to make frames for upholstered furniture, legs of tables and chairs. However, the same table can consist entirely of this material if operating conditions (street, bathhouse) or interior style (loft, retro) require it.
Computer desk
An example of furniture made from panel furniture, assembled with your own hands, can be a table for working at a computer. To install this multifunctional, compact product, you will need:
- 3 shields with dimensions 2000x600x18 mm;
- 3 – 2000x400x18 mm;
- 2 – 2000x200x18 mm;
- edged board 12x120 mm;
- plywood 6 mm;
- dowels.
Rice. 7. You can assemble a computer desk of any size from furniture panels. Choose the color, number of shelves and drawers at your discretion.
Rice. 8. Computer desk: assembly diagram with dimensions
First of all, we draw up drawings, take measurements, then move on to the actual production of the table:
- We “cut” a large shield onto the tabletop, side walls, bottom and top of the cabinet.
- We plan the corners of the sides of the upper outer part, giving them smoothness.
- In the sidewall that will fit tightly to the wall, we make a recess for the baseboard (5x5 mm).
- In the center of the side inside the vertical wall, to achieve the required rigidity, we install a transverse panel. We fix it with self-tapping screws.
- We file off sharp corners and make recesses for the baseboard in the niche that is intended for the system unit.
- We make a frame for shelves placed above the table.
- We attach the frame to the already connected parts.
- We “cut” the middle shield for the top shelf, the small shield will go to the middle partition connected to the tabletop.
- We make a shelf with a jumper from a small board and place it above the cabinet.
- We make pull-out drawers. We make the walls from edged boards, the bottom is made from a sheet of plywood. We connect everything with self-tapping screws.
- We install ball or roller mechanisms for drawers and countertop shelves.
- We cut out the table top for the keyboard from a 40 cm wide board. The scraps can be useful for decorating the outside of the drawers.
- The entire product is disassembled.
- The table elements are processed with a grinding machine.
- All components are coated with 2 layers of varnish.
- After it dries, the final assembly of the entire table is performed.
- We install handles and decorative elements.
The nuances of choosing a wooden countertop
So that all of the above problems arise as rarely as possible, and no repair work is required. When choosing a wooden work surface for the kitchen, you need to take into account a number of nuances.
Material.
If we talk about wood, the best options are oak, teak, walnut and beech and others. These breeds are strong and durable. But they are also the most expensive. If you choose other options, pine is the best. It contains resins that protect the wood from rotting.
Manufacturing method.
Solid countertops (solid), which were mentioned above, are not affordable for everyone. Therefore, in the selection process, people often give options to glued models. The latter, especially if they consist of different types of wood, can combine strength, visual appeal and positive features of all types of wood that compose them. Veneer is a very thin covering of natural wood. In the case of the tabletop, he covers it with a slab of MDF or inexpensive types of wood. Finally, laminated options based on chipboard or MDF are very popular. They have a wide variety of appearances.
In modern kitchens you can find countertops made of artificial or natural stone, glass, stainless steel, ceramic tiles, but most often solid wood or chipboard sheets lined with plastic are used as the main material. If you don’t know how to protect a capricious surface, there is a risk of its deformation and rapid destruction under the influence of moisture and other negative factors.
Following the basic rules for caring for raw materials will help avoid unpleasant consequences. In addition, there are many effective approaches that help improve the quality of the product and its resistance to external influences.
Advantages
In addition to the desire to make furniture on your own, you need to have a special tool and some skills.
If you have everything, then you can start making a table for a schoolchild. The advantages of making furniture items yourself include:
- saving money;
- the ability to make furniture of any design, size and shape;
- independent selection of consumables.
Care instructions
In order for a wooden tabletop to retain its appearance longer, it is necessary to properly care for it:
- The wood is wiped with mineral oil. It adds shine and prevents the growth of harmful microbes.
- Every day, remove any remaining water and food, first with a damp sponge, then wipe dry. To clean the countertop and wash dishes, use different sponges and rags.
- Hot dishes, iron containers with sharp edges at the bottom, heavy kitchen appliances are placed on stands.
Expert advice
When deciding on the choice of protective coating, be guided by the recommendations of professionals and your own aesthetic preferences.
For processing use:
- High-quality oils with Osmo and Saicos wax - practice has shown that material treated with this composition does not deform, does not crack, is not inferior in strength to varnish, and retains moisture for up to 30 minutes without penetrating into the pores of the wood.
- Polyurethane varnishes Akzonobel, Hesse Lignal, Sayerlack - when treated with such compositions, traces of wine, juice, and coloring products are removed by wiping with a damp cloth. They are characterized by high moisture resistance, resistance to temperature and mechanical influences.
Tools
Tools you will need :
- jigsaw;
- drill;
- hacksaw;
- chisel;
- screwdriver;
- hammer;
- drill.
If you are planning to make a complex model of a table, also prepare:
- milling machine;
- sander;
- clamps.
As for materials , you need to stock up on:
- lumber;
- bolts, nuts, washers;
- self-tapping screws;
- furniture glue;
- dowels;
- paint and brushes;
- liquid nails;
- varnish;
- tape measure;
- pencil;
- building level.