Articles
All photos from the article
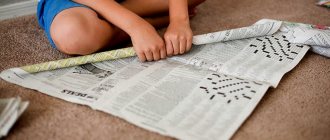
If you want your child to give you a little break from time to time, you can do this by giving him an activity that he will enjoy. For girls, for example, this could be a game of dolls, which can be expanded with additional items. You can assemble a doll's crib yourself using available material - plywood. In this article we will offer several options along with drawings, so in your free time you will only have to transfer them to a template and cut them out using a jigsaw.
We make a cradle and a bed for a doll with our own hands from plywood
Below you will learn how to make a cradle for a doll and a regular crib. The first differs from the second in the possibility of its swinging. There is nothing complicated in either the first or second case; you will need a minimum of materials and tools, as well as some patience. The price of crafts will be minimal, and much cheaper than in the store.
Pros of DIY
The advantages of making a dollhouse with your own hands from plywood include the following:
- A product made according to an individual drawing involves the use of its own dimensions, design and functionality. The main advantage of such a toy is its uniqueness and the ability to take into account the child’s wishes when arranging and decorating rooms, choosing layout and furniture, accessories and decor.
- The house can have the necessary and convenient size, which is selected taking into account the free space in the children's room and the wishes of the child. This can be a tabletop or floor-mounted design.
- You can involve the child in decorating and arranging the interior space even at the stage of drawing development - joint work brings the child together, allows him to reveal the creative potential of the child, teaches him to make independent decisions and bear responsibility for them.
- Working with plywood is a creative and fun process that the whole family can participate in.
If you make it yourself, you can give the house any appearance.
Design and decoration
If you were able to assemble a toy cabinet for your child, this does not mean that the child will like the masterpiece you created.
To do this, it must be beautifully decorated and supplemented with decorative elements. Even if you have a simple box, it should have a pleasant appearance. In this case, you can use the following registration methods:
- painting with a brush;
- pasting with wallpaper or photo wallpaper;
- decoupage with napkins;
- fabric covering;
- stickers, stencils.
Decorate your closet with your favorite characters
Decoration is the most enjoyable moment in work. Before you begin, talk to your child about what he would like to see in his room. You can make a cabinet as a small copy of the main piece of furniture or paste it to match the walls of the room. An original and interesting way is to apply stencils, which you can easily do together with your child.
Don’t forget about the braid, it always looks good along the edge of the product. Various satin ribbons give the product a truly childish, attractive look. Also, beads, sparkles, decorations and rhinestones can visually embellish children's furniture. You can use materials that you have at home, or you can purchase decorations at the store. Where there are a great many of them now.
If you know how to make a wardrobe from various boxes, you can always surprise your child. In addition, this is a great way to save the family budget, because buying such furniture now costs a pretty penny. And spending time with your child will only be beneficial. Don't doubt yourself, take the materials and create!
Advantages of plywood
Any materials can be used to make a dollhouse yourself, but plywood is used more often, as it has a number of advantages:
- A whole category of toys for children are made of wood, in particular plywood, due to its pleasant to the touch, warm surface.
- The light weight of the material allows you to create large structures that even a child can move from place to place.
- Plywood is a durable material, so structures made from it are reliable and durable.
- The material is affordable, which allows you to make a toy no worse than the one sold in the store, but for much less money.
- Working with plywood is easy, it is easy to process and does not require the use of special tools or professional skills.
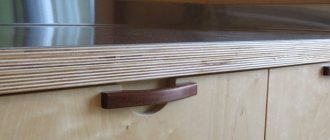
- After assembly, the house can be painted or left as is, covered with transparent varnish - the surface of the plywood is smooth, with a pleasant natural pattern and shade.
Plywood has an attractive appearance and natural shade
Note! E0 grade plywood is an environmentally friendly and safe material. This type of material is used in the manufacture of goods for children.
Preparatory work
At the first stage, you will need to decide on the dimensions of the structure. To do this, you should take into account the size of the doll the child is playing with - the toy should fit freely at full height with a margin of a few centimeters to the ceiling. There should also be enough space for arranging toy furniture - a crib, a table with chairs, kitchen furniture.
Houses for Barbie
The number of floors in the house depends on the size of the toys and the height of the child. If the figures do not exceed 20 cm in height, then the house can have up to 3 floors. If the structure is assembled for a standard Barbie doll, then it will not be possible to make more than 2 floors - then it is better to arrange the rooms horizontally.
Floor-mounted 3-storey house for playing with small figures
Having decided on the concept, you can begin to develop the project in more detail by drawing a design drawing to scale on a piece of paper.
Project details
Drawing
The drawing of the details of the house must be done to scale - you can draw it on a sheet of paper or in a special computer program. This will allow you to reflect the dimensions of the product, the number and sizes of parts, and determine the methods and locations of fastenings. Also, at the stage of creating the project, you should decide on the internal layout, shape and design of the house. This stage of preparatory work should not be skipped, as it allows you to determine the required amount of material and the sequence of assembly of the product.
Basic elements of a dollhouse
Note! To make a house, you can use a standard drawing. It is worth remembering that when changing (increasing, decreasing) one size, a proportional change in the remaining sizes follows.
When developing a drawing yourself, you will need to consider the following:
- The shape of the rear wall is a rectangle or pentagon, which allows you to make a gable roof.
- To make the assembly process easier, the base is made slightly wider than the space inside.
- The ceilings of the upper floors should have smaller dimensions than those at the base.
- The main structural elements also include sidewalls, interior partitions and roof parts.
Sketch diagram of the house
How to decide on sizes
The dolls, their houses and furnishings are smaller copies of us and our homes. And the most reliable way to make doll furniture with your own hands and not make a mistake is to measure real objects, reduce them several times, and then work with the obtained values.
Furniture for dolls - copies of our furniture
How much to reduce the actual dimensions depends on how small or large the doll is, because they range from 7 cm to 60 cm or even higher. Accordingly, they need furniture of different sizes. To determine the number by which the actual dimensions should be divided, divide the average human height in centimeters (170 cm) by the height of the doll. Let's get some number. This is how you will need to divide the dimensions of real furniture.
For example, the height of the doll is 15 cm. We calculate: 170 cm / 15 cm = 11.3. It is by this number that we divide all the parameters of “human” furniture. It is also worth saying that 14-15 cm is the most popular size among the doll population. Therefore, most of the finished furniture is made in a ratio of 1:12. We can also use the existing dimensions, at least so that we can navigate the scale of the required parts and the amount of materials.
Approximate dimensions of furniture for doll children
So, the most common doll sizes are:
- male doll 150 mm;
- female doll - 140 mm;
- child doll - 75-100 mm;
- toy baby - 65-75 mm.
If you need furniture for dolls of similar sizes, its parameters will be as follows:
- Bed: double – 160*130 mm;
- single - 160*75 mm;
If the toys you have are slightly larger/smaller, you don’t have to adjust the sizes. If the difference is large, you will have to increase or decrease (or you can calculate it yourself).
Tools and material
Making a plywood house is carried out in several stages. Particular attention should be paid to acquiring the necessary tools and materials.
List of materials and tools:
- Plywood sheets, the number of which is calculated in accordance with the drawing, taking into account the size and number of parts. The resulting value is rounded up. On average, it takes 3 sheets of plywood to make a dollhouse.
- The roof of the house is made of plywood, corrugated or regular cardboard.
- To ensure strong fixation of plywood parts, use quick-drying wood glue.
- For temporary and additional fixation of parts, you can use mounting tape.
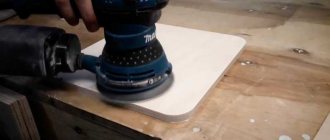
- Sandpaper is used to sand parts. Particular attention should be paid to the ends of the elements.
- The parts are cut using an electric jigsaw.
- The parts are fixed when assembling the house using self-tapping screws.
- At the stage of preparing the material for cutting, you will need a ruler, tape measure, and pencil.
Necessary tools
After assembling the house, it needs to be decorated. To do this, use scraps and other remnants of finishing materials: wallpaper, film, colored paper, pieces of linoleum, fabric, felt, laminate. Window openings are filled with transparent plastic or plexiglass.
What do you need to know when working with plywood?
Children's furniture should first of all be safe for play. When cut, plywood forms many sharp burrs on the edges.
To avoid injuries and splinters on your child’s fingers, be sure to sand all edges before assembling the product. This measure allows you to eliminate hangnails and make toys safe.
When making doll furniture, you can do it differently: transfer the patterns of the product parts onto plywood and trace all the contours with a sharp knife.
Sawing after this leaves significantly less burrs on the edges, but final sanding with sandpaper still does not exclude it. Even the edges of fiberboard parts become neater and more attractive after sanding.
The joining of parts in the manufacture of doll furniture is done using glue. Cleaning the contacting surfaces is a mandatory step in this case as well. Apply a thin layer of glue to parts of the product, connect and press the parts together, then wait until dry under a load.
To make children's furniture with your own hands you will need:
- plywood or fiberboard up to 5-6 mm thick;
- a jigsaw and a set of files for it;
- glue “Moment-Crystal” or similar;
- pencil, ruler;
- sandpaper with medium and fine grain;
- scraps of fabric for upholstery, acrylic paints and varnish;
- decorative elements as desired.
Related article: Eyes for DIY crafts
Small workshops on making pieces of furniture for dolls will help you master this type of home crafts and independently create an environment for playing in a dollhouse.
Step-by-step instructions for making and assembling a plywood house
The sequence of making a dollhouse from plywood is as follows.
Table 1. Making a dollhouse
| Illustration | Description |
| In accordance with the drawing, the dimensions of the parts to be cut are applied to the surface of the plywood. |
| Fragments of large size and simple shape are cut out on a machine. |
| In accordance with the drawing, the required number of floors is cut out. |
| To cut out smaller parts, use a jigsaw |
| The junction of two roof elements (slopes) on one side is taped with tape. |
| The parts are turned over and the ends are coated with glue at the points of contact. The parts are pressed and installed in the required position. |
| Glue the pediment. |
| A jigsaw is used to make window and door openings. |
| To insert a jigsaw file and start cutting out the window opening, first drill a small hole. |
| You will have to drill a hole on all sides of the window opening. |
| The inside of window and door openings is sanded using sandpaper. |
| For large parts, use a grinding machine. |
| Holes for self-tapping screws are drilled using a countersink drill so that the screw head is subsequently recessed into the solid part. |
| The parts are painted in the selected colors. |
| The house is assembled using ordinary self-tapping screws, the heads of which are subsequently painted to match the color of the part. |
Note! The method of fastening plywood parts depends on its thickness and the size of the elements. When the material is thin and the house itself is not large, the elements can be fixed using wood glue or using special grooves.
Assembling a small house
Video - How to make a plywood dollhouse
Making a beautiful house and furniture for Barbie dolls
We decided as a family to make a house for Barbie. The purchased ones all looked the same, but I wanted it to be special. My husband made the house himself, and the children and I made the furniture and decor. They started making it before I decided to write a master class, so the first stages, unfortunately, are not captured in the photo. But I will attach diagrams and drawings according to which this house can be repeated. This is the first work of this kind for us, so please do not judge harshly. And although such an experiment is very different from my main activity, why not share it with you. Moreover, under the auspices of a wonderful master class competition. So, let's go! The beautiful Princess Merida will demonstrate to us all stages of the work.
I will not list here all the materials that we will need, since there are a great many of them. I can say that anything can be useful in such a matter. Therefore, we began to collect suitable jars, boxes, and decorations in advance. Many materials are interchangeable. The main thing is not to stop experimenting, trying, using your imagination to the maximum. This master class contains ideas taken from the Internet, for example, hangers made from paper clips. But basically, everything was invented by our joint family mind. White, turquoise and pastel lemon were chosen as the main design colors. We were all tired of the pink Barbie colors for a long time, and we wanted the house to be less toy-like and more like a real one.
In the photograph, the husband tried to schematically depict the layout of the house. At the top are the details of the house, and at the bottom is how they should be positioned. All dimensions are given in centimeters. The designations are deciphered as follows:
FLOOR1, FLOOR2, FLOOR3 - vertical partitions on floors;
L1, L2 - left outer walls (1 - first floor, 2, respectively, second);
P1, P2 - right outer walls;
LV1, LV2, PV1, PV2 - left and right internal walls;
FRONT3 - facade wall of the roof;
LF2 - left front wall of the balcony.
To make the house, two sheets of plywood 0.8 cm wide were purchased. You will also need wooden blocks with a square cross-section of 30x40 mm. We cut out the parts from plywood, thoroughly sand all the cuts until they are absolutely smooth. We assemble the house using blocks. We drill holes at the joints and screw the plywood to the bars with wood screws. I think that men will not have any difficulties with assembly.
This is what the house looks like after assembly. We paint it in the color we need and wait until it dries completely.
While the house is drying, we will make paintings. Cut out bright pictures and glue them onto wood-colored cardboard. We used thick scrapbooking paper. The top was covered with transparent tape to create the illusion that our paintings were framed under glass.
We make stairs. The bottom one will be ordinary, made of plywood. Wooden corner slats are glued to it with wood glue (sold in any construction supermarket). And according to the design, our upper staircase should be spiral. For it we need a wooden stick with a round cross-section and small rectangles made from leftover plywood. We fasten these rectangles with special wood screws. To prevent the plywood from cracking, pre-drill small holes. We first paint both stairs, then attach them to the house.
We cut out 34x20 cm rectangles from fabric and string them on wire. We twist the wire around cute push pins.
We installed stairs, hung curtains, and glued pictures with double-sided tape. Now let's add some vegetation. From the carpet of “grass” we cut out our lawn. For us, it will go downstairs along the perimeter of the entire house; for this purpose, we have previously provided for an expansion in the lower tier. We will also decorate the roof with a lawn, where we will have a recreation area. We cut out decor from self-adhesive paper that we use to decorate the façade of the house. You can buy ready-made stickers; now there is a large selection.
This is what our house looks like at this stage. It's time to furnish it with furniture.
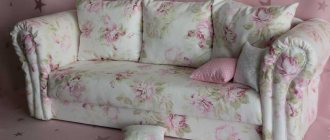
Making a sofa. First, we cut out the future frame of the sofa from cardboard. I made patterns with dimensions for the master class. We need four parts: one bottom (10x20 cm), one back wall (13x20 cm) and two sides (8.5x10 cm). I recommend making them from thick corrugated cardboard.
Now we cut out rectangles of the same size from foam rubber. In principle, you can replace it with padding polyester or other filling, but then you first need to sew the cover, and then fill it. We use foam rubber, so we work as follows. We cut out one back wall, two sides and three bottoms. I have foam rubber 1 cm high. If it is thicker, then you can make 2 bottoms accordingly. Glue it all to the corresponding cardboard parts.
Our upholstery is leatherette. But it can also be made from fabric. We actually sheathe or glue our blanks. I don't have a sewing machine, so sewing is kept to a minimum, and where there is, everything is hand stitched. The main part is simply covered with leatherette. When upholstering a sofa, you need to remember that the side with cardboard remains outside, and the side with foam looks inside.
When all the parts are upholstered, we glue them together with a reliable, strong adhesive. I used the transparent Moment gel.
Now we make a soft seat and back. To do this, from the same foam rubber we cut out two blanks for the seat and two for the backrest. In the photo on each side of them the dimensions are indicated in centimeters. From leatherette of the same or a different color, we cut out the future cover a couple of centimeters more around the entire perimeter. We decided to make it turquoise.
And with a regular basting stitch we go around the entire cover in a circle. Then we tighten it, giving the details natural folds of the skin. Using beads of a contrasting color, we make it look like a real sofa, stitching them right through all layers of foam rubber and leatherette. And glue the finished parts to the frame. Essentially, our sofa is ready. All that remains is to add a few elements.
We make a luxurious fringed blanket from an unnecessary scarf by simply cutting it to the required size. And we make the pillows from fabric. We have four pillows. For each you need two squares of fabric, which we simply sew on three sides, turn inside out, then stuff with padding polyester and sew on the last fourth. The photo shows a pattern for such a square (8x8 cm).
So, our sofa is decorated and completely ready for housewarming.
For the bedroom we need a bed. Again, we cut out two parts from thick cardboard: the bottom (26x18 cm) and the side (9x8x18 cm). From foam rubber we cut out two parts for the side and three for the bottom.
We glue them with cardboard patterns and cover them or cover them with fabric. I selected the fabric to match the leatherette from which the sofa was made. We make the legs for the bed from ordinary cardboard for creativity. We cut the squares, make cuts on them, as shown in the photo, twist, glue and bend the cut tops. We glue these tops to the bottom of the bed. I glued it with a glue gun to be safe. But later I removed the legs from the bed; the children liked the idea of a low bed better. Master-master
We also make a bedspread and pillows for the bed. Now our Merida has a cozy place to sleep.
Merida is a very hospitable young lady, and she just needs a place where she can have a good time with guests, drinking tea and enjoying cakes. And for this we make chairs and a table.
Here I present a chair pattern that was more difficult for me than the others; I had to tinker before it turned out just right. It is quite long, so I cut out the frames for the chairs from A1 cardboard.
After the base for the chair is cut out, we cover it with fabric. A very important point - when gluing the back, we remove the seams and hide them on the front side, and the seat on the back. We fold our fabric-covered base along the dotted lines and glue it together. As you can see, the front side of the chair back has become the inside.
The last step is to carefully glue the seat itself. We decorate our chairs with contrasting ribbons and fabric.
Now we make the table. I found a cylindrical part from an office chair that had fallen into disrepair, and I decided to use it. But you can make such a part from ordinary cardboard by simply cutting out a rectangle, twisting and gluing it. I covered the blank with white album paper.
We cut out the tabletop from thick cardboard and glue white paper on top. I did this so that the color of the cardboard would not show through under the tablecloth. Using a glue gun, I glued the tabletop to the table leg.
We cut out a tablecloth from the fabric and secure it with ribbon. I glued it in three places and hid these places under napkins in the color of the overall design. This is the table and chairs we got for the dining room.
Let's decorate our house with flowers. I bought ready-made ones, but you can make them yourself using wire, glue, semolina and paint. For the flowerpots I used corrugated designer cardboard. I cut out rectangles of different heights, rolled them into cylinders and glued them. I inserted the flowers into plasticine and decorated the top with sea pebbles.
I placed the flower arrangement in dried flowerpots and voila! We have three beautiful flower vases.
The children and I made rugs from wool.
I will only show the process in general terms, without going into details, since there are a great many wonderful detailed felting master classes on the Internet.
I made two large rugs, and the children worked on the small ones. A lot of fun for children, so I highly recommend it as one of the options for joint creativity
Merida has a huge number of outfits that must be stored somewhere. So let's move on to the closet. For it, I took a cardboard box of suitable size and cut off the two top flaps, leaving only the future doors we needed. I covered the inside with white paper. In general, of course, you can paste it to match the color of the wood, but the children wanted the inside of the cabinet to be white, so they decided on that.
We cut out shelves for the cabinet from thick cardboard, cover them with white paper and fasten them with a glue gun.
We make hangers from large paper clips.
I made the hanger beam from an ordinary cocktail tube. I covered the cabinet with self-adhesive tape in the color of wood and glued foil to the doors, imitating mirrors. Our closet is ready and stocked!
In her free time, Merida loves to enjoy funny cartoons, and we will create a TV for her.
We cut out two identical parts (15x12 cm) from thick cardboard and glue them together. We are preparing three patterns from black self-adhesive; you can use black tape instead of self-adhesive.
First we glue the sides, and then the entire plane of our plasma.
We made the leg from a regular cap from a black felt-tip pen. And from two matchboxes the base on which the TV will stand. We first glue this base together, then glue it with paper for reliability, and only then with self-adhesive tape. We attach the leg to the TV and then to the base using a glue gun. So that it stands well and does not fall over, we attach the leg to the base not from the top, but from the back, so that it reaches to the bottom and serves as an additional fixation.
Cut out the picture you like and glue it to our plasma. The TV is ready!
Now let's take care of the kitchen work surface. I used a box that was the right width and adjusted the height by simply cutting it. The height should be approximately up to the doll's hips or waist.
We cover the perimeter of the box with white self-adhesive tape, and cover the tabletop with another color that suits us. You can use a yogurt container for the sink. We cut a hole in the tabletop along its perimeter. Place the yogurt container there and glue it.
We cut the soap out of an ordinary candle, and the dishwashing sponge out of foam rubber. The cutting board was made of cardboard and covered with self-adhesive in the color of the wood. And the faucet was made from craft wire, simply pushing it through the tabletop and gluing it from the inside. This is the kitchen surface we ended up with.
It was decided that there should be a coffee table next to the sofa. For it we will need a plastic transparent lid for sour cream and an empty jar for soap bubbles. Glue the lid to the jar.
We decorate the table with a piece of leatherette on top, thereby hiding the place where the two main parts are glued together.
Let's take care of the furniture for the roof. First of all, Merida needs a sun lounger to enjoy a pleasant sunbathing. To do this, cut out two parts of the same size (7x27 cm). One is made of thick cardboard, the other is made of regular cardboard for crafts. Bend the thick cardboard along the dotted line. We glue the parts together so that the thin cardboard at the bend does not fit closely to the thick one, thereby fixing the bend of the chaise lounge. I tried to show this clearly in the second photo. We cut off the excess thin cardboard.
Our chaise longue will be made of bamboo, so we take sticks for canapés and cut them into 9 cm long bars. We sand each one well at the cut points with a file or sandpaper, so that in no case will there be any splinters in the future.
We glue each stick one by one to the chaise longue with craft glue or PVA glue. We make the legs from two clothespins, disassembled into parts. The rear legs are half-length clothespins, the front legs are half-length clothespins. A cocktail umbrella will decorate the corner of our chaise lounge. And from an ordinary kitchen towel or microfiber rag we cut out a beach towel for our beauty.
The sun lounger is ready, you can sunbathe
Since there was simply no room left for a bathroom in our house, the children asked to make a jacuzzi on the roof. A large ice cream container is ideal for these purposes. In our family this delicacy is held in special esteem, so without any doubt we purchased a 3-kilogram package. To simulate foam, we use regular box filler. This type is often placed in parcels when delivering fragile goods. You can also take foam balls, but there is a risk that you will have to collect them throughout the apartment. You can also use filler from old damaged toys, for example. You can also pour real water, but I stick to the rule that playing with water can be either in the bathroom or outside.
So, we thoroughly wash our container, dry it and then cover it on all sides with thick cardboard, leaving 1.5 cm of free space at the edges in order to later obtain rounded corners.
After the cardboard is securely glued to the container, we paste it around the entire perimeter with white paper, carefully rounding the corners. Then we apply self-adhesive in a color that suits us. We attach a tap made of craft wire to the corner of the container. To do this, make a small hole in the plastic of the container, insert a wire there and secure it with glue on the back side. We place one red and blue bead on the glue, which will be responsible for hot and cold water. We fill the container with “foam” and our Jacuzzi is completely ready! In it, Merida will be able to splash around with her friends.
It's time to arrange our furniture and celebrate the housewarming!
Despite the fact that this was our first time doing such a project, we succeeded, which means you can do it too! Immerse yourself in your imagination, experiment, look for interesting materials and solutions. Such a house is not just a doll attribute, it is something that brings the family together, pleases the eye, and gives happiness to children. The more seriously you take such an experiment, the longer it will serve and delight you and your kids.
The house can be made both very expensive and quite budget-friendly. It all depends on the materials that are used in it. You don't need any special knowledge or skills. The same carpet can not be felted from wool, but sewn from fabric, crocheted, cut from ready-made rugs, and so on. Many aspects can be simplified or, on the contrary, made even more elegant and interesting. The scope for creativity here is incredibly deep and diverse.
If you liked this master class, please click the orange “like” button on the right. I would be very grateful for your support in the competition. This is our first time participating in such an event and we are very excited.
Sincerely yours, Olga Lavro and family.
Features of product decoration
Paint the dollhouse with environmentally friendly paint, such as acrylic. You can get a bright, rich or soft, pastel shade by adding tinting paste to the base composition.
Material for painting plywood
After the house is assembled, you can begin to decorate the interior walls, floors, and arrange plywood doll furniture.
Internal filling of the dollhouse
To make the structure more realistic, it is electrified using autonomous lamps powered by batteries, which are secured with double-sided tape.
Autonomous lamps
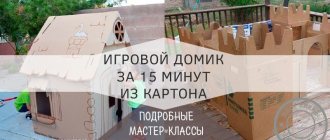
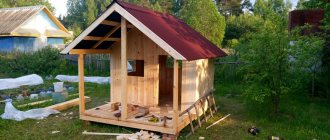
Plywood growth house
This design can be used both outdoors and in the apartment. The house is easy to assemble, literally within 5 minutes it can also be easily disassembled into convenient fragments that can be stored in the pantry.
On a hot day, such a house on the site will provide comfortable conditions for playing outdoors.
Play structure for home
In essence, it is an enlarged copy of a dollhouse. Therefore, its production takes place using the same technology.
Table 2. Step-by-step instructions
| Illustration | Description |
| First, a drawing is made with details: determining the dimensions, shapes, number of parts, fixation points. |
| Patterns of individual fragments are made on a scale of 1:1 and transferred to sheets of plywood. After this the material is cut out. |
| The parts are polished. |
| If necessary, parts are painted. |
| The house is being assembled. |
Particular attention should be paid to the interior decoration of the house. The design may provide for a bench and a folding table, or a shelf on the wall. Furniture can also be portable plastic or wooden.
When operating the house outdoors, it is necessary that the base be dry, so the structure is placed on a podium or dry grass
Plywood is often used in the furniture industry and for the manufacture of a large number of boxes of various sizes and other very beautiful and functional crafts. What plywood products can you make with your own hands? Read in the special article.
Inside the house, you can lay a soft mat or mattress on the floor, on which the child will feel comfortable.
General information
Nowadays, children's toys are not in short supply, so you can satisfy any child's wishes. However, the price of good toys, as a rule, is quite expensive, and cheap Chinese analogues are often unsafe for health. Therefore, independent needlework has obvious advantages.
In addition, a girl can be involved in this work.
This will allow her to develop such qualities as:
- perseverance;
- accuracy;
- love for handicrafts.
I must say that the process of making plywood products is very exciting, so it will certainly bring pleasure to both the child and his parents.
The photo shows an example of the interior of a dollhouse