Advantages of self-upholstery
For a novice home craftsman, reupholstering kitchen corners is not difficult. Simple design, availability of materials, simple manipulations simplify the process. Advantages of independent work:
- saving money without losing quality;
- acquiring a new skill (after wear and tear, restoration will be needed again);
- You can carry out repairs at any time;
- the opportunity to choose the materials yourself.
Companies offer calling a specialist to your home, taking measurements or removing furniture for subsequent restoration. All this is not cheap, and it takes a lot of time. Therefore, independence is more appropriate here.
A high-quality result cannot be achieved without disassembly, so you will have to spend time disassembling the structure and removing elements. This will allow you to change the coating without damaging other surfaces.
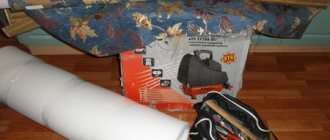
The owner independently assesses the condition of the structure. To strengthen it you will need fittings and suitable fasteners. To update the appearance of wooden panels, you will have to resort to using paint and varnish. To facilitate the process, tools and materials are prepared in advance.
Saving money without losing quality
Learning a new skill
You can make repairs at any time
Possibility to choose your own materials
Decoration with rattan inserts
The principle is the same as with ceramic tiles. Rattan inserts will look appropriate with ethno- and eco-style. Rattan copes well with moisture, which is why it is well suited for the kitchen. It can be used to replace glass inserts along with large-scale restoration of facades. Rattan inserts can be glued on top of blind cabinets. The variety of weaves and the presence of several shades will allow you to choose the appropriate insert option.
Working with rattan is easy:
- a fragment of the desired shape and size is cut out; you can use pruning shears or metal scissors;
- the segment can be attached to the facade with a stapler;
- Wooden planks pre-treated with an antiseptic are installed around the perimeter of the insert. You can use glue;
- The main thing with rattan is not to overdo it - small inserts on the largest cabinets will be enough to add the necessary notes to the interior.
Selection of materials
Restoration of kitchen corners requires a careful approach to the choice of material, taking into account operating conditions. Coloring, unusual texture, original design of the canvas are less important than wear resistance and quality. The material is chosen so that you don’t have to reupholster it every year, and the appearance is preserved as long as possible.
| Type of material | Description | pros | Minuses |
| Leather | It is better not to choose genuine leather for self-repair. There is a risk of spoiling the material. It is worth giving preference to artificial. | Durability, spectacular appearance. Wide range of colors, shades, ease of care. | Even artificial leather can be faked, and such material has a much shorter service life. |
| Tapestry | Ideal for frequent use. | Relatively inexpensive material, long service life. Easy to care for using soap solutions. | It becomes unusable after greasy stains appear. Fades with prolonged exposure to direct sunlight. |
| Chenille | Popular material for restoration. | Democratic price. Pleasant to the touch surface. This upholstery is tear-resistant, does not fade, and does not absorb odors. | A wide range is presented only in large cities. In small ones the choice is limited. |
| Flock | Non-absorbent fabric. Suitable for those who decided to upholster furniture themselves for the first time. | The material is resistant to fading and stains. | Short service life: the textured pattern quickly peels off from the surface. |
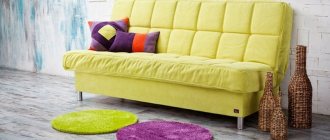
When choosing material for upholstery, preference should be given to non-marking colors. High-quality fabric is easy to clean; a budget option is more difficult to get rid of stains. It is better to take measurements based on the dimensions of the removed upholstery. If the kitchen is made in the same style, then the material must match in color and texture. The use of contrasting shades for backs and seats is popular. In this case, the corner will become a fashionable accent in the kitchen.
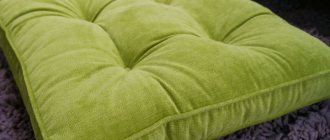
The upholstery of kitchen corners suffers from frequent use, and the fillings lose their elasticity. Sheets of foam rubber are placed inside. In order not to make a mistake with the size, add a centimeter to the measurements on each side.
Leather
Tapestry
Chenille
Flock
Foam rubber
Decoration with ceramic tiles
After renovation, almost everyone has leftover tiles. You don’t need a lot of material for this method, so even buying new tiles won’t break your budget. Naturally, not all facades are tiled. A fragment with a beautiful pattern can be glued in the center. This can be one tile or four smaller tiles laid out in a square or diamond shape. You can lay out the contours of the cabinets with small tiles. Often such decoration is used to decorate the lower or upper edge of the set. The image on the tiles should match the overall style of the kitchen.
The operating principle is as follows:
- It is better to remove the facades, dismantle the fittings;
- At a minimum, the surface must be washed and degreased with an alcohol-containing composition. If desired, the facade can be painted, following the tips described above;
- Place the tiles on the surface in advance, determine the ideal place for them, it is better to carefully trace them with a pencil;
- Prepare tile adhesive, apply it to the facade and start gluing the tiles. The principle is almost no different from the usual installation of tiles, only the glue will be needed so that it can hold the tiles on a wooden (or other) facade;
- when everything is dry, you can frame the tiles with molding to make the decor look complete.
Required Tools
The master will need the following tools:
- hammer;
- drill-driver;
- mites;
- spanners;
- stationery knife;
- glue;
- stapler;
- anti-stapler;
- scissors;
- marking tool.
All of the above is a minimum set. If the design is too complex, then additional tools will be needed. The consumables used are staples, glue, chalk, and furniture nails. If the condition of the furniture is completely deplorable, then you will need suitable fasteners, a jigsaw, sandpaper, and a pry bar. A screwdriver and wrenches will help you disassemble the structure. An anti-stapler and a knife are useful for removing upholstery.
The filler is not always easy to remove. If the manufacturer glued foam rubber, you will have to remove it with a knife and then clean the surface. High-quality glue will allow you to glue the upholstery (a special one is used), and a stapler will allow you to secure the fabric (furniture nails will also work). A knife is recommended for cutting material, and scissors and chalk are recommended for cutting.
Glass replacement
As a rule, it is enough to simply wash glass inserts in facades well to return them to their original ideal appearance. But what if you want something new? You can replace the existing transparent glasses with frosted or colored ones, then the kitchen will noticeably change. True, the glass will have to be made to order, and not everyone can handle the replacement itself.
A more budget-friendly option is to buy self-adhesive film. With its help, you can give the glass the desired shade without depriving them of transparency. It will help create a matte effect or imitate a real stained glass window. Anyone who knows how to use a tape measure or measuring tape, scissors and is able to carefully apply the film can definitely cope with gluing the film.
There is also an old, ancient method that involves applying a mixture of chalk powder and silicate glue to the glass. This material is applied to the glass in two layers, after which they become matte.
Stages of work
Do-it-yourself reupholstery of a kitchen corner consists of the following steps:
- design analysis;
- removing old upholstery;
- removing the filler;
- taking measurements and developing patterns;
- sewing cushion covers;
- strengthening the new filler;
- securing new upholstery;
- decoration.
If the condition of the corner is unsatisfactory, then the replacement of drawers, panels and restoration of wooden parts will be added to the stages of work. Additionally, you may need to purchase and install new fittings and strengthen structural elements (if they are loose). Poor quality material wears out more over time, creating an additional problem - repairing weak bolts. Broken sockets are expanded with a drill, dowels are inserted (they are pre-coated with PVA). After the glue has completely dried, you can continue assembling the structure. Self-tapping screws must be used for fastening.
Removing the upholstery
Step-by-step instructions will help you reupholster your kitchen corner properly. An anti-stapler will get rid of staples. It is better not to use a knife for such a procedure, otherwise fasteners may remain in the wooden panel. To remove them, you will need pliers or pliers.
The upholstery is followed by removing the filling. Manufacturers often glue foam rubber to the base. A sharp knife will help to gradually scrape the surface, which must then be carefully removed. The remaining parts of the foam are also removed.
The entire process of removing upholstery, in the case where the design is the same as a non-separable sofa and the corner is completely covered with fabric, comes down to the following points:
- removing seats by removing hinged fasteners;
- backrest disassembly;
- separation of the box from the legs;
- checking parts for fastening and fittings;
- removing staples with an anti-stapler;
- getting rid of filler.
Removing the seats
Parsing the back
Separating the box from the legs
Checking fastening parts and fittings
Removing staples with an anti-stapler
Getting rid of filler
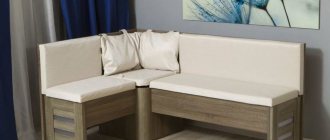
The process of removing the upholstery when the kitchen corner looks like a simple bench with a soft seat and back is divided into several stages:
- clear free space around;
- the frame is dismantled;
- the fabric is removed with an anti-stapler;
- check the corner itself for integrity;
- restore worn parts;
- remove old foam rubber;
- cut new foam rubber and glue it;
- the covers are pulled over the frame;
- fixed with staples on the reverse side without distortion;
- assemble the product.
The removed fabric will be used to clarify measurements, so its integrity must be preserved. Damaged or torn material will not allow you to determine the exact dimensions; for this reason, the structure itself is measured with an allowance for bending.
Disassemble the frame
Remove the upholstery
Restore worn parts
Replace old foam
Cover all parts with fabric
Assemble the product
Cutting fabric and filling
How to renew a kitchen corner after disassembling and removing the upholstery - more on this below. It will not be possible to achieve a high-quality result if you do not cut the fabric or cut the stuffing in advance. Previously removed material is used as a pattern. It is desirable that each element is sheathed in one piece. If this is not possible, then you will need to fasten the flaps together before laying out and tracing the pattern.
If the new upholstery is much denser than the old one, you need to add a couple of centimeters to the measurements. A flap that is too small will not allow enough tension in the fabric. As a result, the material will be damaged, and you will have to take measurements and cut it again.
The master must leave allowances that will be used for tucking and fastening. It is easier to work with the filler; it is simply cut along the contour of the piece of wood or plywood to which it will be glued. To keep the shape longer, add one centimeter to each side when cutting the filler. When fastening, you can use glue or staples (fixation in increments of up to 100 mm).
Cut fabric using old material
Trim the filler along the contour of the furniture
Frame repair
The design of most furniture quickly deteriorates. Before you reupholster the kitchen corner with your own hands, you need to inspect all the elements for wear. Accurate markings and careful, careful work without haste will help you avoid problems during subsequent assembly. One of the common problems is peeling coating on the legs.
Restoration of wooden parts takes place in several stages:
- cleansing from dirt and stains;
- removal of remaining coating;
- sanding;
- filling cracks and delaminations with glue;
- painting;
- fixing the result with varnish.
Any wooden element may require restoration, but a primer is needed before using varnish or paint. In the case when parts of the furniture are replaced with new ones, it is necessary to mark and drill holes in advance for subsequent fastening. Frame repair is a common need when reupholstering a kitchen corner. Elements that have fallen into disrepair are restored. If the wooden legs have lost their former luster or the coating has peeled off, then they are cleaned of external contaminants, sanded, varnished or painted. If cracks or gaps appear in the frame, they are filled with wood glue.
In case of significant damage, the part can be replaced entirely by cutting it out of chipboard. Accuracy and precise markings will make it easier to assemble furniture with a new element. In this case:
- legs are renewed;
- cracked plywood sheets are replaced;
- cracks and delaminations are filled with glue;
- Scratched boards are sanded.
To reliably glue the parts of the structure together, experts advise using clamps. They will press down on glue-coated surfaces without having to hold them with your hands. Clamps enhance the adhesive properties of the material and allow you to securely fasten parts.
Clean from dirt and stains
Remove remaining coating
Sand
Fill cracks and delaminations with glue
Paint and varnish
Reupholstery and assembly
Re-upholstery and assembly are carried out step by step:
- Attach the filler with glue or staples. The standard step is from 5 to 10 centimeters. You will often have to install fasteners on curved surfaces.
- The cut fabric is placed face down on the floor. The part is placed on top of it.
- On each side the material is fixed in the center. Gently tighten so that no distortion occurs.
- Fix in increments of 3 to 4 centimeters using staples.
If the design is complex or the padding is too thin, then we tighten the surface with a carriage tie. Furniture nails can be used as fasteners. This will increase the service life of the new coating.
Reassemble the kitchen corner in the reverse order of disassembly. Where the fasteners will subsequently be, all holes are drilled in advance. This will help avoid damage to the upholstery and filling. The duration and complexity of the work depend on the design. For example, when assembling a sofa from three components, the sequence of actions does not change, only the corner part is assembled first, and then the side parts.
Attach filler
Cover with fabric
Assemble the corner
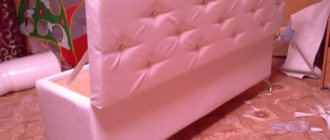
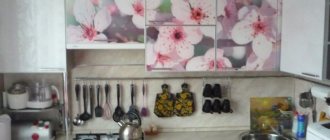
Use of chintz
Fabric decor is rarely used, so this is your chance to make your kitchen unique. You will need a piece of fabric with a suitable pattern, and then everything is simple:
- the beginning, as always, is to dismantle the facades and fittings;
- cabinets are measured, fabric is cut out and glued to pre-washed and degreased facades;
- facades are covered with colorless varnish in 5-7 layers, it will protect the fabric from moisture, grease and odors;
- All that remains is to return the fittings to their place, and you can purchase new, more suitable handles;
- An interesting effect can be achieved if you make a lampshade for a lamp from the same fabric, or sew covers for chairs.
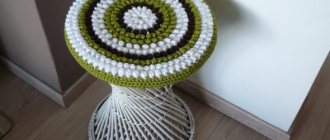
How to decorate
The updated kitchen corner can be left unchanged or decorated. Several popular decoration options:
- decoupage;
- pillows with contrasting covers;
- adding bright accents in the form of rollers or blankets;
- decoration with inserts made of genuine leather or suede;
- use of knitted capes;
- hand painted;
- fastening plywood ornaments.
For decoration, stencils are used that will help you apply designs of varying degrees of complexity onto wooden panels. The use of fringe or tassels is no longer relevant. A repeating pattern is applied to the arms, legs and small plain elements.
You should not use more than two ways to decorate a kitchen set. Too much decoration will ruin the appearance of the corner. It is better to opt for a more concise option.
The decoupage technique should be used with caution. For decoration, one color scheme and one type of pattern are used. If the kitchen already has furniture or appliances decorated in the same way, then it is better to abandon this idea. Otherwise, the appearance will be rustic and rustic.
Even a novice craftsman can reupholster a kitchen corner. The main thing is to strictly follow the step-by-step instructions, do the work carefully and without haste. Updated furniture will decorate the kitchen.
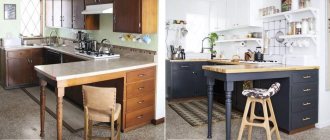
Replacement of facades
Many people think that facades covered with film look somehow too modest. This is all, of course, a matter of taste and personal preference, but it is difficult to radically change the kitchen using vinyl film, because glass inserts or panels will not be added to the doors. To make serious changes to the kitchen interior, it is better to act radically and completely replace the facades. Yes, it will be more expensive than with film, but still much cheaper than buying a new headset. This method is perfect if the furniture frame is still quite strong and durable.
It will be easiest for owners of modular furniture that was purchased relatively recently. Then you can buy facades of the required size and replace them yourself. But you’re not so lucky often, so you usually have to make custom-made facades. It is not at all necessary to change wooden doors to wooden ones, and chipboard to chipboard. The uniqueness of this restoration method lies precisely in the fact that the appearance of the set can be dramatically changed using completely different materials.
The cheapest option is facades made of chipboard or plastic. MDF and wood will cost more. You can choose fittings and decorations, for example, use glass inserts, but all this will be reflected in the price. Handy craftsmen, of course, can make all the facades themselves. If you have woodworking skills, then why not? But it’s much easier and faster to contact a specialized company that will produce facades for your set.
Repair of kitchen facades in Moscow
We recommend to residents of Moscow and the region, which has been operating for more than 20 years and specializes in the repair of kitchen facades. Experienced specialists can replace facades or repair existing ones by painting, enamel coating or gluing film. The company's services also include hardware repair and countertop replacement. All work is carried out on site, preliminary measurements are taken, the design and estimate are agreed upon, and the required fittings are manufactured from the desired material. All work is guaranteed. You can view detailed information and examples of work on the page https://remont-kuhni.com/service/remont-kuhonnyh-fasadov/.
An example of the work of specialists
What else is used to update kitchen facades?
The imagination of home craftsmen knows no bounds, and people's ingenuity has generated a lot of interesting, non-trivial ideas on how else to refine an old kitchen facade. The following materials are used for this:
- vinyl stickers, the range of which amazes even experienced designers. Plain, boring facades can be decorated with animal figures, world landmarks or inspiring phrases. It is very easy to glue and remove this decor;
- sea pebbles and mosaics are glued like ceramic tiles and allow you to create interesting decorative effects;
- wooden decor. There are ready-made kits for children's creativity, but if you have the skill, you can cut wooden figures yourself. All that remains is to open them with varnish and glue them to the facades. This decor looks best on wooden facades.