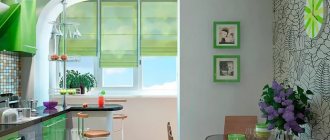
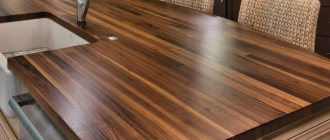
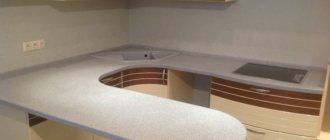
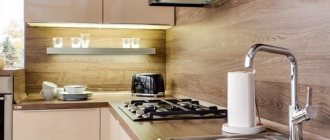
No kitchen can do without a countertop, as this detail of the kitchen interior performs a number of important functions:
- is a work surface for cutting food and preparing it;
- is an area for placing the necessary equipment and tools;
- sometimes a tabletop can be used instead of a table.
Restoration of a veneered kitchen table top
The kitchen countertop tends to wear out over time; various chips may appear, since it is subjected to numerous mechanical influences and loads for a long time.
Partial restoration of a burn on a kitchen countertop before and after
Therefore, it is restored, updated and repaired more often than other furniture components of the kitchen in order to restore its attractive appearance.
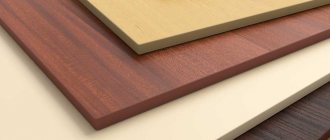
A chipboard tabletop has a low price, as well as a large selection of a wide variety of colors and textures
These elements of kitchen furniture are made from various materials: wood, chipboard, stone, plastic, glass.
hpl panels for chipboard cladding have a huge number of color options and attract buyers at an affordable price
The most common type are those made from chipboard, as they are inexpensive and can withstand high temperatures. As an option, there are separate matte and glossy ones, coated with plastic. For their production, laminated, melamine and laminated chipboard is used.
Laminated chipboard - the sheet is covered with paper impregnated with resin
For laminated chipboard, the same paper is used, but of greater thickness, impregnated with melamine resin and fixed under pressure
The tabletop can be damaged due to exposure to moisture and heat, excessive looseness and other damage appear on it. Many people wonder how to repair a kitchen countertop.
Chipboard covered with film is afraid of moisture; the ends and edges of the tabletop suffer from water ingress
Ceramic tiles or mosaics are often used to restore the worn surface of a kitchen table.
Very often, countertop repairs can be done independently without the use of special tools.
Restoration of a table top made of chipboard before and after
Holes
Repairing holes on the surface is quite easy, because most often they are not too deep.
They arise from sharp blows with a heavy object, for example, with a hammer when beating meat.
First you need to clean the hole with a file to make the wax stick better. Then properly degrease the top of the hole with solvent or alcohol.
A tabletop made of chipboard or solid wood can be restored with your own hands.
After the degreaser has dried, heat the wax until soft. To make the final stage of work easier, it is recommended to immediately select a filler that matches the color of the material.
We seal the hole with wax, leaving a little of this material on the surface of the countertop.
After hardening, use a plastic spatula to remove excess from the surface.
We polish the repair area well with a felt rag. If the texture of the wax after polishing matches the rest of the surface, we complete the work.
If additional coating with furniture varnish is necessary, we carry out such manipulations. Some time after the varnish has hardened (16-24 hours), we polish it again with felt.
The tabletop is covered with a layer of varnish to secure the result.
Tips for repairing damage and preventing it
Tabletop repairs are carried out as carefully as possible so that the restoration site does not stand out from the rest of the surface.
A few tips will help with this:
- When choosing how to cover a chipboard countertop, pay attention to the rest of the kitchen design. If the facades are glossy, choose a glossy varnish coating. For calmer kitchens, matte varnish is more suitable.
- If you couldn’t find a coloring composition that perfectly matches the color of the countertop, then a tint varnish will help hide the differences between the problem area and the rest of the surface.
- To prevent delamination of the work surface, immediately after purchase, cover its ends with silicone compound and plastic strips. Additionally, the entire surface is treated with varnish.
Scuffs
Scuffing is one of the easiest defects to eliminate. The depth of the abrasion is small, just rub the damaged area with a furniture felt-tip pen. You should not work it directly on the surface. It is recommended to first paint a soft cloth, such as silk, with it. And then use this rag to thoroughly treat the abraded area.
Before you begin repairing the product, you should conduct a small diagnostic and assess the nature of the damage.
In this simple way you can deal with shallow abrasions. If the size of the defect is too large, we paint the surface with a felt-tip pen of the appropriate shade, and then polish the resulting area with a piece of cloth.
Using this technique, it is possible to blur the boundaries of processing with new paint and smooth them out visually.
If it is necessary to restore a varnished surface, before painting, use fine sandpaper to thoroughly clean the area of wear, degrease it, and only then paint. After the furniture marker has dried, we coat the work area with varnish, which we also polish 16-18 hours after application.
To avoid new scratches, it is better to cover the surface with a protective compound or transparent film.
Restoration of wooden surfaces
No matter how carefully you handle the furniture, abrasions, scratches, and stains still appear. They are easy to eliminate. The main thing is to know how and with what.
- If the wooden surface has simply lost its shine, find a wood care product that contains orange oil. Take a clean sponge, dampen it slightly and microwave for 20-30 seconds. Spray the product from a spray bottle, then wipe with a hot sponge (hands should be wearing rubber gloves with a coating on the inside).
A hot sponge and orange oil will restore the shine of wooden furniture
Such transformations are possible using a marker, alcohol and wax.
Chips
Chips occur quite often, because in the kitchen there are a lot of dishes and cutlery with sharp edges.
To remove the chip you will need wax. Here, too, the main recommendation is to choose a material that matches the color of the countertop, because painting the wax base can be quite problematic.
Such damage to the edges of the tabletop will require even more labor-intensive repairs.
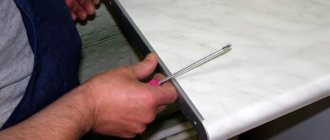
We cut it off or thoroughly sand the chipped area, melt the wax and apply it to the problem area. We wait for it to dry completely, polish it - and you’re done.
The molten composition is applied to the damaged area and given the desired shape.
If you need to tint the repair area or varnish it, we complete the restoration process with such work
After the wax has hardened, the excess is cut off and sanded.
Installation process
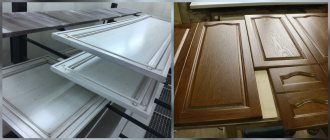
After ordering and manufacturing the components and doors, proceed with installation steps:
- Remove the old elements of the set and unscrew the front panel from each drawer;
- Remove the screws that are attached to the box. Use the old door as an example, mark on it the fastenings that will be on the new facade;
- Before installing the hinges, make a hole for the lock on the facade that you have marked;
- Now attach the hinges from the old doors into the hole;
- Hang the new doors, first attach the hinges at the top and then at the bottom;
- Change the front on drawers and cabinets;
- In the place where you made the marks, screw the screw onto the new facade. Check that you did everything correctly and check the strength of the fastenings.
Scratches
Removing scratches from a surface is as easy as removing abrasions, and maybe even easier. Before starting work, degrease the surface. If the scratch is shallow, it can be quite simply rubbed with a piece of wax (often there is no need to even melt it).
If the scratches are deep, you can use soft wax.
If the scratch depth is more than 3 mm, we perform preliminary cleaning of the surface from dirt for better adhesion of the wax.
Then we polish the work area with a piece of felt. If necessary, tint with furniture varnish. It is recommended to use ear sticks for small scratches; for larger scratches you will need a brush of the appropriate width.
Finally, the tabletop should be coated with colorless varnish.
Note! If there are several deep scratches nearby, it is recommended to completely remove the surface layer of the countertop in this area. This will allow you to avoid repeated damage to the integrity of the treatment area due to exposure to moisture - even with the most painstaking work, microcracks will certainly remain and grow over time.
Wax is applied to the scratch using a rubberized spatula.
Recommendations for extending the life of kitchen furniture
Prevention will help to avoid scratches, peeling and swelling of the material.
Preventive measures:
- Additional processing. Waterproof sealant is applied to the joints between the sink and the table, as well as between the table and the countertop.
- Aluminum strips protect the integrity of the coating from moisture. An edge is installed on each side of the furniture. This must be done immediately after purchasing the furniture.
- Silicone prevents the coating from swelling. When installing the countertop, treat the entire surface adjacent to the stove.
- Waterproof sealant. When replacing the sink, the product is applied to all open areas of the table.
- Special stands. Whatever the material of the countertop, taking care of the coating will help extend its service life. You should not place hot objects on the table; it is better to place fabric or foam material under them.
You should also not put foods on the table that can change its color. It is better to use a board for cutting.
This is interesting:
How to remove scratches on a refrigerator - what can you use to rub it off and paint over it?
What to do with a crack on the hob.
Features of joining kitchen countertops to each other.
Cracks
Cracks on the surface of the countertop are the most common reason for its complete replacement. As the material most susceptible to negative influences, the top layer will certainly become unusable after some time. And the thinner and cheaper the material of the top layer of the countertop, the sooner it will begin to become covered with cracks.
If even small cracks appear on the countertop, urgent repairs are required - otherwise the crack may grow larger, and then the panel will no longer be repairable.
Before you begin work on restoring the countertop from cracks, it is necessary, in principle, to assess the feasibility of such work.
A wide crack in the top layer across the entire tabletop makes repair impractical. Even the most painstaking work will inevitably crack again after a while.
Glue is taken into the syringe and the crack is filled along the entire length. If it is very thin, a needle is put on the syringe for more precise coating.
If it is shallow and small, we proceed according to the standard scenario.
We clean, degrease, apply wax, polish. Additional painting and varnishing as needed.
It is recommended to immediately apply wax of a suitable shade; due to the large size of the cracks, even professionals are not always able to restore the uniform color of the surface.
A day later (after the glue has dried), the restored area is painted over in a suitable tone.
Repair or change
Is it worth it to start repairing a laminated chipboard countertop yourself? To do this, you need to assess the degree of destruction. Sometimes it is not profitable to repair; it is easier to purchase a new laminated surface.
Often it is necessary to update only the surface layer by fixing a small fragment, and everything else can be left unchanged. Wood is one of the materials most suitable for repair; it is easy to extend and insert patches. In the case of laminated chipboard, everything is a little more complicated. Therefore, it is better to undertake repairs when the damage is small.
If the damage is small, then you can do your own restoration. Otherwise, you will need to replace a separate piece of the panel.
Helpful advice! It is problematic to repair built-in furniture and kitchen appliances. A good way to update is to replace just one wood countertop. Sometimes you have to change the entire facade, but this is cheaper than modernizing the entire kitchen.
It happens that the new surface contrasts with other planes of the kitchen unit, and it makes no sense to completely restore the original appearance of the kitchen. Then it is recommended to find a creative method, for example, cover the surface with a beautiful pattern, cover it with glass exactly to the size of the tabletop and seal the ends.
Wetting the tabletop
Soaking is another fairly common case of tabletop damage. The reason for its appearance is prolonged exposure to moisture, so most often the edges are subject to such defects.
If the wood chip layer is swollen under the laminated film, it will take some effort to correct the situation.
Soaking immediately attracts attention, so many people strive to eliminate this problem as quickly as possible.
Note! Fixing this problem often requires complete removal of the countertop.
First, you should thoroughly dry the countertop. Then mechanical cleaning of the soaking area from rotten parts is carried out.
The restored area is covered with bars and clamped with a clamp. The product is left in this position for 24 hours until the glue dries completely.
After this, furniture glue mixed with sawdust is placed into the resulting cavity; you can even use the remains from the previous step.
Note! Now it is important to press the glued layers as best as possible on the wet side.
Leave the tabletop under load for at least 24 hours. The more pressure the load puts on the repair site, the smoother and more uniform the result will be.
Treating the ends with water-repellent sealant or silicone compounds will help prevent swelling of the wood-based base under the laminated film.
After the glue has dried, install the tabletop in place. It is recommended to treat the open and unprotected side surfaces of the tabletop with silicone sealant; it will protect against repeated damage.
Cosmetic repairs: TOP 3 creative methods
The result of replacing the countertop and the look of the kitchen before and after.
They update the existing countertop in different ways - the final result here largely depends only on your imagination. However, there are three main options that are most popular.
Transformation of the kitchen after replacing the countertops and facades
In first place in terms of creativity and prevalence is tabletop painting using a stencil. This method allows you to implement any ideas, being also the least expensive in terms of money. The desired pattern can be found on the Internet, printed, then you only need to cut out the stencil itself (thick cardboard or thin plastic is used), and it’s time to get to work.
Using stencils you can bring almost any idea to life, and this method will not be expensive
In addition to the stencil, you will also need acrylic paints in the desired colors, a brush, and a foam sponge. Before you start painting, you need to prepare the surface: wash it, degrease it. Next, the tabletop is covered with the main color, then, using a template and a sponge, the selected pattern is applied. To ensure that the paint does not flow under the stencil and the pattern is clear, experts recommend applying a thin layer of paint to the sponge. If you doubt that you can apply the image accurately with a sponge, use a brush.
Stencil painting goes well with decoupage. This method is not recommended for use on the surface of a work area that is regularly used and cleaned with chemical detergents, but, for example, a dining table or a bar top in a studio apartment can be safely decorated this way.
You can make a creative thing with your own hands if you use the decoupage technique
The main thing is not to overdo it with the number of drawings, choose the right combination of pictures for decoupage and the painting pattern, otherwise it may turn out sloppy.
Tools and material costs will also be required here to a minimum. Ready-made decoupage pictures are sold in all art supply stores, but you can save money by cutting out pictures from napkins, magazines, and newspapers. The work is carried out in several stages:
- clean and degrease the surface;
- dilute PVA glue with water (ratio one to one), moisten the pictures with this solution;
- carefully glue the images to the tabletop, smooth them out to remove air bubbles from under them;
- After complete drying, the surface is varnished in three, or better yet, four layers (each layer must dry before applying the next).
Burns
Burn-through occurs when the surface is exposed to too hot dishes. Before you restore a kitchen countertop made of laminated chipboard, you need to get rid of the visible burn area. We work with sandpaper or a file, as necessary.
If the protective laminated layer is exposed to high temperatures, it will leave an unsightly burn mark.
And then we carry out the same algorithm as for a scratch - fill it with wax, sand it, paint it or varnish it.
By following our simple tips, you can easily, quickly, and most importantly, economically bring your countertop to its original form.
The best option is tabletops, the edging of which is made of aluminum tape.
Fighting stains
High quality acrylic countertops are not afraid of stains. Fresh stains from tea, coffee, wine, brightly colored vegetables and juices can be easily removed with warm water or a mild detergent. The stain can only become embedded in the surface if the top layer has previously been damaged. That is why such countertops should not be cleaned with abrasive materials, and hot dishes should always be placed on reliable stands.
Fresh stains from tea, coffee, wine, brightly colored vegetables and juices can be easily removed with warm water or a mild detergent.
Important! Chemically active substances - acetone, various solvents, products with a high concentration of chlorine - are best kept away from artificial stone.
It is easier to remove any stains in a timely manner. If you need to remove an old stain that has not been affected by a regular product (for example, dish gel), you can try applying a non-aggressive bleach.
Important! Light artificial stone surfaces can be easily cleaned with a melamine sponge. In its properties it resembles a pencil eraser. Removes splash marks, drips, fresh traces of rust. This is an inexpensive product that can be used every day.
Repairing damage to a plastic table
Quite a popular material used for the manufacture of kitchen furniture, which does not swell or get wet. However, mechanical stress on plastic furniture often leads to the formation of cracks or chips, especially in the kitchen.
To repair such a countertop, you will need a special adhesive composition intended for plastic products. This will allow the loose covering to be reattached.
If minor flaws appear on the table - cuts, scratches, then you can do without expensive glue; you can also use regular instant glue for these purposes.
Preventive measures
The glass work surface of the original design attracts with its presentability and allows you to emphasize the status and originality of the interior solution. To prevent various damage to the fragile base, it is necessary to use special care products, and use convenient stands and mats for dishes.
Wood and chipboard countertops must be treated with silicone and moisture-resistant sealants to eliminate the risk of deformation under the influence of environmental humidity or direct contact with hot or cold liquids. It is also important to ensure that wooden structures are protected from fire, given the flammability of the material.
