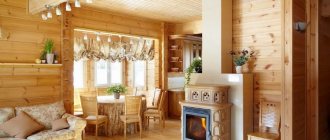
Wood is the most popular and valuable material with excellent consumer characteristics. Wood is used for construction, interior decoration, interior decoration, furniture and other various household items.
But wood also has weaknesses, such as a tendency to warp and deform. If the board has moved, how can it be corrected? In this article we will present four effective methods.
In order to straighten the board that has led, you need to understand why the wood warped.
The main causes of wood deformation
Changes in temperature and humidity
A natural material such as wood tends to absorb water. In a room with constant high humidity, wood will absorb water and swell. This will ultimately lead to deformation. The same thing happens from temperature changes in the room. Especially in combination with high humidity.
Improper drying
The largest percentage of deformation occurs during drying. It happens that they sell you under-dried boards, which then, when dried under natural conditions, can warp. The fact is that moisture from the wood does not evaporate evenly along its entire length. This creates tension in the wood fibers. This stress ultimately leads to deformation.
Or you bought good quality boards, they were delivered to your site. They lay in a damp garage, so the geometry of the material will be disrupted. It’s a shame to throw away such material, but it’s also impossible to use it for its intended purpose.
So what should we do? You can try to correct the deformation.
We offer 4 working methods for leveling the board.
The board can be leveled:
Learn more about each method.
Outdoor drying conditions
It is enough to lay the material under a special shelter, but without dense insulation on the sides. It is important to protect the board from precipitation, while leaving the possibility of direct contact with air.
A special lining is also provided on the bottom. How to properly dry boards outside if there is no foundation or screed? Do not allow direct contact of lumber with the ground. Experts recommend creating a gap of up to 30 cm, and the surface of the ground should be covered with roofing material or a sand and gravel cushion. The board can be laid on a special sheathing, rails or beams, but with insulation of the contact spots.
It is also necessary to take care of the condition of the ends, which are treated with paint, drying oil or protective oil for wood before drying. Dry material is also placed between the boards themselves to prevent the development of negative biological processes throughout the batch.
In terms of time, this drying process can last from several months to 7 years. Its disadvantage is the inability to achieve deep drying with a minimum humidity coefficient.
Leveling the board with a plane
The method is quite simple. Use a plane to remove wood from the uneven area until the surface is level. It should be borne in mind that the thickness of the board will decrease. Therefore, this method is suitable for correcting small curvatures.
Important: take a plane with a long sole.
This is necessary to avoid the appearance of waves on the board from the plane.
Crooked lumber: what to do?
Unfortunately, quite often you have to deal with curved lumber. In such cases, carpenters say that “the board went screw.” This material is difficult to use.
A slight curvature can be corrected. This requires 2 strong screw clamps. Place one clamp on a curved board that will serve as the bottom beam. Use the second clamp to secure the corner bracket. The corner bracket is pre-attached with self-tapping screws to the lower beam.
Straighten the crooked beam by pressing down on the clamp. When the beam is level, attach it with several screws to the part of the bracket that is located on the pole. To keep the timber in the proper position, use a long self-tapping screw.
Attach the screw clamp to the bottom beam. While pressing the clamp, bring the lower beam into the desired position. When the beam is completely level, screw in a long self-tapping screw. It must be long enough to fit at least halfway into the post.
The bottom beam is now secured and will remain in place.
Board "screw". How to fix.
High-quality cutting is a rarity at our sawmills. And when combined with proper storage, it’s simply fantastic. Therefore, screw boards come into our hands more often than expected.
But you have to build from something.
Screwing a screw onto a healthy board does not give any result. Torsional force is stronger than self-tapping screws
The solution was simple.
To begin with, I leveled and firmly secured one end of the beam, while the second turned out to be quite piled up.
Now I needed to straighten this edge. But it’s difficult to twist a thick beam with just your hands. I did the following:
Although then I thought about it and realized that it would have been easier to just tighten it with screws through the corner.
After googling a little, I found 2 more ways
What method do you use?
Yes, I once used a lever to straighten a 15 cm beam in the ceiling. The lever was in the form of a 2.5-meter 5x15 board, screwed onto plumbing screws. It crackled, but didn't break.
Will the timber-board straightened in this way remain under tension for the rest of its life? Or does the tension decrease over time?
That's right, nothing is going anywhere. The screws were torn out, and the corner would also be torn out.
I've heard such advice - they say, soak it for a day - and then it will straighten out. Well, it will straighten out for a while to avert your eyes, then it will dry out anyway and curl up in the construction site.
The only way to use screws is to let them run short.
Level and monolith with concrete... without boards....
That's right, nothing is going anywhere. The screws were torn out, and the corner would also be torn out.
Well, there are other fasteners, all sorts of wood grouse and studs.
I split my timber with pieces of plywood between the bridge sections in the ceiling.
Only not plywood, but the same board and all sorts of screws were used for the breeches. ;-))
I put the screws away for cutting and took them straight. The tension remains and the corner will tear off.
Will even such a corner really bend and tear off?
But here you can already relax)) you’ll tear up the crap)))
If you dry it in a restrained state, then it should not twist. I saw how they made armrests for chairs. The steamed workpiece was bent from a flat stick and dried. That's all the technology is. The chairs served for decades and did not get twisted.
Will even such a corner really bend and tear off?
Such a corner may not be torn off, but the beam will easily burst. You need to calculate how much it will cost to replace the beam with a normal one and the cost of all this fastening of corner pins, wood grouse, etc.
Straightening a valuable warped board. | Restoration
Painting restoration techniques. E.V.Kudryavtsev, M., 2002
Knowing the property of wood to bend under the influence of moisture, it should be used in combination with mechanical action. If the board has not been impregnated with any moisture-resistant substances and absorbs moisture, the situation is simpler. If the wood is not “prone to drink,” then some layer of it that inhibits moisture absorption will have to be removed by scraping and even planing, depending on how significant the obstacle is.
Aligning a warped painting with blades
When this is done (of course, these actions are permissible only after the paint layer has been strengthened, if it is in poor condition), the picture is placed on a flat, strong table face down, with some kind of fabric placed under it to protect the texture. Use cotton wool moistened with warm water to wipe the board generously so that after the water has been absorbed by the board, the surface remains moist. After this, even bars are laid and a load is placed on them (iron, weights, pieces of marble, etc.). The load should not be too heavy, otherwise it may have an excessively rapid effect and damage the work. Always remembering that “arcs are bent with patience and not suddenly,” one should not rush. As the load acts, moistening should be repeated.
You can also use this technique: cover the moistened area with a wet cloth, place the same weights and, as it releases moisture to the wood, resume wetting. The advantage of this technique is that the material gradually and constantly moistens the wood, but it is not so convenient to observe the condition of the board.
To straighten the board, a system of pressing with blades is sometimes used at various points on the board. Above the lying picture, at some distance from it, two or three wooden blocks attached to the table are placed. Wooden or cork pads and blades of the required size are placed between the picture board and the bars, which are lightly “beaten” with a hammer from time to time. The blades need to be installed in different parts of the board, both those that fit tightly to the table (so that they cannot rise and contribute to cracking the board) and those that are raised, those that need to be straightened.
A more mechanized device for fixing warped boards is called a “lattice clamp” (see picture).
It resembles an ordinary wooden harrow, in which, instead of teeth, wooden screws act in the bars, like our ordinary clamps. The entire structure is placed above the table and firmly fixed on it, forming, as it were, a common machine. This machine is very convenient to use, as it allows you to press in different places on the board placed under the grate. In this case, the pressure is applied very smoothly (the hand feels the screw) and at the same time the pressure force can be adjusted. In addition to straightening warped areas, this machine is an excellent press for duplicating boards in a number of other restoration works. The picture placed under the grate, as it straightens, is pressed more and more against the trunk until, finally, it “spreads out” on it.
Leveling out warpage is a rather complex operation, and therefore the most important thing is gradualism. You should not waste time on this - the main thing is a good result, and it can be achieved no earlier than in a few days (8-10 or more). After correcting the warping, the board under the same presses should dry and stabilize in a new state.
Source
Gender survey
At this stage, you will have to carry out not only a thorough inspection, but also measurement of irregularities. The wooden floor must meet the following requirements:
- the boards should not be damaged by rot or mold;
- cracks or gaps between elements should not be more than 5 cm (even if they are less than 5 cm, leveling with plywood will be required; other methods cannot be used);
- height differences do not exceed 1-2 cm.
Assessing gaps and height differences between boards
If these conditions are not met, then it will be almost impossible to repair and level the wooden floor without changing the boards. To choose an alignment option, you need to know the height difference. The following instruments are used for measurements:
- construction levels (laser, hydraulic, bubble);
- rule.
The simplest option is to attach a long strip or metal profile to the floor and measure the deviations with a ruler. You can also buy a bubble level at a hardware store to inspect a wooden floor yourself. It determines the slope of the board and costs between several thousand depending on the length of the body.
You can make a hydraulic level yourself. All you need here is a thin transparent tube and water. The disadvantage of such a device is that it is not very convenient to use. The most accurate way to measure a wood floor is with a laser level. This device is used by professional builders, its cost is high, and its use requires special skills. If you need to level the boards in a house or apartment yourself, there is no need for such precision.
Why does the board warp: the origin of the “propeller”
Wood is a natural material that reacts to external influences. The fibers dry out, swell, deform to the point of twisting, and shrink. And if the board dries unevenly, then the fibers along its entire length behave differently. And this leads to the fact that the wood, which is smooth after sawing, changes its shape, becomes deformed and is wrapped with a screw.
If you leave the board to dry without loading, the forces of nature will work in full force and deform the material. The closer to the core of the trunk the board was cut, the more powerful the twisting effect.
Another option for eliminating the defect is treatment with a steam generator and subsequent rectifying load. It will help if you have time to wait for the board to dry, but there is still no guarantee of success.
However, there are methods that can be applied already when installing deformed lumber.
Option two: pinch with a spacer
To straighten a screw board, you will need a couple of pieces of boards equal to the pitch of the rafter system. We place one segment where the corner of the curved beam is blocked, the second one is hammered in next, simultaneously correcting the defect, that is, leveling the wrong angle.
PHOTO: avatars.mds.yandex.net Quite reliable fixation, which does not even require any additional fasteners; everything works only due to tightly fitted parts. So these details should be measured especially carefully.
Option three: fix with a lever
This is also a kind of wedge installation, but you first use a lever to straighten the board. What could be a lever? Basically, any available material: a shovel handle, the same board, a piece of metal pipe. The main thing is that the material is suitable in length.
PHOTO: avatars.mds.yandex.net To level the board, it does not require much effort, but after leveling you need to fix it in the correct position, and for this you will need a corner (as in the first option) or a spacer (as in the second)
If during the construction process you find a lot of such deformed boards, it makes sense to build a convenient lever, for example from reinforcement, so that the correction process takes less time.
As you can see, the task is not impossible, and with some persistence you will achieve results. But in any case, you need to make sure that the seller does not slip defective boards, because situations where we are deceived at lumber depots are quite common.
And here’s another valuable video tutorial on how to fix a crooked board from a real master:
Source
The board is screwed, how to fix it. How to straighten a wooden board? Straightening a wooden board
*information is posted for informational purposes; to thank us, share the link to the page with your friends. You can send material interesting to our readers. We will be happy to answer all your questions and suggestions, as well as hear criticism and suggestions at
Very often in construction and renovation we are faced with the need to use various boards. Wood adds beauty and practicality to both interior and exterior decoration. However, not all of them are perfectly smooth during use, and manufacturers’ guarantees about this are not always justified. What to do and what to do in such cases? Is it possible to eliminate defects irrevocably, and how can this be achieved? We will discuss this today in our article.
Ways to combat curvature
So, if you are an expert in this field of knowledge and are not used to giving up under any circumstances, then do not be clouded in this case either. A simple plane will help you here, with which you can plan a dry board fixed in a stationary state. Pay attention to the length of the sole of such a tool, since a short plane will not be able to eliminate such a defect. Thus, you will get a completely flat edged board without much effort. If there are few boards, then a manual planer will help cope with this task.
If there is a mountain of materials in front of you, then use an electric planer, since the back end is more difficult here. This requires endurance and patience, and without special carpentry skills you will get by quite well.
Fix such a board and slowly remove the warped part of it. Thanks to the wide base of the plane, you will be able to feel the exit to a flat plane. It should be remembered that such a process will reduce the thickness of the boards. It is unlikely that it will be possible to make the material absolutely even, therefore, when laying the boards on the floor when installing it, try to do it closely, securing it with self-tapping screws. After this, sanding will consolidate the result. This is where a scraping machine will come in handy; you don’t have to buy it, but you can rent it, which will help you save on costs.
Causes of curvature
It should be noted that the result of any method of dealing with crooked boards depends on the cause of such a violation. If the floor was laid incorrectly or the curvature was the result of wet boards, then simple leveling will not bring long-lasting results. In addition, you will need to dismantle the cavity under the boards, dry it and set up a ventilation system, only then will leveling the boards make sense.
Thus, there are several ways out of the current situation and their result will be positive if you take a comprehensive approach to solving the issue. Good luck!
Before you start making wood products, you need to prepare the source material and, in particular, eliminate the curvature of the boards by straightening at least one edge. If the deflection of the board does not exceed 15 mm, then you can straighten the edge using a plane or woodworking machine, but if you come across a workpiece with a large curvature, use one of the suggested techniques.
1. A long board, the deflection of which is more than 15 mm, should be cut into 2-3 short ones. This will reduce the deflection of each workpiece and use a plane. The figure shows how from a long board with a deflection of 20 mm, you can get three workpieces with a deflection of 7 mm.
2. If for some reason it is impossible to cut the board into several parts, try using this method. Set the woodworking machine to a cutting depth of 1.5mm, then place the piece with the concave edge on the machine table and make several passes from one end of the board. With each pass, the length of the processed part of the board will increase. As the cut gets closer to the middle of the board, turn it with the other end and repeat this procedure. Both cuts should “meet” in the middle of the board. After such an operation, the curvature (deflection) of the edge will be less than 3 mm. Now use two full passes to completely level the edge. Start processing from the end of the board where the wood fibers are directed obliquely downwards away from the cutter. Make the last pass along the entire length of the board, reducing the removal amount to 1 mm. To avoid chipping and scuffing, the feed should be small.
The direction of the grain of the board in relation to the direction of rotation of the cutter
We remove material 1.5 mm at a time until the curvature of the board is reduced to 3 mm or less
3. If the board is too long for processing (planing) on the machine, or the curvature of the short board is very large, proceed as follows.
Using a straight edge or cord, mark a line as shown in the picture and saw off the concave part of the board along the line with a circular saw. Finish the edge using a plane in one pass. Tapping a line with a cord
It should be remembered that the wood of some tree species easily chips or tears. This often happens when working, for example, with maple boards with characteristic bird's eye curls, especially if the plane blades are not sharpened enough. In this case, reduce the feed to the minimum (2.5-5 cm/s) and remove chips of 1 mm or less. If you are eliminating a slight curvature of the board and it is difficult to determine the amount of material removed, you can use the following method. Draw a wavy line along the edge, then make one pass. The lines remaining on the edge will tell you about the need for further processing.
Place the board on the concrete surface. The room should be cool and dry. Place another piece of lumber parallel to the deformed part. It should be placed between two even boards of the same size.
In some cases, it is possible to lay lumber with so-called “mirror” deformation.
The structure is secured with clamps. The curved piece is laid with the deformation down. If the board is curved in an arc, then the protruding side turns upward.
Treat the wood with a steam cleaner and place a weight evenly on its surface. If you are straightening a long board, additional weights are placed at its ends. The result is checked after 3 days. If unsuccessful, the procedure is repeated.
Furniture panel: recommendations for storage and installation
Furniture board, regardless of the type of wood from which it is made, has a humidity of 10 ± 2%. Therefore, any wood before gluing into a furniture panel is dried. The furniture board you purchased is made of solid wood, in compliance with GOST 20850-84 and GOST 19414-90, dried in optimal conditions for this material. The moisture resistance of the adhesive joint has category D-3 (indoor use). Those who purchase and use furniture panels for the manufacture of stairs, furniture and other wooden products may encounter a number of problems if basic storage conditions are not met. This is deformation (warping) of the shield and cracking at the ends. Wood is a natural material that is susceptible to environmental influences. The main reason why problems may arise is changes in humidity during transportation and storage in rooms with high or, conversely, low humidity. Depending on air humidity, wood can gain or release moisture. This happens until you coat your stairs (or other products) with varnish or oil. Below are the basic requirements and recommendations for storing and installing furniture panels that must be followed:
1. All products must be packaged.
2. Do not unpack the furniture board immediately after delivery; it must “acclimatize” for a week at room temperature. It is especially necessary to adhere to this rule in winter, when the products are brought into a warm room from sub-zero temperatures during transportation, and problems will be inevitable if you immediately open the packaging.
3. Do not store furniture boards in rooms with high humidity, where “wet” repair work is being carried out, such as plaster, putty, or screeding.
4. The furniture board must be stored in a dry, ventilated room, stacking it horizontally on three or more transverse spacers. Two spacers must be placed at the edges of the canvas, and the rest in the middle.
After opening the package, treat the ends of the furniture panels with varnish, wax or oil. This procedure takes 5-10 minutes, but in the future it will save you from many problems. In winter, air humidity in heated rooms is very low, and usually no one bothers with purchasing and installing humidifiers. Almost all moisture release occurs through the ends of the furniture board (about 75%) and if the room is dry and hot, the board begins to crack at the edges. At the same time, one can often observe the fact that in the middle of the board the humidity is 10% (i.e. normal), and at the edges it is 5-6%, which certainly creates problems in the form of warping or cracking. The end processing procedure will avoid this. We recommend repeating this procedure in the same way after you have cut the furniture panel.
Installation rules. 1. Before installing the furniture panel, especially in winter, it is recommended to acclimatize the furniture panel in the room for a week. 2. The furniture panel is designed for installation in rooms with air temperatures from 10 to 30°C and relative humidity from 40 to 60%. 3. Do not leave furniture panels near heating appliances! Sharp fluctuations in ambient temperature can lead to the appearance of cracks and deformation of the furniture board. 4. Installation of a furniture panel in a room under construction or renovation can only be done if the room is completely ready; it must be dry. Both low humidity and high indoor temperatures should be avoided. We can summarize the above with one more recommendation: buy furniture board in advance to give the product time to acclimatize.
Straightening a wooden board
To straighten a wooden board, you need the following tools:
First of all, you need to secure the board motionless. After this, begin to carefully remove all surface defects from the wood. When choosing a plane, pay attention to the fact that the sole of the plane must be long. A planer with a short surface will in any case leave unevenness on the wood.
If there is not much lumber, you can get by with a hand plane; if you have a lot of wood, you will have to use an electric one. Its wide sole and comfortable design will almost independently level the surface of the board.
Please note that this treatment reduces the thickness of the lumber.
If wooden boards are intended for laying on the floor, then all defects on the front surface of the boards are eliminated before installation. Otherwise, in about a year the boards will completely dry out and become completely deformed.
If you start trying to sew crooked boards onto the floor, then in any case they need to be laid tightly board to board and additionally screwed together using self-tapping screws. In the case of such installation, the floor will in any case need to be carefully sanded with a parquet sander.
In order to save money, you can not purchase tools, but rent them.
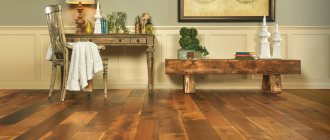
Wood is very popular for interior decoration, as it has a number of very useful properties. This material retains heat perfectly, does not emit any harmful substances and is an environmentally friendly natural material.
Now you can have lumber delivered directly to the construction site. But you need to take into account that such boards can fail, since they perfectly allow moisture to pass through. And when the board dries, it will deform in any case. Unfortunately, such cases occur everywhere, so you need to know what to do in this situation.
Leveling the walls of an old house
This work is carried out using metal corners 60 mm thick, and the length must correspond to the length of the opening. First you need to cut off some of the wood and prepare a place for the stand, and only then will you have to install the metal corner. By leveling the walls you can ensure:
- aesthetics;
- reliability;
- durability of the house.
Well, to ensure high anti-corrosion properties, the surface of the boards should be treated with a special compound
Thus, the alignment of curved block walls guarantees the quality, strength and safety of the building.
How to straighten crooked boards and whether they will become deformed again
Very often in construction and renovation we are faced with the need to use various boards. Wood adds beauty and practicality to both interior and exterior decoration. However, not all of them are perfectly smooth during use, and manufacturers’ guarantees about this are not always justified. What to do and what to do in such cases? Is it possible to eliminate defects irrevocably, and how can this be achieved? We will discuss this today in our article.
Ways to combat curvature
So, if you are an expert in this field of knowledge and are not used to giving up under any circumstances, then do not be clouded in this case either. A simple plane will help you here, with which you can plan a dry board fixed in a stationary state. Pay attention to the length of the sole of such a tool, since a short plane will not be able to eliminate such a defect. Thus, you will get a completely flat edged board without much effort. If there are few boards, then a manual planer will help cope with this task.
If there is a mountain of materials in front of you, then use an electric planer, since the back end is more difficult here. This requires endurance and patience, and without special carpentry skills you will get by quite well.
Fix such a board and slowly remove the warped part of it. Thanks to the wide base of the plane, you will be able to feel the exit to a flat plane. It should be remembered that such a process will reduce the thickness of the boards. It is unlikely that it will be possible to make the material absolutely even, therefore, when laying the boards on the floor when installing it, try to do it closely, securing it with self-tapping screws. After this, sanding will consolidate the result. This is where a scraping machine will come in handy; you don’t have to buy it, but you can rent it, which will help you save on costs.
The second option for correcting uneven board surfaces is to follow the simple laws of physics - the action of weight. Stack the boards using special spacers to prevent them from touching each other. Place heavy things on top, say barrels of water. All this should be placed in the barn, where the window will be open and the heat gun will be turned on. This method will help you save the thickness of the boards, but the effect of this procedure is not always justified.
Causes of curvature
It should be noted that the result of any method of dealing with crooked boards depends on the cause of such a violation. If the floor was laid incorrectly or the curvature was the result of wet boards, then simple leveling will not bring long-lasting results. In addition, you will need to dismantle the cavity under the boards, dry it and set up a ventilation system, only then will leveling the boards make sense.
Thus, there are several ways out of the current situation and their result will be positive if you take a comprehensive approach to solving the issue. Good luck!
1. Straightening a warped board.
24. Lattice clamp
Painting restoration techniques. E.V.Kudryavtsev, M. 2002
Painting
By the way *
Architecture
In Egypt (Cairo), the gigantic statue of Ramses II was damaged due to the high concentration of exhaust gases in the atmosphere. Over the past 32 years that the statue stood on the station square, it was damaged more than in the past three millennia, so it was decided to move it to an indoor pavilion. This is one of the illustrative examples of the impact of pollutants on historical and cultural monuments.
By the way *
Furniture
Let's look at the mistakes.
The first and most important mistake is that the material of the walls is not taken into account.
The second mistake is that you need to choose the smoothest block and preferably planed or at least calibrated on both sides.
The third mistake is that the plane for the sheathing is not aligned.
The fourth mistake is that you need to think about the design of internal and external corners in advance.
There are two popular ways of leveling bars - “using linings from scrap materials” and “using spacers”.
1. Straightening a warped board. | ARTconservation
The board intended for parquet must first be straightened. Knowing the property of wood to bend under the influence of moisture, it should be used in combination with mechanical action. If the board has not been impregnated with any moisture-resistant substances and absorbs moisture, the situation is simpler. If the wood is not “prone to drink,” then some layer of it that inhibits moisture absorption will have to be removed by scraping and even planing, depending on how significant the obstacle is.
23. Leveling a warped painting using blades 24. Lattice clamp
When this is done (of course, these actions are permissible only after the paint layer has been strengthened, if it is in poor condition), the picture is placed on a flat, strong table face down, with some kind of fabric placed under it to protect the texture. Use cotton wool moistened with warm water to wipe the board generously so that after the water has been absorbed by the board, the surface remains moist. After this, even bars are laid and a load is placed on them (iron, weights, pieces of marble, etc.). The load should not be too heavy, otherwise it may have an excessively rapid effect and damage the work. Always remembering that “arcs are bent with patience and not suddenly,” one should not rush. As the load acts, moistening should be repeated.
You can also use this technique: cover the moistened area with a wet cloth, place the same weights and, as it releases moisture to the wood, resume wetting. The advantage of this technique is that the material gradually and constantly moistens the wood, but it is not so convenient to observe the condition of the board.
To straighten the board, a system of pressing with blades is sometimes used at various points on the board. Above the lying picture, at some distance from it, two or three wooden blocks attached to the table are placed. Wooden or cork pads and blades of the required size are placed between the picture board and the bars, which are lightly “beaten” with a hammer from time to time. The blades need to be installed in different parts of the board, both those that fit tightly to the table (so that they cannot rise and contribute to cracking the board) and those that are raised, those that need to be straightened. Schematically it will look like shown in Fig. 23.
A more mechanized device for fixing warped boards is called a “lattice clamp” (Fig. 24).
It resembles an ordinary wooden harrow, in which, instead of teeth, wooden screws act in the bars, like our ordinary clamps. The entire structure is placed above the table and firmly fixed on it, forming, as it were, a common machine. This machine is very convenient to use, as it allows you to press in different places on the board placed under the grate. In this case, the pressure is applied very smoothly (the hand feels the screw) and at the same time the pressure force can be adjusted. In addition to straightening warped areas, this machine is an excellent press for duplicating boards in a number of other restoration works. The picture placed under the grate, as it straightens, is pressed more and more against the trunk until, finally, it “spreads out” on it.
Painting restoration techniques. E.V.Kudryavtsev, M., 2002
How to straighten wood
Method 3: using an iron and sunlight Method three: pressure
Wood can warp when exposed to moisture and heat. Additional exposure to heat and moisture from the opposite side of the sheet can help level the surface. While small "waves" in wood can be corrected using just moisture and heat, more complex warps may require additional pressure.
Method 1 of 3: Using an Iron
Method 2 of 3: Sunlight
Method 3 of 3: Method three: pressure
You will need
Using an iron
Using sunlight
Using pressure
How to straighten a board
To straighten the board you will need:
1. If there are a small number of boards, then it is worth planing them using a hand plane. It is necessary to fix the board motionless, and then carefully remove all irregularities from the surface. Here it is worth considering the following: if the sole of the tool is short, then it will be practically impossible to avoid the wavy unevenness of the board. Therefore, it is better to purchase a plane with a long sole.
3. No matter how carefully you try to level the boards, you still cannot avoid further processing. When you lay uneven lumber on the floor, you need to pull all the boards close to each other and screw them to the joists using self-tapping screws. After installation, the floor, as a rule, will look like a herringbone, since areas that were not covered by joists and were not fastened with screws will bend. To correct this deficiency, it is necessary to sand the floor surface. This needs to be done using a parquet sanding machine, which you can either buy or rent. If you can’t cope on your own, it’s better to invite a specialist.
You should not expect good results if the boards were initially crooked or misaligned. Laying a wooden floor means re-flooring it after a year. After this time, the boards will dry out, adapt to the environment and acquire their permanent shape. After this, you need to go over the entire floor again with a sanding machine.
Creakiness
Old floors can have another very significant drawback: squeaks. They must be eliminated first.
Causes of squeaking
Each squeak is individual, but the general reasons are as follows.
- Initially, boards with high humidity were laid. After drying, they became deformed and rub against each other when loaded.
- Large distance between lags: boards sag under load.
- Thin boards.
- Due to the drying of the wood, the fasteners became loose.
- There is high humidity in the room.
Eliminating the last two is understandable, but the rest will have to be tinkered with.
You should start by tightening or replacing fasteners.
They vary in color.
Black with PH standard head (Phillips). D 3.5 – 4.8; L 16 – 150 mm. Hardened, phosphated. With large thread pitch. Inexpensive, fragile, insufficiently protected from rust. The slot often breaks off. For interior work.
Yellow with head PZ (Pozidrive)D 1.5 – 6; L 10 – 250 mm. More expensive, galvanized, with good corrosion resistance. The head has diagonal rays (double cross). Reliable slot. With smaller thread pitch. They can only be tightened with a bit marked PZ. Universal, for external and internal work.
Yellow ones are recommended for all floor leveling work. In what follows, we will call them fasteners or self-tapping screws.
If the creaking does not stop, check (by the location of the fasteners) the distance between the lags. If it exceeds the recommended one, you will have to bring it into the norm.
If isolated creaks remain, a hole is drilled in these places through which polyurethane foam is poured. Rubbing powdered graphite into small and short cracks also helps.
The creaking of floorboards against each other is eliminated by making cuts between the boards with a circular saw or an angle grinder with a saw blade. The main thing during such an operation is not to get into the fastening element.
The creaking of thin boards is eliminated by laying slab material on top.
Simultaneously with these operations, it is necessary to examine the floor elements for the presence of wood-boring insects and fungal diseases. The affected areas are cut out, or the board is completely replaced. New wood materials, including slabs, must undergo fire and bioprotection.
We wrote in detail about eliminating creaking wooden floors in this article.
How to straighten a board | Production of seals and profiles
Wood is very popular when decorating rooms because it has many useful properties.
This material retains heat perfectly, does not emit any harmful substances at all, and at the same time is an environmentally friendly natural material. But it is worth considering that such boards can seriously fail, since they allow moisture to pass through well. And when the board is completely dry, it will definitely become deformed. We will also tell you where double beds are sold at low prices. 1. If the boards are in small quantities, then it is necessary to plan them with a hand plane. You need to fix the board motionless, and then carefully remove absolutely all irregularities from the surface.
3. No matter how carefully you try to level all the boards, you will still not be able to avoid all further processing. When you completely lay uneven lumber on the floor, you should pull all the boards close together and screw them to the joists with self-tapping screws. After laying, the floor will often look exactly like a “herringbone”, since areas that did not fall under the joists at all and were not fixed with self-tapping screws will completely bend. To completely correct this defect, it is worth completely sanding the floor surface. This must be done using a parquet sanding machine, which you can either purchase or rent.
Source
We carry out coverage diagnostics
To understand whether it is possible to level a wooden floor with your own hands, and how to level a wooden floor, using which method, you must first conduct a preliminary diagnosis of the surface. First of all, you need to check the following components of your existing wood floor:
- Make sure there are no dents or holes on the surface.
- Check the floor for rotten, wet or decrepit boards.
- Broken and badly damaged boards.
If all of the above problems are present, they should be immediately eliminated by completely replacing one or more wood boards. After which their surface is carefully sanded and covered with paint and varnish in order to be able to undergo further processing.