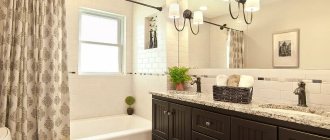
The appearance of open communications in a bathroom, as a rule, is not attractive and does not fit into the interior. Therefore, they try to hide all this pipework in every possible way, some of which will be discussed below. The features of technical solutions and options for implementing the most accessible and interesting ideas will be described in detail. The material is supplemented with a large number of photos and videos on how to close the pipes in the toilet.
Option to hide bathroom communications “in the closet” Source mebel-expert.info
Basic Rules
As a rule, there are many different pipes in the bathroom, ranging from water pipes to sewer pipes. Extra, not very aesthetic details spoil the interior of the room, distracting attention, so most homeowners try to hide them during the renovation process.
If you are determined to close risers or other utilities in the bathroom, then you must follow the following rules:
- To close risers and sewer pipes laid in an open way, heavy materials and solid walls cannot be used. If communications are tightly walled up, then it will be impossible to get to them during an accident. And if you use heavy materials for embedding, then dismantling them in an emergency will take too much time.
- Water pipes and other communications must not be covered with solid structures. It is important to provide inspection windows or doors that do not spoil the appearance of the room, but at the same time provide free access to the pipes for maintenance and repair.
- The material covering the risers must be highly resistant to moisture and corrosion. Firstly, there is high humidity in the bathroom, which is why non-moisture-resistant material will quickly lose its appearance. Secondly, due to temperature changes, condensation often settles on the surface of the pipes, which also has a negative effect on the lining material from the inside.
- Before sealing the wiring with plastic panels, it is necessary to replace the pipes with new ones to prevent leaks in the future. In addition, you should check the waterproofing of the joints.
Please note that when installing the duct for the plumbing, you need to provide sound insulation made of mineral wool or polystyrene foam to reduce the noise level inside the bathroom.
Hiding beautifully
It is not always convenient to cover pipes with auxiliary materials. In some cases, there is not enough space for complex designs, or time for toilet renovations may be limited. Sometimes it is enough to simply decorate the pipes; when we cover the communications with a partition, access to them is difficult, and this can cause inconvenience.
External placement of communications
The pipes can be left in sight and not decorated, if they look beautiful on their own. For example, metal communications in combination with plumbing fixtures made of the same material are perfectly combined and will fit into the interior of a restroom in the loft, techno or hi-tech style. In a toilet with such furnishings they will become a source of pride. But such pipes are expensive, and there is a risk of getting burned.
Therefore, you can beautifully beat ordinary communications:
- cover with paint that matches the overall color scheme of the toilet;
- decorate with unusual patterns, you can use special stencils;
- cover it with beautiful stones, braid, glass;
- disguise with artificial plants or make the pipes themselves in the form of trees: the toilet will resemble an impenetrable jungle or a dense forest;
- cover the pipes with various labels or stickers;
- If you use your imagination, you can use a material that is usually recycled, for example, metal caps from carbonated drinks, and in addition to the unusual design of the pipes, it would be appropriate to make a small panel from the same material.
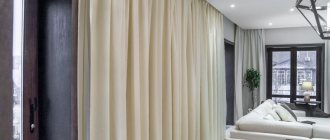
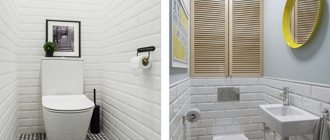
Blinds
Disguise in this way resembles a false wall. But it is not a wall that is being created, but a curtain. If necessary, it can be rolled up.
Advantages of blinds:
- closing the pipes in this way saves a lot of time;
- installation does not create a lot of debris;
- the service life of the blinds is long;
- the price is low;
- the niche formed behind the blinds is convenient for storage;
- the design is compact both open and closed, it will not interfere, however, open blinds provide full access to meters and taps;
- the choice of material is very large: from inexpensive and universal plastic to expensive and specific wood and metal, but due to high humidity, fabric options are not recommended for use in the toilet;
- the assortment is replete with a variety of colors and patterns, it will not be difficult to choose the right ones;
- in case of damage or loss of appearance, there is no need to replace the entire structure; it will be enough to replace the damaged slats;
- they can replace the screen under the bathtub or become a partition covering the washing machine if it is located in a niche.
Roller shutters
A more reliable and thorough way to hide pipes compared to blinds. They have a similar mechanism: when the structure opens, the slats are collected into a roll or stack inside the box. They take up more space, but if there is enough space, it is better to give preference to this method of disguise. Particularly interesting are automatic models controlled by remote control.
Drywall box
Many, when deciding how to close the risers in the bathroom, opt for drywall. Moisture-resistant plasterboard is a practical, inexpensive material from which it is very convenient to install a box.
It is resistant to moisture, and any facing material can easily be applied to it. To work with this material, you will need steel guides, self-tapping screws for drywall, a grinder or a hacksaw for cutting sheets, a hammer drill, and a screwdriver.
Drywall box
The installation process is as follows:
- First, a frame for the box with risers is built. It can be made from steel profiles or wooden blocks. It is better to use profiles, as they are stronger and more durable. If the box is to be tiled, it is better to use a reinforced profile that can withstand heavy weight.
- First, the guides need to be attached to the walls and then to the floor.
- Then, using a hacksaw or grinder, a sheet of moisture-resistant drywall is cut.
- After this, the plasterboard blanks are fixed to the frame guides using self-tapping screws and a screwdriver.
- Lastly, the plasterboard box is puttied, coated with a deep penetration primer, and then lined with finishing material.
Note! Many homeowners, when installing a pipe box made of moisture-resistant plasterboard with subsequent tiling, do not make an inspection window for fear of spoiling the appearance of the structure. However, now construction stores offer invisible revisions, which are tiled and do not stand out against the general background of the false wall.
Construction made of plastic panels
Very often, finishing craftsmen recommend erecting a false wall to hide pipes, risers and other communications made of plastic panels. They are lightweight, inexpensive, moisture resistant, easy to clean and easy to install.
In addition, in the event of equipment failure and the need for repairs, the plastic panels can be carefully removed and then fixed back without causing much damage to the finishing of the room.
Box made of plastic panels
To work with plastic you will need:
- Plastic panels in your favorite coloring.
- Bars, plastic or metal profiles for making a frame.
- Plastic guides for fastening panels.
- Plastic corners for decorating external corners.
- Hacksaw or jigsaw for cutting plastic sheets.
The advantage of this option is that you can build a plastic structure with your own hands, even if the renovations in the rest of the room have already been done. The work must be done in the following order:
- First, we install a masking box made of metal guides, plastic profiles or wooden blocks around the riser.
- Then we place a fixing strip for the panels along the top and bottom of the box.
- After this, carefully close the box with plastic panels.
- At the final stage, we glue the corners to the outer corners using silicone glue so that the structure looks neat.
https://youtube.com/watch?v=rp_cxKsiZ6k
Please note that a plastic box cannot be lined with tiles or any other finishing material; it cannot even be painted. Therefore, immediately choose panels of a color and design that suits you.
Options that do not require installation
It often happens that the appearance of a bathroom with openly passing risers bothers homeowners, but there is no way to do anything drastic. In this case, you can use ideas for masking communications using improvised means:
- You can hide pipes from prying eyes using roller shutters. They perfectly disguise unsightly pipes, meters and other devices, but at the same time provide access to them at any time in case of breakdown.
Roller shutters - Curtains will help disguise communications . This may not be the most aesthetic solution, but it will help hide rusty pipes for the first time.
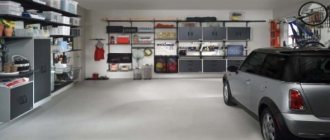
- In order not to waste space in the box for risers, you can arrange a closet . Additional storage space will never be superfluous in the bathroom.
Before starting work
When planning a bathroom and toilet renovation, be sure to consider a way to disguise water pipes
First of all, you need to make sure that communications are working properly. Under no circumstances should there be any corrosive areas, much less leaks. Before hiding heating and water supply pipes, it is advisable to insulate them. It is necessary to determine in advance the location of technological hatches and install main filters for water purification. Recently, roller shutters for toilets have become especially popular. This option combines a neat appearance and full access to communications.
Be sure to pay attention to the condition of the walls. You need to make sure that there are no traces of mold or mildew on them.
If the latter are present, carry out thorough mechanical cleaning and double treatment with fungicides.
How to close the pipes in the toilet: how to hide + hide the pipeline
Communications in the bathroom are not the most pleasant sight. No matter how expensive pipes with shut-off valves are, they can only decorate a specific loft-type interior. If you are not one of the adherents of industrial design, then there is a strong desire to hide these networks.
How to line the pipes in the toilet? For example, gypsum board or plywood This is interesting: Choosing blinds for the bathroom: advantages and differences
There are different ways to hide pipes in a toilet, but most of the methods involve creating a wall frame from different materials. If the choice fell on this method, it is better to replace the old water supply and sewer pipes with new ones in advance. It is dangerous to hide old communications behind a wall; then it is better to choose a collapsible option that will provide access to communications at any time.
How to make a box from plasterboard
You can cover the pipes in the toilet by making a box made of plasterboard. This is perhaps the most popular solution. This is because the technology is very simple; pipes of any configuration can be hidden. Then there are many options for finishing this box: lay the tiles with glue, level the surface with putty, then paint or wallpaper.
The pipe box in the toilet can be vertical or horizontal
Peculiarities
If you choose this option for closing the pipes in the toilet, then you should consider some points. The first is all plumbing fittings - meters, filters and must be accessible. There are several options:
- make one panel folding or rotating (hinged);
- part of the panel can be removable, fastened with a pair of screws and/or magnets;
- install a hatch (plastic or invisible hatch under the tile finishing.
You can, of course, make the structure non-removable, but if necessary, you will have to break everything and then rebuild it, and problems happen even with new pipes.
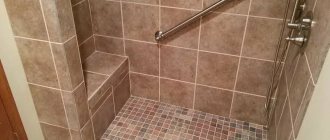
Special hatch for tiles
Secondly, if you are going to finish the tiles, it is better to glue them with a special glue, rather than lay them on a mixture of cement and sand. The adhesive layer required is thinner and its mass is smaller. Under such conditions, it will be easier to remove/lift the cover.
Work order
First, decide what your box will look like. It is advisable to plan everything so that it not only covers the pipes, but, if possible, also carries a functional load. For example, if pipes run below along the wall on the right or left, which happens if a hygienic shower is installed in the toilet, the box can be made a little higher, and various necessary little things can be placed on its upper part.
How to close the pipes in the toilet - make a box from plasterboard
If you are closing the risers that run in one of the corners behind the toilet (the layout of standard Khrushchev toilets), it makes sense to close not only that corner, but to sew up the entire wall, making it into a cabinet. Shelves can be open or closed (with or without doors), but in small apartments this is very convenient.
If the pipes are on the back wall, and the toilet is narrow and long, it makes sense to sew up the back wall completely
Having decided what your box will look like, markings are applied to the walls and floor. Then take galvanized profiles for drywall. Down and on the sides there is a supporting profile - PN (UW) - without curved sidewalls. Since the structures are small, a profile of 50*40 mm is sufficient. The jumpers are fitted with a rack profile - PS (CW) - its width is also 50 mm, and the depth can be small if desired.
Jumper connection
The jumpers are cut to size (using tin snips) and secured with self-tapping screws. For a short distance - up to 50 cm - one at each end is enough; for a larger beam, put two. The installation step of the racks is about 60 cm, the jumpers - with approximately the same step. In the place where the door is attached (if provided), a reinforced double profile is installed.
The assembled frame is sheathed with gypsum board, cutting it to size. They are fastened with small self-tapping screws with a screw at the end (TEX 3.5 * 9.5 mm). Install fasteners around the perimeter and in places where jumpers/stands go, a step of 20 cm. When screwing, you need to make sure that the cap is slightly buried in the drywall, but does not break through the cardboard.
After the cladding comes the finishing work, and it depends on the chosen finish. Before painting and wallpapering, the box is completely puttied; before laying tiles, only the screw heads are covered with putty.
What else can you use to make a box for pipes in a toilet?
Not everyone likes to work with drywall and profiles for them. In this case, the frame can be assembled from dry wooden blocks. If desired, they can (and in principle should) be treated with antibacterial compounds so as not to rot.
Instead of drywall, you can use OSB or moisture-resistant plywood. All these materials can hardly be called 100% environmentally friendly, but many are more accustomed to working with them. All of them are moisture resistant, easy to process - this is a good alternative.
Make the back wall of the toilet out of plastic
You can hide the pipes in the toilet behind plastic panels. This method of closing toilet pipes is the cheapest, but also the most short-lived. Plastic is easy to spoil, it is pressed through, so you have to be careful.
Now a little about aesthetics. If the decoration of the walls in the toilet is planned from the same plastic, then there are no problems at all - everything is in the same style. If the wall decoration is different, there are two options - find plastic panels that are similar in color or play with contrasts by adding a couple more details of the same color.
The colors were chosen very well - exactly to match the tiles
It is easy to cover the pipes in the toilet with plastic panels. First, the frame is assembled, but already made of wood. It is attached to the walls and floor with anchors. Since the structure is small, it will hold up perfectly.
Starting profiles for plastic panels are attached to the frame, and sections of panels of the required length are inserted into them. They have a tongue/groove type connection and are installed without gaps. The plastic is attached to the frame using staples or screws. To provide access to the pipes, an inspection hatch is installed in the plastic box. There is another option - to make the panels removable.
Finishing the box and ceiling with one plastic is a good idea
When purchasing, choose plastic wall panels (there are also ceiling panels) - they have thicker walls and are more difficult to press through. If you plan to use the upper surface of the box, it is better to place a sheet of plywood (moisture resistant) under the plastic.
Roller shutters in the toilet
The easiest way to close the pipes in the toilet is to install plumbing shutters (roller blinds, roller blinds). This option is ideal if you need to cover the entire back wall. Guides are installed on the sides, a reel with strips is attached to the top, that’s all, the installation is completed, you can use it.
This is interesting: DIY bath screen
Roller shutters in the toilet can only cover part of the wall
The disadvantage of this option is the price of roller shutters. She bites. But at any time you can raise the roller shutter that covers the pipes, and you can repair it. There is another way to reduce the price - install roller shutters not from floor to ceiling, but cover only the central part, where all the connections are located.
You can hide the pipes in the toilet behind roller shutters
Even if you do not need to cover the entire wall, but only part of it, you can build a wall from gypsum plasterboard or wall foam blocks and attach roller shutters to this wall.
How else to hide pipes in the toilet
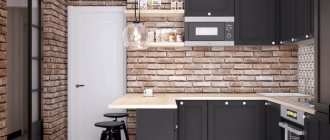
In small-sized apartments, every centimeter of space counts and simply covering at least some part of the room is a real luxury. Then you can close the pipes by making a utility cabinet. For this, narrow toilets in Khrushchev buildings are an ideal option.
You can close the pipes in the toilet by making a cabinet
Planks are attached to the walls on both sides, and hinged doors are attached to them. The shelves are assembled locally. They can be made removable to provide access to the pipes if necessary.
What are the doors made of? The simplest option is from laminated chipboard, but you can also order them from MDF. They will be made to your measurements by workshops that manufacture furniture. If you also choose a color to match the main finish or make a cabinet the same color as the entrance doors, you will get a good interior.
A very inexpensive way to make the back wall of the toilet attractive is to use horizontal or vertical blinds. There is no hassle at all with installation, the only thing is that you need to find the right size. Then nail the bar to the ceiling, and attach the blinds themselves to it.
Blinds in the toilet on the wall - an inexpensive way to hide pipes
When selecting, it is also important to guess the color - either match the tone, or use contrast. And by the way, plastic horizontal blinds will be more practical in this case - they will not bend if you accidentally touch them. In general, a good option in all respects.
Install roller shutters
On the box that hides the pipes, you need to make a hole to repair them. To close it, they install plastic roller shutters. If they are the entire length of the wall, from floor to ceiling, the box does not need to be installed.
Photo:
Location of pipes and bathroom layouts
The first thing that needs to be done before deciding how to hide pipes in a toilet is a clear understanding of where each pipe leads to and from, whether they can be moved or completely removed during repairs or remodeling.
Below are diagrams of the most common layouts of separate toilets and combined bathrooms in old (pre-90) apartment buildings.
Taking into account the fact that all plumbing fixtures - a toilet, a sink in the bathroom, a bathtub (shower stall), a sink in the kitchen - must be supplied with water and ensured by draining the used liquid, they try to place these fixtures on the “single line” and, accordingly, the pipes laid along one wall.
The illustration presented shows a typical connection for apartments in houses built in the 70s...80s of the last century. But, despite the passage of time, the same scheme is usually used in new buildings.
Thus, the pipes in the toilet located behind the toilet further go into the bathroom and kitchen, and it is necessary to hide the space only near one wall - the back wall of the plumbing cabin or the rebuilt toilet room (combined bathroom).
The diagram highlights the part of the toilet where the sewer pipes (green circle), cold (blue circle) and hot (red circle, with a centralized supply) water pipes are located. This is the part that will need to be sewn up.
Sewage connection diagram
Sewerage layout
Even at the design stage of a house, a drainage system should be developed that would harmoniously fit into its structure. Initially, the diagram marks the location of the common vertical riser. It is usually located in the bathroom or toilet. Horizontal drain pipes diverge from its lower part. It is to these pipes that all plumbing fixtures are connected via siphons.
The bathroom usually has a sink, bathtub and washing machine. In the toilet, a toilet and a bidet (if available) are connected. The kitchen usually has one sink or a shared dishwasher. The sewerage scheme in the house provides for an inclination of all horizontal pipes towards the riser of at least 3 degrees to ensure gravity flow of drain water.
Elements of the sewer system
Installation of internal sewerage is carried out using key elements, without which it is impossible to do.
The elements of the home sewerage system include plumbing fixtures, connecting pipes, fittings, splitters, siphons, and elements for fastening the pipeline to the walls. The pipes now used are predominantly polypropylene or metal-plastic. Steel pipes are already out of use. The exception is copper pipes or stainless steel products. However, their cost is very high. The connecting elements are made of the same material.
Plastic risers are now also used. However, if you are not replacing the main riser, which is made of cast iron, then you will need additional rubber adapters to connect the plastic pipes and the cast iron riser. The riser has a standard size of 100 mm. In some cases, when we are talking about a multi-storey building above five floors, a riser with a diameter of 150 mm can be used.
The purpose of the riser is to compensate for water hammer in the system and the absence of foreign odors in the house. If it is not possible to lead the riser upward, outside the house, then a vacuum valve is installed at its outlet, which solves the same problems. The diameters of horizontal drain pipes are usually 50 mm.
Laying sewer pipes in the house
We will prepare everything necessary for installing the sewer system.
Installed sewer pipes
The rules for installing sewer pipes provide for the use of the following tools:
- Scissors for cutting polypropylene pipes.
- Hammer.
- Hacksaw for cutting metal.
- Level.
First, all elements of the system are brought together. That is, they are trimmed and tried on. It is better to cut pipes with special scissors, but you can also use a hacksaw.
Installation of sewer pipes in the house is carried out at the bottom of the wall, observing the required slope to the riser. After joining the pipes, the pipeline is secured to the walls using a hammer drill and special round latches. The connecting fittings also have sockets with seals, so all connections are easy to make.
In this way, literally in one day, you can completely install a sewer system in your home. Everything necessary for these purposes is now on sale.
How to hide pipes in a toilet
There are three things to consider when solving this problem:
- pipes MUST be accessible for repair. That is, the option “walling everything up with brick and cement, and then finishing the outside” is not even worth considering. Any finishing of the rear “false wall” provides access to the main communications nodes and the meter, if it is installed in the toilet;
- the base part of the partition must be rigid enough to withstand the weight of the finish and the possible load from the user’s weight - many, sitting “in a pose of thought,” prefer to lean it on the toilet cistern or, if it is hidden, on the wall;
- ALL trim on the camouflage partition must be moisture resistant. Otherwise, the very first “flood” from the neighbors will lead to the fact that the finishing will have to be done again.
As a result, three options are mainly being considered - covering the pipes in the toilet with plasterboard for further finishing, installing lathing with subsequent installation of plastic panels or other panel/plank cladding, installing a built-in cabinet in the toilet that will successfully hide all communications and at the same time provide access to them normal access.
Additional advantages of installing boxes or partitions to mask pipes are that there is no need to level the walls, the layout of the room is simplified, and cleaning is easier.
Simple tips
Here are a few more recommendations on how to properly cover the pipes in the toilet with plastic panels, chipboard partitions, and blinds.
To construct camouflage structures, it is better to use a metal profile as a frame. Wooden frames will swell from moisture and deform the coating.
To prevent the appearance of mold and fungi, the inner surface of the finish and pipeline must be treated with antiseptics or special solutions.
When installing roller shutters, the drum is turned so that it faces the pipes and does not clutter up the usable space.
Fabric blinds look beautiful as hatches, but this option cannot be called practical. They are expensive, and the fabric gets dirty quickly.
If the manhole cover is immediately selected to match the appropriate tile sizes, you will not have to perform costly and burdensome cutting of ceramics.
I like it I don't like it
Partition position
This question is quite important. Where should the false wall be located - behind the toilet cistern or in front of it? It depends on the toilet model. For the “compact” design, in which the cistern is mounted directly on the toilet bowl, there is only one option - the wall is mounted behind the cistern. If you use a wall-hung model with the tank located on a special installation, you can safely install a partition immediately behind the back wall of the toilet. The installation in many cases becomes the basis for installing such a partition and always has a sufficient distance from the racks to the edge of the toilet so that decorative panels can be mounted.
Below is a diagram of the placement of the wall between the wall-hung toilet and the installation.
How to cover a sewer pipe with plasterboard
Depending on exactly how the pipes are placed in the toilet, one of the types of creating masking boxes made of plasterboard is used:
- on the entire wall;
- on the lower part of the wall and a separate vertical box for risers;
- a horizontal L-shaped or U-shaped box around the perimeter of the rear wall of the toilet and a vertical box for risers.
Let's consider the first option - a single box for the entire back wall. In this case, guides and racks are mounted to the entire required height (to the ceiling or below, depending on the position of the pipes). Spacers must be installed - at least two. This is necessary to give the wall the required rigidity. For access to meters, valves, and pipe connection points, service hatches are provided; these places must have a edging of racks and guides for attaching gypsum boards.
This is interesting: Screen under a tile bath
When sewing the prepared frame, the places for future hatches are cut out in the gypsum board panels. It is also possible to assemble the wall from individual fragments, but in this case it is necessary to pay more attention to puttying the seams and maintaining a single plane of the wall.
If several boxes connected to each other are provided, the frame for each is mounted separately, but connected by common racks.
It is advisable to carry out the cladding here in solid sheets to reduce the number of seams.
Step-by-step instruction:
- The wall(s) are marked using a tape measure and level. The latter is mandatory, since otherwise it is impossible to maintain the parallelism of the profiles and their vertical/horizontal position;
- protruding parts of the wall and floor are removed, cracks and potholes are sealed;
- box racks are installed. They are attached to the floor with dowels, the length of which ensures normal fastening in the material. For uneven walls, it is better to use special mounting brackets that allow you to align the racks perfectly correctly. On smooth surfaces, you can attach the U-shaped profile directly to the wall;
- fastening elements are installed. For a vertical box these are horizontally located profiles and vice versa. Jumpers can have different options for fastening to the main racks;
- Sheets of moisture-resistant plasterboard are attached to the fully assembled frame. Special self-tapping screws for drywall are used as fasteners;
- you can make an inspection hatch in a box yourself, but it’s easier to buy a ready-made sample right away with loops for attaching to the profile;
- After installing all the gypsum board panels, the joints between them are glued with serpyanka (mesh tape) and carefully puttied until a smooth surface is obtained. The same is done for self-tapping screws recessed into the drywall.
After completion of the work, the surface of the box is finished with tiles, painting, plaster or another method.
The solution to the question of how to hide pipes in a toilet with access is discussed in more detail in the video.
The photo shows the appearance of the toilet after finishing the walls and plasterboard boxes with ordinary ceramic tiles.
Review of materials
There are many materials you can use to hide sewer pipes or water mains. For example, blinds that will cover a niche in the wall. Plastic panels or plasterboard can be used to sew up the box in which the utility lines will pass. On the Internet you can find photos of various options for using these materials.
Drywall
The most commonly used method is sewing pipes into a plasterboard box. Detailed video instructions for installing the box can be found at the end of the article. This material has many advantages:
- If necessary, the structure can be dismantled.
- Installation work is quite easy. First you need to build a frame from timber or profiles. Then cover everything with plasterboard.
- This is an environmentally friendly material that is harmless to people and animals. It does not emit harmful substances even when heated.
- Using drywall you can get a flat and smooth surface, which is suitable not only for laying ceramic tiles, but also for wallpapering and painting.
The only disadvantage associated with using drywall is that if you replace or repair pipes, you will have to completely dismantle it and then rebuild it.
Plastic panels
You can sheathe the same box as for drywall with plastic panels. This material has its advantages:
Methods for hiding pipes in the bathroom
- These products are very easily and quickly mounted on a frame made of timber or guide profiles.
- The material is safe for humans.
- If the box is sealed with plastic panels, then they are much easier and faster to dismantle in the event of an accident than drywall. In this case, after repair work is completed, the product can be installed in its old place.
- Impressive service life while maintaining its original appearance.
- This material is not afraid of moisture. It is easy to clean and is not susceptible to mold or damage by insects.
- There are many options for colors and textures of this material on sale, so you can easily choose a product that matches the style and color of your interior. There are also coatings with photo printing and various geometric prints.
- After you cover the box with plastic panels, you do not need to do any finishing, because the panels have a decorative coating.
The only drawback is that this material may not harmonize well with tiled wall cladding.
Blinds
The simplest and most affordable option for hiding pipes in a toilet is to use blinds. It is suitable for small bathrooms, in which all pipes are located on one wall or in a separate niche. Using blinds you can get the following benefits:
- They do not require complicated installation - you do not need to make a box or frame, you just need to fix the fasteners on the ceiling. This way, you can quickly and easily close the wall where sewer pipes and water communications pass.
- This product allows you to save free space in the room.
- Depending on the size of the blinds, you can cover the wall partially or completely.
- To gain access to pipes or water meters, you just need to lift the blinds.
- A large assortment of colors and textures, as well as blinds with photo printing, will make it easier to choose the right product to match the color and style of the interior.
- Due to the fact that an impressive section of the wall will be closed, shelves for storing household chemicals and various household equipment can be installed behind the blinds.
There are almost no disadvantages to blinds; it is important to choose products from high-quality material that will not change its color during operation. It is also important to consider that the product should be easy to wash and not absorb odors.
Homemade or ready-made box
To close the pipes in the toilet, you can use a ready-made or homemade removable box. This option also has its advantages:
- The finished product just needs to be installed (see photo below).
- If the finished structure is not suitable due to the characteristics of the room, then you can make such a box yourself. Its manufacture and installation will also not cause problems.
- Due to the fact that the structure is removable, there is access to utility networks at any time.
The main disadvantage is that it is a fairly large product, which may not be suitable for your small space. Also, the price of the structure will be slightly higher than making a permanent box from plasterboard using the method described above. There may also be problems connecting the toilet if you use a ready-made box. Types of sewer pipes for indoor use
How to cover pipes in a toilet with plastic panels
The installation diagram of masking elements and the general procedure of work differ little from actions with drywall. This is due to the fact that plastic panels also require a frame - and to ensure the required strength, it is best to use a standard drywall profile.
However, in some cases, a wooden frame is also used to install plastic. Of course, this option is worse, since wood is not a moisture-resistant material, and there is always a risk of excess moisture in the toilet, especially near the pipes and tank. However, with proper treatment, a wooden frame can easily withstand 5...10 years before a major renovation of the bathroom.
Important: the difference between the installation of plastic panels and the installation of gypsum boards lies in the method of fastening. To make the wall or box look neat and complete, it is better to use the so-called starting profile and other accessories for the panels.
The procedure is relatively simple:
- mounting strips are installed (profiles for drywall or specifically for panels);
- using clamps or self-tapping screws, basic profiles are attached - starting, corner, and so on;
- panels are inserted into the grooves of the profile one by one; they are additionally fixed with clamps, self-tapping screws, and less often with glue.
Below are two videos - on the simplified creation of a box from plastic panels and using the described technology, on a metal supporting profile.
https://youtube.com/watch?v=rp_cxKsiZ6k
The decision to cover the pipes in the toilet with plastic panels is especially logical if the entire room is completely lined with them. Due to the comparative ease of installation, you can do everything yourself.
It is worth noting that the installation of a false panel or plastic boxes on a frame can also be quite successfully combined with finishing the entire room under tiles.
Roller shutters
If the bathroom is small, then additional structures for hiding pipes and a riser in the toilet will take up useful space. Roller shutters do not require much space and open compactly, so it is worth considering this camouflage option. They are blinds that rise and fall using a shaft and a special design. They are made from:
- wood;
- aluminum;
- plastic.
Plastic roller shutters are considered the most profitable option. They are inexpensive, waterproof, and have a neat and attractive appearance. Roller shutters are mounted on top of the cabinet wall or built inside an opening with pipes.
When inserting, the roller shutter box can be left outside or hidden inside. The second method is preferable, because the box located inside the cabinet will not clutter up the appearance of the bathroom.
How to close the pipes in the toilet: other options
In addition to the methods already discussed - using boxes and walls made of gypsum plasterboard and plastic panels - there are other, quite successful ways to hide communications while maintaining access to them.
The first and most common is the built-in wardrobe.
It can be performed on the entire back wall or, as shown in the illustration above, only on the upper part. The basis of such a cabinet is a frame or other fastenings for shelves and doors. You can also hang a finished cabinet by removing part of the back wall and shelves so that there is room for a sewer riser and hot and cold water pipes.
Below are several configuration options for such cabinets; their layout depends on the position of the pipes.
Such a cabinet is especially convenient if in the toilet, in addition to pipes, you also need to hide a water heating tank.
And, of course, the shelves will not be empty - the built-in closet is perfect for storing detergents and cleaning products, a strategic supply of toilet paper, cleaning tools and other useful things.
The video shows in detail the process of creating such a cabinet, taking into account the mistakes of the creator.
Another successful camouflage option is roller shutters. This design provides quick access to all communications, while when closed it looks very aesthetically pleasing and is easy to clean.
The main task during installation is the placement of the side guides and the top box, which hides the roller shutter lifting mechanism. The video provides instructions for installing the structure yourself.
This method has, perhaps, only one drawback - it needs to be installed over the entire opening. If it is necessary to cover not the entire wall, but only part of it, you will have to install an additional box or at least one additional wall to install the guides.
Roller shutters do not have to open only from bottom to top - you can install two products or divide the main leaf into two parts, the lower of which (behind the toilet) will be stationary.
The advantages of this option include quick installation and compatibility with all bathroom finishing methods. In addition, neutral white is by no means the only possible design for a roller shutter. Manufacturers offer a large selection of photo printing and color canvases.
Plumbing cabinet
Organizing the closet behind the toilet is a very cool option if space allows. So the pipes will close, and additional useful space will appear. All you need to do is make shelves and come up with something with doors. We won’t talk about what and how to make shelves from. But with doors there are two popular options.
Louvre doors
The market is full of so-called louvered doors. Their cost in the popular Leroy Merlin is about 1000 rubles, which is quite affordable. However, it is worth keeping in mind that often these options are not painted and have a bare wood texture - it is not always suitable and not everywhere.
You can paint the doors yourself without much difficulty. If you have no desire to engage in creativity, you will have to worry about finding ready-made options, which can sometimes be not at all easy.
Louvered doors are distinguished by their easy installation, attractive appearance (even with a hint of “delights” such as lighting) and affordable cost. But there were some downsides. The first drawback is that the finished doors must fit your size. The second disadvantage is that if the pipes hidden behind them are noisy, then the “leaky” structure will not muffle the sound as much as we would like.
Wardrobe with chipboard doors
Chipboard doors are a more versatile option, as they can come in absolutely any size and color. Unfortunately, not all “furniture makers” want to take on such a small order if nothing else is required besides doors. There are two ways out: look for a long time for a contractor and prepare for overpayments, or make the doors yourself. Cutting chipboard to size will cost about 1000 rubles. All that remains is to cut in the hinges and install.
Compared to louvered doors, a chipboard solution will have better sound insulation. The rest is just a matter of individual preferences and vision of the final result. In addition, chipboard can be used to cover “fixed” areas that simply should not be visible.