Ceiling molding is an element of finishing decorative finishing, which is used to enrich the design in the interior of a living space. When decorating ceiling surfaces, moldings made of various materials are used: wood, foam plastic or plaster. The most widespread in construction are moldings made of polyurethane - foamed plastic, the manufacture of which uses a complex technological process. The liquid material is poured into shaped molds and sent for further processing in an oven.
Kinds
There are several classifications of moldings.
More often, users evaluate the external qualities of the material. Some are more beautiful, others do not suit the interior. Some bend, others are solid. Moldings differ in the type of materials from which they are made. Let's look at the main ones.
Tree
Wires can be installed into the wood molding. Production is possible from different types of wood. Some brands offer a modern option - creating blanks from gypsum and applying a composition based on glue and wood shavings to them. Such moldings are cheaper.
The wood is generally durable and can be painted. Such materials are durable, but slightly heavy compared to others.
Wood molding is always handmade. In machine automated production it is difficult to obtain a well-processed coating. This affects the cost - wooden material, although it looks noble, is sometimes unreasonably expensive.
If the wood has not been treated with an antiseptic and a special agent that protects it from moisture, it is better to carry out such work right away. If the humidity in the bedroom is low, then you can leave the wooden covering in its original form.
The tree weighs more, so it can move. To prevent this situation, you can reinforce it with self-tapping screws.
Gypsum
If the material is of high quality, it will last a long time. However, it is not always possible to determine the quality of products by appearance.
Plaster is expensive, weighs a lot, and is not easy to install. Strengthening is also required, however, when introducing fasteners, the structure may crack.
The use of gypsum is justified if there is high humidity in the room and there is a risk of damage.
Polyurethane
Advantages of the material:
- low cost of repairs;
- ease of fixation;
- light weight;
- large selection of colors;
- can be painted and even laminated;
- ease of care;
- The surface is smooth, so it is practically not dirty.
Polyurethane is similar to plaster. This is a durable material, high quality, low cost. The service life is 30 years if the surface is covered with a good finishing layer.
Expanded polystyrene - polystyrene foam
This material has many advantages - it is lightweight, easy to fix, and is not afraid of moisture.
However, when choosing, you should pay attention to the fact that adhesion to heterogeneous structures is not easy to achieve. For example, moldings will not last long on decorative plaster or paint
Expanded polystyrene is fragile, not durable, and easily damaged.
Polystyrene
It lends itself well to painting and applying other compositions. Lightweight, quick to attach. Does a great job creating any designs. This molding can be fixed transversely, securing one element next to another. There can be a lot of finishing options.
The disadvantage is the grainy surface, so the coating quickly becomes dirty and darkens from the constant ingress of dust. There are no defects, chips, or detachments on the cut.
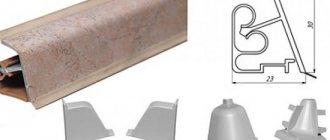
Material of slats
Molding is made from different types of plastic, wood, metal or plaster.
Type 1. Wood
Wood has been used for centuries to make applied decor.
This is a traditional material for making moldings. Wooden decor must be treated with an antiseptic, and then it can be varnished or painted. Self-tapping screws or glue are used to secure the planks.
Advantages:
- Wood is easy to process.
- It is reliable and durable.
- The material is easy to paint and glue.
- The tree is durable with proper care.
- You can cut holes in the wooden molding for the wires.
Flaws:
- The tree is not moisture resistant.
- It's expensive.
- Wood planks have a large mass.
Type 2. Gypsum
Very often, rooms are decorated with plaster stucco.
This is another classic material for applied decor. To install such molding with your own hands, use gypsum or alabaster mortar.
Double stretch ceiling
Plastic ceilings in interior design
This definition means two different ways of designing a two-level ceiling structure. In the first case, a conventional two-level structure is created, where the ceiling is stretched at each of the established levels with height differences. Between them are hidden lamps.
Photo of double ceiling
In the second case, a two-layer structure is created, where the canvases are stretched one above the other. Moreover, one of them is perforated, translucent, etc., which creates different visual effects. Stretch fabric installed on top of light sources gives a great design. Combinations of lighting elements are hidden under the translucent ceiling, giving the output, for example, a hidden image of the starry sky.
How is molding different from cornice?
Molding
- an element of interior decor that has a straight back side and is designed to be attached to one plane. They are used to frame mirrors, windows, doors, highlight arches, panels on walls, etc. Moldings are used at the junctions of different finishing materials, for example, when the lower part of the walls has one finish, and the upper part another. Moldings can create luxurious accents by zoning or highlighting decorative elements. On the outside, they can have a variety of ornaments, patterns, or be made in a restrained, simple style.
Cornice
on the back side it has two planes and is designed for mounting in a corner, between the wall and the ceiling. The design of cornices can also be very diverse.
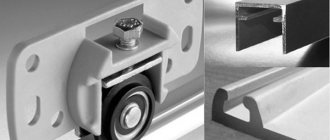
How to choose molding
Installation of a plasterboard box on the ceiling
To select a suitable ceiling decor for creating the interior of a room, you need to take into account two main criteria - the width of the plinth and the material used in its manufacture. Choosing molding is not difficult. So, if the room has smooth walls, and the owner gives preference to environmentally friendly materials, then it is better to purchase wooden fillets, but if the economic component comes first, then it would be advisable to use polyurethane decorative elements.
As for the size of the finishing material, its width directly depends on the height of the ceilings of the room being repaired. Moreover, the higher the room, the wider the molding. If we touch on the style of decorative plinth, then it all depends on the preferences and imagination of the homeowner.
DIY decor - subtleties of manufacturing
First, you need to decide on the type of moldings, color, texture of the canvas, and the location of the molding on the wall. To install the decor you will need the following materials:
- glue for the frame (gypsum or liquid nails);
- penetrating soil;
- miter box (for processing the edges of the planks);
- wallpaper glue;
- water based paint.
The next stage is marking the future decor
It is important that the angles are exactly 90 degrees. Then the moldings are cut, taking into account the size of the decorative element
Apply glue around the perimeter. Apply the moldings, holding them for a while. If necessary, they are fixed with self-tapping screws. Putty is used to mask the cracks at the joints.
Next, the surface is treated with a primer, then paint in two layers. Then the main fabric is glued on, smoothing it from the center to the periphery. The edges of the wallpaper are trimmed with a sharp knife.
A carefully thought out wall composition will add variety to the interior. It will allow you to realize artistic fantasies and bold plans, bringing coziness, style, and individual comfort to your living space.
How to choose
The sequence of creating a pattern on a plasterboard ceiling
Let's consider the general rules for choosing moldings for various interiors.
- When choosing molding, take into account the style of the interior.
- The occupancy of the room with furniture and accessories will influence your choice. In order not to overload the interior, give preference to thin and simple-designed skirting boards.
- Massive molding with a large number of decorative details or ornaments is suitable for large apartments, as well as rooms with high ceilings.
- For small apartments, wide skirting boards can be used only if the walls and ceiling in such a room have light shades. For small areas it is worth using smaller elements.
- If the room has low ceilings, then panels, vertical pilasters, fillets and pseudo-panels will help to visually correct this deficiency.
- In bright rooms you can use dark-colored moldings, playing with contrast.
- For wide rooms with low ceilings, trims and panels with a height greater than the width are suitable, which will visually increase the height of these ceilings.
In what interior styles are they used?
The choice of configuration and width of the molding is made taking into account the dimensions and style of the room. In spacious, high rooms, you can use wide planks with an abundance of decor, but in a small, low room they will look ridiculous. Here you can use narrow slats with a minimum of decor.
Rooms decorated in high-tech, loft and modern styles are often decorated with plastic and foam moldings with a smooth and even front side. The surface of the plinth is painted to match the color of the interior. They harmonize well with stretch ceilings and PVC panel coverings.
Wooden and polyurethane fillets emphasize interiors in a classical style, and are also appropriate when decorating a room in Art Nouveau, Art Nouveau, Empire, Art Deco, Rococo and Baroque styles. The listed styles imply the use of an abundance of decor, so the surface of the planks can be decorated with carved relief ornaments and patterns.
How to install structures
Installation of tension fabric with rounded contours is possible only with the participation of specialists. If you can assemble the frame for a multi-level structure yourself, then you can cut the vinyl and solder the profile only using special equipment. And the process of installing canvases requires a certain skill, which is acquired with experience.
Installation of a round stretch ceiling
Depending on the type of structure, a suspended round ceiling is made using one of two technologies: on a wooden frame and in combination with plasterboard.
Wooden frame
For multi-level structures made exclusively of tension fabrics, a wooden frame is installed. The principle is simple:
- A circle is drawn on the base and short bars are attached to it.
- On the perimeter walls, mark the level of the main sheet and install a harpoon profile.
- Then measure the level of understatement of the protruding figure.
- To complete the next step you will need a professional laser level. It is installed so that it shows the level of the lower plane of the protruding figure. To make a step with a smooth bend, take a narrow strip of plywood or veneer. The width of the strip is measured locally with a tape measure. They apply it to the ceiling and look at the mark shown on the ruler by the laser level. Having cut the plywood, it is screwed to the bars.
Wooden frame
Screw the profile to the step and stretch the film.
Combined designs
The options for assembling a frame with a recessed and protruding circle differ in that in the first option, a flexible profile is first mounted on the base, and after that the rest of the frame is assembled. In this case, the long supporting profile at the junction with the niche is trimmed. In the second option, a regular frame is first assembled, the drywall is twisted and a radius protrusion is mounted on top of it. The procedure is as follows:
- In both cases, first mark the ceiling level, taking into account the height of the recessed lamps.
- If the interior is planned so that the circle protrudes, then the first level can be mounted completely on the entire ceiling using standard technology. A guide profile is attached to the wall along the perimeter, a load-bearing profile is inserted into it in increments of 60 cm and drywall is hemmed.
- The frame of the protruding structure is twisted directly through the drywall of the first level.
- To draw a circle, use a cord and a self-tapping screw.
- A flexible profile along the circumference is made by cutting the UD guide profile with metal scissors. A flexible profile is made in a double set - for the top and bottom rows. One such profile is screwed to the ceiling along the contour of the drawn radius. To do this, use long metal screws (35 mm). In this case, it is necessary to ensure that the self-tapping screw fits into the supporting profile of the first level.
- Next, short vertical posts are cut according to the height of the protruding figure. To do this, use a CD profile. The number of racks is calculated from the fact that they are mounted in increments of about 30 cm. The lower flexible profile is screwed to the lower edge of the racks with LN screws. This is how the lower level of the step is formed.
Projecting step
- If a recessed circle is made, then the radius is drawn on the very base.
- For this you will also need a professional level, with which you measure vertical short posts for the side of the niche.
- First, mark the level of the first row on the walls in exactly the same way and attach a guide profile around the perimeter. In this version, the long supporting profile is twisted to the place where the niche will be mounted. After this, the flexible profile is attached, and only then the remaining CD profile is mounted.
Recessed circle
The plasterboard is puttied, painted and then installers are called to install the suspended ceiling.
You can see how professionals stretch the fabric onto a complex frame in the video:
A suspended round ceiling with proportional dimensions and well-chosen material will make the interior of the room beautiful and harmonious.
Areas of application in design
Having figured out what exactly ceiling moldings are, information about their use will be useful:
- Polyurethane fillets look ideal in rooms decorated with clapboard made of the same material. Thanks to its design, the product can serve as a profile into which the lining is inserted.
- Foam inserts are appropriate in any style using false ceilings and suspended structures. The decor is selected depending on the color scheme of the style. In addition, plastic is easy to paint, which adds to its advantages.
- Wooden moldings are classic elements. Inserts frame ceilings made of wood, but fillets on decorated suspended structures will look good. Another area of application is floor framing. This identity of top and bottom brings together interior solutions and becomes the highlight of the style.
- Expanded polystyrene will be appropriate for finishing coatings made of plastic and gypsum. For example, in a bathroom where the ceiling is decorated with PVC panels or in a living room with plaster stucco. The advantage of polystyrene foam fillets is their versatility. They fit perfectly on glue or uncured plaster, and this gives wide design possibilities. For example, you can “continue” the ceiling into the wall by placing a white polystyrene foam patterned fillet on the plaster in the area where the two planes meet. If desired, the lamella can be gilded or coated with a different color.
One cannot help but mention the gypsum version. Such moldings can be seen in museums and ancient chambers. Made by the hands of craftsmen, the planks repeat patterns, have a rich texture and serve as a true decoration of the joint area. On sale you can find both simple plaster moldings starting at $8 and handmade masterpieces starting at $20-25. But considerable weight, installation difficulties and maintenance requirements detract from the popularity of the product. But a gypsum fillet can become not only an option for decorating a joint, but also play the role of an independent artistic element.
Main materials of ceiling plinths
Polystyrene fillets go well with many materials - from plastic to textured putty. It adheres well to construction adhesive and other joining solutions. This material is produced from raw materials by heat treatment
It is possible to obtain a surface of different textures, which is important to consider when choosing ceiling moldings:
- relief with a pattern;
- smooth varnish fillet;
- rough matte.
Polystyrene is slightly more expensive than polystyrene foam, but it does not support combustion
This is important when finishing surfaces where electrical wiring runs and lighting fixtures are installed.
However, at high temperatures in the flame of a fire that spreads from flammable substances, the plinth will still burn.
The soft material easily wrinkles and loses its shape under mechanical stress. If pressure or impacts are possible on the surface, it is better to use a finish made of hard materials. One of the advantages is that foam plastic can be painted.
Polyurethane fillets are flexible and durable, and are considered an ideal material for decorating the junction of walls and ceilings. This property is very valuable when designing rounded surfaces and broken ceiling lines.
Polyurethane is moisture resistant, so it is used in rooms where there are open containers with water. For all its advantages you have to pay dearly. Before gluing the skirting boards to the ceiling, you should stock up on glue for polymers.
This is an environmentally friendly material, without which decoration in the palace, Empire, Renaissance, Baroque and Rococo styles is indispensable. The disadvantage is the fragility of the material; such a baguette is undesirable in subsiding buildings and in areas of seismic activity.
You can connect the molding parts and the molding and attach them to the junction of the ceiling and wall only with gypsum mortar or putty of a thick consistency.
Polyvinyl chloride or PVC fillets are a common finish at the junction of walls and ceilings, an affordable and practical material. Cornices are offered in different color variations, with patterns to suit any interior design.
This is a type of plastic, and the laminated surface imitates any material, including wood or marble. This plastic plinth is easy to attach to the ceiling using special glue. The material is resistant to temperature changes. A baguette secured with screws serves as the basis for fastening the finishing panels.
Wood is rarely used for ceiling moldings, but it looks great. The only drawback is a noticeable joint between the segments due to the difference in wood texture. This is the most expensive finish used for an elite classic interior where expensive materials are used. This type of cornice requires fire protection treatment.
At the intersection of different materials
If tiles or wall panels are laid only on part of the wall, the transition from tiles/plastic to a flat wall does not look very presentable. In order to make this transition more attractive, they use special border tiles, but they are too expensive - much more expensive than regular ones. No less interestingly, you can design this joint using molding. The decorative strip is mounted so that it covers the joint.
If the tiles do not lie up to the ceiling, the transition can be made using molding
The width and thickness are selected for the specific interior and the thickness of the materials being joined. Since we are usually talking about a bathroom, toilet or kitchen, it is more advisable to use materials that are easy to clean and are not afraid of high humidity. The optimal choice for tile joints is polyurethane. It can then be painted the same color as the wall or tile.
The transition from one material to another is best accomplished using molding
If you are decorating the transition between plastic panels and a painted/bleached wall, you can use a plastic plinth. Wooden panels or MDF panels are best joined to walls using wooden moldings.
The same technique works very well when you have to combine two colors or two textures. Moldings are used to separate and harmonize joints. This can be an accent wall, which is very fashionable now.
You can separate material of a different color using moldings
But an accent wall doesn't have to be a different color or pattern from start to finish. It is for such a case - if a canvas or material of a different color occupies only part of the wall - that moldings come in handy. They give a finished look to this finishing element.
Advantages
The main advantages of using moldings:
- Ease. Wood weighs more, and all other types of compositions are lightweight. This makes it possible to simplify the installation and delivery of the coating. To fix light elements, it is enough to prepare a simple adhesive composition suitable for molding.
- Strength. This advantage is characteristic of wood and gypsum materials. Foam and polyurethane are fragile. On the other hand, high strength coatings are usually not required in the bedroom
- Easy to install. Installation is limited to taking measurements and marking for installation. When this stage of work is completed, you can begin application. In order for the molding to stick well, it is enough to hold each element pressed against the wall for 1 minute.
- They are not afraid of moisture. Neither type of material absorbs moisture. This advantage is achieved thanks to modern technologies that provide the possibility of high-quality processing and protection.
Moldings are used in different design styles. They are beautiful - this is their most important advantage, for which users buy the material.
Overlay elements must not be painted or damaged. They are processed and covered with film under production conditions. If damaged, part of the film is removed. In this case, some elements can be replaced with others by dismantling the damaged pieces and installing new linings in their place.
Furniture decor with wallpaper
Covering old furniture with paper trellises is a godsend for those who adore Provençal motifs in design. With the help of excess finishing materials, you can create an original piece of furniture that will become the center of the decoration concept.
The technique for decorating a set is similar to decoupage, but does not require soaking the wallpaper with water. To glue wallpaper patches, you need to properly prepare the set.
- Clean the surface of the furniture from varnish and old paint.
- Get rid of cracks using putty.
- To obtain a perfectly smooth surface, treat it with sandpaper.
- Prime the work area with acrylic primer.
Furniture decorated with bamboo wallpaper looks original. This set will fit perfectly into an oriental-style interior. For the Scandinavian trend, trellises with imitation of natural stone or spectacular wood are suitable.
Ceiling trim with molding
Before proceeding with direct installation, you need to worry about the following tools and materials:
- suitable adhesive composition;
- a device for cutting material at a certain angle,
- paint brush;
- well sharpened knife.
For installation on ceilings and walls, white acrylic-based sealant or construction liquid nails are usually used. According to the advice of experts in the construction industry, it is more advisable to use liquid nails for the simple reason that they set much faster and hold the glued parts more reliably.
Calculation of the amount of material and installation of molding
Initially, it is important to calculate the required amount of material that will be used for repairs. The length of each side of the walls of the room is divided in half, since the standard molding is available in two-meter sizes
The results obtained must be rounded upward. When adjusting fillets in the corner parts of the room, an additional cut will be made, so it is necessary to purchase material with a small margin.
Decorative parts can be attached to walls covered with wallpaper, and the procedure will not cause any particular difficulties, since the surface under the wallpaper is in most cases flat. Installation on unprepared surfaces is also possible, although this makes the process slightly more difficult. To attach the molding to a bare wall and ceiling, it is necessary to pre-treat the surfaces of the latter. In this case, the molding will merge with the wall and ceiling and will look like a common decorative element.
I would like to emphasize that when installing molding, it is very important to join it in the corners with high quality, for which there is a certain technology. Initially, the shape of the cut is noted in the corner, after which, using a construction sawing mechanism (miter box), the edge of the material at the joining point is cut at the required angle
If you are not sure of the correct selection of the corner cut, then it is advisable to create a template from the remnants of the material at the joining site, according to which you can perform the cutting.
After adjusting all the connecting points, you can proceed to directly attaching the decorative elements to the wall and ceiling. Work begins from the corner part of the room, as it is considered the most difficult. Having installed the decorative part in the corner of the ceiling, all other elements around the perimeter of the room are glued by analogy.
To attach elements using liquid nails to a bare wall and ceiling, you must follow a certain sequence of actions:
- at the initial stage, the working surface of the wall and ceiling is processed, which are leveled with putty;
- liquid nails are applied to the pre-fitted material;
- the decorative element is glued to the wall and ceiling, while excess adhesive is removed with a rag;
- When cracks form at the junctions of adjacent elements in the corners, the latter are sealed with putty or sealant.
If, during the process of gluing the material, gaps have formed between the ceiling and the decorative element, then they are processed in the same way as the corners.
Shapovalova Margarita Vasilievna
https://propotolok.guru
How to close the joint between a ceiling and a wall without a plinth
It is well known that even the most popular so-called “invisible” profile, used to cover the baguette as much as possible with the tension fabric, still leaves a small gap between the wall and the edge of the tension fabric. Against the general background, such a gap does not attract much attention, but still the line where the ceiling decor joins the wall creates the impression of incompleteness or unfinished finishing.
Problems may arise if, a few months after installing the stretch ceiling, the invisible supporting profile suddenly becomes visible, narrow gaps turn into serious cracks. This is not such a rare phenomenon when a baguette bends under load, and the stretch ceiling becomes like a stretched sail.
PVC plug
The design problem can be solved at the planning stage of a stretch ceiling scheme. Many baguette profiles have a mounting groove at the bottom, into which it is easy to insert an additional decorative plug.
This solution has two quite significant advantages:
- Easy to install and remove the cover. If for some reason, for example, to repair a stretch ceiling, it is necessary to remove the decorative plug, then this can be done within a few minutes without using any tools;
- The plug does not leave any marks on the ceiling or on the surface of the walls; there are no residues of glue, putty, or sealant.
This means that if necessary or, for example, if the owners want to change the design of the room, the overlay can be changed an unlimited number of times.
The installation process takes minutes
The disadvantages of the plug include its relatively simple appearance compared to the baseboard; it cannot be used as a full-fledged decorative element. This is more of a practical and convenient protective tool than a way to decorate suspended ceilings.
Polyurethane skirting
Overlay elements made of polystyrene and polyurethane do not always fit organically into the design of a room with suspended ceilings. Decorative plinth is more often used for plasterboard ceiling surfaces with stucco molding and relief decor.
The plinth looks great in retro style
Polyurethane plinth becomes indispensable if the suspended ceiling and walls are decorated in complex, not always coordinated and quite bright colors. In this case, a wide edging laid around the perimeter of the ceiling will soften the contrast of the finishes of different color schemes.
Protective tape
It is clear that using a plinth is not mandatory; not everyone likes the idea of laying an additional decorative element under the ceiling fabric or film. Therefore, you can close the remaining gap between the edge of the stretch ceiling and the wall with a special non-woven tape.
The material is glued along the transition line, the gaps at the joints disappear, the design of the room remains virtually unchanged, but becomes somewhat angular
Drywall drywall
Photo of the design of a suspended ceiling made of plasterboard.
This type of two-level suspended ceiling has become widespread and is often found in apartments with European-quality renovation.
Photo of the design of a two-level suspended ceiling made of plasterboard
Whichever type of ceiling is chosen, to install it you will need a whole list of materials and tools, which include:
- Level (an indispensable tool for correct ceiling installation). Thanks to it, you will be able to install the structure and drywall sheets without distortions. There are several varieties of this instrument. Laser or inexpensive water-based ones are often used;
- Hammer (a construction tool used to adjust the ceiling surface for installing profiles);
- Screwdriver (device for tightening screws);
- an ordinary square (a simple tool used for marking and drawing straight lines);
- Screws and self-tapping screws (fasteners for securing profiles);
- suspensions and profiles (frame of the future ceiling);
- Drywall (sheets of material from which the ceiling surface is formed). When installing stretch fabrics in rooms with high humidity, such as a kitchen, you will need moisture-resistant plasterboard sheets. This material is unique because it is easy to install and give any desired shape.
- Hacksaw (tool for shortening profiles). An electric jigsaw is also used, with which the work is faster.
If desired, construction work can be entrusted to professionals, but in this case the cost of European-quality repairs will increase significantly. On the other hand, only masters of their craft will protect you from unintentional errors during installation and guarantee high-quality completion of the assigned tasks.
The process of installing the ceiling itself is complex and requires skill. First of all, using a pencil, the selected design sketch is drawn on paper, after which it is carefully displayed on the surface itself. If difficulties arise at this stage due to the complexity of the sketch, you can use various construction tricks:
- the use of curved blanks cut from plasterboard, on which it is much easier to draw the selected sketch.
- using coordinate centers. Usually these centers mean the corners of the room, however, if the sketch has a lot of curved lines and circles, it is more advisable to fix the fasteners on the ceiling and use it as a coordinate center. In this case, a thread with a pencil is tied to the fastener, with the help of which further marking is carried out.
After marking work is completed along the perimeter of the ceiling, a frame is mounted from a rigid guide profile, into which CD partitions are subsequently installed. This is shown in the photo:
Installation of a drywall guide
After the installation of the frame is completed and the component parts are fixed using fasteners, it is covered with plasterboard, which is subsequently, after installing point light sources, repeatedly puttied and painted.
During installation, the main thing is to provide for the location of electrical wiring, point sources of lighting and ventilation, since dismantling the installed frame is not an easy task and will require the intervention of professionals, thereby causing associated costs for correcting repair errors.
Connecting LED strip
Of course, it is better to carry out European-quality repairs not according to training instructions, but under the supervision of professionals or with their direct participation. And you can monitor their work personally, making, if necessary, suggestions for improving the design of the room.
How to glue moldings to the wall: choosing the installation method
How to get rid of black mold on walls and ceilings
The sections discussed above spoke not only about the wide scope of application of moldings, but also about their varieties in shape, materials, texture
It is important to note that each type requires special installation conditions and can be attached in several ways
The most commonly used adhesive composition. The most commonly used is silicone glue. With its help, you can reliably fix moldings made of plastic, rubber and metal on a flat surface. Liquid nails are used for the same purpose, especially if the surface is not perfectly smooth or has pores.
Almost all materials from which moldings are made are flexible, with the exception of products made from natural materials such as metal or wood. Therefore, such planks must be glued along clear contours, and neat cuts must be made in places of bends.
Silicone glue is most often used to fix moldings.
An excellent solution to the dilemma of choosing products and fixings is the use of self-adhesive moldings. The main condition for their successful use is the need to glue them to perfectly clean and dry surfaces. They begin to remove the protective tape directly during the gluing process, removing it centimeters at a time.
How to glue moldings to the wall: nuances in carrying out the work
Actually, the installation process is quite quick and simple - it is enough to follow a clear sequence of actions and follow several rules, including the following:
- Before gluing the moldings to the wall, it is necessary that they lie in the room for at least 24 hours in order to adapt the material to the humidity and air temperature;
- For installation, strictly special adhesive mixtures or liquid nails are used;
- if the moldings are attached to concrete walls, then acrylic glue is used;
- to ensure reliable fixation of the panels, they are carefully pressed against the wall and held until they set;
- During installation, level installation is important; corners should also be trimmed as carefully as possible.
Moldings are glued starting from the corners moving towards the center of the room
The fastening process itself includes a number of sequential actions and consists of the following stages:
- Preparatory. At this stage, the surface of the wall is covered with plaster and thoroughly primed. Markings are also applied to the places where the parts are supposed to be attached.
- Installation. This is the main stage during which assembly adhesive is applied to the planks. You need to start gluing the moldings from the corners, moving towards the center of the room.
- Drying. This process will take at least 6 hours. At this time, it is advisable to start masking the cracks and gaps that have formed between the molding and the wall. For this purpose, ordinary putty is suitable; after drying, its excess can be easily removed with sandpaper.
- After gluing the moldings, the entire wall or selected areas are covered with the selected material. This could be wallpaper, paint or panels.
Thus, moldings can be called a universal material that successfully hides imperfections in the finishing, protects corners or joints from damage, helps to zone a room using various finishing materials or focus attention on a certain segment. In addition, the material can perfectly diversify and decorate the interior, giving a new image to the room, adding elements of luxury and grace.
At the same time, installation of molding does not require a lot of time, money and special skills
In addition, the material can perfectly diversify and decorate the interior, giving a new image to the room, adding elements of luxury and grace. At the same time, installation of molding does not require a lot of time, money and special skills.
How to do
Not all options for such decorative lighting can be arranged independently. However, the most popular of them can be assembled with your own hands.
To arrange the simplest version of such lighting, no additional structures are required. It is enough to purchase a regular polystyrene skirting board and install it in the room. LEDs are placed in the gap between the inside of the baseboard and the wall. The only difficulty with this placement is finding a place for the power supply.
The main thing in this arrangement is to choose a sufficiently strong adhesive for the baseboard. It will be attached to the surface on one side only and should be held as tightly as possible.
The second option will require more significant costs and can only be used with matte types of films, since gloss will reflect everything that is underneath. To lay the diodes, a plasterboard niche is used here, which can be assembled even after installing the tension covering. However, it is better to provide such lighting in advance. This will not only make assembly easier, but will also slightly reduce the overall cost.
Installing diodes in a special profile is not as difficult as it might seem at first. Simply, when installing the ceiling there will be several additional operations. You should foresee in advance the place where the power supply and the glow controller, if used, will be installed.
The created visual effect of a ceiling floating in the air with this installation is very strong. The next photo shows such LED lighting for a stretch ceiling installed in a special profile around the perimeter of the room.
The most interesting from the point of view of visual effects will be the option with the placement of LEDs between the stretched fabric and the ceiling. In this option, the strip with LEDs is installed even before the covering is stretched. However, there will be several restrictions.
First of all, not every canvas can transmit light. To create the desired effect, a translucent coating is required. Secondly, the power of the diode strip should be limited to a value at which they do not melt the film when heating up during operation.
Painting the baseboard
White baseboards are often intended for painting. You can start painting it within a day after applying the sticker. How to paint polyurethane baseboard? For the ceiling version, water-dispersion paint is usually used. For flooring - acrylic or latex, since in this case the surface can be washed later.
To paint polyurethane floor plinths, you can use acrylic dye
Now let's see how best to do this. Typically, painting the baseboard is done before gluing it. However, it can be painted after installation. In this case, the walls and ceiling along the planks are glued with masking tape. Painting is done in two layers. You can use either a brush or a spray bottle.
We found out how to paint a polyurethane baseboard. Now let's see how best to do this. Typically, painting the baseboard is done before gluing it. However, it can be painted after installation. In this case, the walls and ceiling along the planks are glued with masking tape. Painting is done in two layers. You can use either a brush or a spray bottle.
Paint can be applied either with a spray gun or with a brush.
Moldings varieties and main advantages
Molding used as a decorative element in a residential area is usually made in the form of long slats in a corner design. In this case, the wide part of the element is glued to the wall surface, and the narrow part to the ceiling surface. There are also decorative elements made in the form of a straight plinth (as in the photo), which are attached to only one surface - the wall. Moreover, thanks to this fastening, the molding adheres more securely to the surface.
The wooden decorative element has its own history, which goes back many decades, but this type of finishing material has also found its consumer niche in the construction market. To make wooden fillets, both cheap and expensive types of wood are used.
I would like to emphasize that installation of wooden molding is possible only on perfectly flat surfaces, and due to the significant weight of the material, self-tapping screws, rather than glue, are used when attaching it.
Fillers made of polymer material are much cheaper than their wooden counterparts and much easier to install. At the same time, due to the ease of processing, they are produced with a variety of patterns and shapes.
However, the most popular are polyurethane fillets, which are suitable for finishing any uneven surfaces, which is achieved by the significant plasticity of the material, thanks to which even with strong bends of the molding it does not break, but takes on the desired shape.
Beautiful moldings on the ceilings in the interior
Interior decoration with molding: features of the work
When decorating an interior, there are a number of features and nuances that you need to become familiar with. This will eliminate a number of mistakes, make the appearance of the room unique, and extend its service life.
How to paste under wallpaper
Basically, the color of the molding is chosen not only so that it matches the wallpaper, but also emphasizes the design of the room.
If the wallpaper is light in color, the room is large and spacious, then light-colored planks are used.
However, when introducing dark tones into the design, for example furniture, they create a contrast - highlighting the light wallpaper with a dark finish.
When and how to glue wallpaper
Wallpaper is glued when all finishing work is completed. That is, a day after gluing the plank, it is painted in the desired tone. After drying, grout is done, removing all excess. Only after this the wallpaper is glued. They must be glued carefully butt-to-metal with the molding. You need to make sure that the edge of the canvas is smooth and does not overlap the bar. Otherwise, the appearance will be spoiled.
How to properly glue frames made of different materials
Almost all planks are glued to the base, with the exception of wood. It is secured with self-tapping screws. After the markings are made and the planks are cut according to size, the corner parts are glued first. You need to make sure that the angle is even. Afterwards, horizontal and vertical strips are attached to the corner elements.
For strength, holes are made in the planks for self-tapping screws. After drying, the screws are removed and the holes are sealed with putty.
How to attach metal and wooden baguettes for decoration
Metal and wood slats are heavy. They are not mounted with glue. To decorate a wall or doorway, the planks are fixed with self-tapping screws and dowels. The pitch between the screws is determined based on the size of the strip, as well as its width and weight.
How to glue polyurethane baseboard frames under wallpaper
Polyurethane strips are glued to the base using:
- White liquid nails.
- Glue for polyurethane, for example "Oras".
- Polymer universal glue “Dragon”.
All adhesives have good adhesion and a number of features.
In what cases is the baguette not attached to the wallpaper?
Craftsmen do not recommend attaching molding to wallpaper. However, if the wallpaper has been hung recently, it is good to stick to the surface, then the strips are attached to the canvas. But there is no guarantee that the decor will remain in place for a long time. Under its weight, it can peel off and tear the wallpaper.
Device options
The main advantage of installing such decorative light is that it can be installed at minimal cost and, in some cases, even after installing the coating itself. To do this, you don’t need to radically redo anything - just assemble another level from plasterboard or simply install a decorative plinth, behind which the lighting elements are installed.
There is another, more complex installation method. It involves the use of a special fastening profile, which allows you to install light strips in the space between the wall and the stretched film. With this installation, the structure does not touch the walls and the feeling that it is simply floating in the air is further enhanced.
To arrange additional light in this way, you will need to plan it even before the ceiling is ordered, since you will need to use a non-standard profile. The cost naturally increases, but the resulting effect is worth all the money spent. The photo below shows what suspended ceilings look like with such lighting around the perimeter.
Exactly the same planning will require the installation of diodes between the canvas and the ceiling. With this installation option, they will not be visible from the outside until they are turned on. The method is very beautiful and effective, however, it is not possible in all cases.
Installation of polyurethane brackets
Installation of brackets (consoles or fragments of cornices) is not difficult.
Therefore, we will dwell on possible options for using this decor group.
Brackets - supporting elements of projecting parts of walls in the form of a protrusion in the wall, often profiled and decorated (with scrolls or other decorations). Most often, the brackets are presented in the form of a volute, usually decorated with a relief acanthus leaf.
- A variant of the classic framing of cornices is along the edges, or placing brackets under the cornice along the perimeter of the entire wall with equal indentations.
- The most common use of brackets is to decorate the frame of doorways and beams that divide a room into different functional areas.
- It is also possible to create complex interior decorations consisting of multi-level cornices and consoles made of polyurethane (C118 + A118).
- Use consoles for decorative shelf bases (additional strengthening of the structure using metal fasteners or brackets is possible).
- Designers often use brackets to decorate furniture fronts (for example, kitchen units or wardrobes), which gives the furniture individuality.
- Decorating fireplace portals or other protruding structures is also successfully used - any numerous variations of your choice.
Molding configuration
Most often, decorating walls with moldings is used in the reconstruction of ancient interiors.
Below is an example of the use of moldings in a Victorian interior.
Wall moldings for Victorian interiors
The multifaceted use of moldings (for ceiling medallions, in wall bas-reliefs) is typical for classical designs and neoclassicism. Figured bas-reliefs and complex configurations are perfectly highlighted by the built-in ceiling lighting.
In modern interior styles, complex forms of moldings are used more restrainedly. The shapes of the frieze are simplified, acquiring simple geometric shapes.
This photo shows that a simple form of molding is used to separate the walls and ceiling, made in the same color.
The neutral color of the walls harmonizes with the wicker furniture.
The color division of surfaces can organically blend into the color scheme chosen by the designer.
The pastel pinkish color of the ceiling molding with a simple profile matches the tones of the headboard, floor lamp, and soft pouf.
A more complex form of molding extending onto the kitchen ceiling is needed to visually reduce a large area of the room.
The high height of this hall forces architects to use all techniques to visually reduce it.
Ceiling, middle moldings in the interior of the living room with a sharp white color divide the high painted walls into unequal parts. The monotony of large walls is broken by the absence of molding on the pediment of the fireplace and the stepped structure of the ceiling frieze.
The opposite effect of using contrasting moldings is also possible.
In this interior, light molding expands the ceiling area, and the visual contrast with dark walls enlarges the small living room.
Options for using moldings on walls in the interior: photos of original solutions
What is molding, types and options for use in the interior
Moldings are used in the design of different rooms and functional areas. The most common is the use of moldings on the walls in the interior of the living room. Photos, of which there are many on the Internet, clearly demonstrate this. In this case, experts recommend adhering to the following rules:
- In low-ceiling rooms, it is better to avoid decorating the ceilings with wide, contrasting ceiling plinths. A laconic material to match the ceiling would be more appropriate here.
- In small living rooms, narrow slats of small sizes look great, and in spacious ones, wide and massive ones.
- Moldings should fit perfectly into the overall style of the interior and be harmoniously combined with the entire decor.
- It is better to choose decorative elements in opposite proportions. Low ceilings will go well with vertical narrow moldings on the wall, and horizontal panels are appropriate in a room with high ceilings.
Small narrow moldings look great in small bedrooms
These recommendations are also relevant when using moldings on the walls in the bedroom. But in the design of kitchens, the use of this type of decoration is excluded, which is primarily due to practicality, in order to avoid the accumulation of dirt and carbon deposits on convex elements.
Wall decor using moldings: combination with other materials
Moldings go well with various finishing materials, in particular:
- decorative plaster;
- varnish and paint;
- wallpaper;
- elements made of wood and MDF.
The use of moldings allows you to successfully zone the space, creating different geometric shapes and figures. For example, wallpaper molding on the walls will help to highlight individual sections with texture. You can simply use different paint colors if you are using paintable wallpaper. This combination of materials makes it possible to imitate panels.
Wood moldings have a chic look, are easy to clean and durable
Nowadays, the trend is a combination of coatings that are different not only in color and texture, but also in composition. For example, the transition from a painted wall in the kitchen area to a wall covered with wallpaper in the living room will be perfectly brightened up by moldings. In this case, they will become an indispensable tool in zoning rooms and distinguishing one material from another.
To create a design in a modern style, you should choose smooth, strict panels, and to decorate an interior in a luxurious classic style, elements with stucco are ideal. In this case, moldings for interior doors in the form of platbands are often used. A harmonious combination will ensure the selection of planks, doors and baseboards in the same tone.
Molding frames will allow you to visually enlarge small windows. To do this, you need to perform one simple but successful trick - cover the entire area with light curtains, and not just the area where the windows are located.
The competent creation of geometric compositions from moldings will help to refresh the room. Before gluing moldings to a wall with wallpaper, carefully consider the location of the sections and furniture arrangement. This design design is more typical of the classics.
Geometric compositions on the walls made of moldings will help refresh the room
Ceiling design with stucco moldings made of natural gypsum
If you decide to decorate the ceiling with gypsum stucco, then get ready for the difficulties that you will encounter on the way to the result. However, if everything goes smoothly, if you are attentive and careful, then the result will please you for decades! Natural stucco is a luxury and joy from manual labor.
To prepare the solution, follow the recommendations:
- Dilute the powdered gypsum with water to the consistency of kefir.
- Pour plaster into prepared molds.
- Compact the plaster to avoid voids.
- Leave for half an hour until completely hardened.
Mix vigorously using a special drill attachment.
Flexible
Decor of this type can be made of PVC or polyurethane. These materials are quite strong and at the same time very flexible, which makes it possible to decorate even strongly curved surfaces with them. PVC inserts are used for finishing framing of tensile structures, being the most popular solution in this case.
Polyurethane flexible ceiling molding has become an indispensable decorative part when decorating curved surfaces such as columns. No other material can be bent like this. In addition, polyurethane baguettes will help solve the problem with walls that are not too smooth - there will be no gaps left between such a plinth and the plane of the wall, as in all other cases.
The disadvantages of flexible decor components include the rather high cost in the case of polyurethane types of such decor and not a particularly wide selection of shapes in the case of PVC inserts for tension coverings. In addition, it is worth considering that polyurethane moldings weigh quite a lot and need to be mounted on a ceiling or wall with a durable coating.
Ceiling decoupage with paper
Decoupage is a specific technique for decorating various surfaces. This method is often used to decorate ceilings and involves applying various patterns made from newspapers, magazines, calendars, and photographs to the surface. When choosing this finishing option, the owner of the room has a wide field for experimentation.
The main advantage of this technique is exclusivity. In most cases, decoupage can be completely re-done, especially if it was done independently, because all finishing elements are chosen by the person taking into account personal preferences. The disadvantage is the painstaking finishing process.
Ceiling decoupage
Do-it-yourself ceiling decoupage with paper
How to decorate with applications from individual pictures or their composition? First you need to prepare all the necessary tools and materials.
These include:
- acrylic lacquer;
- PVA glue;
- nail scissors;
- Printer;
- books;
- clean cloth;
- synthetic brushes;
- colored paper;
- newspapers;
- putty knife;
- brush for removing old paint;
- putty;
- primer;
- dye;
- pencil.
Table. Stages of self-decoupage of the ceiling.
| Steps, illustrations | Actions |
| Step 1 | Find a clearly defined image online or in print. It is necessary that the drawing matches the style of the interior. Designers recommend using images of natural motifs or abstractions for decoupage. |
| Step 2 | If necessary, change the image size and contrast. Create the overall composition of the decorative appliqué in advance. Print out all the selected pictures that will make up the composition. |
| Step 3 | Using nail scissors, cut out all the necessary pictures. |
| Step 4 | If the composition includes finishing the ceiling with printed drawings, then you will glue them to the ceiling. You can use another material - colored paper or fabric. If you chose colored paper or newspaper pages, then place the image cut out from the printout onto the selected material and cut out the elements of the ceiling applique along the contour. |
| Step 5 | Prepare the ceiling for application. To do this, remove the old finish using a spatula and brush. The surface must be completely free of old coating. |
| Step 6 | Level the surface of the ceiling using putty, if necessary. |
| Step 7 | Prime the ceiling and then paint it in the chosen color and wait for the paint to dry completely. |
| Step 8 | Now you have a smooth painted ceiling and prepared materials for applying the application. Before you start decorating, mark the design so that the finished composition is even and you don’t have to re-glue crookedly attached elements. |
| Step 9 | Apply PVA glue to the prepared drawings with a brush. Press the design against the ceiling and wipe the image with a clean cloth to remove all the air from the space between the design and the ceiling. |
| Step 10 | Apply acrylic varnish in 2 layers over the image. |
Matt acrylic varnish
In this same way, you can completely cover the ceiling with black and white pages from newspapers, magazines, and calendars.