For several years I dreamed of purchasing a light table for sand painting. The finished tables I saw were quite large in size and at a decent price. In addition, I didn’t want to overwhelm an already small apartment with oversized furniture.
In this article I will tell and show how I made a sand painting table with my own hands.
We take the LACK table from IKEA as a basis. It has a very small size: 55 cm x 55 cm and a height of 45 cm, there are many different colors, I chose green. At that time it cost 600 rubles.
Stage 1: Choosing the right acrylic (glass)
Ideally, I wanted to make the top of the table from one thick piece of acrylic with a step around the perimeter. However, acrylic must be milky (white) for uniform light dispersion, but it is quite expensive and generally difficult to find with a thickness of more than 5 mm. In addition, in order to make a step you need a router or something similar. My friends in the advertising workshop (where I bought glass) did not have such equipment. Instead, I ordered two sheets of acrylic from them. One transparent, 8 mm thick and one milky, 3 mm thick.
Glass sizes
- transparent acrylic 480mm x 480mm
- milky acrylic 550 mm x 550 mm (table size)
*in the photo the thick acrylic is also white, in fact it is transparent, just the protective film on it is white
What will you need to make a sand painting table?
The materials and tools needed to make a glowing table with your own hands are inexpensive.
Necessary materials
- Boards.
- A sheet of plywood 10 mm thick or furniture board.
- Glazing bead.
- Plexiglas.
- Ribbon with light bulbs.
- Fork
- Switch.
- Nails.
- Self-tapping screws.
- Water based varnish.
Required Tools
- Thicknessing machine for processing boards.
- Hacksaw for cutting boards and plywood.
- A hex key for driving screws or a hammer when using nails.
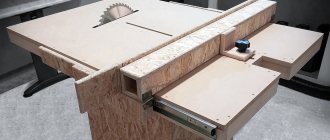
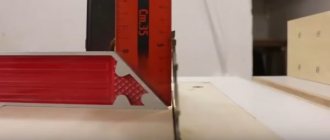
Step 2: Measure twice, cut once
- Carefully mark the top of the table. Check your markings, you can attach a sheet of thick acrylic to make sure that it will fit the cutout in the table. The sheet may not be cut out in exactly the right shape, so it is important to control this point.
- I recommend using only new blades for the mounting knife. To make an even cut, use a ruler as a guide. The ruler should not slide on the surface. Don't rush, because... It's very easy for the knife to jump off the cutting line.
- Remove the cut outer surface of the table. There we will see the honeycomb filling, it also needs to be completely removed.
- Make sure the cutout matches our acrylic.
Do-it-yourself home sandbox
I’ve had this homemade sandbox for a very long time, and I completely forgot about it. I made it when Alice was one and a half, realized it was too early, and removed it. And then I found her, and the child’s happiness knows no bounds, especially after I pulled her from Cyprus back to rainy Moscow, where for the last couple of days I couldn’t even go outside without special needs.
How I did it. A huge container from Ikea with a lid and about 6 packages of aquarium sand from the pet store (probably a kilogram each, but I don’t remember exactly). Just in case, I baked all the sand in the oven.
The sand for aquariums is very fine, much finer than that found in children's sandboxes. This, on the one hand, is a minus, because it scatters around the room more easily, but on the other hand, it is so pleasant that you forget about the main minus when you touch it. By the way, it comes in different colors.
For games with cereals and sand, we always use large blankets, which at the end of the game are simply shaken out somewhere. It is very comfortable.
I don’t think there’s even a need to write about playing with sand. There's a whole world here. Sifting, building, modeling, treasure hunting, gardening, camel caravans, loading and unloading, painting and just mindless wad.
Each time the game can take on different forms, depending on the content. Since we want to extend our sea holiday, we now have pebbles and shells.
And how pleasantly it flows and flows through your fingers. Such relaxation, mmm...
It seems there is even such a thing as sand therapy. I’m sure that’s exactly what we have. And if you wet such sand, it’s just a fairy tale! It molds just perfectly - with your hands, with molds - with anything, and holds its shape very well.
For example, today we made a mountain with a tunnel for a car in it. They also made enclosures for animals, and a bunch of other things.
By the way, I noted a couple of ideas for the near future. I haven't implemented them yet, so no photos. Firstly, with this sand you can build a light box, as we recently did with hydrogel, and you will get a table for sand painting. Secondly, you can place something under a transparent container, for example, a treasure map or a drawing where you need to look for something, clearing only part of the surface from the sand. Something like secrets. Thirdly, make the secrets themselves, just like in the good old days. Fourthly, put a mirror on the bottom, it gives a very interesting effect. And fifthly, try making kinetic sand. About kinetic sand. Usually 2% silicone is added there, but I heard that girls tried to make such sand by adding water and starch, but in this case the mixture deteriorates over time. Maybe there are those among you who know something about how to make kinetic sand at home? By the way, you can read about all our other games with cereals in the “Motor and Sensory” section, for example, here. I responsibly declare that all these games are still very popular among us, and over time the love for them only grows stronger. If only there was variety)
Stage 3: Trim the corners
Each corner of our table is reinforced with chipboard blocks. They prevent us from installing thick acrylic. If you trim them, they will serve as a good support for the glass. It is necessary to trim to the thickness of the acrylic; this can be done with a regular mounting knife. Be careful, the main thing is not to cut yourself, if you cut off more than necessary, then it’s okay, with the help of scraps and PVA glue you can increase the required height.
Once we are sure that the thick sheet of acrylic fits perfectly into the bed prepared for it, we can begin painting the inside of the table. It may seem that this is not necessary, but it is not. The white color will help diffuse the light more evenly and increase the brightness of our light table.
Finishing
After manufacturing and assembling the drawing table, it needs to be given an attractive appearance. Before painting the product, it should be sanded . Once you are sure that there are no nicks, chips or other defects on the table, you can begin painting.
Attention : finishing will not only improve the aesthetic qualities of the drawing table, but will also extend its service life.
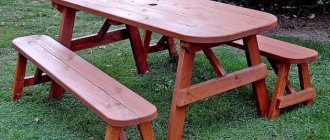
The table can be painted any color . The legs of the product can be made colorful and multi-colored. In other words, use your imagination and create exclusive and unique sand painting tables with your own hands.
Tip : a coffee table, a children's table, or even a glass table can also become a bright decoration for your home.
Stage 4: Electrical
Here I had to turn to specialists (familiar advertisers).
- We took 5 meters of self-adhesive LED strip. This tape is powered by 12 volts, so a power supply is required in order for the sand painting table to be plugged into an outlet. The ribbon comes in a variety of colors, but the color chosen was cool white. Because it feels like the brightest.
- We wanted to make a switch, but we didn’t have one at hand
- A hole was drilled in the bottom of the table through which the plug was passed. At the opposite end of the plug, several clamps were tightened so that it did not fall into the hole.
Product Features
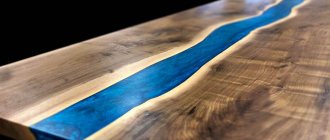
A table for drawing with sand is a structure with a transparent, illuminated tabletop, which is surrounded by additional sides so that when manipulating with sand it does not spill out. Some models are equipped with special compartments for storing tools and sand. The luminous screen is made of acrylic, glass, plexiglass. Light elements are placed inside that will not heat up during operation. Lighting helps make sand paintings more impressive and expressive. In this case, it is necessary to observe the intensity of illumination.
The light should not strain the eyes, but it should be bright enough to provide contrast to the designs.
Making a table for sand painting with your own hands is not a complicated procedure, but it will require carefully following the steps of the instructions. In addition, you need to think about what materials to choose, decide on the model, dimensions and shape of the future product. Making your own equipment for creating sand paintings will significantly save money.
Stage 5: Lighting Installation
Place the tape on the table, but do not secure/glue it. Make sure that the chosen laying pattern is ideal and the entire tape fits. It is better to start gluing from the end that is close to the connection cable, so that in the end you do not have to drill a new hole. The adhesive tape is quite strong, although I did add a few strips of double-sided tape on the folds and corners just to be safe.
We connect the tape to the power source. Tests show that everything works.
Stage 6: Installation of acrylic
Mark and drill holes in the first sheet of transparent acrylic. Next, we use this sheet as a template for drilling milky acrylic. The holes must be larger than the screws, otherwise the acrylic may crack when screwed.
The corners of milky acrylic can be rounded.
Select fasteners that are the right size for you. There are self-tapping screws of different colors and with different heads; I liked the shiny ones with a round head, which I chose.
Roll it all together and you're done! Try to keep the glass clean, otherwise dust and dirt on the inside of the acrylic or between two sheets will be very noticeable when you turn on the light table.
Light tablet - also known as UPTABLE copy table
I first read about the light tablet in a book by Miu Mau - “The Diary of a Maniac Designer” by Yana Frank. There is a whole chapter dedicated to copying tables and what a convenient device they are for artists and sympathizers. But the description of the table for illuminating the image from below in the book created the impression that it was something bulky and heavy, and seemed to be necessary only for artists who draw a bunch of pictures in ink or in a continuous stream. For example, for comics artists - because it makes it easy to outline a pencil sketch with a black outline. Now, while working on articles about creative and unusual gifts, I found a modern version of light tables - UPTABLE - lightweight, space-saving and comfortable. The possibilities for their use by Second Street residents are almost limitless:
Still, probably in childhood, we did this kind of thing - you put a piece of paper with a drawing on the window, a blank sheet of paper on top and, sticking out your tongue, carefully trace the contours - then all that remains is to outline the edges with a brighter marker and color the finished picture. True, in the process of such sketching, my hands became numb, it was possible to draw only with a pencil, and it was very difficult to redraw something from the book - holding it, completely open on a separate sheet, with one hand, which also holds a sheet of paper, is quite difficult.
Drawing
As for the drawing, here you can show your imagination. It is necessary to make it more convenient for you to manufacture and assemble the product, and to avoid mistakes during the work process. Typically, a sand painting table is rectangular or square in shape. Its height and length can be any .
Game exercises
At home, in kindergarten, and in early development classes, children learn through play. This is the best way to teach the complex through the simple. A tabletop sandbox with high sides and play exercises for preschoolers will help you with this.
Training your fingers
Start your first acquaintance with animation not with theory, but with practice. Give the opportunity to touch, smell, and explore the material. Turn on the lighting in the sandbox. You can play soft music so that the kids are completely immersed in the process and understand that something unusual is about to happen.
Ask preschoolers to draw any object or figure on the glass with their finger. Let them tinker with the sand as much as they like.
At the same time, motor skills, imagination, and attention develop
Let's play hide and seek
You will need a rake, shovels and a thick layer of sand. Give students small toys (Kinder figurines). Ask to bury it unnoticed by others. Have a competition to see who can find a friend's toy faster with their eyes closed using their fingers.
What a surprise I have
The teacher hides various small objects (buttons, rags, pieces of paper, figurines, balls, coins) in the sandbox. The children's task is to find one object each with their hands, guess what it is by touch. In the process of understanding and feeling an object, you need to talk about your feelings and assumptions.
Treasure
The sand needs to be poured into a deep container or chest. Place pirate treasures inside: beads, coins, map, “gems”. You need to look for treasure with one finger. Attach a fascinating story to every discovery. Tell it yourself or come up with it with your children.
Stone
Find a cobblestone on the street. Let it be unpleasant to the touch: cold, slippery, rough, etc. Bury the item in the sand. Ask the children to touch an unknown object at the same time, tell them how they feel, why they feel uncomfortable, and the like.
Continue exploring as a group when the stone is removed from the sandbox. Tactile sensations are responsible for the formation of speech and train emotional endurance.
Option No7. From starch and dishwashing gel
And the last sand recipe, which also involves the use of available materials. It will take no more than 15 minutes to prepare!
So, you will need:
- dishwashing gel (1 teaspoon);
- clean fine sand (2 cups);
- starch (preferably corn starch, but potato starch is also suitable - 1 cup);
- warm, but not hot water (0.5 cups);
- essential oil (optional, just needed for scent).
Step 1 . Take a container of a suitable size, mix all the ingredients to obtain a homogeneous mass.
The components must be mixed until a homogeneous mass is obtained.
Step 2 . In principle, the “smart” sand is ready. A great surprise for your child!
The finished sand holds its shape perfectly
The sand is not wet, but as if wet
Kinetic sand figurine
The material is easy to cut
On a note! First, it’s better to make a small portion, and only then, after filling your hand, you can make more sand using different dyes. Try the recipes above to not only please your baby, but also save money!
Homemade kinetic sand
The main disadvantage of the described sand masses is further cleaning. Get ready for this! You can lay a disposable tablecloth or oilcloth for your child in a place where it will be convenient to clean. When your baby is done playing, store the sand in an airtight container to extend its lifespan.
We also note that homemade “smart” sand, despite its similarity to factory sand, still dries out after some time and therefore becomes unsuitable for play. What should I do? Just add a small amount of water or spray from a spray bottle.
What is the benefit of this activity
American cartoon director Carolyn Leaf presented an interesting idea to teachers and parents on how to organize children’s leisure time and develop multidirectional skills at the same time.
She created a sand video. The heroes came to life and acted on the luminous board. The artist painted them with her fingers using sand. The idea was picked up by other animators. The method of creating images and plots has been highly praised.
Gradually, drawing on a special board with sand came into the lives of ordinary people. Teachers began to practice such classes with children of different ages. The fascinating method of pedagogical work was studied from the point of view of psychology, physiology, and didactics. Teachers and preschool educators who practice innovation have noticed the following beneficial properties of such activities:
- Drawing with sand on glass is fun and interesting. 99% of children receive a charge of positive emotions during the lesson and entertainment.
- The method has no special rules. The baby can draw with his palm, one or more fingers, create any shapes and erase them quickly if something doesn’t work out.
- The absence of restrictions relieves emotional stress. Children are relaxed, moderately excited, and feel like the creators of a unique masterpiece.
- Motor skills develop. Kindergarteners are tired of plasticine and pencils; practicing finger dexterity with a light tablet and sand is no less useful. Speech develops simultaneously with motor skills.
- Graphomotor skills are improved. Schoolchildren develop the ability to follow a contour, hold a pen correctly, and observe the rhythm of movements.
- Suitable for any age. Nursery children, schoolchildren and adults enjoy drawing on the board. The magic of free-flowing animation leaves almost no one indifferent.
- Relief from stress. Working with sand is included in a course of psychotherapy for the treatment of neuroses, tics, and insomnia. Healthy children also calm down during classes, find peace of mind, and forget about troubles.
- A unique method helps to reveal creative potential and find yourself. The child shows imagination, shows hidden abilities, and is not afraid to evaluate the result.
If we consider the methodology from the point of view of organization and material costs, the following advantages are revealed:
- Consumables are cheap. It is not necessary to buy sand; use semolina or ground coffee.
- You can make a drawing tablet with your own hands. You will need a lamp, plexiglass, and a wooden box. The equipment takes up little space in the room and does not require special care.
- Any mother, father, or grandmother can teach a child to draw with sand. No special education or courses are required for classes. Look at examples of work on the Internet and feel free to start creating.
This is interesting: Polyurethane moldings: we explain all the nuances
Purpose and types of easel
An easel is needed to place the canvas intended for painting on it. The lighting falling on the future painting matters for the choice of color.
Types of canvas stand:
- stretcher;
- floor or tabletop;
- machine;
- lyre;
- sketchbook or tablet;
- tripod.
Each type of canvas stand has its own purpose:
| Easel name | For whom and what is it suitable for? |
| Stretcher or clapperboard |
|
| Lyra |
|
| Easel machine or studio |
|
| Tripod |
|
| Sketchbook |
|
| Desktop | They are used by children and teenagers, that is, by those who have just started learning about painting. |
| Transformer |
|
Many parents make easels for their children from cardboard. But this option is only useful for a 5-year-old child.
If the future artist is over 7 years old, and he seriously intends to engage in this art, then he buys a real easel. Otherwise, the child may lose the desire to create due to the fact that he will not feel surrounded by the necessary supplies that a real artist uses.
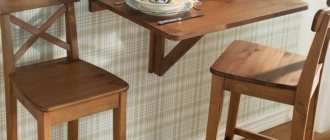
With or without legs?
There are two main options on sale - with and without supports. Let's look at all the main features:
- Options without legs - can be placed anywhere. It is much more convenient for small children to play on the floor, so this option is perfect. In addition, they can be placed anywhere - even on the kitchen table, even on the desktop. Essentially, this is a box that moves to the right place, it is convenient to transport and carry.
- Models with legs . There are two varieties - with stationary supports and with telescopic legs. The second option is much preferable, since you can adjust the height as the child grows and he will always be comfortable. In addition, you can change the height depending on whether children are playing standing or sitting, this is also important.
The design on adjustable legs adapts to the child and allows you to quickly change the height of the working surface
- There are options with removable supports . They combine the advantages of the two options described above. While the child is small, a structure without supports is used, then the legs are placed, and you set them to the required height.
When choosing a design with legs, always check that the height is easy to adjust and that it is securely locked in the desired position. The process should be easy and quick. It is best if the structure is set according to certain marks, then you do not have to set each leg separately.
Education
The sandbox is also used for training. Unlike a white sheet of paper, it arouses genuine interest - children are more willing to complete tasks:
- draw letters, numbers, figures;
- copy them from the original, turning on the backlight;
- make up and write words, syllables;
- hide (bury) or, conversely, look for a given number of figures in the sand;
- Place dots with your finger in accordance with the number on the card.
Illuminated sand painting kits sometimes include a chalkboard for drawing with chalk. With this accessory, any activity can be easily transferred to the sand panel. You can also buy a table with a compartment for a gaming lid. Its design can be different: the alphabet, a world map, a zoo, a farm - all this can also be studied.
A tablet for drawing with sand is an excellent “springboard” for a child’s development. It will bring a lot of benefit and joy!
Beneficial effect on psychological state
Sand is unique: soft, pliable, pleasant to the touch.
Playing with it, the child calms down, the psycho-emotional state becomes equalized, and negative experiences seem to “fade through the sand.” This is an excellent way to relieve stress and is one of the therapy options for hyperactive and anxious children. A sandbox for a child is a miniature model of the surrounding world. It is possible to play out various situations that the baby faces in reality. Through play, he learns to solve life problems, express feelings, and act. It is easier for him to open up and “tell” about his experiences. Adults can learn more about the baby's inner world by observing and studying his sand drawings.
Sand animation
The child will be able to perform the first simple animation in three to four lessons, having mastered the technical basics of drawing. Invite the student to draw an apple tree on the glass. A step-by-step master class is given below:
Prepare sand and screen. Treat the surface of the table with an antistatic agent and remove excess. Take some sand into your fist and scatter it on the light table. The surface should be covered evenly.
Draw the trunk with your thumb and press down on the entire pad.
Rising to the top of the apple tree, sharpen the line. Draw not all with a pillow, but with a half, then with a nail.
Use your little finger and index finger to draw thin and thick branches. Curve the lines to make the apple tree look like a real one.
Draw a crown. Take sand, pour it generously around the branches, at the top.
Leave a little for the bottom of the picture. Scatter it under a tree. It will be weed.
Using your fingerprints, draw apples on the branches. Determine their number yourself
It is important that the circles are not blurry, the edges should be clear.
If you draw three or four apples under a tree, on the ground, you will get an autumn version of the picture.
Now clear the background. Draw a contour around the crown, remove excess sand from the surface
The tree will have a shape.
Option No6. From hair balm and starch
A plastic mass can also be prepared using hair balm. As a result, you will get excellent material for children's creativity!
Hair balm is also suitable for creating kinetic sand
To work you will need:
- 9 tbsp. spoons of hair balm;
- 750 g potato starch.
Step 1 . You will also need food coloring, so have it ready. As an option, you can take gouache.
Step 2 . Pour the balm into a container, then add the dye and mix them thoroughly until the mass becomes homogeneous.
Step 3 . Add starch little by little, stirring constantly to obtain a mass without lumps. If the mixture is made correctly, it will not stick to your hands or stain them.
Sliced kinetic sand fish
Tools
Tools for making a table you will need :
jigsaw;- drill;
- screwdriver;
- self-tapping screws;
- ruler;
- assembly knife and new blades for it;
- building level.
From the materials you need to prepare:
- a plywood box with high sides (you can buy it in a store or make it yourself);
- acrylic glass;
- whatman;
- Double-sided tape;
- special glue;
- 4 bars for legs;
- lamp or LED lamp.
Help : with a competent approach to making a drawing table, it will take you several days. You can assemble the product in a day, but for it to completely dry and stick together properly, you will need to wait a couple more days.