The main reason why the kitchen is swollen or swollen is poor quality materials. The tabletop should not be damaged by splashes if they are wiped off immediately. Cleaning with wet wipes should also not harm. If the film comes off after a few drops, the plastic bulges, or the edges swell, the problem is a manufacturing defect or:
- exposure to high temperatures, which damage film coatings;
- insufficient amount of glue applied during production;
- non-compliance with operating rules;
- constant high humidity in the room.
Blistering also occurs after mechanical damage to the surface. A small scratch is enough for the destructive process to begin after moisture gets inside.
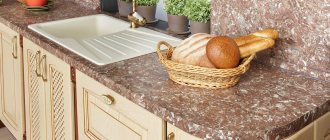
Swelling of the countertop in the kitchen: what to do and how to treat swelling
When choosing a kitchen set, many first of all think about the facade, color, drawers, and the question of what kind of countertop should be fades into the background.
Maybe that's why it causes the most problems. Tables made of stone, glass, stainless steel, and ceramic tiles have found their place in modern kitchens, but most often solid wood or chipboard sheets lined with plastic are used as the main material. If you do not know how to protect the surface, there is a risk of its deformation and rapid destruction under the influence of moisture and other negative factors. What to do if the tabletop suddenly swells, and how to fix it?
Prevention is everything! How to avoid the swelling effect of furniture
If the root cause cannot be eliminated in any way, then it is better to replace the parts made of chipboard with similar ones in size and color, made of MDF with PVC film.
- Firstly
, MDF itself is a denser material and practically does not swell. - Secondly
, the PVC film is “stretched” over the ends. And when there are no gaps between the surface material and the end material, there is nowhere for moisture to penetrate.
You can order parts in the same place where they offer MDF facades with PVC film. When ordering, be sure to specify the chamfer radius.
Article on the topic: How to remove sticker marks from furniture
A chamfer is a rounding along the edge of a facade (in our case, shelves). For doors it is made with a larger radius and often with steps. For a shelf, the chamfer radius should be as small as possible. Unless, of course, you are considering the option of making a shelf or tabletop with a rounded end.
Did you like the post?
Like so as not to lose (it will “save” it in your profile feed) and subscribe to the channel “ DIY Furniture! "
What you might need for cosmetic restoration of chipboard furniture
Each type of defect and restoration requires its own approach, materials and tools. Let's look at what you might need to repair laminated chipboard furniture:
Set for restoring furniture with wax pencils
Furniture repair tool
Can parquet swell?
The standard situation, which most often happens in practice, comes down to one of three options:
- A small amount of water was spilled on the floor. In this case, swelling and repair of the parquet do not threaten; nothing needs to be done except remove the water and wipe the covering dry;
- The parquet set was flooded with a decent amount of water, a layer of several centimeters. The first thing you need to do is remove the water as quickly as possible; you can collect it or move it with mops and brooms into an adjacent room where there is no parquet or laminate flooring. The faster, the higher the chances of subsequently fixing the parquet, if it is swollen, without disassembling;
- A real flood, the parquet boards are in a flooded state for several hours. The first thing to do is eliminate the cause of the moisture seepage, then scoop out everything you can and wipe dry.
Restoration of chips and scratches on tables, cabinets and cabinets made of chipboard
Chips at the ends of lids and table tops, especially at radii, are not uncommon for children's and office furniture.
They can be removed altogether if the end of the furniture is covered with melamine edge. To do this you need:
If the chips are deep enough and it is not possible to grind them off, then such defects can only be masked:
In a similar way, deal with scratches and dents - select the wax or stroke according to the shade, fill it until it is level with the surface, sand it, retouch it and treat it with a fixing varnish or polish.
Repairing chips
To repair chips on chipboard you will need:
Chip on laminated chipboard
Chips usually appear at the corners and are small, light-colored indentations (chipboard color).
The elimination process consists of several stages:
Removing scratches
Such damage is especially often found during the renovation of children's rooms. To remove scratches, you will need the same tools for repairing furniture as for repairing chips, only instead of hard wax it will be more convenient to use soft wax. .
How to remove scratches: sequence of work
Advice! To seal cracks when wax is unavailable, you can use a special furniture touch.
Restoring a worn surface
Scuffs, like scratches, often occur on laminated chipboard due to constant contact with the surface of foreign objects. For example, you can find them during renovations in the hallway or kitchen .
As a result, the top protective layer and partially or completely the paint layer are worn away.
In order to eliminate the abrasion that has already appeared, you need to do a few simple manipulations:
Repairing cracks
Cracks in chipboard furniture often appear under the influence of moisture, heat or improper use at the attachment point of the cabinet doors.
To repair cabinet furniture with your own hands you will need:
After the glue has dried, the element will be ready for use again.
The main reasons for the swelling of furniture sets
Swollen furniture in the kitchen or bathroom is a reason for frustration for any owner. To reduce the risk of damage to your favorite headset, let’s figure out why the problem occurs:
- Chipboards swell due to prolonged contact with water, or due to violation of maintenance rules. Exposure to moisture leads to the fact that the surface begins to delaminate and the PVC film peels off from the chipboard.
- Another common reason is a manufacturing defect. Unscrupulous furniture manufacturers save glue when gluing plastic film. Therefore, after some time of use in “difficult” conditions in the bathroom or kitchen, the film begins to come off. In this case, you need to contact the seller and demand repair or replacement under warranty.
- However, owners often allow delamination themselves, for example, without paying attention to maintenance. Mold spots on swollen furniture are a sign that it was used in conditions of high humidity. And if there is no manufacturing defect, then the case is not covered by warranty, therefore, repairs or replacement will have to be carried out independently, at your own expense.
Restoring a broken hinge area
To work, you will need a lining and a bolt, which must be immediately screwed to the torn loop. The hole is clogged with oil to prevent epoxy resin from penetrating there in the future .
A small amount of epoxy resin and hardener are diluted on a film, a piece of masking tape, or in a disposable cup. Add a little filler (sawdust or construction putty) to make the mixture thick enough.
The resulting product is applied to the damaged area, then a loop is screwed on to hold it in place. Leave the part until completely dry. As the resin hardens, the lining will adhere exactly where needed.
Next, using clamps and a clerical blade, they make a kind of formwork for the edge: they fix the blade on top to limit the plane for pouring the mass. The inner surface of the chip from the outer edge is filled with a similar mixture (epoxy and putty) and allowed to dry.
At the next stage of work, you will need a small section of the sewer pipe, the diameter of which will exactly fit into the hole for the loop. Using masking tape, it is secured inside the round hole, and the remaining part of the damage is filled with epoxy mixture.
After drying, remove a piece of pipe and apply a finishing epoxy layer. As the initial setting progresses, carefully level it with the blade of a stationery knife.
New edges of a suitable color are glued to the ends of the furniture piece. To do this, use a hair dryer, an edge with an adhesive base and thick gloves for safety reasons.
The edge of the edge is heated with a hairdryer and pressed against the end of the part by hand. After cooling, the excess sections of the edge are cut to length and width using a special furniture veneer cutter or a regular stationery knife.
Next, the edge is sanded until the edge is perfectly even. At the end of the work, paint the repaired area with suitable paint and secure the loop.
Thanks to simple steps, you can give a second life to most products in the house and save on the purchase of new furniture.
Source
Can parquet swell?
The standard situation, which most often happens in practice, comes down to one of three options:
- A small amount of water was spilled on the floor. In this case, swelling and repair of the parquet do not threaten; nothing needs to be done except remove the water and wipe the covering dry;
- The parquet set was flooded with a decent amount of water, a layer of several centimeters. The first thing you need to do is remove the water as quickly as possible; you can collect it or move it with mops and brooms into an adjacent room where there is no parquet or laminate flooring. The faster, the higher the chances of subsequently fixing the parquet, if it is swollen, without disassembling;
- A real flood, the parquet boards are in a flooded state for several hours. The first thing to do is eliminate the cause of the moisture seepage, then scoop out everything you can and wipe dry.
True, all of the listed methods for eliminating the consequences and reducing the risk of damage to a parquet board apply to well-maintained parquet. If the set has not been repaired, does not have a varnish or paint layer, or has not been treated with protective mastic, then wooden parquet flooring has a chance of swelling by almost 100%.
Advice! Any parquet installation can be corrected, even without disassembly, so first of all you need to remove free water and in no case try to do hot drying or sanitizing with strong air currents.
You will need to remove some of the parquet flooring, there is nothing to do, otherwise the floor will not dry completely
You can, of course, remove water quickly, but you should not do it this way. The first thing you need to do if the parquet has been lifted by water is to preserve the dies and prevent them from cracking. Therefore, it is necessary to dry slowly, steadily reducing the moisture content of the wood.
Restoring moisture-swollen chipboard
Surely many people are familiar with the picture when chipboard swells after exposure to moisture. Most people in such situations immediately despair, but in fact it’s in vain, because repairing chipboard furniture after swelling is possible. To do this you will need:
First, you need to heat the swelling area with a hairdryer and tear off the edge from it. Then you need to make a depression in the center at the site of the swelling using a circular saw (the height and depth of the milling must be greater than the site of the swelling).
After which you need to generously lubricate the place where you drank with glue and leave it for 20 minutes, as the glue needs to be allowed to absorb. Then you need to make a filling mixture from sawdust or crushed chipboard mixed with PVA glue (it is important that it is not too liquid).
The resulting mass must be placed in the prepared recess and compacted using a spatula (or finger).
Then let it dry for 10 minutes. At this stage, it can be stated that the chipboard repair is halfway through.
On each side of the chipboard you need to put bars and tighten them with clamps. The resulting excess glue must be removed using a spatula. To adjust the width of the chipboard, you need to apply an edge and tighten the clamps. Let stand for 24 hours. Upon completion of the repair, you need to slightly heat the edge and glue it back.
Analyzing the above, you might think that repairing chipboard is very easy. However, a trivial case was considered when a piece of chipboard was swollen and needed restoration. There are often more serious problems that only a professional can handle.
In order for the restoration of chipboard products to be successful, you need to seek help from specialists. Otherwise, there is a high risk that the repair will result in much more serious consequences, which will require significant costs. Therefore, this measure is the most optimal.
Step by step solution to the problem
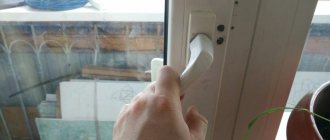
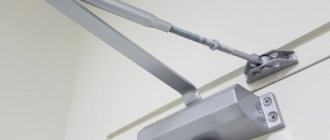
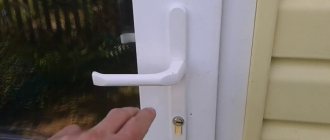
When the bathroom door swells, the question of what to do comes first. The first step is to determine what exactly has changed shape: the door frame or the leaf.
To determine the deformation of the door frame in the bathroom, it is necessary to measure its height, diagonally and, using the rule, determine the bulges on the vertical edges.
If it is the frame that has been opened, then the following steps should be followed:
- remove the damaged casing;
- remove dried foam underneath;
- install the platband in its original place.
After free space appears in a few days, the door frame will return to its original state and there will be no problems with it.
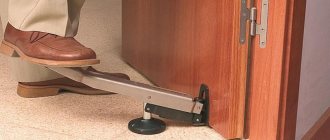
When the cause of swelling lies in the door leaf, there will be much more work:
- the door lock is removed;
- Use sandpaper to sand the end of the door. This removes a small layer of material. Care should be taken not to remove excess, otherwise large gaps may form;
- so that the lock can fit clearly into its grooves, you should go a little deeper, since some layer of wood has been removed;
- After this, the lock is installed back. And the entire canvas is covered with a layer of stain or varnish. If it is possible to find a suitable color to match the previous one, it is not necessary to paint the entire door; it is enough to update only the end after cleaning.
Repairing swollen chipboard furniture using plastic
The simplest solution is to cover the swollen end with a plastic corner or a special profile designed for finishing laminate flooring. This restoration option is suitable for parts that continue to withstand structural loads and do not need to be replaced. In other words, we are talking about appearance and cosmetic repairs.
The material is inexpensive and can be purchased at a construction market. In addition, you should stock up on any brand of “liquid nails” glue. The work is simple, and it is not difficult to do it yourself with minimal experience in repairs.
The plastic cover must be cut to length and glued to the damaged end using “liquid nails.” While the glue hardens, the corner is fixed using clamps through wooden pads. If such a tool is not available, the parts can be pressed using books or temporarily secured with tape.
The end result is a pretty decent look. If the shelf behind the door was repaired, its hinges may need to be readjusted.
Types of primer for chipboards to protect them
Processing sheet material involves applying a primer, which comes in the form of:
- Stains. Used for boards made of pressed chips after lamination. The liquid makes the texture more pronounced, improving the appearance.
- Varnish. The colorless option is chosen for its protective function. Different tones of varnish are used for decorative purposes.
- Water-based acrylic composition. Requires pre-treatment of chipboard as it is easily absorbed.
- Latex composition. Water-dispersed paints and varnishes provide reliable protection against liquid ingress. The disadvantage is the high cost and difficulty in removing the coating.
- Alkyd enamel. The advantage of this primer is the possibility of application without preliminary surface preparation. This treatment will increase primer consumption.
- Spray paint is also suitable for priming purposes. This option is suitable for a small chipboard surface.
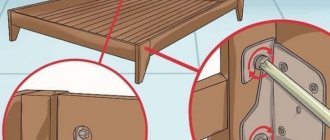
Restoration of the ends of laminated chipboard tables and countertops
You can restore the ends of expanded laminated chipboard using wood glue; regular PVA will also do. First you need to carefully remove the edge, warming it with a hair dryer.
Next, you need to determine how much the material has swollen. If its thickness has increased by more than 2 mm, it is necessary to make a longitudinal groove at the end of the damaged part. It is better to make the cut using a circular saw without removing the part.
In its absence, it is possible to make a recess with an ordinary hacksaw for wood. In this case, it is better to dismantle the part to provide access to the hacksaw blade along the entire end. The depth of the slot should correspond to the size of the swollen area of the chipboard.
Next, generously coat the groove with glue and leave for 15-30 minutes so that the cavity is saturated with glue. If the thickness of the part has increased by no more than 1-2 mm, the end of the part is impregnated with glue without preliminary scoring.
Now you need to prepare putty from wood shavings or sawdust mixed with PVA glue. The mass, mixed until smooth, should be kept for about 10 minutes. before use. Using a spatula, you need to apply putty to the end of the chipboard and, if possible, level it.
On both sides of the edge of the part being repaired, you need to lay two bars and compress them with clamps, ensuring the original thickness of the chipboard. Exposed adhesive should be removed. The glue will harden for at least a day.
As the glue dries, the clamps and bars need to be removed. The end of the laminate should be leveled by treating it with sandpaper wrapped around a small block. The surface should be cleaned of dust and degreased.
At home, a new edge can be glued by heating it with an iron. In this case, the old edge, even carefully dismantled, will most likely not hold well, and new material should be purchased.
To fix a delaminated chipboard edge, epoxy resin is quite successfully used as an adhesive. At the same time, the restored part of the product acquires additional strength and moisture resistance. However, restoring swollen laminate flooring with epoxy resin is more expensive and takes longer, while PVA provides quite acceptable performance.
Portal about construction
Many people sooner or later face the problem of swelling of interior doors. Such troubles especially often happen with curtains blocking access to the bathroom and toilet. Those people who have never encountered such problems are wondering why this is happening. This is especially annoying if the door is new and has only recently been installed. Immediately all the reproaches are directed at the installers, saying that amateurs did their best. But you shouldn’t immediately blame them for this, since the problem is not always the installation.
The first step should always be to determine the cause of poor closing of interior doors. If the linen in the bathroom is swollen, it is solely due to dampness in the room and poor ventilation. If the door is made of natural wood or MDF, then sooner or later it will swell or become deformed due to dampness.
Why do the ends and surfaces of furniture swell?
First of all, we note that chipboard (chipboard) is inherently prone to swelling from moisture, since it contains wood components. Manufacturers strive to increase its moisture resistance by adding special impregnations to the internal structure and trying to reliably protect the material from the outside.
There is a special moisture-resistant chipboard, which is intended for rooms with high humidity, but any material swells in atmospheric conditions. This gives rise to a set of reasons for chipboard swelling during operation:
The conclusions are very simple:
How to choose and lay laminate so that it is not afraid of water
To prevent the floor from swelling and the new laminate from being damaged by water, when choosing, it is important to base your choice on the type of room. Depending on this, there are two types of laminate: moisture-resistant and water-resistant. Moisture-resistant will withstand frequent cleaning and a couple of drops of spilled water, but will not survive constant contact with it. Waterproof can survive a flood. The difference is in the composition of the base of the board: in the first - fiberboard, in the second - plastic or PVC.
Laminate flooring is divided into service classes. Only two classes are suitable for the house: 31 - for living rooms and bedrooms, and 32 - for the kitchen and corridor. The rest are suitable for swimming pools and public places where thousands of people pass daily.
The thickness of the board reaches 12 mm. Based on the initial condition of the floor, you need to choose the thickness of the laminate and the underlay: 6 mm is suitable for a flat floor, 10-12 mm for a lumpy floor. This will compensate for distortions and waves, ensuring a tight fit and strength of the joints.
The floor should be leveled as much as possible using cement screed or self-leveling mixtures. Smooth waves 1-2 mm high may remain, but there should be no obvious pits or bumps. The mixture must be completely dry before installation.
If you want to Add an article to your bookmarks, click on the button block on the left!
Order men's and women's bags in our store
Grade: 4.5682
Added : 09/30/2012 Validity : unlimited Votes : 44 Views : 43984
Hello. Tell me, I have chipboard on the floor and water leaked onto it, the chipboard is swollen, now there are bumps in some places, and there is still an incomprehensible smell, although it has already dried. HOW CAN THIS MATTER BE LEVELED.
By and large, there is nothing you can do; the easiest way is to replace the swollen chipboard sheets. Although you can try to stretch the swollen places with self-tapping screws, there is no guarantee.
Park Guell
There are two ways to visit one of the most famous parks in Barcelona: the first is to join a virtual tour presented on the official website; the second is to wander around Google Maps, switching between hundreds of panoramic images.
Park Güell was conceived by Count Eusebi Güell as an ideal green cottage community: he wanted to transfer the model of an English garden city to Barcelona. But the project was not finished: Gaudí created the main entrance, flanked by two pavilions, and a large observation deck overlooking the city, framed by a winding bench. Of the sixty planned houses, only two were built, one of which the architect purchased for himself in 1906. In 1922, the Barcelona City Council bought the park and transformed it into a new urban space.
Casa Batllo
This building was built in 1877 for textile magnate Josep Batllo i Casanovas, but in 1900 the new owner decided to demolish it to build a new one. Nevertheless, Gaudí managed to preserve the original structure. He designed two unique facades with balconies in the shape of sea shells, completely redesigned the lower floor and mezzanine, creating original furniture for them, and also added a basement, attic and terrace.
A virtual tour of Casa Batlló offers the best views of Barcelona from the rooftop and wander through the floors, looking at the huge stained glass windows.
State duty when going to court
According to the terms of the Federal Law on the Protection of Consumer Rights, when going to court to protect a violated right, the state fee is not paid. This provision was confirmed in Article 333.36 of the Tax Code of the Russian Federation.
Attention! State duty calculator.
However, the person against whom the judgment is rendered is obligated to pay all legal costs incurred by the other party. The same requirement applies to the payment of state duty.
It should be borne in mind that if the value of the claims exceeds one million rubles, then the state duty must be paid when going to court.
Watch the video. How to draw up and submit a statement of claim to the court:
Sagrada Familia
We left Gaudi's most famous masterpiece for last because the temple can be explored for a very long time - its thousands of amazing details and architecture that amazes the imagination.
The Sagrada Familia has stood unfinished for the second century - Antonio Gaudi completed only the crypt, which his predecessor began, and further construction was supervised by Domenech Sugranes. But the completion of the large-scale project is nearing its end: according to experts, the work will be completed by 2026.
In the meantime, visit the virtual Sagrada on the official website or watch the completion of construction.
Did you like the article? Subscribe to the channel to stay up to date with the most interesting materials
Source: kvartira.mirtesen.ru
House Mila
Let's move from Park Güell to Paseo de Gracia. It is here that the pearl of modernism is located - the eight-story Casa Mila with thirty-three amazing balconies. In this project, Gaudi acted as an innovator, creating a free layout in the apartments due to the absence of load-bearing and supporting walls (the building is supported by a reinforced concrete structure and columns).
Take a virtual tour on the official Casa Mila website or check out the famous chimneys on the roof in photographs taken by tourists.
El Capriccio
The house, called El Capriccio, is one of the few Gaudí buildings built outside of Barcelona. This is a summer estate that the architect designed in 1885 for a noble nobleman, the heir of the Marquis Maximo Diaz de Quijano.
The house stands out against the greenery, even though it is decorated with matching tiles. It looks exotic for the small town of Comillas, and this is not surprising, since Gaudí's early works were inspired by Mudejar. Hence the tower, reminiscent of a mosque minaret.
You can read more about the building in our article and then take a tour of the house and surrounding area using Google.
Pre-trial claim to the store
Having in hand the conclusions of a merchandising examination that has confirmed that the kitchen set is defective, you should prepare a written claim addressed to the seller or furniture manufacturer.
The current civil procedural legislation does not provide for special requirements when drawing up this document. However, legal practice has developed a certain list of issues that should be reflected in the content of the claim.
claims for the return of a kitchen set free of charge in word format
These include:
- in the upper right corner the full details of the seller or manufacturer, organizational and legal form of ownership, legal address, including the name of the locality, street name and building number are indicated,
- last name, first name, patronymic of the buyer, his place of residence, means of communication in the form of telephone or email address,
- name of the document “Claim”,
- when, where and under what conditions was the kitchen set purchased, its characterizing data, availability of warranty,
- what defects or defective elements were discovered during the operation of the furniture,
- how they are confirmed, indicating the number and date of the expert report, the specialist’s conclusions,
- legal basis for filing a claim,
- the demands put forward,
- further steps in case of refusal to satisfy the stated requirements,
- Attached documents,
- date, signature, surname and initials of the consumer.
The claim is drawn up in two copies by hand or typewritten. If it is made in the name of the seller, then a third copy can be made and sent to the furniture manufacturer.
The document can be delivered to the seller or furniture manufacturer in person or a claim with the attached documents can be sent by mail. To do this, use a mailing with a description of the attachment and notification of delivery of the letter to the addressee.
ATTENTION! View the completed sample claim for the return of a kitchen set: