It is not enough to purchase a high-quality, ergonomic, durable and attractive sink. In order for it not to lose its qualities, it must be installed correctly. Such products have different appearances, and each of them should be installed differently. Thus, sinks can be overhead, integrated and mortise. The installation process is carried out in 3 stages:
Scheme for installing a sink into a countertop.
- installation of the sink itself;
- mixer installation;
- connecting the sink to the sewerage and water supply system.
The connections should be treated with a rubber seal, and it is better to discard fum tape and tow.
Overview of sinks
You can choose a kitchen sink based on several criteria. They include the functionality of the sink, the type of installation and the compatibility of the model with the design of the kitchen space. When determining functional characteristics, you need to pay attention to the following:
- The capacity of the bowl is determined according to your own needs. If the family is large and you have to wash large volumes of food and large pots, then the housewife will need a sink with a large and deep bowl.
- Models with an overflow - an additional hole on the edge of the bowl - are convenient. Such a sink will never get too much water, and when immersing dishes in it, liquid will not splash out over the edge.
- The volume of simultaneous manipulations will determine the number of bowls. The industry produces both single sinks and more complex systems consisting of 2-4 compartments. Often the sink also has 1-2 wings for drying dishes.
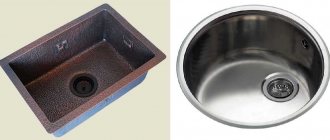
- The strength of the material or coating is chosen depending on the ability to change the sink after a short period of time. Enameled steel sinks are cheap, but quickly fail due to chipping of the enamel, while nickel-plated sinks can last much longer, although they are more expensive.
Installing a kitchen sink can be done in different ways. By type of installation there are:
- an overhead sink that completely covers the countertop of a separate cabinet;
- mortise, built into the recess of a common tabletop;
- an integrated bowl, i.e., constituting a single surface with the countertop.
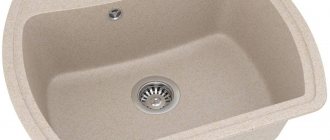
When choosing a model that suits the interior of the kitchen, pay attention to the material, color and shape of the product.
The choice of a sink based on these criteria depends on the comfort of the housewife, who will have to spend time in the kitchen, on the hygiene of the coating or the installation method. The compatibility of the material with other interior details is also important: a shiny nickel-plated sink will look impressive with other similar details, and in a kitchen designed in the same color scheme, it is better to install a painted model of a suitable shade.
Exploitation horror stories
The two most common misconceptions during operation:
I'll get an electric shock when the disposer is running
accidentally sucks your hand into the hole and tears off your fingers
What can you say about this? Firstly, as mentioned above, all electrical connections must be made through an RCD.
You are not afraid when you wash your hands or dishes under hot water from a running water heater. The same applies to wall-mounted boilers.
Well, the start button has no electrics at all. Everything runs on air pressure.
Regarding injuries. Let's explain it on our fingers
Mistake #25 Make no mistake, the disposer does not work like a garden shredder for grass and plants.
There are no sharp blades inside it. There is a smooth rotating disk with cams on the edges.
When lowering leftover food, the cams throw them onto a stationary perforated ring around the perimeter (like a grater). It turns everything into a homogeneous mush.
That is, placing your fingers in the center of the hole in the shell will not cause them to be cut off. The distance to the rotating parts is chosen with a margin (about 20cm).
To reach them, you will need to stick your entire palm inside and somehow manage to bend it.
If you still have a psychological barrier, then there are special pushers for safe work with the disposer. They can come as a set or be purchased separately.
In general, to summarize all of the above, if your budget allows you to purchase a household waste shredder (today prices for good models start at 20,000 rubles), buy it without hesitation.
Proper installation and following our simple tips will forever rid you of a bunch of bad-smelling garbage in the kitchen. Plus you will never have such awkward situations with the opposite sex
https://youtube.com/watch?v=L_0b356dfNw%3F
Neighborhood of washing and other equipment
The sink should be installed so that there is at least 40 cm between it and other kitchen appliances. In practice, this is dictated not by convenience, but by safety considerations: by placing the refrigerator next to the sink, apartment owners risk receiving an electric shock or causing a short circuit as a result of water entering the sink. electrical appliance Between the refrigerator and the stove, it is recommended to install a cabinet with a working surface (countertop), on which food from the refrigerator is laid out before processing.
The rules of ergonomics in the kitchen advise following the triangle rule, i.e., positioning work points (stove, sink, cutting table) so that they form a triangle with sides no more than 1 m. In a small kitchen with furniture placed along one wall, the stove is next to the sink turns out to be not the most convenient option. It is better to place the sink and stove on the sides of the cutting table. Its length does not exceed 60 cm.
Sometimes the sink is placed in the corner module of the kitchen unit. This arrangement is convenient because it helps to fulfill the triangle rule. When choosing a corner location for the sink, you should leave a distance between the sink and the refrigerator or stove. Between these working points, modules with countertops are placed.
Assembling the cabinet
Standard models of kitchen units are easy to assemble yourself. When assembling the sink cabinet, you need to check the completeness of the product:
- 2 sidewalls;
- facade;
- bottom;
- 2 stiffeners;
- accessories.
Depending on the delivery, the sink cabinet may also have a back wall. Often the kit includes fasteners for an overhead sink.
The parts are connected using self-tapping screws and corners, screwing in fasteners from the inside of the panels. Install stiffeners at the top to connect the side walls and create an open space in place of the tabletop. When installing a free-standing sink (overhead) on the walls, you need to attach the brackets from the kit. For mortise models, the cabinet is used as part of the common base of a single tabletop. The doors are hung on furniture mortise hinges after the set is assembled.
For the corner module, the stiffness connections are arranged differently. In most cases they can be installed on the façade and one side. When assembling corner sets, you must follow the instructions for the product.
Initial data
There is a lower kitchen cabinet-table. Its depth is 405 mm. It is covered with a tabletop 600 mm wide. The task is to build into the countertops a round sink with a bowl diameter of 400 mm and a total size of 490 mm.
Difficulties
When assembling the lower cabinet, upper tension strips 8 cm wide were used (see picture). The distance between them is 230 mm and it is clear that the sink does not fit into this distance. Therefore, the closet had to be rebuilt somewhat.
After the rebuild, the top rear bar was sawed off and moved down. The strength of the structure was not affected, and space for installing a sink was freed up.
First closet remodel
The cabinet front brace was also rotated and corners were added to attach the countertop.
Second closet remodel
Installation of an overhead sink
Depending on the product model, installing an overhead sink on a cabinet can be done in different ways:
- If the cabinet is supplied with fasteners, then installation is carried out on them. To do this, you need to mark the installation location of the bracket on the inside of the sidewall, screw the screws into the mounting points, and then hang the bracket. Self-tapping screws should not be fully tightened. Place the sink on the cabinet and slide the mount along the mounting hole. In this case, the head of the screw should fit into the bend of the hole, and the sink should press against the end of the side of the cabinet. After installing the mount in the desired position, the screws should be tightened.
- If there are no fastenings, and the sink has sides curved down, then you can install an overhead sink with your own hands and attach it to a sealant. To do this, apply silicone to the ends of the sidewalls, install the sink and press it with a weight for 24 hours. When the adhesive layer sets, the sink will securely connect to the base. If necessary, you can screw self-tapping screws into the mounting holes on the sides, if any.
- Do-it-yourself installation option - on a support made of bars. When the cabinet is very different in height, and the fastenings are not suitable for the selected model, you can make the support yourself. The dimensions of the structure must make it possible to attach an overhead sink. The bars are mounted using self-tapping screws on the inside of the side walls of the cabinet, and the installation height is adjusted so that the edges of the bowl are at the level of the countertops of adjacent modules.
Selecting a sealant
The sealant plays an important role in installation. The building materials market offers several options for this product:
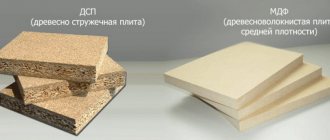
- acrylic - does not contain harmful substances, is excellent for metal, chipboard and MDF, dries quickly. The main disadvantage is strong shrinkage and rigidity; joints can crack over the years and will allow water to pass through;
- polyurethane - suitable for places with high humidity and unstable temperatures, has excellent adhesion to almost all materials. The sealant is elastic and practically does not shrink, but it is better not to use it for MDF, chipboard, or plastic. The polyurethane composition is ideal for sinks made of stone, granite, and metal;
- silicone - elastic, does not shrink, has excellent adhesion.
Apply any sealant to clean materials to improve adhesion. Without preliminary preparation, cracks may appear and moisture may enter.
Installation of a built-in sink
Before installing the sink into the countertop, you need to make a recess for it. To do this, use the template supplied with the sink, or trace the outline of the sides and bowl, turning the product over. When marking, you need to leave intact that part of the countertop that will be under the side, and cut out only the outline corresponding to the bowl of the sink.
For sawing, a hole is drilled into which the jigsaw blade will be placed. It is advisable to drill inside the outline that will be removed. This way you can achieve an even cut along the entire contour of the recess. Place a jigsaw file into the hole and carefully cut out a recess for the bowl, trying to follow the contour as clearly as possible.
The edges of the hole for the sink need to be filed and sanded. Place the bowl and check the accuracy of the fit of the recess: if the cut is made correctly, the sides fit tightly to the tabletop. Carefully cover the cut with silicone sealant and dry the tabletop.
Install taps into the countertop and connect flexible hoses to them. Before installing a mortise sink, apply a layer of sealant to the edge of the recess. To seal the joint, you can use the gaskets that come with the sink. Place the sink on the countertop, tighten the fastening bolts from the bottom using the following algorithm:
- first those located diagonally on the product;
- after that - fastenings in the middle of its sides.
When tightening along the contour of the sides, excess sealant may be squeezed out. It must be wiped with a rag, and a gasket that is too wide can be cut off with a sharp knife.
Connection to water supply
To connect to the central water supply, special flexible hoses are used. It is better to give preference to reinforced ones, since they are able to last a longer period of time without changing their characteristics or failing.
Connection occurs using flexible hoses.
It is important to calculate their length so that it is enough from the place where the tap is fixed to the point of connection with the central pipeline. The hoses will be secured using nuts. They must be supplemented with washers with a seal to prevent leakage.
The hoses are secured with nuts.
When this method of connecting to a water supply is carried out, when tightening the nut, try to feel the moment when it is necessary to stop applying force in order to prevent damage to the thread. In addition, it is important not to overtighten the nut so that if the connection begins to leak, there will be a thread left to tighten it more tightly and eliminate the leak.
Installation of an integrated sink
It is more difficult to install a built-in sink properly than a built-in sink. For a good result, you need to accurately mark the contour of the side and bowl, so you should definitely use a template for the product. The cut under the bowl is made in the same way as in the previous case.
Installing a kitchen sink below the level of the countertop requires a recess and under the sides of the product. They can be made using a rebate cutter, selecting part of the tabletop material along the contour of the sides. This achieves the effect of deepening the product into the surface. The depth of the recess is determined by the thickness of the side.
After removing the quarter, silicone is applied to the edges of the recess, the bowl is placed in the recesses and secured with clamps. You need to tighten the clamps, starting with the corner ones, located diagonally on a rectangular sink, or opposite each other if it is round.
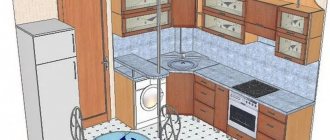
Sink in the corner: installation features
Bowls of different shapes can be used for installation in a corner module. Manufacturers also produce special overhead-type products with sides, the contour of which corresponds to the standard dimensions of a corner cabinet. There are also mortise options, suitable only for installation in the corner segment of the headset.
When installing a corner sink, the same principles are used as when installing simple varieties. But there are also differences:
- The tap is installed in the far corner, so it is better to install it and connect the flexible connection before attaching the sink;
- when purchasing an overhead model, you should make sure that its dimensions and shape match the existing corner cabinet;
- a rectangular sink will have to be placed diagonally on the corner segment, so you need to carefully check the correspondence of its center lines and diagonals.
To ensure a beautiful position of the bowl in the center of the module, you need to mark the tabletop before installation. Straight lines connect the opposite corners on the left and right, as well as the far corner and the center of the front strip. Using these lines you can align the position of round and rectangular sinks.
How to choose and install a faucet on your kitchen sink yourself?
When choosing a mixer, you need to pay attention to the height of the tap. Too high will create a lot of splash when used. It is difficult to wash large dishes under a low tap. Kitchen faucets may have a flexible hose with a nozzle.
The faucet can be installed separately, in the countertop next to a mortise or integrated sink. On the side of overhead models there are standard holes for the mixer. The lower part of the device is placed in the hole, where flexible hoses for hot and cold water are connected. Fastening is carried out according to the instructions for the mixer model.