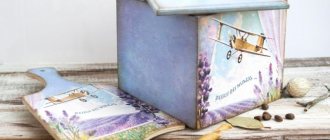
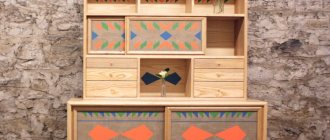
Decoupage furniture in the Provence style is a great way to get inexpensive but very attractive interior items. Various techniques for decorating furniture are used precisely for the purpose of creating truly unique decorative products, and the most optimal solution would be to use decoupage.
Such a simple technique can be mastered at home; moreover, you do not need to spend large sums of money on the purchase of exclusive furniture. Today we will tell you more about the decoupage technique and its application on furniture.
Decoupage furniture in Provence style
What is decoupage and what types are there?
Decoupage is a way of decorating furniture or any other surfaces using appliqués and varnish. In this way you can decorate absolutely any piece of furniture and furniture, be it a closet, chest of drawers, table and much more.
Using the decoupage technique you can decorate any surface.
Table No. 1. Varieties of decoupage technique
| View | Description |
| Straight or classic | This is a decoration method in which the picture is glued directly to the surface itself in any way. After which they begin to carefully grind it until it becomes perfectly smooth. Depending on the artist’s idea, the surface is treated with varnish or tinted using another method. |
| Back | This is the name given to the technique of decorating various glass objects. In this case, the image is glued to the other side and is located under the glass. This technique differs in that the entire processing process will proceed in reverse order. |
| Art | This is the name for a technique that combines artistic painting with decoupage. This is done in order to combine the pasted images into one picture. |
| Volume | This is the name given to the technique of decorating volumetric surfaces; it combines elements of painting and sculpture. This means that when decorating the surface, you can use various natural materials (shells, twigs, leaves, flowers) and special paste. |
| Decopatch | This is the name for the decoupage technique, with the help of which a patchwork-style blanket is created on the surface. For such purposes, you can purchase special paper in the form of small pieces of material. |
Decoupage table with wallpaper
It is worth noting that in addition to gluing images using napkins or decoupage cards, various additional aging effects are used. We will look at the most popular of them.
Table 2. Effects of aging
| Effect, illustration | Description |
| Attrition | This effect allows you to achieve an imitation of already used furniture with a rich history. To do this, the surface is treated with natural wax and fine-grained sandpaper. |
| Craquelure | This is a technique that creates cracks on the surface. It is done using special varnish and paint of various shades. Usually they try to choose radically different options in order to create a bright background. Cracks begin to appear on the surface after the varnish dries. There are a large number of materials to choose from when working with this technique to create different patterns. |
| Patching | This is the name for a technique that imitates the natural darkening of surfaces, which usually occurs during long-term use of furniture. Designers apply gold, silver or black plating. |
| Shading | This technique allows you to mask the borders of the pasted image. It involves working with paint and a dry brush to create a shadow effect. You can apply a shadow of absolutely any color depending on the design itself. |
| Toning | This is the name for the technique in which spots and various sparkles are applied to the surface of the design. This is done using varnish for the same purpose of masking the edges of the image. |
| Potal | This is the name for a decoration technique that is done after the image has dried. It involves decorating the surface with gold or silver paint. This gives the product an unusual decorative appearance. |
DIY methods for aging furniture
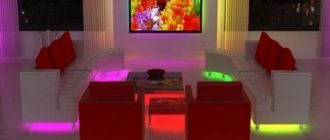
Idea 7. Decorating the wall with vinyl stickers
Vinyl stickers are good because they are easy to stick, peel off without leaving marks, are sold in a great variety of pictures and are very inexpensive. With their help, you can change the wall design as often as you like.
Text wall sticker in the interior
Vinyl stickers in the form of words in the bedroom
Vinyl stickers in the nursery
Vinyl sticker on the kitchen wall
- The largest number of decorative wall stickers can be found on Aliexpress; you can also look for good pictures in construction hypermarkets and art stores. If you wish, you can order the desired picture in the size you need from the printing house.
- It is best to apply stickers to painted walls or plain wallpaper.
- Before gluing the drawing, you need to make markings.
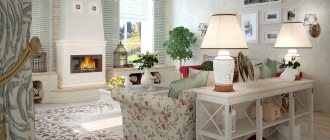
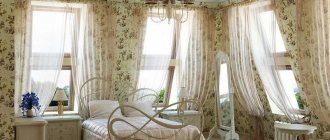
Features of the Provence style
In order to recreate the characteristic motifs of Provence, it is necessary to select appropriate drawings. They have the following features:
- the base is usually light, it can be white, beige, powdery pink;
- directly for finishing furniture, you can use different tones of blue, green, purple (it is recommended to choose everything that is associated with the south of France);
- They mainly use pictures of various flowers, landscapes, animals or images in a marine theme - it depends on the purpose of a particular piece of furniture.
This design suggests the presence of a romantic, rustic style. Therefore, here you can show all your creative abilities.
Important point! In the decoupage technique, only matte varnish is usually used. This is done in order to obtain an “antique” design.
Drawings in the style of "Provence"
Drawing with stencils, templates and stamps
In order to paint the walls in the kitchen, you can use stencils, templates, stamps or tape.
The simplest and most accessible way to decorate walls with your own hands involves the use of stencils:
with their help you can both outline contours (example in the photo below) and completely paint over the wall in the places of cutouts;
stencils can be bought at a hardware store, their choice is now very diverse, and they are made from thick paper, special film or plastic; You can also easily make stencils with your own hands: you just need to print out the drawing, transfer its contours to lavsan film and cut out the necessary holes with a stationery knife. stencils can also be used on regular wallpaper - if, of course, the image matches the given interior style.
The process of creating a stencil design is as follows:
The wall is marked with a pencil - the places where the stencil will be located are highlighted. The stencil is fixed so that there are no discontinuities. Store decor is often made with a self-adhesive surface, and paper tape is used to secure homemade stencils. The paint is applied in several approaches. It is better to apply two thin layers - this way the drawing will be more accurate. It is better to apply the paint using circular movements (if using a brush) or light pressure (if using foam swabs). To remove excess paint from the stencil, use a foam sponge. When the drawing is dry, it is coated with a transparent varnish on a vinyl or acrylic base. This will make the drawing more durable and will not allow it to smudge.
Stamps and templates are also a great way to quickly “paint” your kitchen walls with your own hands.
You can make templates for painting walls with your own hands from cardboard. In this master class we propose to paint the walls with this template.
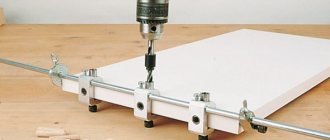
In the photo below, the principle of working with a homemade cardboard template is shown on a slate board for clarity.
Instructions:
We print and enlarge the template to the required size, transfer the design to thick cardboard and cut it out along the contour. We begin tracing the contours of the template from the ceiling. We slightly shift the template and again trace it around the edges (photo No. 3, 4, 5, 6). We take a flat (!) artistic brush and begin to draw the contours from the inside of the picture (photo No. 7, 8).
Master class in decoupage technique: design of various furniture
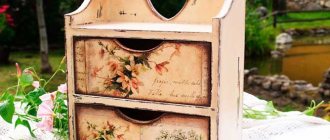
Decorating an old chest of drawers
Using this unusual technique, you can decorate any furniture, including a chest of drawers that is no longer used for its intended purpose due to its unsightly appearance.
You can read about how to make a chest of drawers out of wood with your own hands in our article.
During the work you will need the following:
- white acrylic paints;
- sandpaper;
- cutting tool;
- drawings;
- plates;
- velor roller;
- special sponge;
Step 1. First of all, you need to clean the surface of the chest of drawers from dirt. To do this, wipe it with a damp cloth and detergent. When it dries, you will need to polish the surface with sandpaper until it is perfectly smooth.
The old chest of drawers should first be cleaned of dirt.
Step 2. Then you will need to pour the required amount of white acrylic paint into a disposable plate, and then apply it to the chest of drawers using a velor roller. Water-dispersed paint is distinguished by the fact that it dries very quickly, literally in a few seconds. Only one coat of paint will be applied, so you need to do everything carefully the first time. At the same time, if the dried paint looks translucent, then this is only for the better, because at the aging stage some layer of it is still removed from the surface.
It is better to apply paint in a thick layer to fill all empty spaces
Step 3. You need to paint all sides of the chest, including the sides. It is not forbidden to use a regular paint brush, but a roller applies the paint more evenly. In addition, this significantly speeds up the process. It is worth noting that when decorating any product in the Provence style, you do not have to be particularly careful, because the more careless the coating looks, the better.
Paint the chest of drawers with a roller and acrylic paint
Step 4 . The dresser handles need to be painted. For such purposes, you can take a thin brush or a special sponge (as in our case). It allows you to quickly paint over any small details from all sides. It is worth noting that all family members can be involved in such work. If we are talking about children, then you will need to use only special non-toxic acrylic paint for children's creativity.
Paint the handles with paint
Step 5: After painting the dresser, you should leave it for about 10-15 minutes until it dries. Even though acrylic paint dries very quickly, you should not rush.
Let the chest of drawers dry
Step 6. While the acrylic paint dries, you need to cut out the images. This should be done as carefully as possible so that fewer fragments of the white sheet remain.
Cut out the image exactly according to its outline
Step 7. The next step will be to decorate the chest of drawers in an antique style. To do this, you will need to take fine-grained sandpaper or any hard iron brush. Before starting work, it is recommended to wear rubber gloves to protect your hands. Next, you should move the sandpaper in the direction of the lines on the surface of the wood.
Sand the surface with sandpaper
In this case, it is necessary to apply quite strong pressure so that the surface is non-uniform, because the more careless it looks, the more spectacular the chest of drawers will be.
The result should be a chest of drawers with many different “antique” abrasions.
Step 8. Next, you need to take our blank pictures and coat their back side with PVA glue (the layer should be dense).
Coat the picture with PVA glue
Step 9. Then you need to attach the image to the place where you plan to fix it and coat it with another layer of PVA glue. You can arrange the pictures in any order. The main thing is that they are combined with each other.
Attach the picture to the surface of the chest of drawers
Step 10. It is necessary to carefully coat all sides of the image so that it fits as tightly as possible to the surface. In addition, there should be no air bubbles underneath. If they are, then they need to be removed, moving with sweeping movements from the center to the edge.
It’s convenient to paint over pictures with a small brush.
Step 11. To ensure that the edges of the picture do not stand out from the general background, they will need to be treated with the same white acrylic paint and a thin brush. This should be done with each picture. This method will also help if in some places the image does not adhere very tightly to the surface.
Finish the edges with white acrylic paint
Step 12. Next, you can take colored acrylic paints and add some details to the image. This step is optional and can only be done if desired.
We complement the images with other decorative elements using colored paints
It is important that these details do not stand out from the general background, but are combined with the composition
Step 13. At this stage, the product is considered ready, but in order to preserve it for many years, it is recommended to cover it with several layers of varnish. This can be a regular matte varnish or a special decorative one with a cracking effect. If you choose the second option, you can give the product in the Provence style an additional twist.
Cover the surface with varnish
Video – Decoupage of kitchen furniture
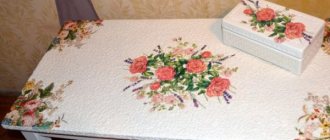
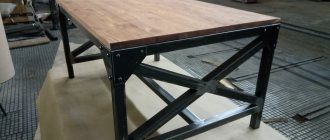
We decorate the table “antique” with French motifs
In this case, an old piece of furniture will also be used - a table that has long lost its aesthetic appearance. We will try to make a unique product out of it.
During the work you will need the following:
- decorative napkins (can be taken with any pattern, in our case they were used with French motifs);
- paint - you need to take acrylic paint of a light shade;
- gold paint for decoration;
- putty;
- sandpaper (fine-grained and coarse-grained);
- brushes
Step-by-step instruction
Step 1. The first step is to remove the old coating from the countertop. In addition, this will remove any contaminants from the surface. This can be done using a grinding machine or a special solvent. Usually everyone chooses the method that will be more convenient for them.
Old varnish needs to be removed
Step 2. Since this is an old table, it may have various chips and damage that will need to be repaired with putty.
In the same way it is necessary to hide the separated seams
Step 3. Now you need to remove the thick layer of varnish from the table legs. Doing this with a grinding machine or solvent is not very convenient due to the design features - there are small carved parts here, so we will use regular coarse sandpaper. It is necessary to remove as much of the wood as possible. After finishing the surface treatment, it must be wiped with a cloth soaked in alcohol. This is done in order to remove all kinds of traces of fat.
Sand the table legs and frame
Step 4. Next, you need to cover the table frame and tabletop with the first layer of white acrylic paint. After 10-15 minutes, you can apply the next layer in order to hide all bald spots.
Prime the base of the table with white acrylic paint
Important point! Since the first coat was used as a primer, it is best to lightly sand it with fine-grit sandpaper before applying the second.
In the same way, you need to paint the tabletop in 2 layers.
Step 5. Next, you need to decorate the table using the darkening method. To do this, some areas should be touched up with black acrylic paint. It is advisable to be careful at this stage to avoid leaving large stains. In this form, the structure must be left for some time to dry.
We create the effect of darkening the surface “antique”
Step 6. Next, you need to take a little wax for creativity or any wax candle and carefully rub all the dark spots. This is done so that the subsequent layer of white paint can be removed without any difficulty with fine-grained sandpaper. After completing the work, a large amount of wax crumb remains on the surface, which must be removed with a brush (it must be hard). It is important to carefully treat every corner. Otherwise, during subsequent painting, unsightly bumps will remain. For these purposes, you can use any brush.
Rub the darkening with wax
Step 7. Apply another layer of white paint over the darkening. Usually one coat of acrylic paint is not enough because shadow marks will show underneath. Therefore, it is necessary to apply another layer.
Cover the surface with another layer of white acrylic paint
Step 8. After applying the second layer, you need to leave the structure for a while to dry.
The edges of the table top are also darkened and painted with acrylic paint
Step 9. Once the second coat of paint has dried, you can begin sanding down the dark spots using fine-grained sandpaper. Thanks to the presence of wax, the paint will come off the surface easily. In this way, it is necessary to carefully process the entire structure of the table and the corners of the table top.
Sanding dark areas
Step 10. Next, using gold paint and a dry brush, we go over the edges of the structure, creating an unusual, decorative look for it. All movements must be very light, otherwise you will only leave stains.
We process the edges with a dry brush and gold paint
There should be a light golden shadow without any oil stains.
Step 11. The next step is to start decorating the tabletop with decoupage. To do this, you need to take decorative napkins and tear them into fragments so that the edges remain uneven.
Tearing napkins
Since the napkins are three-layered, only the translucent top layer with the image will need to be separated from them.
They must be distributed on the tabletop in the order in which they are planned to be glued. This is done in order to have an idea of what the completed drawing should look like.
Step 12. The napkin must be placed on the film and then moistened with water from a spray bottle so that it becomes damp. At this stage, you should manually straighten out any wrinkles that have formed.
Spray with water
Step 13. Next, the picture can be applied to the tabletop along with the film, after which it needs to be straightened with a rag. Next, the picture must be glued to the tabletop using PVA glue. Each side should be processed so that the image fits tightly. When the first layer has dried, you can apply the second. In the same way, you can glue all the pictures on the table, first the largest ones, and then the small ones.
Glue it to the table top
Step 14. Once the layers have dried, they will need to be sanded with fine-grit sandpaper. This is the most labor-intensive process and usually takes a long time.
Rub the surface with sandpaper
Step 15: Next you need to apply additional touches of gold paint (if required). You can also leave dark spots on the tabletop itself, the main thing is not to overdo it with the decor. After all, products in the Provence style should look relaxed.
Finishing the design of the tabletop
Step 16. Upon completion of all work, the structure should be coated with transparent varnish in several layers.
We coat the tabletop with varnish
The simplest technologies
To carry out wall painting in the kitchen, you can choose a technique that is suitable in terms of the level of complexity and availability of materials for almost anyone who wants to do the painting with their own hands.
For wallpaper to be painted
It’s not difficult to make a drawing on the wall yourself, but the basis for applying the drawing – in this case, wallpaper – must be of high quality
An excellent option for this is paintable wallpaper, no matter whether it is white or colored. White wallpaper can always be painted in a color that suits you
After pasting the wall on which the painting is applied, the glued wallpaper is painted with the desired color (for example, dark brown), then a design is applied over the dried paint. Take your time and wait about a week to allow the paint on the wallpaper to dry thoroughly before applying the design.
What to draw with?
You may find it more convenient to apply a design to the wallpaper using a so-called textured roller. The textured roller is made up of two: a roller with a pattern and a regular rubber one. The technology of work is simple and very similar to painting, but, nevertheless, it is better to first practice on an unnecessary piece of wallpaper. The image shows the technique of applying a pattern using a textured roller. This technology is especially convenient when applying a floral or geometric pattern to wallpaper. Remember that before applying a geometric pattern, you should mark the walls for it.
Stencil
Stencil painting is quite accessible both in terms of technique and materials. Drawing with a stencil does not require any special skills or costs: you can take the risk of painting even without special education. But in any case, the kitchen walls on which the painting is supposed to be painted must also be prepared. Tools can also be the most common ones used for repairs: roller, brushes, sponge. It is best to use acrylic paints for stencil painting; they adhere perfectly to the surface, are non-toxic and durable. You can use acrylic paste or fine-grained plaster.
But when choosing from a huge number of available stencils, your individuality and the presence of a clear vision of how your kitchen will look should be reflected. Stencils can be bought in many construction or online stores, but it’s more interesting to make them yourself. It is most convenient to work with stencils made of polymer film that can be glued to the wall: they are easy to clean and reusable.
Another way to paint kitchen walls with your own hands is to use stamps
It is important that the image on the stamp is clear. Stamps can be made of foam sponge, cork or other natural material: in construction stores you will find a wide selection for drawings
Don’t be afraid to spend time thinking about the composition, how well the painting you choose conveys your idea, and how individual elements do not discord with each other and with the kitchen design style as a whole. And don’t forget that painting can immediately transform the kitchen, but it can also ruin it, quickly get boring and become an irritating element for some family members.
Useful tips for beginners
In order to avoid various mistakes during the work process, it is recommended to follow some recommendations of professional craftsmen:
- Before you start painting the surface, you need to mentally divide it into several equal parts and work separately in each of them. This method will allow you to avoid various stains and bald spots. In addition, it can also be used in the case of regular painting of any piece of furniture.
- The final strokes must be drawn from one edge of the surface to the other, in a straight line, without interruption. After which you should immediately wipe off all stains with a napkin, because acrylic paint sets very quickly.
- Each layer of paint must be thoroughly dried, especially before starting to sand the surface.
- Upon completion of work, all tools must be cleaned of paint and glue. Then they can serve you for a long time.
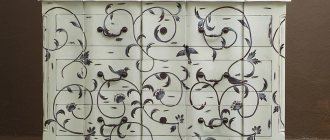
Furniture painting using a cabinet as an example (with photo)
Start painting furniture without thinking about the drawing. Focus on the overall result of the decor of the entire piece of furniture. Choose a simple but favorite motif and idea, just something that will inspire you.
If you already have confidence that coloring a drawing is not difficult? Move on to working on wooden furniture. We offer you to master more complex painting techniques, which we will talk about using the example of painting a cabinet:
- Transfer only the outlines of the design to the surface of the cabinet using carbon paper.
- Choose the color yourself, according to your taste. Apply the paint in two layers, the first layer is translucent.
- Apply the second coat of paint using impasto strokes.
If it is possible to remove the doors or pull out the chest of drawers and place the surface to be decorated horizontally, then it will be easier to paint and the result will be better.
Bathroom
Tired plain tiles in the bathroom and toilet can be updated by painting the walls yourself. For this:
- Wash the tiles thoroughly using Pemolux or another detergent.
- The tiles are sanded with fine sandpaper, creating roughness to enhance adhesion.
- Wash off dust and prime.
- The design is applied over squares using special paints.
If space allows, you can create a 3D drawing at the bottom of the bathroom.
Painting walls in a home is a relevant element of decor, it gives the room individuality, adjusts the dimensions and shows the taste of the owner
The drawing attracts the attention of guests and adds pride to the performer in his work.
https://youtube.com/watch?v=y_ervzcCgvc
Mosaic
Mosaic on the kitchen wall looks very appropriate and aesthetically pleasing. This finishing method allows you to restore, creating many original color and texture variations that are suitable specifically for your interior. In addition, mosaic tiles are durable and moisture-resistant material.
Mosaic on the wall is a way to transform an old kitchen.
There is a wide variety of mosaic tile options, we list the main ones:
- Ceramic mosaic. It is durable and strong, easy to maintain and environmentally friendly.
- Glass panel. Glass tiles are also highly resistant to moisture and chemical compounds.
- Plastic mosaic. This type of PVC mosaic is easy to install on your own, as the panels can be easily separated using scissors or a utility knife. Its advantages are low price and easy replacement. You can make any design from this mosaic, choosing colors that suit your interior. The disadvantages of this material include susceptibility to deformation.
- Tiles imitating mosaic. It is a tile consisting of smaller squares.
- Mosaic made of broken tiles. This option looks very original and is cheaper in cost than whole tiles. In addition, you can prepare broken tiles yourself.
How to create a mosaic pattern with your own hands
There are many technologies for creating a mosaic pattern - from the simplest, geometric, to those using a computer, which even allow you to create a reproduction of an artist’s masterpiece. The geometric method involves simply alternating squares of different colors with different sequences. You can find out about PVC apron here.
The computer can also be used for the geometric method. On the Internet you can find free special programs for color selection and determine those color combinations that will look most aesthetically pleasing in your interior.
There are also ready-made mosaic modules; the choice of patterns is quite wide and satisfies any needs. The technology for laying such mosaics has been significantly simplified.
To create a mosaic panel, special matrices and mosaic grids are used. The squares are glued to the frame and a tile of a certain size is obtained. Find out how to transform an old table with a ceramic tabletop in this material.
Mosaic laying
The mosaic installation process consists of the following steps:
1. Preparatory work. The surface on which the mosaic matrix will be applied is carefully leveled and primed
It is very important that the surface is well cleaned and dry
2. Surface marking. The matrix sheets should be laid out on the floor according to the drawing and measurements should be taken. Then control marks are placed on the wall in accordance with the measurements.
3. Apply glue solution to the surface. After this, the actual installation begins. The glue does not need to be applied to the entire surface at once, otherwise it will dry before the entire mosaic matrix is applied. The matrices are laid and after the final adjustment of the sheets to each other, they are firmly pressed into the adhesive solution.
4. Grout. After you are sure that the solution has completely hardened, remove the protective layer from the mosaic after soaking it. Do not wait for the grout to dry, as this will make the grout difficult to remove.
Graffiti
One of the types of airbrushing is graffiti. This trend in wall painting appeared in the 80s, when teenagers painted the facades of buildings on city streets, the walls of garages, and this action was regarded as hooliganism. Translated from Italian it means “drawings written or scratched with paint.” At the moment, it is very popular in the design of loft-style homes, where there are elements of brickwork.
Using this type of wall decoration, a person with the help of graffiti:
- emphasizes the individuality of your home;
- visually enlarges the room;
- compensates for the lack of furniture thanks to bright elements;
- corrects room imperfections.
There are several ways to design using this technique. You can do the following:
- draw a sketch on the wall and paint on it using brushes and a roller;
- use a stencil (usually for letters) and add some elements with spray paints;
- glue ready-made graffiti and complement them with painting;
- apply a design from a spray can without using tools.
Abstraction and depiction of space are appropriate in this type of technique.
Conclusion
Information on how to repaint old furniture and how to decorate it will be useful to almost everyone. This work is not labor-intensive, but still there are quite enough nuances that affect the quality of the finished product. So you should at least read the tips above, as well as study the video in this article: then you will be able to work much more fruitfully.
If the furniture has lost its attractiveness or is tired of its appearance, then this is not a reason to get rid of it, because everything can be easily fixed by repainting.
Drywall is one of the best modern materials for finishing ceiling surfaces, allowing you to realize the most fantastic ones. Sometimes functional interior items are suitable in practical terms, but their appearance ceases to be pleasant and loses its former aesthetic value.