Not every apartment has enough space to ergonomically place all things and household items in the main living space. This problem can be partially solved by using the free space of the balcony or loggia. And in order to make storage relatively convenient and at the same time complement the interior, you will need an appropriate design.
In this article I will tell you how to assemble a cabinet from lining on a balcony according to drawings and diagrams. What tools are needed for manufacturing, how to calculate the amount of materials to save the budget.
Why do you need a closet on the balcony?
A wardrobe is a necessary piece of furniture in every apartment. You've probably come across a lot of unnecessary things cluttering up your home. By placing the closet on the balcony, you can solve this problem.
Not everyone has the opportunity to purchase a large apartment in order to easily fit all household items.
You can put unnecessary things in it, for example, some seasonal clothes, place jars of pickling on the shelves for the winter, or put a box of tools away from children.
Where to begin
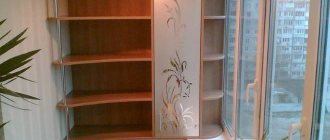
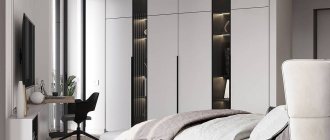
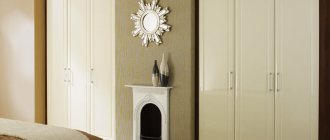
Wardrobe with shelves in the balcony niche.
Often, balconies have niches for installing cabinets (example in the photo), but before you begin installing a modernized pantry, you should know:
- Glazing the balcony will preserve the attractiveness of the wooden finish for a long time, protect it from dampness and direct moisture;
- Installation should begin with repairing the floor, if not the entire balcony, then certainly the part where the bottom of the cabinet will be located;
- Elimination of all cracks and cracks, as well as additional insulation of walls and floors will protect against drafts and sudden changes in temperature conditions.
Such simple introductory instructions help preserve the wood paneling so that it will delight you with its natural beauty for many years.
How to make a cabinet from clapboard with your own hands
Lining is a thin board from 7 to 20 mm, designed for covering various surfaces. What is the advantage of this material?
- Safety.
- Easy processing.
- Thermal insulation and sound insulation. Wood is a thermal insulation material.
- Durability. This material will last you a long time.
- Naturalness. Wood is an environmentally friendly and healthy material.
- Simple installation technology. Even the most novice owner can cope with attaching the lining.
- Versatility. This material can be used to solve various kinds of problems.
Natural wood has been used to create furniture for many centuries.
What are the advantages of creating a cabinet with your own hands?
- Saving money;
- Individual design;
- Independent selection of sizes, materials, shapes.
But do not forget that creating this kind of thing is a labor-intensive and time-consuming process. Therefore, it must be approached with full responsibility.
The material does not tolerate temperature changes.
Drawing and diagram
The design of the cabinet must be carried out taking into account the type of balcony on which it will be installed.
This is an approximate drawing of a wooden cabinet with 4 doors.
Types of designs:
- Standard two-door version. It all depends on the width of the room. If you have enough space, the space can be divided into 2 or 3 sections. If natural wood is used to make furniture, then such a structure can be installed in an uninsulated room. Changes in temperature and humidity will not harm it. Despite this, it is worth taking care of protection from external precipitation. This can significantly extend the service life.
- One and a half closet. This option is suitable for balconies without a niche.
- Two-section model. The width of the left section can be calculated to fit the size of the window sill, which is well suited for balconies with an extension, where the window sill space is 30-40 cm less than the outer perimeter of the glazing.
- Cabinet with one vertical section.
- Model for narrow loggias.
- A wide option for spacious balcony spaces.
In addition to the closet, you can make separate shelves on the balcony.
Sample cabinet layouts have been reviewed here. You can develop your own projects that will fully satisfy your needs.
Selection of tools and material
To start making your own product, you need to prepare the following tools and materials.
- Bars for frame 40 by 40 mm. Recommendation: purchase pine beams. The main thing to pay attention to is that the logs must be dry, clean and without signs of rotting.
- Metal corners for connection.
- Boards for door frames.
- Lining for cladding. It will also be useful for doors, so take it with a reserve.
- Material for shelves - chipboard or boards.
- Additional materials - hinges, locks, handles, decorations.
- Self-tapping screws for fasteners, nails, clamps for lining.
- Screwdriver with magnetic attachment.
- Saw, hammer.
- Construction level, tape measure.
It is better to have all the necessary tools at your fingertips.
First you need to choose the lining material, and then start creating the cabinet.
Advice. A lining made from wood species containing the least amount of resin is ideal. The class of lining depends entirely on your preferences. The higher it is, the more presentable the appearance of the product will be.
A few words about garden furniture
For stationary garden options, drawings of do-it-yourself summer cottage furniture, as a rule, are not made. This is due to the fact that mostly coarse, heavy materials are used for these purposes. Special precision during installation is not required here, so a simple sketch is enough.
Metal products are rarely used, with the exception of a concrete table in a barbecue area or gazebo. As a rule, it is made on one support pipe; a support frame from an angle or a metal sheet with a thickness of 5 mm is welded horizontally to it on top.
Swing for the garden.
The top plate is most often assembled from wooden planks and rigidly fixed to the support frame. A wooden tabletop is beautiful, but in this case it is impractical. Outside, it will need to be cleaned and re-varnished every year. From experience, we can recommend using an asbestos-cement slab for the countertop; it is less attractive, but will last for more than 20–30 years.
Logs are often used to assemble stationary benches and tables. They are cleared of bark, sanded and varnished. The installation technique is quite simple, the difficulty lies in the volume. It is difficult to process and collect thick logs alone.
The simplest set of pallets.
Advice: in country dacha communities, especially recently created ones, electricity is not always available. Building a house or assembling furniture without electricity now is, to put it mildly, difficult. Renting a diesel generator for your dacha can help out.
The video in this article shows several assembly options.
Cabinet creation process
Step 1. Prepare all the materials that were described in the previous paragraphs.
Step 2: Create the frame. For this we need pine beams. First, let's start creating the rear frame. Horizontal beams are attached to vertical beams at a distance of 55 cm. Nails are used to connect wood. Anchors are needed to attach the frame to the balcony wall. The slats can then be attached to the rear frame. Metal corners are used to fix the frame at right angles. Then the lower frame is created in a similar way. Also, with the help of anchors, all the walls and bottom of the structure are attached to the walls of the balcony.
It is possible to calculate how much material will be required only after the design has been determined.
Step 3. Lining the inner wall of the frame. A sheet of chipboard is ideal for the back of the frame. Using self-tapping screws, it is attached to the rear wall.
Step 4. Installation of shelves on the frame. We cut out the chipboard sheets to the required size and install them on the horizontal wood guides.
Making a cabinet out of clapboard with your own hands is not at all difficult if you follow the step-by-step instructions.
Step 5. Door. It is necessary to prepare the frame. Let's take thin beams and fasten the frame to the required height and width. We will use a diagonal jumper to make the frame strong. Then we cover the frame with clapboard. We fasten it with nails. Then we install locks, hinges, handles and secure the door to the cabinet.
Step 6. Decoration. After the installation has been completed, you can begin decorating. At this stage, it all depends on your preferences and desires. You don’t need to decorate a lining cabinet at all.
Creating such furniture yourself is a simple but labor-intensive process.
The final stage. To extend the life of the cabinet, it is necessary to coat it with several layers of protective varnish. You can use acrylic paints to add brightness and personality to the resulting product.
The lining is fragile, so you need to work with it carefully.
Once the cabinet is completely coated with varnish, leave it for 36-48 hours until completely dry. After this, you can begin to operate your homemade clapboard cabinet.
Materials, fasteners, tools
For production you will need:
- Wooden beam. To assemble the frame, pine bars with a section of 50x50 or 40x40 mm are suitable. They are widely sold, durable, easy to process, resistant to moisture and the appearance of putrefactive formations. To ensure that the frame is smooth and does not deform over time, it is advisable to use planed blanks with a moisture content of no more than 12%.
- Wooden slats. Needed to assemble the door base. A suitable cross-section is 15x40 or 20x40 mm. The geometry of the slats and its moisture content are especially important here, since the doors are not rigidly fixed to anything, unlike the same block for the frame.
- Sheet material. For unheated rooms, OSB or moisture-resistant plywood is suitable, but if the balcony is insulated - laminated chipboard or MDF. Thick sheets can be used to make shelves; thin sheets can be used to sheathe the back wall and the inner surface of the opening elements.
- Nails 15 mm. With their help, the lining is attached to the supporting frame. It is correct to fasten through clamps, but fixing directly into the groove is also possible.
- Stapler and staples 10 mm. An alternative to nails, less reliable and inapplicable without clamps.
- Lining. It is not advisable to buy from coniferous species (pine, spruce, larch), especially if the balcony faces the sunny side. If there are knots and areas oversaturated with resin, in the heat this resin will be released outward, which will negatively affect the stored items and the appearance of the homemade cabinet. This process can also occur with a supporting frame made of pine timber. But the likelihood of resin appearing here is somewhat less (the bars are located inside and do not heat up as much as the outer skin).
- Self-tapping screws, dowels. The frame is assembled using self-tapping screws and attached to the adjacent perimeter of the balcony. Dowels are needed for fastening to walls and concrete floors.
- Metal corners. It is much easier to assemble structures from timber and slats using such fasteners.
How to place it correctly
If there is a niche at the end of the balcony, then this is an ideal place to install a cabinet. Depending on the size and shape of your balcony, you can consider two cabinet options - corner and wall. Based on how much space you have, you can equip the structure with different types of doors.
Proper planning of the balcony space will help combine all these functions.
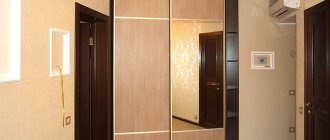
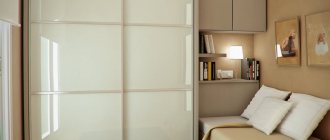
The following cabinet options are best suited for a balcony:
- single-leaf or double-leaf cabinet with hinged doors;
- with sliding doors.
Lining is a universal material in terms of decoration.
There are 2 design options for a balcony cabinet:
- Built-in. This option allows you to rationally use space, reducing material consumption. Please note that the built-in wardrobe is only suitable for balconies where there is an unloaded area and three solid walls on which the frame will subsequently be mounted.
- Corpus. This option consumes more material. If necessary, it can be moved to any place.
There are several cabinet designs.
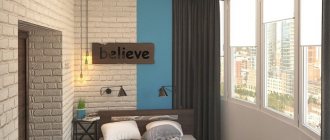
Sleeping area
If you have a bed or mattress, that’s good. All that remains is to decorate the sleeping area with an original headboard. For this purpose, scraps of boards, painted and arranged into a figured composition, will be useful. However, old lumber does not need to be brought into a civilized form, but, on the contrary, you can choose colorful, “beaten by life” specimens.
Separately, it is worth mentioning ladders, trestles and stepladders. These are ready-made heated towel rails, clothes hangers and shelving.
What else can you use to make a wardrobe for a balcony?
The main threat to furniture is moisture. Therefore, the material for the cabinet should be selected based on this factor.
There are many types of lining.
- Wood is the most practical material for any furniture. Advantages: aesthetics, easy to process, has excellent performance characteristics with timely care and processing. There is a contraindication - cold, unglazed balconies with high humidity.
- Chipboard (chipboard). The main disadvantage of this material is its poor resistance to moisture and temperature changes, so such furniture will only perform well on glazed balconies and loggias. Chipboard is suitable for heated rooms.
- MDF. The quality of the material is high. The properties of MDF are as close as possible to natural wood, but there is one important difference - the price. These panels are not afraid of either humidity or temperature changes. A good advantage is their environmental friendliness.
- Plastic - PVC panels. The most unpretentious material. It is often used because it is not afraid of moisture, is suitable for many tasks, inexpensive, and does not require much effort in care. It also has its drawbacks. This is fragility, changing color over time if it is exposed to sunlight for a long time.
- GKL. This is moisture-resistant drywall. This material cannot be called the best among its predecessors. The reason one can come to this conclusion is its fragility. Other disadvantages are the high consumption of material for the manufacture of a reliable structure. It is worth paying attention that the doors will have to be made of a different material.
- Metal-plastic. This material is known for its practicality. He is not afraid of either heat or cold. High humidity and mechanical stress do not pose too much of a threat. Most of all, this material does not tolerate bright sun because it causes yellowing. Individual elements for the cabinet (doors, shelves) are purchased at hardware stores.
Chipboard is one of the most popular materials for furniture.
The next thing you should pay attention to is the frame. Most often, timber is used for it, as mentioned earlier. Its size can be 40 by 40 mm or 50 by 50 mm. If the balcony is not heated, then wood is not the best choice. Due to changes in temperature and humidity, the dimensions of the timber will change.
Attention! To avoid damage to furniture, regular impregnation with protective agents is necessary!
If the closet does not fit, you can make a chest of drawers.
The optimal solution would be to use a metal profile that has a galvanized coating. It does not respond to temperature changes or humidity.
If the structure is free-standing, then the required amount of materials can be calculated by adding up the total area.
The next item is shelves. These components are easiest to make from sheet material, plywood, chipboard or laminated chipboard. The shelves are made from scrap boards. Treatment with a special varnish is also required. The shelves are placed on timber or secured to the frame with screws.
Making a cabinet out of clapboard with your own hands is not at all difficult if you follow the step-by-step instructions.
Next come the doors. There are three options for doors that are used in the manufacture of a balcony cabinet.
- Ordinary doors. Easy to install. Necessary materials: doors, furniture hinges, screwdriver.
- Sliding doors. Save space. Required materials: guides, roller systems for the door leaf.
- Roller shutters. Modern doors, not a cheap option.
The design of the doors may be different.
The doors can be the same height as the cabinet. If the cabinet has several sections, then each door has a height and width equal to this section.
Use advice from professionals when creating your closet.
I would also like to give some tips that will make your work easier when creating a cabinet from lining:
- Cladding products must be placed only on a glazed balcony. Because the impact of external factors - thunderstorms, wind, rain, direct rays of sunlight, have a detrimental effect on wood materials.
- Pay attention to the floor of the balcony. Pay special attention to the place where the closet will be located. The floor must be level.
- Get rid of cracks on the balcony and insulate it. This will help avoid the influence of temperature changes on your product.
Doors
The frame of the cabinet door is made from planed boards. The dimensions of the door will be determined by the parameters of the furniture itself. Remember that the doors should be slightly narrower than the section of the product. These conditions must be met in order to gain access to all its sections equally. In this case, the closed cabinet doors should overlap each other slightly so that an unaesthetic gap does not form between them.
Let's sum it up
Thus, making furniture from lining, as in the photo, is not at all difficult. And in order to make this task even easier for you, the article contains a video with a detailed description of the work required for this. Go for it!
Although we, for the most part, relax at the dacha only in the summer, no one wants to give up the usual benefits of civilization. But if for a city apartment we are ready to spend a substantial amount on purchasing furniture, then we are more attracted to garden or kitchen furniture for a dacha made with our own hands.
Execution options
In addition to standard placement methods: horizontal and vertical, over the entire surface, there are several more design techniques for lining arrangement:
- Diagonal. It will provide dynamics in the interior, as an accent on the wall or ceiling, but will require more painstaking work.
- Alternating multidirectional stripes. Giving a special, exclusive charm using various patterns: herringbone, steps, bricks and all sorts of combinations of these methods. The high cost of the method is more than compensated by the individuality of the final result.
- Only the lower third of the wall surface is decorated, the upper part is decorated with wallpaper, paint, and the border is decorated with molding. In addition to financial benefits, you can get a unique interior.
- An excellent option would be to create a panel, another fragment of an original shape on one of the walls, which can become a significant interior accent.
Sheathing
With an integrated design, only the cabinet door will have to be covered with your own hands. First, the door frame is installed. Depending on whether the door is double-leaf or single-leaf, the frame will consist of 1 or 2 parts:
- A wooden frame is formed from a narrow board, equal to the perimeter of the front wall of the structure;
- To increase rigidity, a diagonal crossbar is also nailed to the frame;
- Next, with the help of nails, clapboard sheets adjusted in advance to the appropriate size are attached to the purchased frame;
- The doors are equipped with handles, platbands and are attached with hinges to the main frame.
The final step is to varnish the doors. This will not only make the cabinet more attractive, but will also increase its service life.
Let's sum it up
From all of the above, we can come to the conclusion that making a cabinet in a niche in the extension is not so difficult. But thanks to this design, the balcony will become comfortable and have a lot of space, despite the unlimited number of things stored there. And by doing such magic with your own hands, you can not only significantly save money, but also make your balcony fascinating and inimitable.
Innovative design trends dictate their own rules. Nowadays it is no longer stylish to fill the balcony with unnecessary things. In modern apartments, this area does.
Why not use the balcony as an additional relaxation room? Why is it necessary to store old things there? Probably half of them have balconies.
Color
Some of the presented style solutions involve painting the lining, which can transform boring walls into a truly designer creation. Some are based, on the contrary, on maximum preservation of not only the texture, but also the color of the wood.
Everywhere has its own nuances:
- Golden honey is a natural color that gives a particularly warm atmosphere and indescribable energy. The main aspect is the dosed amount to avoid the “sauna” effect. Combination with any contrasting colors - blue, red, green, of varying intensities from catchy to pastel. The matte finish of wooden lining is an indicator of fashionable, modern design.
- Brown shades can be used with sufficient lighting. It is not recommended to get carried away with ceiling designs in dark colors; if desired, choose the lightest possible shade. For an apartment, you can play on one of the favorite techniques of designers - contrast. Options: one accent wall, the rest are made in an extremely light color with support in decorative elements, or alternating brown parallels along the entire perimeter with light wallpaper.
Style
Wooden lining can be processed in ways that allow the design to acquire its own individual character:
- Environmentally friendly - preservation of the natural pattern of wood.
- Treated - by impregnation, special means: smoothness, glossiness or matte is added.
- Painted - original color.
- Brushed - relief and texture come to the fore. Special type: only coniferous wood is taken.
All this diversity is necessary to create unique interiors in the most diverse styles, embodied for apartments and country houses. At the peak of popularity, the following style solutions directly involve this type of finishing:
- Eco. It will support the natural microclimate and combines perfectly with other materials, such as stone; with living phytowall – one of the best.
- Retro, vintage. Antique styles acquire even greater charm due to the lining, and brushing will enhance the effect of a spiritual retro atmosphere.
- Scandinavian. White matte boards are the hallmark of the style.
- Provence. The interiors convey the warmth of the sunny French coast through varnished paneling.
- Country. The “landhouse” profile with its decorative grooves will help to emphasize some of the natural elegance of the style.
- Rustic, natural, other ethnic styles. The surface is subject to aging due to fire and bleaching. Latest design preferences: bleached ash, oak, pine.
- Shabby chic. An excellent background for shabby, aged pieces of furniture, like “sugar” decorative items.
- Modern. Current option: gray, silver lining, especially locally used. The design does not contradict a certain urban orientation; gloss is only beneficial here.
- Loft. The rough, unpolished surface of such options as “American” and “quarter” will emphasize the industrial style.
Drawings and diagrams
It is impossible to talk about any standards regarding cabinets for balconies. And the sizes and configuration, and the glazing is different for everyone. Therefore, even the size of the shelves has to be determined “on the spot”. But here are a few examples that you can change as you need.
Stages of work
You need to start by preparing the walls of the balcony. It is advisable to treat them with an antifungal compound so that a layer of mold does not form between the wood panels and concrete. Even glazing a balcony does not guarantee that the room will be absolutely dry in any weather. Small cracks are sealed with concrete, and the depressions are leveled with a screed.
First, a wooden frame is installed. To do this, you need to take wooden slats of sufficient thickness for structural strength, corresponding to the height and depth of the future cabinet. The frame is secured to the ceiling and walls on all sides using anchors.
Cabinet shelves can be made of wood or plasterboard