DIY wardrobe from Leroy Merlin
You can make a convenient, functional and high-quality wardrobe yourself by purchasing parts and components from Leroy Merlin. It will not be inferior to factory analogues, and its assembly will take Let's tell you more about how to make a built-in wardrobe with your own hands from Leroy Merlin products.
Leroy Merlin kitchens – 50 photos, prices and selection guide
- Low price. In most cases, when choosing furniture, buyers are guided by its cost. To produce sets of countertops, cabinets and other elements of kitchen furniture, the company’s specialists use available raw materials. At the same time, the designs, while looking stylish, are of high quality. The minimum service life, taking into account the provided warranty service, is 2 years. Luxury kitchen ranges such as Delinia come with a 25-year warranty.
- High build quality. Cabinet fronts are assembled from durable materials. They withstand high humidity, temperature fluctuations, and mechanical stress. The surface does not lose its original appearance for several years.
- Availability of a modular system. Leroy Merlin furniture is produced in a modular configuration. This allows you to combine various components of cabinets, fittings, facades, bar counters, and countertops. If any element is damaged, it can be easily replaced.
- Convenience of ordering through the official website. To evaluate the appearance of ready-made furniture sets, it is not necessary to visit the store. You can view available models on the company’s website and place an order online. The goods will be delivered by any convenient courier service. When visiting the brand's showrooms, you can purchase kitchen utensils and accessories.
Planning
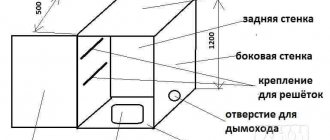
When approaching the organization of storage space from a professional point of view, you must initially choose the right location for the closet. At this stage it will become clear whether additional elements will be required for manufacturing:
- false walls;
- covers.
Having chosen a place, we move on to the drawing. It indicates the exact dimensions (height, depth, width), as well as internal contents. At the drawing stage, it will become clear how many additional parts will be needed for the organization:
- boxes;
- shelves;
- rod
For accurate display the following parameters are taken into account:
- The thickness of the cabinet walls is 16 millimeters;
- The thickness of the sliding doors is 100 millimeters.
Avoid hard-to-reach places, and keep in mind that if there are drawers, space will be required. Wardrobe doors do not always allow this. Sometimes it is appropriate to use not two doors, but three. You need to select this element according to the width and height parameters, as well as the color scheme. There are models with glass that are ideal for wardrobes in bedrooms and hallways. Below are the door sizes.
Article on the topic: Make a cabinet with your own hands
The door width can be 604, 704, 804 or 904 millimeters. In this case, you can select doors of the following height (the full height of the opening in millimeters is indicated in brackets):
- 2252 mm (2400);
- 2440 mm (2500);
- 2560 mm (2600).
You will need to select guides for the doors. Remember that sliding doors are installed with overlap. Next to the drawing, sequentially list all the cabinet parts and their quantity. Now you can go to the store.
What to consider when choosing a cabinet model
A piece of furniture is usually installed for a long time. Therefore, it is important to carefully consider all the nuances of the design.
- Cabinet dimensions . The structure must fit harmoniously into the surrounding space. But at the same time it must be of such a size that it is possible to place everything necessary inside. At the same time, furniture should not be an obstacle to free movement around the room. Options for cabinet sizes depending on the number of doors and contents
- Features of the room layout . In narrow rooms you will have to abandon hinged wardrobes, giving preference to sliding models. Corner designs add coziness and allow you to make maximum use of the entire area. It is important that the installed product does not cover window or door openings and does not serve as an obstacle to light sources.
- Internal filling . It depends on the purpose of the structure. As a rule, in apartments, wardrobes are installed in living rooms, corridors or bedrooms. Depending on this, the number of compartments, their types and sizes are determined: areas for hangers, shelves (stationary and retractable), drawers, mezzanines, hooks, etc. In addition to the internal “filling” located behind closed doors, sometimes an open one is convenient a console on which you can place frequently needed items (documents, keys, glasses, etc.), as well as accessories and souvenirs for interior decoration. The contents of the cabinet depend on its purpose
- Execution of sashes . Cabinet doors can be decorated with decoratively processed glass. An excellent option is mirrored doors. Such elements significantly increase the functionality of the entire structure, since, in addition to its beautiful appearance, a cabinet with mirrored doors allows you to avoid placing additional mirrors.
- Style of a piece of furniture . You can choose an option for installation in any interior, but the type of fittings used often depends on its style. You don’t often see modern mechanisms in classic products. Loft style cabinets are suitable for installation in an apartment or studio
- Material possibilities . The appearance of the cabinet, dimensions, manufacturability of its “filling”, materials used in manufacturing determine the final cost of the product.
First of all, you should study the serial models presented by the manufacturers. If you do not have the necessary options, you can contact specialized organizations, placing an order for the manufacture of a structure according to individual dimensions, or, after soberly assessing your capabilities, start assembling it yourself.
Options for filling a four-door cabinet
Design options
Making a built-in wardrobe with your own hands from Leroy Merlin products is quite simple. It will fit perfectly into the interior of any room: children's room, bedroom, hallway. The most commonly produced cabinets are the following types:
- with two sections;
- with three sections.
Depending on the content, you can create several wardrobe sections or linen sections. If it is not possible to make a built-in wardrobe deeper than 450 millimeters, then the hangers will have to be placed end-to-end.
A sample list of parts looks like this:
- body - 1 piece;
- filling - 1 piece;
- cabinet interior - 1 piece;
- corner panel - 1 piece;
- corner shelf with left direction - 5 pcs;
- guides - 1 piece;
- doors - 2 pcs.
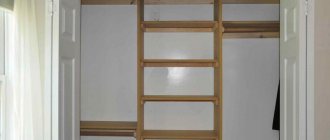
This cabinet has a closed section, as well as open shelves on the left side. The main reason why a closet with sliding doors is installed is the small size of the rooms in the apartment.
Step-by-step manufacturing instructions
As an example, consider a simple but quite functional model. To make it, it is enough to have a simple set of tools, desire and basic carpentry skills.
Step 1: Prepare your materials. To make a cabinet, you need to purchase 24 pieces of furniture confirmats, 6 pieces of adjustable legs, 1 liter of linseed oil.
Flaxseed oil and drying oil
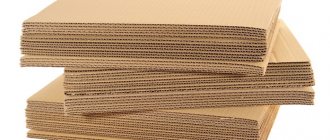
The dimensions of the cabinet are 2.4 m × 1 m = 2.4 m2, this is how much fiberboard you need to buy for the back wall. Now we need to calculate the required footage of the furniture board. For the cabinet you need to cut out the following parts:
- sidewalls 0.4×2.4 m – 2 pcs.;
- internal vertical partition 0.4×2.4 – 1 pc.;
- bottom and top 0.4×1.0 – 2 pcs.;
- shelves 0.4×1.0 m – 3 pcs.
We took the dimensions without taking into account the thickness of the furniture sheet; ours has this parameter of 18 mm. During cutting, the cabinet shelves are cut in half and in total there are 6 of them, but each is approximately 0.5 m long. We will indicate the exact dimensions during cutting. In total, to make a cabinet you will need 2.88 m2 + 1.2 m2 = 4.08 m2 of furniture board. This is a clean area; you need to make a small margin taking into account the geometry of the standard sheet.
Furniture board
Step 2: Cut out the base and top of the cabinet. Length 100 cm, width 40 cm. Measure the position of the holes for confirmations and drill them. The distance of the holes from the edges is approximately 10 cm, the distance from the edge is 8 mm (half the thickness of the furniture sheet). Take measurements very carefully, the quality of the cabinet depends on this. In the base, at equal distances in a checkerboard pattern, drill six holes for the adjustable legs.
Marking
Drilling holes for adjustable legs
Practical advice. Be sure to stack all elements of the same size and check the edges. They must lie in the same plane and be strictly perpendicular to the parts.
Step 3. The distance between the internal shelves is 80 cm, drill a hole in this place for the confirmation. Remove sawdust from the surface and use fine sandpaper to erase any rough edges and burrs.
Grinding
Step 4: Using the bottom as a template, mark out the interior shelves and top of the cabinet. Use a hand-held circular saw to cut the pieces.
Marking Shelf 2 Shelf 3
Regiment four
While working, securely fasten the shields to the work table using a clamp, and use them to secure the saw ruler. The cuts must be even and parallel. Take your time, follow the recommended cutting speed parameters. Otherwise, the edges will inevitably chip, and this is a big problem. Sanding out uneven surfaces is difficult and requires a lot of time and special tools. Real craftsmen have a minimum amount of manual grinding; they achieve surface cleanliness through the quality of their tools and the selection of the correct processing modes for furniture panels.
Sawing
Step 5. Prepare a hole for confirmations at the ends of the sidewalls and the vertical partition. They should be located exactly in the middle of the thickness and at an equal distance from the edges. To mark, use a carpenter's square; all axes of symmetry should be located on the same line. It is much easier to mark on three parts at once - fold them evenly on the work table, align them and secure them firmly with clamps.
Marking holes for confirmations
The drilling depth should correspond to the length of the confirmata. Immediately make holes for the shelves.
Drilling holes
Step 6. Use a hand router to round off the sharp ends; this not only increases the safety of using the cabinet, but also greatly improves its appearance.
Furniture milling milling
Step 7. Treat the surfaces of the elements with linseed oil. You need to use an ordinary paint brush, apply the oil evenly, do not leave gaps.
Linseed oil treatment
Currently, the use of natural compositions for finishing the front surfaces of furniture is becoming very popular. In terms of reliability, design qualities and durability of protection, natural compositions are almost in no way inferior to modern varnishes or paints. And in terms of health safety, they have no equal.
You need to know that absolutely all materials made using synthetic resins emit a very harmful substance, formaldehyde, into the air. The quantity may vary and depends on the quality of the material, but there are always compounds in the air. They have a negative impact on the entire body, children are especially affected. Another advantage of natural oil is that it costs much less than artificial coatings.
Allow time for the oil to dry completely. Depending on the temperature and ventilation efficiency, you will have to wait from a day to 3-4 days. After complete drying, you can begin assembling the cabinet.
Step 8: Prepare fiberboard sheets for the back of the cabinet. They will be fixed with a stapler; if you wish, it is better to use small nails.
Fibreboard for the back wall of the cabinet
Assembly algorithm
Due to the fact that the cabinet is quite large, it is better to assemble it in the room at the place of use. Prepare the site, remove all unnecessary items. To perform assembly work, you will need a screwdriver; it will also be used for drilling holes.
Step 1. Arrange the cabinet parts according to their intended purpose, check the completeness and draw up a preliminary action plan.
Step 2. At the first stage, you need to assemble the frame. Place the two sidewalls and the bottom side by side and begin assembling the elements into a single structure.
Frame assembly
Work very carefully, do not let the parts fall, they can tear out the confirmations. Once the bottom is secured, install the middle shelf in place, it will significantly strengthen the cabinet structure.
Shelf installation
Now the frame has relatively good stability, you can work more calmly. Attach all the elements of the cabinet one by one until the last one is in place; there is no need to pull it together.
Vertical wall mounting
Only after this check the corners and tighten the confirms until they stop.
Step 3: Screw in the legs.
Legs are twisted
We planned a large number of stops on purpose. The bottom of the cabinet is made of ordinary furniture board 18 mm thick, and there is no supporting frame. The slab cannot withstand heavy loads; the more legs, the less effort on each.
Step 4. Secure the fiberboard slabs of the back wall; secure the material with a stapler.
Rear wall mounting
Step 5. Place the cabinet against the wall and check its position.
Checking the cabinet position
Use adjustable legs to install it in a strictly horizontal position, otherwise there will be problems with opening/closing the doors.
Important. Be sure to ensure that all six legs of the cabinet rest on the floor. If you do not follow this recommendation, the bottom will become deformed, big problems will appear, some of them may be critical and cannot be eliminated.
Step 6. Take the exact dimensions of the doors and order them to be made by professionals. The fact is that only the most experienced furniture makers can make a designer facade; beginners should not even try. A beautiful facade significantly improves the appearance of the cabinet; for the sake of this effect, you can go for a slight increase in the cost of furniture.
Step 7. Secure the resulting doors into place. They have all the holes, hinges are inserted into them and on the other side they are screwed with self-tapping screws to the sides of the cabinet.
Hinges are attached to the facades
Attaching hinges to the cabinet Screwing on the next door Screwing on handles
If necessary, you can screw the retractable bracket
Ready cabinet
Adjust the position of the doors and attach handles to them. The cabinet is now completely ready for use.
We have given detailed instructions for making an ordinary cabinet from furniture panels. This is furniture for universal use; it can be installed in children's rooms, bedrooms or hallways. But today built-in furniture is considered relevant; it takes up almost no free space and perfectly performs its main functions. You can read how a built-in wardrobe is made on the website; we have a very useful article.
Cost, installation
Built-in wardrobes from Leroy Merlin are inexpensive. Cost of some components:
- solid sliding doors - from 1,728 rubles;
- sliding doors with mirror - from 2485 rubles;
- end hanger - 137 rubles;
- drawers - about 1000 rubles;
- roller guides - from 106 rubles.
The cost of a two-door built-in wardrobe with various contents will cost approximately
Installing cabinets yourself is quite simple. First, the body is assembled, then they begin to assemble the filling. Particular attention should be paid to marking the guides for drawers. They are attached to the side walls before the cabinet is assembled.
At Leroy Merlin you can order a wardrobe based on an individual project. The products meet all quality standards at an optimal cost.
Features of the filling and internal structure of the wardrobe
Varieties of prefabricated wardrobes, consisting of metal profiles, adapt to any room geometry. Photos of finished projects help to see furniture systems in a real environment, which makes it easier to choose the type of structure. In Leroy Merlin catalogs there are many elements of wardrobe systems, among which buyers often choose complexes based on the type of designer. The popularity of such wardrobes is due to their versatility and ease of transformation.
Attention! It is not always possible to calculate in advance the exact number of modules and determine their location. Unlike classic cabinet furniture, in Leroy Merlin construction sets you can easily swap the component modules.
To create a comfortable environment in the wardrobe, you will need a multi-level or local lighting device. Inside the furniture system, holders, mesh baskets, shelves, racks and hangers can be combined. When choosing the contents of your wardrobe, it is important to consider not only the relevance of the design, but also the ease of use of the structures.
Content
- Built-in wardrobe: advantages and disadvantages.
- DIY built-in wardrobe: preparatory work.
- Drawing up a drawing.
- Choice of filling.
- Materials and fittings for built-in wardrobes.
- What should the fittings be like?
- Tools for assembling a built-in wardrobe.
- Built-in wardrobe: detailed assembly instructions.
- Facade finishing.
- Let's summarize.
Built-in wardrobe: advantages and disadvantages
The main feature of a built-in wardrobe is the absence of a back wall, top and base. Creating such a storage system costs less than buying a regular cabinet model, and assembly is quite easy to do yourself. Additional advantages of a built-in wardrobe include:
- 1 maximum space saving - you can effectively use the features of the room layout (niches, unclaimed corners);
- 2 compactness - sliding doors save space; for their operation there is no need to provide “blind zones”;
- 3 capacity – the volume of usable space is 2.5 times greater in comparison with standard cabinet models;
- 4 reliability - a built-in wardrobe assembled by yourself will serve you for many years without special care or the need to replace fittings;
- 5 versatility - correctly selected materials and finishes allow you to install this furniture in any room;
How to connect furniture panels
To fix individual elements from furniture panels together, several types of hardware are used, each of them has its own purpose. Fasteners cannot always be interchangeable; the specifics of use must be taken into account during the manufacture of the cabinet.
| Type of hardware | Brief description of technology of use and technical characteristics |
| The most common, traditional and fairly reliable hardware. For many centuries, nails were the only way to secure wooden parts in furniture making. They can be long and short, thick and thin, smooth and screw-shaped or notched. The head of the nails is also different; in some types it is completely absent, which makes it possible to make hidden connections. There are nails with enlarged heads for fixing fragile materials. |
| Wood screws | They appeared relatively recently, but have now gained wide popularity due to their excellent performance characteristics. They are made of ferrous or non-ferrous metals, the heads are countersunk or ordinary. Compared to nails, they have increased pulling performance. |
| The so-called Euroscrews. If nails and self-tapping screws are considered universal-purpose hardware, then confirmats are intended only for assembling furniture. They are made of durable steel and, due to their special design, ensure a strong connection between furniture parts. During installation, a special confirmatory drill must be used. |
| Fixes and minifixes | Special fittings that allow you to assemble/disassemble furniture without losing the original parameters of fixation strength. The most complex hardware for furniture consists of two elements: an eccentric and a rod. Some models additionally have plastic inserts to minimize wear and friction. Installing a fix requires some experience and special tools. |
Now, having minimal theoretical training, you can start making a cabinet from furniture board with your own hands.
DIY built-in wardrobe: preparatory work
When wondering how to make a built-in wardrobe with your own hands, you need to pay close attention to the preparatory stage. First of all, you should choose the location of the storage system. This can be a niche, corner or end wall (relevant for elongated rooms).
Next you need to take measurements. The height of the built-in wardrobe is equal to the distance from floor to ceiling. In the place where you plan to install the cabinet, measure this indicator at several points. The width of the storage system depends on the size of the niche, the size of the room, and your own needs.
Drawing up a drawing
Next you need to complete the drawing. You can do it manually or in a special program (for example, “BT-cabinet”, “Basis-cabinet”, PRO 100, etc.). The main advantage of virtual designers is the automatic calculation of indentations, total dimensions of furniture, quantity of materials and other important parameters. The program also allows you to immediately select the filling.
If you make a drawing for a built-in wardrobe yourself on paper, remember the thickness of the material (chipboard, MDF, wood). The width of each compartment should approximately correspond to the parameters of the door. To ensure that the sliding structure is not too heavy, it is recommended to make the sash no more than 100 cm. You can also select a ready-made drawing on the Internet. This is the simplest option for owners of apartments with standard parameters.
Filling selection
When making a built-in wardrobe in the bedroom with your own hands, pay attention to the contents - the number and location of shelves, drawers, hanger bars, compartments for household appliances, shoes. You can also add retractable systems here, for example, a built-in ironing board. There are a huge number of filling options available on the Internet, among which there is sure to be an optimal solution.
Article on the topic: DIY built-in furniture for the bedroom
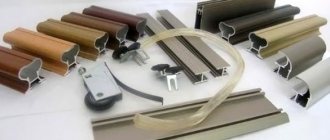
Materials and accessories for built-in wardrobes
To assemble a sliding wardrobe built into a niche with your own hands, you need to choose the right materials. DIYers use everything from plywood to drywall, but often the finished furniture doesn't live up to expectations. Experienced craftsmen recommend only a few types of material for these purposes.
- Chipboard/laminated chipboard is an inexpensive option for structures of simple shape. Available in a huge range of colors, textures, and allows for photo printing. MDF is a better material to process than chipboard. It costs more, but has increased strength and environmental friendliness. The variety of façade solutions is somewhat smaller, but do-it-yourself sliding doors for a built-in wardrobe will last a very long time. Natural wood (laminated veneer lumber or solid wood) is an expensive material with an excellent natural texture.
What should the fittings be like?
When deciding how to assemble a built-in wardrobe with your own hands, pay attention to the selection of accessories. This includes rods, rails, mounting pins, screws, and support elements. But the most important issue remains the purchase of a roller system. There are three options.
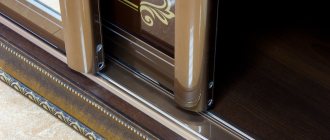
- 1 Bottom rail - the door rests on the bottom roller, and the top frame simply prevents the panel from falling out. The simplest and most reliable option.
- 2 Top rail – the sliding system is located at the top, so it operates quietly and less dust accumulates on it. However, it is more difficult to install, and if handled carelessly, the roller can break.
- 3 Monorail – the structure is equipped with two pairs of rollers. This is a fairly reliable, but more expensive and difficult to install option.
Tools for assembling a built-in wardrobe
- Screwdriver, drill. Roulette, building level. Set of screwdrivers, including hexagons.
A grinder and a hacksaw can also come in handy if you have to correct errors made during calculations on the go. This set of tools is quite enough to assemble a built-in wardrobe with your own hands according to the diagram.
Sliding doors for the Leroy Merlin dressing room: sliding and folding
Cost calculation
To find out the cost of the headset, you need to provide store employees with information about the desired configuration, sizes, and accessories. Often the final price differs from that presented at the point of sale, as it depends on several factors.
To draw up a project and clarify the cost, you can use the online planner on the company’s website or consult by phone.
When analyzing the data, the program will create a detailed cost calculation, which will take into account the set of modules and parts required to assemble the kitchen. If you do the design yourself, you can see price tags in the lower right corner or in the specifications section.
The next way to calculate the cost is to open the project gallery with exhibition samples. It contains examples of ready-made headsets with prices per linear unit. m. If the configuration parameters differ from the required ones, you can change them using the scheduler.
- Costs of frames, equipment, cabinet configurations. When estimating the parameter, the design and the presence of complex elements are taken into account. For example, a cabinet with 1 door is sold cheaper than a design with drawers.
- Costs of facades. Basic frames are made from laminated chipboard. But in some series, MDF or expensive solid wood is used.
- Dimensions of the kit. The modular system allows you to assemble a small set for a compact kitchen or a large structure for a spacious room.
- Elements of fittings. The use of handles, hinges, and expensive mechanisms increases the cost of furniture.
- A type of countertop. The structures are assembled from chipboard followed by lamination or application of a plastic layer. Budget kits are not moisture resistant and have a limited service life. You can evaluate the build quality when choosing furniture in the store. If the tabletop is made of solid beech, it will be reliably protected from adverse influences.
Expert opinion
Strebizh Viktor Fedorovich, leading construction foreman
Sliding doors for a dressing room differ from swing doors in their mechanism, which when opened does not take up free space. If you want to clarify something, please contact me!
Built-in wardrobe: detailed assembly instructions
- Assembling the structure begins with installing the base, if provided. Models with adjustable legs can compensate for differences in floor height, but they create space for dust to accumulate. If there is no base, make sure that the do-it-yourself drawings of the built-in wardrobe take into account the possible difference in the distance from the floor to the ceiling. Attach the vertical parts of the structure. They act as stiffening ribs, on which the strength and stability of the entire cabinet depends. Install transverse elements: ceilings, shelves, rods. Start hanging the doors. Mount the bottom rail, but do not secure it all the way - you need to insert the bottom rollers into it first. Markings are made according to the location of the sash to install the upper guide. After final installation of the rail, the door is inserted into them and adjusted with a hexagon. It is important that the sash moves easily. A duster brush is fixed in the lower part, and magnetic elements and stoppers are located on the side.
Article on the topic: DIY corner cabinet for sink
If you assemble a sliding system in a built-in wardrobe with your own hands, you should pay maximum attention to this process. Let's look at the sequence of work step by step.
- 1 Place the door leaf on a horizontal surface so that you have easy access to all surfaces.
- 2 Drill two holes in the top of the stand, which acts as a handle. The upper diameter is 10 mm for the roller and profile, the lower one is 6.5 mm.
- 3 Drill two more holes at the bottom of the same rack. Upper 10 mm (for the roller), lower 6.5 mm (for the connecting screw). The first should be at a distance of 7 mm from the edge, the second - 43 mm.
- 4 At the top of the profile we drill two holes: the top with a diameter of 10 mm, the bottom with a diameter of 6.5 mm. The operation must be repeated on the opposite profile symmetrically.
- 5 Starting from the top, we frame the door (panel or mirror) with a seal onto which we place the profile. We do not cut off the rubber tape at the corners, but simply wrap it and continue laying.
- 6 We put on the stand with the handle and connect it to the crossbar. We use a hex wrench to tighten the screw, but before we tighten it all the way, we mount the upper rollers.
- 7 Install the profile at the bottom of the door. We use pre-drilled holes to mount the roller.
After this, we make a built-in wardrobe with our own hands according to the general scheme - just attach the guides and insert the door.
Marking and drilling profiles.
The first thing you need to do is mark the drilling locations for the profiles. You only need to drill vertical profiles - handles. You will need two holes for fastening the lower horizontal profile, two holes for fastening the upper horizontal profile and two more holes for fastening the rollers that are inserted into the lower profile.
To understand where to drill, you need to measure the upper and lower horizontal profiles. The dimensions you need to know can be seen in the pictures below (marked in red).
Drawing of the lower horizontal profile of a compartment door.
Drawing of the upper horizontal profile of a compartment door.
Mark the locations for drilling holes on the profile handles. On one side of the profile we mark 7mm, and on the other side 42mm. At this stage, it is worth paying attention to the mirror arrangement of the handle profile on the door. The holes must be drilled taking this fact into account.
Mark the drilling location on the profile.
To understand where to drill holes for attaching the roller, you need to insert the roller into the lower horizontal profile and measure the distance from the edge of the profile to the center of the mounting bolt. The roller must be inserted so that its metal frame is flush with the edge of the horizontal profile.
Install the lower door roller.
We measure the distance from the edge of the profile to the center of the bolt.
The distance was measured and the size was 7mm. This size must be marked on the handle profile from the side where the lower horizontal profile will be attached.
After you have made all the necessary markings, you can start drilling holes.
First we drill through holes with a diameter of 7 mm. This diameter corresponds to the diameter of the mounting bolts and screws.
Let's drill a hole.
Now the holes need to be drilled to a diameter of 9mm. But only the first front wall of the profile needs to be drilled. Do not drill into the second wall! A hole with a diameter of 9mm will allow the head of a bolt or screw to pass into the profile. This way the bolt will be hidden inside the profile.
We drill out the holes.
After drilling all the holes, all that remains is to assemble the door.
Facade finishing
In order for the wardrobe to be not only functional, but also pleasing to the eye, it is necessary to take care of its decorative finishing in advance. To do this, you can use several techniques and their combinations.
- A combination of panels of different colors - choose a material whose shades match the interior scheme. The combination of light and dark contrasting inserts looks especially impressive. They can be vertical, horizontal, or staggered. Matte panels give the room a cozy feel and are suitable for spacious rooms. Mirrors with or without a pattern - reflective surfaces visually expand the space and raise the ceiling. Additionally, you get space for conveniently trying on clothes and shoes. Mirrors with matte rough patterns, which are applied by sandblasting or using special abrasive pastes, look especially impressive. The choice of patterns is not limited, but it is advisable to order their execution from specialists, for example, when cutting a sash. Photo printing is a method of applying full-color images to cabinet doors. You can choose any shades and motifs: from “cartoon” scenes to abstract graphics. Such cabinets will become the highlight and main decoration of a minimalist interior. Vinyl stickers and posters are an easy way to decorate your built-in closet doors yourself. Over time, it will not be difficult to remove the boring ornament and apply a new one in its place. You can buy ready-made interior stickers or order a poster from a printing house. Stained glass film is a translucent material with an adhesive composition applied to one side. It is applied directly on top of the mirror, creating a subtle glow effect. By cutting the film, you can create fancy patterns and spectacular images.
Article on the topic: Do-it-yourself furniture for kindergarten from scrap materials
Let's sum it up
You can assemble a built-in wardrobe with your own hands using the video or our step-by-step instructions. It's easy enough for an experienced DIYer. Making all the calculations and using professional sawing will cost much less than ordering an individual production of a storage system or buying ready-made cabinet furniture. You can additionally save on the choice of materials - chipboard or MDF will be a good solution. But it’s worth buying the best fittings, because they are responsible for the durability and convenience of the cabinet.
It is easy to decorate the doors even at the stage of ordering the panels, using spectacular combinations of different shades, mirrors and patterns on them. You can also decorate the cabinet after assembly if you use interior stickers or vinyl posters. Build the most convenient storage system that perfectly suits your needs!
Components and materials for self-assembly
The Leroy Merlin store offers not only furniture, but also accessories and materials for assembling it yourself.
- Laminated chipboard panels. They are a durable and practical material used for assembling cabinet furniture and decorating wall surfaces.
- Furniture panels. Assembled from natural wood. They can be used to make staircases and window structures.
- Edge corners and tapes. These parts are used to process the ends of chipboard structures.
- Facades. Buyers can choose from cabinet doors made from solid wood with interesting milling.
- Louvered doors. Suitable for kitchen cabinets. In addition, they are used to organize ventilation systems that prevent the appearance of mold.
These are ready-made direct kitchens that do not require design. All you need to do is assemble a set of cabinets like a children's construction set. Available in only 11 designs. The frame is made of laminated chipboard, the facades are made of laminated chipboard, MDF and MDF with veneer. Important bonuses:
- The finished combination can be ordered online on the website and seen in person in the store.
- For convenience, each cabinet/drawer is packed in a separate box with all components - hinges, handles, tabletop, etc.
By the way, about the countertop: please note that each cabinet has its own. When the set is completely assembled, the tabletops of the floor modules are connected with special strips (see photo below). Unfortunately, this makes cleaning somewhat more difficult (dirt gets stuck in the cracks) and increases the risk of the chipboard swelling. Therefore, we recommend replacing the “original” countertops with a single sheet of higher quality material.
Kitchen Bianca with a single worktop and different handles. The price of such a combination, excluding the cabinet, but taking into account the plumbing and countertops, was only 10 thousand rubles
One more tip. In addition to the countertop, finished Leroy Merlin kitchens have two weak points:
To extend the life of the kitchen, we recommend replacing the “original” legs and hinges with better ones.
We make a wardrobe in the hallway with our own hands: in 1 day and 11,000 rubles
A detailed catalog of kitchens from Leroy is available for review on the website. The company produces cheap and luxury kits in different categories.
Expert opinion
Strebizh Viktor Fedorovich, leading construction foreman
The modular system allows you to assemble a small set for a compact kitchen or a large structure for a spacious room. If you want to clarify something, please contact me!
We make a wardrobe in the hallway with our own hands: in 1 day and 11,000 rubles
Walls: - Ceiling: - Wardrobe: -
Article on the topic: Do-it-yourself kitchen furniture from clapboard
13,067
Goal: to place, in a narrow passage and minimal hallway space, a place to place current clothes, shoes, a small pile of accessories and a mirror for a family of 4 people. And do it as inexpensively and quickly as possible, in short, assemble the wardrobe with your own hands.
- drill for confirmation
- square
- roulette
- screwdriver
- level
- pencil
- Straight arms
Expenses
- cash - about 11,000 rubles
- temporary - 1 day
Recommendations for carrying out work
As you can see, assembling a cabinet is a fairly simple process that any householder can do. The main thing here is accuracy when taking dimensions and the presence of several tools usually available at home: a saw, a screwdriver, a sanding machine (it can be replaced with regular sandpaper), a protractor, a level and a tape measure with a pencil.
Table. Accessories and devices that may be needed in the manufacture of the product.
| Name | Image |
| Self-tapping screws | |
| Confirmations | |
| Hooks | |
| Furniture dowels | |
| Corners | |
| Drawer guides | |
| Clothes rail with fastening | |
| Sash guide system | |
| Hinges (if a swing structure is installed) | |
| Decorative plugs for mounting points | |
| Handles for drawers and doors |
In addition to the presented devices, modern types of fittings can also be used: smooth and silent closing systems, devices that allow you to open drawers with a light touch of your hand (in this case, there is no need to install handles on the drawers), etc.
- To make the edges of chipboard, most often used for the production of cabinets, attractive, several types of furniture edges are available: paper (impregnated with melamine), acrylic, PVC, ABS plastic or veneer. The easiest way to apply a melamine edge. All you need for this is an iron. But it also serves less than its analogues.
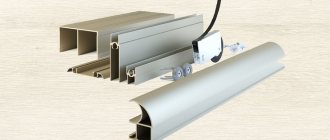
Furniture edges - The most important element in sliding wardrobes is the sliding system. You shouldn't skimp on it. Low quality products can quickly become unusable. Today, there are many models on the market that differ in the type of guides. Whatever device is chosen, it is recommended to pay attention to the material from which it is made. It is best to purchase aluminum systems. They are durable and can easily cope with loads.
- You can cut the material yourself, but if you don’t have many furniture making skills, it’s better to entrust this work to professionals.
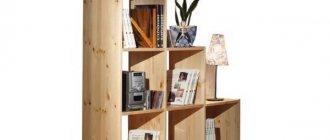
- When drilling holes, it is important to maintain clear geometry, otherwise visible asymmetry, even masked by plugs, can ruin the appearance of the cabinet. Original do-it-yourself bookcase
With a responsible approach to the matter, the labor costs and time spent will be translated into a reliable and functional design, which will take into account all the individual wishes of the owner.
Materials
We go to Leroy Merlin, buy components there and cut them as needed. If Leroy is not in your city, you will have to look in local stores.
- Guide set 1383 mm - 1 piece
- Sliding door, 2455x604 mm - 1 piece
- Furniture part laminated chipboard, 1200x300x16 mm - 3 pieces, sawed exactly in half
- Furniture part laminated chipboard, 2700x400x16 mm - 4 pieces, we saw them in height, as well as two pieces for parts with widths of 350 and 366 mm.
- Furniture part laminated chipboard, 2700x300x16 mm - 1 piece
- Sectoral laminated chipboard shelf, 350x350x16 mm - 6 pcs.
- Schlegel - 5 meters, door stops - 2 pcs.
- Confirmats (a lot), 16mm screws (a bunch) and furniture corners, 30 pieces
How to choose the right Leroy Merlin kitchen: types, design, photos
Furniture parts
Which is better: heated floors or radiators?
Warm floorBatteries
Laminated fibreboard. Practically not subject to deformation, thanks to special impregnation it is protected from swelling, environmental friendliness, decorative appeal. Packaging: stretch film.
Expert opinion
Strebizh Viktor Fedorovich, leading construction foreman
The assemblers offering services on the Yudu website perform their duties responsibly and use reliable tools and fasteners in their work. If you want to clarify something, please contact me!
Assembly
We do the preliminary assembly of the corner elements. We combine sheets with a width of 350 and 366 mm, as indicated in the figure, and first tighten them with confirmations. It is convenient to do this on an editing table, but in the absence of one, you can also use stools. Here we attach the sectors with 2 confirmata on each side. To ensure an even placement of the confirmations, it is recommended to make preliminary markings. For a wide sheet, one confirmation per sector is sufficient for now. We repeat the procedure on a symmetrical element.
We remove the wide (side) laminated chipboard sheet from the assembled structure (it will get in the way) and place the half-assembled structures against the wall. This should be done carefully so as not to scratch the ceiling or tear off the sector elements.
Again, more specifically, we assemble the side elements. At this stage, you can attach the entire structure to the floor and ceiling, if you are confident in the accuracy of the markings. Assembling a wardrobe with your own hands does not tolerate mistakes. When fastening, be sure to check the vertical installation
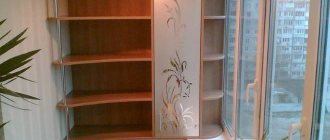
We install a vertical sheet 30 cm wide in the center of the structure. We install rectangular shelves, securing them with furniture corners to the vertical risers, taking into account the fact that these shelves are installed on the same level with the sector elements, the confirmations from the sectors will be hidden.
Now you can finally attach the structure to the walls and ceiling. The structure itself is quite massive and a pair of fasteners for each vertical element is enough - 6 pieces in total.
Article on the topic: DIY wine cabinet
We install the guide under the clothes and screw the hooks for clothes. The quantity is optional, but in practice a couple of hooks are enough in the corner, and 3-4 inside half the cabinet. Cut the guides to the required length. You will need to saw off half of the top one - in connection with one door it is not needed, and it will not physically fit. The top can be secured, the bottom can be simply placed for now, its fastening will come later. Don't forget to put door stoppers in the bottom guide
We install the door in its place. We check that the door fits well into the upper guide and does not fall out of it. To lift the door, you can place a laminated chipboard strip under the bottom guide - sheets 100 mm wide are sold in Leroy. It can be raised to a small height by adjusting the rollers. We control the vertical installation of the door and finally secure the lower guide.
Now you can attach a schlegel and a mirror to the door if desired, install the door in place and use the screws on the lower rollers to adjust its position relative to the cabinet body.
Amazing! So we assembled the wardrobe with our own hands. Over the course of a year of operation, it performed just fine.
Calculation of sliding wardrobe doors.
We will make an approximate calculation of the doors using the Aristo asymmetric profile system. For other manufacturers, the calculation will be similar, but since the dimensions and shapes of the profile may differ, the numbers will be different.
When calculating doors, you first need to take into account their overlap. If calculated correctly, only one handle profile should be visible at the place where the doors overlap. The handle profile of the second door should be completely hidden behind the profile of the front door. Look at the photo below.
Door overlap diagram.
The photo shows the overlap of the vertical profiles of the compartment doors.
Calculation based on the width of the cabinet.
Let’s take as an example a cabinet opening 1600mm wide and 2500mm high. Two doors are installed in such an opening.
Drawing of an asymmetric profile - handles.
If we take measurements of the handle profile, we will get the dimensions shown in the figure. Knowing its parameters, you can begin to calculate the door, namely:
To calculate the width of the door, you can use a universal formula.
Drawing of compartment doors.
Door width = (opening width + number of overlaps * overlap width) / number of doors, where the overlap width is equal to the width of the handle profile, that is, 26 mm.
In a closet with two doors, the formula will look like:
Door width= (1600+1*26) /2=813mm.
Now knowing the width of the door, you can calculate the width of its insert, that is, the width of the chipboard or mirror.
Insert width = door width – 18-18mm, from here
Insert width = 813 – 18-18 = 777 mm.
Where did 18mm come from? If we subtract the depth of the groove for insertion from the width of the handle profile, we get 26-8 = 18mm (see figure above.)
Calculation by height.
Calculating the height is much easier. Subtract 40 mm from the height of the opening. The instructions for calculation say that 45 mm should be subtracted, but practice has shown that 40 mm is enough. This is the distance required to slide the door into the W-shaped top profile.
Door height = opening height-40;
Door height = 2500-40=2460mm
To calculate the height of the insert, it is enough to subtract two dimensions of the horizontal profiles, which are shown in the figure below, from the door heights.
Compartment door profiles.
In our case, on the upper profile this size is 12mm, and on the lower profile it is 47mm.
Insert height = door height - 12-47;
Insertion height=2460-12-47=2401mm
So, we got the dimensions of the door insert - 777x2401.
If the insert is made of glass or mirror, then subtract 3 mm from the resulting dimensions. That is, we get the dimensions of the insert 774x2398.
The missing millimeters will be compensated by a special rubber profile for attaching mirrors. The fact is that a mirror or glass is usually used with a thickness of 4mm, and the groove in the handle profile is 10mm wide, so a special rubber seal is used.
Scheme for installing glass in a compartment door.
Calculation of a cabinet with three doors.
For the calculation, we take a cabinet with an opening 1800mm wide and 2500mm high.
Let's apply the universal formula.
Door width = (opening width + number of overlaps * overlap width) / number of doors, where the overlap width is equal to the width of the handle profile, that is, 26 mm.
Substituting our values into this formula, we get.
Door width= (1800+2*26) /3=617mm
Insert width = door width – 18-18mm, from here
Insert width = 617 – 18-18 = 581mm.
If you use glass or a mirror as an insert, do not forget to subtract 3 mm from the dimensions of the insert.
Insertion height=2460-12-47=2401mm
Calculation of a door with a horizontal divider.
If you plan to make a cabinet door from parts, then in this case you cannot do without a special horizontal divider. In this case, it is necessary to subtract the thickness of the separator partition from the dimensions of the insert. In the figure below it is 2mm.
If the insert is glass, then do not forget to subtract another 2-3 mm per size for the rubber seal.
Drawing of a horizontal profile - separator.
Compartment doors with horizontal divider.
Calculation of the length of sliding wardrobe profiles.
Scheme for installing profiles when assembling a door.
To calculate the length of the upper and lower horizontal profile, you need to know the width of the vertical handle profile. In our case it is 26mm.
In the figure, the width of the handle profile is marked in red.
The length of the horizontal profile is calculated simply. To do this, subtract two widths of the handle profile from the width of the door, since there are two of them on the door.
For example, let’s take a door with a width of 813mm, then
Horizontal profile length = 813-26-26 = 761mm.
There is no need to calculate the length of vertical profiles. From the figures above you can see that the height of the handle profile is equal to the height of the door. We calculated the height of the door earlier and it is 2460mm.