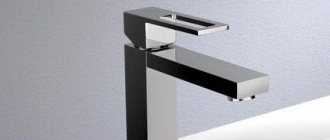
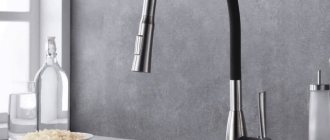
Faucets are used not only in kitchens, but also in bathrooms and toilet rooms. If previously the difference was that kitchen units did not have a shower, today there are faucets with showers for the kitchen. They not only make washing dishes easier, but also solve problems with collecting water in large containers that cannot be placed in the sink.
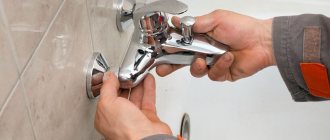
It is impossible to repair faucets without knowledge of their structure. Such actions most often cause complete breakdown of the faucets, when instead of cheap repairs you will have to make an expensive replacement.
But this is not all the problems. There are situations when small leaks, after improper intervention, turn into a large leak that threatens to flood the apartment. You should know that quite often cheap Chinese crafts are used for central taps. They gradually oxidize, which greatly complicates the opening/closing process.
The faucet body is made of silumin alloy, which can crack even with relatively little effort, and the problem from your personal becomes a general one. In this regard, we strongly advise you to study the technical features of the structure of mixers and only then proceed with repairs.
Do-it-yourself single-lever kitchen faucet repair
What will you need for work?
To dismantle and repair the mixer, the following tools are useful:
- screwdrivers with straight and Phillips slots;
- wrenches: adjustable, as well as a set of open-end wrenches;
- pliers. You can also use round nose pliers. It is desirable that the sponges be long;
- working knife;
- repair kit - a set of gaskets for sealing connections. Fum tape and tow with sealing paste are also useful.
Before starting work, make sure that the shut-off valves reliably cut off the water supply to the apartment. It is also worth preparing a rag to quickly wipe up spilled water or dirty hands.
How to disassemble a single lever
To understand how to disassemble a single-lever kitchen faucet, you first need to remove it from the sink. It's not difficult, but you need to strictly follow the procedure. First, turn off the water and make sure that there is no pressure from the tap. Then unscrew the union nuts of the flexible line from the pipes. All that remains is to dismantle the entire structure from its seat. To do this, unscrew the fastening nut or nuts on the studs.
Further work will proceed differently, depending on whether the cartridge or the ball is the main element of the design. It is impossible to determine this visually without disassembling it. Therefore, if you still have the instructions for the mixer, it is better to start working by studying it.
Here is a step-by-step algorithm for repairing a structure with a cartridge:
- Use a knife or screwdriver to pick up and remove the two-color plug on the body, indicating the direction of hot and cold water. Below it is a screw holding the lever.
- Unscrew the screw and remove the lever.
- Unscrew the nut holding the cartridge to the body. Usually it turns away with your hand, but if it gets stuck, use a key.
- Remove the cartridge.
For a ball mixer, disassembly begins in a similar way. Remove the lever, then unscrew the plug. You'll need a screwdriver here. After unscrewing the plug, remove the dome with pliers, take out the seal and ball. Failure is most often associated with wear of the seal or the appearance of cracks in it. Ball breakage is less common. Having found a failed element, it is replaced and the system is assembled from the end of the algorithm to the beginning.
How to disassemble a herringbone faucet
For a mixer with two taps (herringbone), the repair consists of replacing the tap axle boxes. First, remove the decorative plugs from the wings (by picking them up with a knife) and unscrew the fastening screws. Now you can use the key to unscrew the valve axle and replace it. There are also cracks in the base (then you will have to replace the device completely) and clogging of the aerator mesh. It can be removed and washed by unscrewing the nut from the mixer spout.
How to disassemble a ceramic faucet
An exotic option is a ceramic faucet. Its mechanism contains figured plates ground into each other. To disassemble a ceramic kitchen faucet, remove the plug and unscrew the fastening screw with a hex key. Then unscrew the dome that hides the nut holding the filter. After unscrewing the nut, you can remove the filter, wash it and reassemble everything in reverse order. If there is a problem with the plates, you will have to change the entire system.
How to disassemble a two-valve
The two-valve mixer is slightly different from others in design. To get to it, you need to unscrew the valve axle (same as on the herringbone). Now you can unscrew the mixer wing, unscrew the fastening nut with an adjustable wrench and remove the mechanism cartridge.
Cartridge mixers and their varieties
In the vast majority of cases, water taps have a cartridge. They come in ceramic, disc, spherical, for baths and showers, for single- and double-lever faucets. The parts are based on the principle of water supply, its suspension, interaction with streams and tubes. Water treatment in disk cartridges is controlled by the position of the metal-ceramic plates. The latter simply change their location relative to each other. The pressure force depends on the compression density of the protrusions of the upper disk with the holes of the lower one. Dual-channel housings have 2 cartridges for cold and hot liquids separately. The water flow conditions are adjusted due to the fact that the units change their location in the sleeve. Cartridges like thermostatic cartridges are complex devices with sensitive instruments. Cartridge designs are being improved, so faucets have fewer and fewer malfunctions.
Ceramic faucet cartridge
The part is a unit with two ceramic plates. When the valve is turned, the dampers mix hot and cold flows. Changing the position of the top plate leads to increased pressure. The cartridge design does not provide any gaskets between the plates, so the potential service life of the mixer will always be longer. It can work for about 10 years without a single breakdown or replacement. Consumers receive a silent device with smooth control in the form of this mixer. To maintain the condition of the faucet, you only need to use Teflon or silicone grease.
Cartridges are classified by height, diameter and seat, less often by rod length. The diameter of the unit determines its wear resistance, service life and power. The wider the width, the better, and the price does not always depend on the diameter.
Cartridge for shower faucet
The main part of a shower mixer is a diverter, which mixes water of different temperatures and switches the device between the Shower, Bath, Overhead shower, etc. modes. The regulation and supply system will fail if the switching element breaks. Mixers differ in parameters and configuration due to the cartridge that regulates temperature and pressure. The latter are divided into types depending on the handle (toggle switch) Shower/Bathtub. There should be from 3 to 5 grooves for distributing flows in the shower cartridge.
For shower cabins, cartridges of collapsible and non-removable types are produced. Parts of the first type can be easily repaired. Maintenance procedures include cleaning components and applying ointments. Type 1 cartridges are more practical. One-piece models are more expensive and break much less often. In this case, it will not be possible to eliminate the breakdown, nor will it be possible to find out the cause of the malfunction. The cartridge is not opened, but a replacement is simply purchased.
Cartridge for single lever faucet
Streams of water of different temperatures enter through holes in the bottom of this device and are mixed in a closed groove, after which the total flow goes through the third outlet hole. The percentage of hot and cold water changes the rotation of the plate.
This type of cartridge contains:
- stock;
- axis;
- sleeve;
- frame;
- leash;
- movable and fixed plates;
- noise suppressor;
- top and bottom gaskets;
- bottom.
The rod is a transmitter of the movement of the mixer handle. With the help of an axis, the rod is fixed in the bushing, so these parts work in harmony. The sleeve remains in place, and the rod moves between positions that provide the desired temperature and pressure. The body is supported by the bottom, and inside this space the leash is connected to the rod, the stationary plate “sticks” to the moving one. In the mixing cavity there is a noise-absorbing part, which is made in the form of plastic pins and a metal mesh. The seal between the bottom and the fixed plate is ensured by the top gasket. The lower one maintains the integrity of the flows between the slots in the body and the bottom.
Cartridge for ball mixer
The ball valve cartridge has a round shape. There are holes in the lower part of the part: the same size if there are 2 of them, and two smaller ones next to the larger one if there are 3. The locking ball changes position, blocks all the holes or some of them, partially or completely. In ball mixers, durable fluorinated rubber improves water flow. The liquid in the pipe presses on the ball, which is also supported by rubber seats.
When acting on the handle, the spherical figure can change its position. The holes will completely or partially coincide with the pipes. The ball and seats are usually combined into one structure, but some models are assembled with seats on the inner walls of the body. Type 2 products are made in fewer quantities because they fail more often. During prolonged periods of inactivity, limescale deposits form between the ball and the pads.
Thermostatic cartridge for faucet
The thermostat, also known as a thermostatic cartridge, is undoubtedly the key element of a faucet that maintains the temperature level. When changing the ratio of 2 water flows, the cartridge instantly reacts and changes the volume of supplied resource in order to maintain the set temperature. At the center of the assembly is a thermomechanical device that converts temperature changes into movement. When heated, the wax in the cylinder expands. It presses on the diaphragm and transmits the impulse to the rod through the plug. The sliding of the last 2 elements, as well as the support of the diaphragm, is provided by a protective device. A decrease in temperature will mean the spring weakens and the rod returns. The greatest accuracy of operation is observed in devices with a flat diaphragm. Thermostatic bathroom fixtures work to maintain temperatures between 15 and 45 °C.
When is it time to change the cartridge in the mixer ↑
The cartridge ensures mixing of hot and cold water supplied from two different pipes. It can be solid or collapsible, but even in the latter case, repairing the faucet cartridge is not practical. It is difficult to find and select the necessary parts, and the cost of a similar new product is not so high.
Replacement of the cartridge is necessary if the following “symptoms” are observed:
- It is difficult to regulate the temperature or water pressure. Situations often arise when, when the lever is in the “hot water” mode, cold water still flows, and vice versa.
- In the same position of the mixer lever, each time you turn it on, you get water at a different temperature.
- Water drips from the tap, that is, it does not turn off completely.
- The movement of the lever itself is difficult.
The following factors can lead to cartridge failure:
- Poor water quality. For example, it may be oversaturated with chlorine and contain solid particles and other impurities.
- Incorrect operation of the mixer.
- Poor quality materials from which the mixer and the cartridge itself are made.
- Frequent interruptions in water supply, often causing so-called water hammer.
Thus, if one or more of these factors occurred, and as a result there were problems with the faucet, it is time to go to the store for a new cartridge.
Problems during operation
Even high-quality plumbing fixtures fail over time. The service life of the faucet depends on the material from which it is made, the quality of the tap water and the intensity of use. The most common problems that arise when using single-lever models are:
- Cracks on the device body. They arise due to poor quality material and installation errors.
- Aerator clogged. The cause of this malfunction is the poor quality of tap water.
- Wear of rubber gaskets. Seals are consumables; they wear out over time due to the high intensity of use of the device.
Important! No matter how high the quality of the faucet, it needs preventive maintenance. Even if no problems arise during operation, you need to disassemble the device once every 2 years, clean it, and replace the gaskets. After all, even a small speck that gets under the seal can cause a leak.
We disassemble a two-valve type mixer
To disassemble even such a simple mixer, you need to prepare the following tools:
- Adjustable wrench;
- Any matter;
- Screwdriver Set;
The reason for dismantling may be leaks, poor water pressure or adjustment. If you do not carry out repairs immediately, you can wait for a home flood. Before disassembling the mixer tap in the bathroom, you need to turn off the water in the entire apartment using the valve at the inlet, after which you need to open the taps and drain the remaining water. Also, before disassembling the faucet, you need to lay a cloth on the bottom of the bathtub so as not to chip the enamel with tools or parts of the faucet. You also need to close the drain tightly to prevent small parts from getting inside.
1. Remove the plastic red and blue covers on the handles using a screwdriver. 2. The screws found under the overlays must be removed with the same screwdriver. 3. Using an adjustable wrench, unscrew the faucet handles. 4. Disassemble the faucet completely and check for damage and blockages, try to remove the scale inside with a screwdriver. 5. If you need to replace any part, you just need to buy it in the store and put it in place during assembly. 6. Do not forget to clean all threads from debris, rust and plaque before assembly.
Disassembly is as easy as disassembly. The main thing is not to forget to replace the rubber gaskets in time and remember the disassembly procedure. Assembly is exactly the opposite of disassembling a bathroom faucet. It’s not difficult to figure out how to disassemble a bathroom faucet with a shower; you just need to separate the hose using an adjustable wrench. /www.youtube.com/watch?v=Ri1xO6twc84" namevideo=”How to disassemble a faucet” desc=”Disassembling a faucet with your own hands at home.” durationmin=”4" durationsec=”30" upld=”2014-01-22" tmburl=”https://i.ytimg.com/vi/Ri1xO6twc84/hqdefault.jpg” thumbnailwidth=”1280" thumbnailheight=”720" ]
Currently reading
- An easy way to disassemble kitchen faucets yourself
- If the faucet is leaking in the kitchen or bathroom, we’ll tell you how to fix it
- How to change the gasket in a faucet in the bathroom and kitchen
- We repair shower faucet switches in the bathroom
Advice from professionals
When assembling a lever mixer, it is important not to use excessive force, since most faucets are made using silumin, a fragile material that can burst under load . When replacing a cartridge, you must ensure that the product fully matches the parameters of the broken part. Before you begin disassembling the mixer, you need to purchase gaskets, sealing tape and other related materials.
As you can see, disassembling the lever mixer is quite easy. The main thing is to take your time and carefully remember where and how this or that part is located. Having studied the operating principle and design of a lever-type faucet, every homeowner will be able to cope with its repair or complete replacement.
Prevention
It is not always possible to get rid of problems with the mixer with the help of repair work. More often you have to buy a new faucet and install it to replace the one that has become unusable. To extend the life of the crane without breakdowns, it is recommended to choose a product from manufacturers with a good reputation. In addition, it is necessary to regularly prevent damage.
When buying a faucet, it is better to choose a brass model. They are heavier and stronger than sulimine. In addition, they are more reliable and last longer. Most faucet failures occur due to solid particles in the water supply and poor quality water. You can prevent them by installing filters.
Before disassembling the mixer yourself, you need to carefully study the instructions for it. Additionally, it is recommended to watch a video on how to do this, or consult with an experienced plumber.
When connecting parts, you need to use a sealant for greater reliability. If there is a thread, foam tape is used to strengthen it. To ensure that breakdowns are not unexpected, faucets are regularly inspected and seals are replaced.
Problem prevention and care
It is always better to prevent a breakdown than to fix it. Oddly enough, it is the water itself that creates the greatest number of problems. Most units fail precisely because of it. The service life is directly proportional to the quality of the water and the cleaner and softer it is, the longer the sanitary product will last.
The easiest way to extend the life of your faucet is to purify the water. For these purposes, filters are installed in the water supply system that do not allow small particles to pass through, which are often the cause of repairs, tearing rubber gaskets and leaving scratches on adjacent surfaces of parts.
Scale, which forms when water is heated, is also a common cause of breakdown, but it is quite difficult to deal with it on your own. You can install a special softener filter, but it requires additional space and financial resources. Modern manufacturers create high-quality faucets using high-quality materials, which, even in conditions of high intensity and poor water quality, can last for many years. That is why it is best to take a closer look at quality manufacturers.
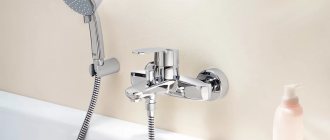
Troubleshooting the Bath/Shower Switch
Sometimes the toggle switch fails and does not change the Bath, Shower or Head shower modes, or does so with problems. Sometimes the switch sticks or moves with great effort. It happens less often that water flows from the spout and the shower head at the same time. In this case, replace the rubber seals, spring or cartridge, or simply find replacement parts for the latter, depending on the nature of the problem.
To replace the cartridge, first remove the plugs, screw and spout. Then remove the fasteners holding the cartridge. The valve is inspected for damage. Most likely, you will have to replace the entire part, especially if there are no obvious faults in its elements.
If water is continuously flowing from your diverter faucet, the problem may be the valve or foreign debris. The cartridge will need to be cleaned of dirt inside and out, and perhaps even replaced.
Stages of replacing the rubber seal
If water flows synchronously in a mixer with a spool in both positions, the gaskets should be replaced. Perform the following manipulations:
- Shut off the water supply.
- Disconnect the spout and hose.
- Unscrew the adapter.
- Remove the handle.
- Remove the spool.
- They take away the old rubber rings.
- Insert new ones instead, after moistening them with water.
- Assemble the mixer parts into working position.
In the case of a leak on a push-button mixer, we can talk about the unsuitability of the seal. First, turn off the water supply and disconnect the spout. Use a hex key to unscrew the adapter. Then remove the cap, take out the button, remove the screw and cartridge. If the assumption that the rubber is unsuitable is confirmed, it is replaced. As a rule, this is what causes the breakdown.
With turbulent noise, the cause of the problem may lie in a worn edge of the gasket. It is cut off with a gentle, slow movement.
If water does not flow, then open the tap and lightly hit it with some wooden object. If nothing has changed, then the gasket may have dried out. Then the water supply is turned off and the structure is partially disassembled to correct or turn over the seal.
Switch Spring Replacement Steps
First of all, turn off the water. We disconnect the hose and spout from the mixer, the adapter from the switch, and use an open-end wrench. We take out the hose and spout carefully so as not to spoil the thread. Then remove the cap from the product, take out the screw and unscrew the button. We take the rod and spring to insert a new one instead of the old spiral. At the end, we assemble the mixer in the reverse order.
External structural details will indicate a problem with the spring. If the switch button does not return to its original position when changing modes or turning off the water, then the problem is likely a damaged, stretched or weak spring. A slight imbalance of parts means the same problem. Even at the acquisition stage, you should remember that the tension of the spring mechanism will weaken over time, so it is better to spend more effort installing it in the valve than to change it prematurely.
What to do if the faucet is leaking
At first, a simple increase in tightness will suffice. All connections are tightened as tightly as possible. If you're less fortunate, the crane will need to be partially or completely disassembled. To do this, use a wrench and an adjustable wrench, a flathead and a Phillips screwdriver.
To prevent the faucet from leaking, you have to replace the oil seal inserts and shower hose gaskets. A leak between the spout and the oil seal nut is a frequent occurrence and does not attract much attention, but if the volumes of wasted water are large, then the liner will need to be replaced. Then a new part is made from the sealing tape. The old liner is removed and the new one is tightly wound.
Before replacing the shower hose gasket, unscrew the latter with an adjustable wrench. Recently, new silicone gaskets have been installed instead of old gaskets. They have proven to be more wear-resistant than rubber ones.
Algorithms for analyzing single-lever mixers
Analysis of the design
Before disassembling a single-lever faucet, you need to prepare. You will need the following tools: a small screwdriver, hex and adjustable wrenches, and pliers. To avoid damaging the surface of the chrome elements, use a piece of soft cloth, and gloves to protect your hands.
The general scheme for disassembling a single-lever mixer with a cartridge consists of the following steps:
- Turn off the water and remove the red-blue indicator (plastic plug).
- Use a hex key to unscrew the fixing bolt under the plug.
- Remove the mixer lever and dismantle the decorative cover by hand.
- Using an adjustable wrench, unscrew the mounting nut and remove the cartridge.
To disassemble a single-lever ball mixer in the bathroom or kitchen, follow a similar diagram.
- Remove the plastic hot and cold water indicator, unscrew the fixing screw and remove the lever.
- Unscrew the decorative nut. Use a cloth to avoid damaging the coating.
- Take out the ball and other parts.
Design
A single-lever bath mixer is structurally different from a double-valve one. It has only one lever handle, with which you can regulate the temperature and water pressure in the tap. This type of faucet is also known as one-armed bandit, ball, joint, joystick. It performs three main functions: mixing water at the optimal temperature, forming a jet and changing its power. The mechanism of its action is quite simple:
- By turning the handle horizontally, you can change the water temperature from cold to hot. Single lever mixer
- By raising or lowering the lever in the vertical direction, you can adjust the flow power. The higher the handle position, the more powerful the jet.
Please note that a single-lever faucet consists of the following structural elements: a rotary handle, a faucet cover, a spout with a faucet body, an internal chamber or cartridge, as well as several gaskets and seals.
Types of pedal devices
The Christmas tree, which is quickly losing its popularity and popularity, is being replaced by practical and stylish devices. The favorite among analogues has become the joystick (single-lever) mixer, where the button at one moment acts as a temperature and water pressure regulator.
Iron, ceramic or plastic devices can be divided into two categories - ball and cartridge. Their prices are approximately the same.
Ball device
- The main element is a metal ball located in the body. There are three holes made in it for the passage of warm, cold and combined water.
- The hollow ball is called a mixing chamber, since it is in it that warm water is combined with cold water.
- The regulator fits well onto rubber seals called seats.
- The well-thought-out design of the housing contributes to the efficient operation of the mixer.
- Control is carried out by a lever that moves the ball. The coincidence of the holes makes the water flow larger or smaller.
Analogue with cartridge
This single-lever mixer device is distinguished by the presence of two ceramic plates.
- At the bottom of the disk (cartridge) there are three holes for the passage of water, in the upper part the liquid is mixed.
- As the joystick changes position, one hole in the bottom plate aligns with the mixing chamber at the top of the disk.
- Smooth movement of the lever is ensured by a special silicone-based lubricant.
Note! Pieces of scale often become stuck in devices, leading to jamming or failure. A special filter can prevent this
The instructions recommend installing it at the same time as the mixer.
List of required tools
Mixers are quite simple devices; to carry out repair work, a minimum set of tools is required; every home should have one.
- Adjustable wrench. It is not very convenient to work with, but it alone can replace several carobs. An inexperienced mechanic will not be able to determine the size of the nut by eye; to unscrew it, he will have to try several open-end wrenches. Another problem is that there are faucets with nuts of domestic and international standards, but they are not the same. For example, according to our standards there are no nuts for 15 mm, 18 mm, 20 mm, and according to international standards there are no nuts for 14 mm, 17 mm, 19 mm. The difference between them is only one millimeter, since they can withstand similar loads, they are installed in the same places. An adjustable wrench can unscrew any nut; there is no need to buy two sets of wrenches and constantly try several for one nut. An adjustable wrench greatly simplifies the process of disassembling and assembling the mixer
- Hex keys. Such bolts are installed on both domestic and imported faucets. The hexagon dimensions range from 2–4 mm, it is advisable to have a set - it is small and does not cost much. If you don't have it, we strongly recommend purchasing it. Such keys are now used to disassemble many household appliances. Hex key set
- Screwdrivers. It should be flat and star-shaped, medium sizes. It is advisable to have a screwdriver with a set of attachments
- Pliers. This is a truly versatile tool, used to perform various operations.
Every home craftsman should have pliers - Portable flashlight. Faucets are installed on sinks, most of the fasteners are located in the lower part of the cabinet. There is always insufficient lighting here, it is very difficult to work in such conditions. The flashlight allows you to easily find small hardware in remote places under the sink. A flashlight will make it easier to work under the sink and in other poorly lit places
Cosmetic repairs or complete replacement of the cartridge in the mixer
The average period of operation of a cartridge in a faucet is 4-7 years. The fact that the internal locking mechanism needs to be replaced will be indicated by the lack of smooth movement of the lever, difficulty adjusting the intensity of water flow, poor mixing of cold and hot flows and the presence of leaks in the device in the closed position.
The last sign may indicate that the sealing gasket has worn out. To eliminate the problem, it will be enough to replace it. If a leak from the device is observed again after this, this state of affairs indicates the need to replace the mixer itself. The cartridge or the plumbing device itself needs to be replaced if significant damage to the mechanism body is detected.
Incorrect operation of the mixer is not always a reason to completely replace the cartridge
If there is a creaking or hum when operating the faucet after replacing the cartridge in the faucet, this indicates that the shut-off device is not sized correctly. Because the valve's outlet diameter is smaller than its outlet or the stem is too long, the lever will not rotate normally around its axis. The situation can only be corrected by replacing the cartridge.
Incorrect operation of the locking mechanism is not always a reason to completely replace the device. If there is wear on the decorative rings or clogging of the working surfaces, it is enough to perform cosmetic repairs to the mixer cartridge.
You can reduce the friction force and extend the life of the cartridge by lubricating the plates with a special oil composition or a sealed mixture. If the working surfaces of the discs become clogged, remove the debris using a regular toothbrush or cotton wool soaked in vinegar. If the thermostatic cartridge is not working correctly, you need to reset the settings and readjust its operation. Failure may occur as a result of frequent use of the device and poor quality water passing through it.
If the cartridge is not selected in size, there will be a creaking or hum when operating the mixer
Popular cartridge sizes
Naturally, the cartridge sizes are standardized for each mixer model. For washbasins, sinks and showers, the most common sizes are 28mm, 35mm and 32mm. At the same time, parts from 40 mm to 46 mm are most often used for the bathroom (in particular, in Grohe and Kaiser). But why is there such a difference in almost identical mixers?
It is believed that the larger the ceramic mixer for a single-lever faucet, the better it is. In fairness, it is worth noting that with Chinese taps (with the exception of FRAP), where the diameter of the spout is often larger than that of branded ones, this rule is actually followed. But for branded models (Fiore Rubinetterie, Iddis, Sedal and others), a large cartridge is not always synonymous with quality.
Technical characteristics (diameters) of different mixer cartridges
Let's look at the technical characteristics using the example of a cartridge with a Touch-Z brass rod:
- Diameter – 45 mm;
- Height with leg – from 60 mm to 65 mm;
- The height of the cartridge without the rod is 47 mm – 50 mm.
Similarly, based on the characteristics, you can choose a cartridge for a kitchen faucet. Let's take Potato as an example. The diameter of the swivel spout is important here - it is recommended to use sizes from 26 mm to 30 mm. To supply hoses, a hole from 38 mm to 40 is used, depending on the model.
The listed sizes are considered standard, but for many original faucets they are not suitable due to their too large diameter. In such cases, non-standard components for 18 mm, 20 mm and 22 mm are used. Hose connections can also be made in holes from 25 mm to 26 mm or more.
Advantages of single lever equipment
Everything that is very capable is easy, in this case we can notice confirmation of this truth.
Here is a sequence of advantages that contribute to the growing popularity of faucets with handles:
- Aesthetically attractive appearance. Stylish design will decorate any interior.
- convenient operation and practicality. Now you don’t need to slide the valves with soapy hands; you can also open the water with your elbow.
- Instant regulation of flow pressure and temperature with one movement.
- Service life is an order of magnitude longer than outdated analogues, also thanks to modern materials and thoughtful design.
- repair and disassembly - Maximum ease of assembly. The owner can fix minor problems himself.
Peculiarities
This type of mixer is a faucet that has only one adjustment handle. Thanks to this design, the water flow in a single-lever faucet is controlled by the movement of one hand.
Its main advantages:
- Quickly obtain a water jet at the desired temperature.
- Ease of management.
- Easy repairs that you can do yourself.
Disassembly instructions
First of all, prepare the tools you will need to disassemble your single lever faucet.
You should have with you:
- Flathead screwdriver.
- Adjustable wrench.
- Spanners.
- Knife.
- Pliers.
Next, your actions will be determined by the internal structure of the mixer. Please remember to turn off the water supply before starting work.
With ceramic cartridge
- Using a knife or screwdriver, remove the plug with the red and blue markings.
- Using a hexagon or screwdriver, unscrew the screw whose function is to hold the lever.
- Remove the lever from the body to reveal the top of the cartridge with the adjusting rod and clamp nut.
- Carefully unscrew the clamping nut, using either a wrench (for a faceted nut) or a screwdriver (for a round nut that has recesses and a shoulder) for this manipulation, depending on the type of nut.
- Remove the cartridge, noting its location inside the case.
Ball
The analysis of this single-lever mixer is carried out according to the following scheme:
- Remove the handle by loosening the screw that holds it in place.
- Using a screwdriver, press down on the ring (its notch) so that it turns counterclockwise, but not completely.
- Remove the dome using pliers without deforming the four-prong ring underneath.
- Unscrew the plastic ring from the dome to check the connection, its rotation and the degree of contamination.
- Remove the plastic shield part by cleaning the black part (seal). Sometimes the whole problem lies in the contamination of this part, so after cleaning the faucet is put back together.
- If cleaning does not help, remove the ball from the tap and inspect it. If you need to replace the ball, install a new part in the mixer, and then reassemble the entire structure in the reverse order.
See it clearly in the video below.
https://youtube.com/watch?v=K1K2Sw0428U
A mixer of this type quite often gets clogged at the tap spout point, which is manifested by reduced water pressure, but to fix this problem it is not necessary to completely disassemble the ball mixer. To clean the spout, first unscrew the nut in the faucet spout. Remove the mesh, and after washing and blowing, install it back, then return the nut to its place.
Crane disassembly stages
First of all, you should turn off the water supply regardless of where the faucet is located: in the kitchen, in the bathroom or in another place. When installing plumbing, it is equipped with water filters. It is necessary to carefully check the filter for any kind of contamination. If this part is in working order, we can conclude that the breakdown is in the mixer.
At first glance, it may seem that disassembling a single-lever kitchen faucet will be difficult, because outwardly it does not have any hooks. The secret is that a bolt is hidden under the plugs indicating the water supply. Sometimes it is located under the emblem. The next step is to remove the cartridge. Things are more complicated with him, due to the fact that during his service he “got attached.” Under no circumstances should you knock on it with a metal hammer; if necessary, this can be done through a block, lightly tapping around the circumference. We remove the used cartridge, wipe the surface of the faucet body with a soft cloth and install a new one in its place.
Most consumers are wondering: how to disassemble a faucet in the kitchen? Before you start disassembling, you need to soak the threaded connection, since in the kitchen, if tap water is used frequently, the tap usually sticks. It is necessary to thoroughly moisten the threaded connections with vinegar or kerosene, but you can also use WD-40 automotive lubricant. After waiting 10 minutes, you can begin to unscrew the faucet parts.
Ball mixers have appeared on the plumbing market relatively recently. The demand for these faucets is growing due to the fact that they are economical due to their infrequent leakage. However, consumers are faced with the same question: how to disassemble a ball mixer in the kitchen for the purpose of a major overhaul. Owners of single-lever faucets with a metal or ceramic valve need to remove the lever - the handle, which serves as a water supply. In most cases, it is secured with a screw, which is hidden under a decorative trim. You are required to unscrew the screw, which will provide access to the internal parts.
Pay attention to the mounting method, as each mixer model has its own. If you are dealing with a ball mixer with a rod, you need to lift it up and carefully remove it, since there are no screws in this design
Once you have removed the lever, you need to remove the housing cover. connecting to the body using a threaded fastener. In some cases, the cover is secured with a screw. In this case it is on the side. There is a clamping nut under the cover. You can unscrew it using a gas wrench or an adjustable wrench. Only then can you remove the cartridge to be replaced. At the same time, remember that the old gasket under it can stick and become compacted. To determine the exact cause of the breakdown, you need to open the water and trace where it flows from and then proceed to replace the cartridge or simply replace the gasket.
For bathrooms, two types of faucets are usually used: two-valve axle-box faucets and single-lever faucets with a cartridge. Many apartments still use two-valve faucets in their bathrooms. Since these faucets have been used since the past, many consumers have an idea of how to disassemble a ball faucet in the bathroom. Under the decorative cover of these faucets there is a screw that is unscrewed first. After unscrewing it, we turn out the valve axle housing with an adjustable wrench. Then you can determine why it failed. In models of such mixers, the gasket located on the stem of the axle-box valve usually fails or the fastening simply becomes loose. After fixing the problem, we install the crane axle box in place.
In modern construction markets these days there is quite a large selection of plumbing fixtures, including faucets. Consumers are faced with the question: “Which faucet is of better quality?”, but no matter which faucet the buyer chooses, in order for it to last longer, several recommendations must be followed:
- To clean the faucet body, it is recommended to choose a cleaning agent in the form of a cream, gel or powder, which is intended specifically for the metal from which this product is made.
- Do not use metal brushes or strong products that corrode the coating, alkaline or vinegar based products.
- To prevent chrome from darkening, traces of shampoo or soap must be washed off immediately with clean water.
- For preventive purposes, you should change gaskets or cartridges more often.
- If desired, it is recommended to install a filter to purify hard water.
Here are a few simple recommendations that, if followed, will not cause you any trouble using your faucets for a long time.
Shower-faucet breakdown
The faucet has another gasket besides the one between the gooseneck and the body (described above), and they are very similar. This gasket is located between the body of the mixer and its switch lever. And both of them are rubbed and worn out by time and bad water.
Replacing the latter is carried out almost similarly to the first:
- Remove the lever. If this cannot be done, inspect it for the presence of a mounting screw;
- Having found it, unscrew it using special equipment and only then remove the lever;
- Clean the surface from pieces and remnants of the previous gasket and insert a new one there;
- Fix the density of the parts together using tape or specialized paste and flax;
- Insert the lever into its original position, tighten the fixing screw if necessary.
If the lever goes down on its own
Spontaneous lowering of the mixer lever usually tells us that it is broken. When you press the flag, water may flow in a thin stream or not at all. Many people believe that the main reason for this lever behavior is a cartridge failure, but this is not always the case.
All residents of a city apartment or country house use plumbing differently. Some open the taps carefully, others, for example, children, jerk the flag sharply. In the latter case, damage to the inner part of the lever, which fits onto the head of the cartridge, may occur. If damaged, the walls of the square insert diverge to the sides, which leads to a certain amount of free movement of the part; when lifted up, the crane begins to fall.
Note! To determine the breakdown, you need to remove the round decorative insert, unscrew the screw and remove the lever. After this, they look at the inside of the flag: if it is damaged, then install a similar part from the old mixer. If you have high-quality plumbing, lowering of the lever may be caused by wear of the cartridge, which will need to be replaced.
How to replace the cartridge?
Of course, the ceramic plates of the cartridge last much longer, but they can also cause poor operation of the mixer, or even its complete failure. It is impossible to repair cartridges - you need to know how to change them.
There are several external manifestations of a cartridge malfunction:
- there is no mixing of hot and cold water: only one of them comes out;
- there is no water supply at all in any position of the tap lever;
- the outlet water temperature is not fixed and changes frequently;
- the tap does not provide a full supply of water;
- after opening the tap, the water from the mixer cannot be turned off;
- Water constantly leaks from under the lever;
- The lever can only be turned with considerable effort.
The operation and condition of the mixer are largely affected by insoluble particles of rust, lime, sand and other impurities in the water. The use of various water purification filters extends the life of the reliable operation of the cartridge, and therefore the mixer as a whole.
The cartridge faucet not only wears out, but sometimes breaks due to a number of reasons:
- low-quality materials were used in production;
- frequent sharp or shock impacts on the mixer lever;
- water hammer in the system;
- poor water quality;
- bad filters or lack thereof.
As you can see, you can’t count on the eternal operation of water mixing and supply devices, especially cartridges, and the time will come when the old cartridge will have to be taken out and replaced with a new one. You can invite experienced plumbers for repairs, but if you have the necessary skills and desire, you can carry out this work yourself.
When replacing a cartridge, you will need the following set of tools:
- screwdrivers for different sizes;
- adjustable wrench;
- pipe wrench;
- pliers;
- hex wrench (small, for the locking screw);
- clean rags;
- WD-40 liquid.
The purchased new cartridge may not fit in terms of seats and dimensions, so the best option would be to bring the removed old unit to the store and use it to buy a new one. The condition for such an exchange should be the presence of other working sources of water that compensate for the absence of the cartridge to be replaced. Dismantling a faulty cartridge is done without much difficulty - you just need to take a few simple steps yourself.
You should begin work by removing the plastic decorative plug (blue/red) by simply prying it off with a flat-head screwdriver. In the depth of the opened hole there is a small locking screw. You need to make sure what kind of head it has and prepare the appropriate screwdriver or hex key. There is no need to turn the screw out completely - just loosen it a little.
We clean the place where the cartridge sits from deposits, dirt, rust, and sand. The cleaning operation must be approached seriously and carefully: if even small particles remain, the cartridge will not fit tightly into place even if the seat marks match. After this, we install the purchased new cartridge into a carefully prepared seat.
Turn on the water and check operation in all modes. If a leak occurs, we disassemble the unit in a known order and eliminate the malfunction. Now the locking screw can be screwed in more tightly and the technological hole can be closed with a decorative plastic plug (blue/red). Cartridges are replaced in a similar way at any location where mixers are installed: these units are almost identical in design and principles of installation and dismantling. The differences between mixers are mainly in their external design.
It’s another matter when the mixer has a more complex design: with a temperature controller, motion sensor or sensors. It is better to entrust the work of replacing parts in such devices to experienced specialists.
Repairing leaks
The task of replacing a cartridge in a mixer is much simpler to solve than it seems at first glance. You will need these simple tools:
- adjustable wrench
- hex wrench
- two screwdrivers
The procedure will be as follows:
- turn off hot and cold flow
- remove the decorative plug located on the faucet
- unscrew the fixing screw located under this plug
- remove the mixer handle
- unscrew the ring located under the handle
- remove the nut using an adjustable wrench
- remove the faulty faucet cartridge
After all the steps you are left with:
- install a new working cartridge
- do the previous steps in reverse order
- turn on the water, check that the faucet is working properly
Replacing the cartridge in the mixer is easy if you follow the instructions above. In order to choose the right part, it is recommended to clearly know what model your faucet is, and it is better to have an example of a faulty cartridge with you.
The best manufacturers on the market
Modern single-lever models are very popular, which is why they are presented in the collections of leading companies engaged in the production of plumbing accessories. Among the most famous brands belonging to different price categories are the following.
GROHE – wide functionality and high quality
None of the faucet ratings is complete without models from the German brand Grohe.
Despite their rather high cost, they have earned the attention of consumers with their modern design solutions, durability and reliability.
Accessories of this brand are often equipped with many additional options, which ensures comfortable operation. Among the wide range of single-lever kitchen appliances, users most often note the Concetto 32663001 model with a 45-centimeter pull-out spout, which practically replaces a pull-out watering can.
The faucet uses a virtually silent aerator and a reliable SilkMove ceramic cartridge. A popular model for the bath is the Euroeco 32743000 faucet with an aerator and a special water saving regulator.
Grohe faucets and other accessories have a classic design, making them easy to fit into any room design.
LEMARK – original solutions
The Czech company produces mainly single-lever products with a high spout, which are convenient to use in the kitchen. Sometimes they also have a built-in dispenser into which liquid detergents are poured. The models are available in a wide range of shades, which allows you to choose the faucet to match the color of the sink.
At the same time, the catalog also presents traditional chrome-plated products, which serve as a universal option. The top best models according to users included the Comfort LM3061C kitchen mixer, as well as the Pramen LM3318C shower unit.
Owners of these devices note the impressive design of the devices, thoughtful design and high quality. Some claim that they have been using Lemark accessories for several years without any repairs.
Lemark single lever faucets are often equipped with additional accessories and fixtures, such as a pull-out shower head, for added ease of use.
OMOIKIRI – Japanese technology
Plumbing accessories from the Japanese brand “Omoikiri” impress with their unique design, as well as the highest quality and long service life. The manufacturer provides a five-year warranty on all products. Many models have a double spout, thanks to which tap water is supplied separately from drinking water.
The rating of the best models for the kitchen includes the Tonami-C single-lever mixer, made of lead-free chrome-plated brass. The accessory has a double spout with a 360° rotation angle and a built-in aerator. At the same time, users note the reliability and durability of the crane.
Although the cost of Omoikiri products is quite high, users consider it justified. The models are distinguished by their reliability, long-term operation, and original appearance.
IDDIS is the best Russian manufacturer
The products of the Russian company are very popular due to their diverse range and affordable price. They are also of acceptable quality and, with proper care, can last up to 5-7 years without repairs.
Among the accessories that have earned high user reviews, we can note the universal single-lever faucet IDDIS Vane VANSBL0i10 with a swivel spout, a retractable head with a square shower, and an aerator nozzle.
The reliable and simple kitchen faucet Alborg K56001C is also popular. Due to its low spout, this model is best used in shallow sinks.
IDDIS models usually have a classic design and a chrome-plated surface, making them a perfect match for common stainless steel sinks
KAISER – German quality at an affordable price
The Kaiser brand produces a wide range of faucets that have different types of spouts - pull-out, stationary, rotary, flexible. The products are distinguished by their magnificent appearance, while their cost is quite affordable.
Among the presented models, users especially noted the Kaiser 13044 kitchen faucet with a body made of high-quality brass.
In addition to its excellent appearance, this sanitary accessory has two built-in aerators and a water filter. The high spout has the ability to rotate 360 degrees, which guarantees easy access to all corners of the sink.
Kaiser catalogs present not only traditional chrome options, but also stylish accessories made in bronze or granite.
Preventive actions
To prevent damage and increase the interval between replacements of individual functional components, it is necessary to remove potentially harmful impurities from the water. Ordinary quartz sand is highly durable. It can quickly damage high-quality ceramic plates. To retain such contaminants, different filters are used:
- Mud collectors are inexpensive. However, such products have limited useful functions. They need to be cleaned regularly.
- The problem is solved using disk models. When the liquid flow is applied in the opposite direction, accumulated contaminants are removed into the drain.
- When there is a large amount of mechanical impurities and for finer filtration, volumetric cartridges and backfills are used.
Modern main filters Well-equipped models independently perform washing according to a given program. Transparent housings simplify visual inspection. The built-in limiter sets the optimal pressure level for additional protection of consumers connected to the main line. Preliminary preparation prevents the formation of scale in hot water supply lines. For this, different technologies (equipment sets) are used:
- polyphosphate fillers;
- ion exchange units and cartridge fillers;
- electromagnetic processing.
Types of single lever mixers:
- Ball. The body of such a faucet contains an iron ball with several holes for hot, cold and mixed water. The ball is located next to the rubber gaskets. Water gets into the wiring and passes through the brass pipe. Depending on the position of the faucet handle, the ball may or may not be movable, thereby ensuring water flow.
- Cartridge. This type of design is a cardtridge consisting of two ceramic plates. One part has three holes, and the other mixes two streams of water. This mechanism works by changing the position of the joystick (lever). Then the two plates are aligned and allow water to pass through. It is usually recommended to install a special filter to prevent breakdowns.
Disadvantages include wear of the seals. To prevent breakdowns and blockages, they must be changed every two years. In addition, disc mixers take a long time to adjust the desired temperature of the water flow. This is affected by the small temperature setting angle. More expensive Frap models do not have this problem due to high-quality parts.
The faucets consist of a body, a swing arm, a retainer, a body cover, a nut, a cleaning ball or ceramic cartridge, a filter spout and a gasket.
https://youtube.com/watch?v=TfcYzw-ivgA%3F
If the question still arises of how to disassemble a single-lever mixer, then you will need:
- Flat head screwdriver;
- Hex key;
- Pliers;
- Hammer.
Note Before starting repairs, it is necessary to close the valve on the central water supply pipe.
- Disassembling the Frap ball mixer, as well as other mixers, begins with removing the handle itself. To do this, use a screwdriver to pull out the plugs, then use a hexagon to loosen the screw connecting the lever to the adjustment rod.
- Turn the recess of the threaded ring using a screwdriver so that the mixer cannot turn completely and the water hose cannot be damaged.
- Use pliers to remove the chrome dome, do it very carefully, trying not to damage the four-tooth ring located under it. The plastic ring is unscrewed from it. This helps to check the presence or absence of contamination and the integrity of the connection.
- If the leakage problem is in the seal, then after cleaning it you won’t have to do anything else. If even after this there is a leak, you need to continue disassembling the ball mixer.
- When replacing a ball in a Frap faucet, you need to remove the old one by lifting it up. There is a small hole in the metal balls that helps turn the mechanism. You need to check if it is clogged. In this case, you will have to buy a new ball.
- Under the seal there are working springs. If there is a malfunction, a flat-head screwdriver will help you remove them for subsequent replacement.
- When replacing seals, you need to use a special lubricant to increase service life.
- Assembling the tap occurs in the reverse order and does not present any particular difficulties. Then turn on the water and check the operation of the mixer. If the leaks are eliminated, then the repair is considered complete.
Repair
Many home craftsmen are interested in how to repair a single-lever ball mixer if it begins to work poorly. Experienced plumbers say: if the device becomes unusable, you can only completely replace the cartridge or clean it, as well as replace the gaskets. To do this you need to proceed as follows:
- First, you need to limit the supply of cold and hot water to the mixer; to do this, you need to shut off the ball valves on the underwater pipes.
- After this, use a screwdriver to remove the decorative trim on the rotary handle of the faucet.
Disassembling a ball mixer - Then you should unscrew the fixing screw and nut, which is the cover of the device body.
- Next, you can unscrew the nut that secures the internal mechanism of the mixer in the desired position.
- The last thing you need to do is remove the cartridge or ball mechanism, replace it with a new one, and then reassemble it in the reverse order.
Replacing the cartridge
Please note that each plumbing fixture has its own service life, which depends on its quality and intensity of use. However, this period can be extended if you improve the quality of tap water using a purifying filter, as well as regularly carry out preventive maintenance of the device. For a single-lever mixer, maintenance consists of periodic disassembly and cleaning, as well as timely replacement of rubber seals.
Technique for disassembling a single-lever ball mixer
A ball mixer differs from its cartridge “brother” not only in the shape of the mixing part. The first also has other features, in particular, the presence of additional sealing elements. Rubber gaskets supported by springs are installed in the holes of the ball. They deteriorate more often and must be replaced.
Technique for disassembling a single-lever ball mixer:
Use a knife or screwdriver to pry up the decorative element on the body and remove it. Use a hex or Phillips screwdriver to unscrew the lock. Delete it. Remove the lever. Unscrew the protective cap by hand. Use an adjustable wrench to unscrew the clamping nut. Next, the algorithm of actions changes slightly in comparison with the analysis of a cartridge single-lever mixer. There are two parts installed under the nut - a cam washer and a cam. Below them is a ball mixing element
They must be removed carefully. Now you can pull out the ball itself. Take a screwdriver and remove the spring bands. Replace parts. Carry out assembly, starting with installing the ball and beyond.
Disassembling a single-lever ball mixer
How to disassemble a single-lever mixer with your own hands, watch the video:
Advantages and disadvantages
Many homeowners pay attention to the single-lever mixer, because its design, repair, and installation are simple, but at the same time very effective and functional. These more modern devices differ from two-valve ones not only in their more aesthetic appearance. They are also very convenient to use; they allow you to more accurately and quickly adjust the water temperature and reduce its consumption. But they also have disadvantages:
- Demanding on water quality. Single-lever faucets, due to the nature of their design, are very sensitive to impurities contained in tap water. Due to its poor quality, they often become clogged and then stop working. Models with ceramic cartridges especially suffer from this problem.
- Low maintainability. It is almost impossible to repair a single-lever faucet with your own hands; you can only replace some of its parts, for example, seals or the entire cartridge.
Remember! To increase the service life of a single-lever mixer, you can improve the quality of tap water by installing a special filter, as well as perform timely preventive maintenance of the device.
Single-lever mixer device
Single-lever mixers appeared on the market not so long ago, but have already gained popularity. These cranes are often called “one-arm” or “single-grip”. You can operate the structure with one hand. After familiarizing yourself with the design of the device, you can understand the principle of operation of the mixer.
Single lever mixer diagram:
- Handle – performs control functions;
- Jet regulator;
- Frame;
- Fixing mount;
- Ceramic or ball cartridge;
- Gaskets made of silicone or rubber;
- Circular nut;
- Liquid supply tubes.
Based on the design, single lever valves are divided into ball and cartridge valves. The ball mixer design includes a steel ball with three holes. Two of them accept hot and cold liquid, mixing the components. The third is used to supply warm water. The ball moves due to manipulations with the handle. By moving in the right direction, you can control the pressure and temperature of the water.
Cartridge taps have a similar operating principle. But the role of the ball is performed by a ceramic cartridge. But it is impossible to repair such a mechanism; all that remains is to completely replace the structure.
Types of mixers: features of their design, pros and cons of operation
The list of main types of mixers should include:
- double lever;
- single lever;
- thermostatic;
- touch, including “smart” ones, which are controlled via the display.
Not so long ago, the two-valve “classic” was the only option and implemented a simple principle of flow separation. The version with one control lever was conceived as a technological innovation. The up and down movements were supposed to regulate the force of pressure, and the side movements were supposed to regulate the temperature. The placement of levers on structures has become the subject of design experiments. In turn, thermostatic and contactless options are considered a big step forward, but even among new technological products there are models whose convenience is questionable.
According to the switching mechanism, mixers are either cartridge or ball. The second type, in fact, is also a cartridge type, but the design of such products does not have rotary disks. Cartridges come in rotary and worm type. Faucets for washbasins and bathtubs, kitchens and bathrooms can be considered two different devices - because of the shower switch.
Double valve mixers
Cranes with two control elements maintain the same positions as other models. The standard design of valves is gradually becoming a thing of the past, as manufacturers try to make plumbing fixtures look modern. The trends had only a positive effect on practicality; the speed of adjustment of the device and the controllability itself increased.
Mixers with 2 valves are divided into two categories. In the first type, the locking element is an elastic gasket. The reciprocating cartridge in this device closes and opens the hole for the movement of water. Silicone gaskets add durability to the mixer. For two-valve mixers of the second group, the locking function is performed by 2 ceramic plates. The upper one rotates around its axis, while the lower one remains stationary. The second type of taps is more expensive.
Single lever mixer
In the body of a single-lever faucet, many holes are made for pipes and mounting elements. The spout of the single-lever version of the mixer is made either movable or integral with the body. For products with an upper handle, the second type of connection is used more often. A low-mounted lever is usually paired with a high, long spout. Aerators of modern single-lever faucets saturate water with oxygen and reduce resource consumption.
In single-lever ball mixers, the role of the “center” of the structure is played by an element with a rounded end, hollow inside and with 3 holes. Due to the rubber seat in the circuit, the taps operate smoothly and rarely break. In turn, the ball is fixed by locking rings with cuffs, and the mixer handle, when it falls into place, is in contact with the rod. The cold and hot water flows combine when the lever is turned and stops when it is lowered.
Thermostatic mixer
The model is considered advanced. This is done by a thermostat to maintain the water temperature at the same level. The device is hidden in a faucet box, and the water flow conditions are adjusted with handles on the sides. For reasons of convenience, the manufacturers made the following scheme: one handle controls the pressure, and the other controls the temperature. Most consumers know the device in this form.
Thermostatic taps are installed on walls and washbasins. In the rarer second option, the devices are equipped with ceramic cartridges, which play the role of a locking mechanism. The devices are always equipped with blockers to limit the maximum flow temperature. Minor repairs to a thermostatic mixer will be possible for anyone who is more or less versed in the instructions. It is better to entrust the smallest elements of the thermostat to specialists.
You should choose a thermostatic mixer among electronic ones with a battery and more functionality.
Touchless faucet
Touch faucets, including touchless faucets, include devices with automatic water supply. The process is activated when a person brings his hands close to the sensors. Activate-stop cycles save time and effort on the same type of movements. In addition to simple touch options, there are also smart faucets. The latter hold the leadership in terms of functionality. The basic set of touchless faucets includes a sealed one-piece spout body, a battery and an electronic unit.
Other names of the device:
- auto;
- infrared.
Touchless faucet sensors, by the way, are not only infrared.
Sensor models use water efficiently. Some people won’t like this, and they will choose an option where the pressure can be increased. Everyone appreciates the high level of hygiene in touchless taps. They almost always maintain a clean appearance and rarely break. Device owners and their neighbors are not at risk of flooding. Design features also have a good effect on service life.
Disassembly and minor repairs of a two-valve mixer
They resort to complete disassembly if they find defects, constantly dripping water or leaks. If none of the reasons apply and there are no visible faults, but the mixer still does not work correctly, then, most likely, it will have to be replaced. First, it is disassembled and inspected.
In case of minor problems with one or both valves, it will be enough to disconnect them, check and screw them back on.
First of all, remove the caps from the handles. Using a Phillips screwdriver, remove the screws in the places where there were decorative parts. We take out the valve and unscrew the core from it. After this, we move on to checking threaded connections and seals. It is possible that these elements are misaligned or lack integrity. A little sanding and cleaning may be enough to get the faucet functional again. To remove the spout from a two-valve device, it will be enough to unscrew the nut. Problems with the spout usually occur on the body side, sometimes in the aerator. To completely disassemble it, you will have to unhook the faucet from the wall or washbasin and remove the cartridges.
What does the mixer consist of?
The central element is the body, and everything else is usually connected to it. The spout (spout) is a part through which water flows out. The spout usually ends with an aerator. The three listed elements represent a mandatory set of components.
Fastening to the base is ensured by a nut with a sealing gasket if it is located under the housing. Wall-mounted options are held by eccentrics, and in this case there are more washers in the design. Handles, handles, valves and other control elements are connected to cartridges, or faucet axle boxes, but instead of all these components a touch panel can also be used. Bathrooms almost always have a bathtub/shower switch on the faucets. It is twisted or pressed, depending on the internal structure of the device.