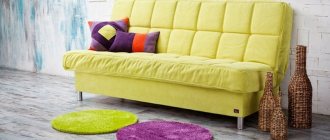
You don’t always have the time or money for a full renovation, but you still want to update the interior. Then use self-adhesive. This is a real lifesaver in such cases. With its help, you can quickly “repaint” furniture and doors and update the interior. Over time, the material becomes unusable and requires replacement. Before you stick on new decor, you need to get rid of the old one. Let's talk about how to remove self-adhesive film quickly and without a trace.
How to remove self-adhesive film from furniture: methods
Often, many of us personally try to breathe new life into old furniture. Not everyone can afford to replace a cabinet or cabinet, so people resort to budget methods of restoring interior items. These include self-adhesive. It can be changed countless times. To do this, such coating must be removed. In this article we will look at how to remove self-adhesive film from furniture and leave the wooden product unharmed.
Features of the material
Today, the shelves of construction stores are overflowing with a huge selection of products, which include the subject of our discussion - self-adhesive. It is used to restore the even and smooth surface of furniture, cars and walls. For each option, a certain type of this material is made, but there is something in common: manufacturers take as a basis a combination of wallpaper and adhesive tape. This combination raises the question for many of how to remove the self-adhesive film from furniture so as not to spoil the piece of furniture if you need to update its appearance. Not everyone knows the answer, so this article will help you figure it out.
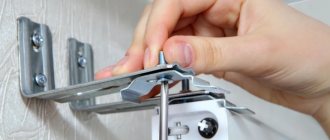
Replacing door hinges
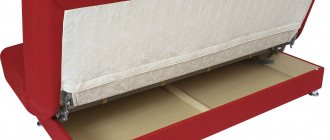
One of the most common types of breakdowns is the failure of furniture canopies on kitchen cabinet doors. It often happens that during use the adjusting screws simply come loose, and the entire repair comes down to aligning the doors and restoring the tightness.
It’s worse if the canopy is completely out of order, for example, the band spring bursts and the latch operates. In this case, you will need to unscrew the fastening, remove the canopy and replace it with exactly the same model. To align the doors, you will need to release the first stopper; by unscrewing it successively, you can achieve the most accurate position of the door leaf.
Advantages of self-adhesive
In addition to the fact that with the help of this material you can restore the attractiveness of furniture, you will have the opportunity to feel like a designer and create an original chest of drawers or bedside table. To do this, you can use several types of self-adhesive. It has the following advantages:
- The ability to prevent moisture from entering the surface of furniture.
- It has different designs, colors and textures, which will allow you to choose the most suitable option for your interior.
- Affordable price.
- Ease of use.
- It does not require special care.
In addition, self-adhesive film can be used not only for furniture, but also for other interior items.
Next, we will consider methods for removing old or damaged coating.
Kitchen set repair
The idea that your home urgently needs a kitchen renovation always comes unexpectedly. The idea may arise as a result of a caustic remark from guests or an inopportunely fallen off handle on the door of a wall cabinet. It would seem that a kitchen set is a complex product with many details, and repairing it, by default, cannot be a simple and affordable task. However, kitchen furniture is successfully repaired even by people who are far from the processes of restoration and restoration of sets.
Method number 1: hot water
If your design work has fallen into disrepair and the question arises of how to remove the self-adhesive film from furniture, use this advice.
First, boil water, cool it to 50-60 degrees and soak a rag in it. Then walk it over the entire surface of the self-adhesive and wait 3-5 minutes. Next, start trying to remove the film from the furniture. As an additional tool, you can use a small spatula or a stationery knife.
Using this method, you need to be very careful when removing self-adhesive PVC film for furniture, as there is a possibility of damage to the surface.
Method number 2: hot air
A hairdryer is the next handy item that you can use to remove the film from a cabinet, cabinet or chest of drawers.
Experts say that in order to get rid of this material, it is enough to warm it up well. Therefore, when solving the problem of how to remove self-adhesive film from furniture, the first thing you need to remember is how you can increase its temperature.
If you don't have an industrial hair dryer at hand, a regular hair dryer will do. You will have to work harder with it, since the area heated by it is much smaller, but the result will be 100%. You can also use a regular fan, which is set to warm air mode. After 5-10 minutes, it will warm the surface of the film, soften the glue, and you can easily get rid of the coating. The transparent self-adhesive film is also removed in the same way.
If traces of glue remain on the surface after removal, you need to use solvent or gasoline. These liquids will help eliminate minor imperfections. To do this, just moisten a piece of rag in one solution or another and wipe the problem areas with it.
Method number 3: sunflower oil
If the previous methods do not suit you, you can use regular sunflower oil to remove the film. The main disadvantage of this method is that it is inconvenient to use, but the result will be positive.
Apply a thin layer of oil to the surface of the self-adhesive, leave for 15-20 minutes, then use a spatula or credit card to remove the coating from the surface of the furniture. The last problem in this case will be scrubbing off the greasy deposits. To do this, just use a soap solution, which will remove all dirt from the furniture in a matter of minutes. Then you need to rub its surface with a hard cloth.
How or with what can you peel off adhesive furniture film?
The auto store sells a special aerosol composition. Its label says: Sticker and Label Remover . Simply spray the product under the edge of the film, and slowly tear off the film as the composition penetrates under it. This product is highly penetrating. VD-40 also belongs to such means .
This is what is written on the packaging of a container of penetrating multi-purpose lubricant:
- cleans surfaces of glue;
- peels off labels;
- removes dried adhesive tape;
- makes it easier to peel off stickers;
- even removes bitumen stains;
- and leaves no traces.
So, as they say, I bought it for my car, and after reading it, I now use it in everyday life, and I wish you the same.
To do the job you will need a good hair dryer, preferably an industrial one. The film can be easily removed when heated thoroughly.
The second problem is glue residue. If you think that you can stick the film over the old glue and everything will be fine, then you are mistaken. If the old glue is not removed, traces may still remain and ruin the appearance of the furniture. You also need to choose a good solvent for the glue so that it does not leave traces. Don't take risks using fatty solvents. White spirit copes well with the task - this is already a proven method
It should be noted that stores now sell special solvents for glue, and auto stores have products for removing tinting and stickers. True, the price of such solutions is much higher.
It depends on what kind of film, what it is made of and what kind of glue is applied to it and how much time has passed since pasting. Not all films can be removed using solvents, and sometimes it is simply impossible to do this. But it is quite possible to use a hair dryer for these purposes, the main thing is to peel off a small corner. But I’ll say right away that the work can be very tedious and nervous, so you need to immediately prepare yourself for a long process. Advice: As far as I remember, I used alcohol for such purposes, yes, rectified alcohol, 96%. and not vodka and not medical. You also need to try solvents.
And lastly, if the old film is not damaged, just stick a new film on it; it’s easier and more convenient.
You can stick another film on top - however, flaws may be visible. It will be easier. As it is, it’s quite difficult to peel off the film. Take a spatula and gasoline, slowly pry it up with a spatula, wipe with gasoline. You can use white spirit. The work is long.
It’s not difficult at all, and you don’t even need an expensive tool.
The glue applied to the film becomes more pliable (it softens) under the influence of temperature.
At home, the temperature can be set using a regular (household) hairdryer,
Do not heat the entire film at once, but in sections.
Start from the edge, heat it up, pry it off with a spatula, for example, and then as you remove the film, heat it up and remove it with your hands.
Hold the hairdryer about 10 centimeters from the surface.
In one place, in a circular motion, in one place, removed and moved on to the next.
If there are traces of old glue on the furniture, then there are several options.
This is either a damp sponge with warm water (see above about temperature), or a more powerful tool, that is, a solvent.
Surface preparation
Tools and consumables
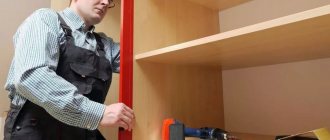
Sanding and sealing cracks
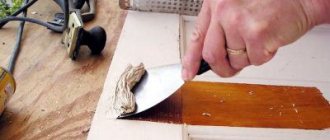
To repaint kitchen facades with your own hands, the doors and front panels must be removed from the body. There should be no decorative inserts, glass, handles or locks left on the canvas. They can be covered with masking tape. It is more convenient to work on a table. It is covered with newspaper or plastic film. You can place a piece of hardboard to prevent damage to the tabletop. The windows should be opened - there will be unpleasant odors and a lot of dust.
The old varnish is cleaned off with coarse sandpaper, then the residue is removed with fine sandpaper - it causes less damage to the base. Nail polish remover is often used. If the front panel is covered with a polymer film, it is steamed with a construction hairdryer. It goes worse with MDF than with chipboard. The base may be damaged. The resulting irregularities must be sanded or puttied. The sanded surface is cleaned of dust with a brush, then with a damp cloth. If you immediately wipe with a damp cloth, the dust will fill the voids and will be difficult to remove. Grease stains are removed with an alcohol solution.
Cracks are sealed with ordinary putty. It is more convenient to use ready-made mixtures diluted in water. They dry for several hours, after which you can proceed to the next step. Panels and doors should be perfectly aligned. Even a slight error will be noticeable after painting.
Solid wood and particle boards are impregnated with antiseptics to prevent the appearance of bacteria.
There are primers for wood and MDF based on organic solvent. They are not suitable for plastic - it requires special mixtures that are unsuitable for wood. They cover not only plastic, but also metal and putty.
If you plan to use an acrylic composition, a special acrylic primer is selected for it, which increases adhesion. The solution is applied manually and mechanically and allowed to dry. It will take a day for it to saturate the base and completely set.
How to cover furniture with self-adhesive film.
Man is designed in such a way that he needs to periodically update his environment. If finances allow, this can be done by purchasing new furniture. But if the family budget does not allow for such expenses, then simply update the façade of the old set using self-adhesive film.
With its help, you can give furniture a new look and eliminate defects that appear during its operation.
Recently, self-adhesive film intended for various furniture has become increasingly popular.
How to choose film for furniture
To give your furniture an unforgettable look, you need to choose the right self-adhesive decorative film. Modern industry offers various options for this material. From cheap polypropylene and polyethylene models, to practical polyvinyl chloride cladding.
Every potential buyer can count on a variety of textures and colors.
Strength and durability, maximum safety in use, and a variety of design options can be noted.
In addition to the material that forms the basis of the furniture film, you need to pay attention to the presence of a protective layer. In the kitchen, such a layer is important for protection from high temperatures and high humidity. If self-adhesive film is used to cover children's cabinets and tables, then the protective layer plays an important role here too.
It will help protect furniture from careless handling by a child.
If direct sunlight falls on the set, then cover it with a cladding that has a layer that protects from ultraviolet radiation. Today you can buy transparent models with such a layer.
Without hiding the facades, it will protect them from fading.
The presence of a protective layer adds additional cost to this material. But it’s impossible without him. If you are going to use cladding in the bathroom, be sure to ensure that it has a high degree of moisture resistance.
The coating can be matte or glossy, imitating various materials.
Pasting of objects located near heaters, stoves and other similar appliances is done using a self-adhesive film based on a thermally stable polymer.
The modern assortment is amazingly diverse, so you are sure to find a suitable option for yourself.
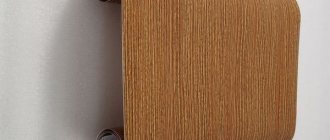
The decorative layer can be made to resemble stone, ceramics, fabric and wood. For furniture, “wooden” cladding or marbled material are suitable. Photo wallpapers have become popular lately.
Especially if they are used for pasting wardrobes.
In addition to furniture, old doors, glass and even walls are suitable for processing with this material. Surfaces covered in this way can be easily washed.
Even a material that is not protected from moisture easily tolerates short-term contact with a wet sponge.
Replacing the sink and countertop
The most eventful part of the kitchen set is the sink and dish drainer. Most often, due to the seepage of water and residual moisture, the countertop turns into an extremely unsightly sight after 10-15 years of service. The sink, even if it is made of stainless steel, is often deformed and covered with scratches. Therefore, countertop repairs are usually combined with sink replacement or restoration.
Start of repairs, dismantling the stove and sink
Before you begin repairing such an important part of the kitchen unit, you need to take care of the safety of the communications available in the room. First of all, you need to turn off the power and turn off the water and gas. This is not reinsurance, this is a mandatory condition, since to repair the countertop you will first have to:
The stove itself can weigh several tens of kilograms, so it is best to remove the countertop for repairs with an assistant. A tabletop made from chipboard, plywood or pressed fiberboard can be removed independently.
Stove repair
The possibility of restoration and repair of countertops made of artificial stone largely depends on the quality of the casting, the presence of deep cracks and local chipping of the material. If there are no chips or breaks in the slab, then it is quite possible to restore the surface without significant material costs.
First of all, the surface is cleaned of dirt mechanically; traces of rust and deeply ingrained dirt are removed with a washing solution of white or vinegar essence. Repair work is completed by grinding and polishing the surface of the countertop or gluing a repair layer based on epoxy resin with a mineral filler.
If the countertop was made of chipboard or plywood, there is no point in restoring it, only replacement is needed. It is best to take measurements from the old slab and assemble a new tabletop from two layers of waterproof plywood 18 mm thick. The cut plywood blanks are glued together under pressure, sanded, painted, coated with epoxy or acrylic varnish, and the important part of the kitchen set can be put back in its original place.
Sink restoration
Most often, sinks are not restored, but replaced with new products. The exception is when the kitchen set uses exclusive, expensive models made of stainless steel or rolled Monel metal.
In this case, you can try to polish the inner surface of the bowl using acrylic-quartz pastes or GOI compounds. If you use an electric machine with a hemispherical nozzle, the repair will take a maximum of 2-2.5 hours.
After polishing, the metal surface is thoroughly washed from abrasive and mounted in a slab.
Nuances that may appear when using self-adhesive film
Pasting smooth surfaces will not cause problems for those who are faced with such work for the first time. Difficulty may arise when gluing corners. And here you can use a trick.
To make it easier to bend the corners of the sheets, you need to take a regular hand-held hair dryer and heat the material with it.
It is also difficult for a person who is encountering self-adhesive film for the first time to compose sheets of material. To prevent a gap from forming, the sheets must be glued so that the next sheet overlaps the previous one by 1.5 cm. Then we apply a ruler to the central part of the allowance along the entire length. And along it, using a sharp knife, we make an incision.
Remove the unnecessary strip. The joint will be perfect.
Lighting is important when working with this material. If it is not enough, then it is easy to overlook minor flaws. They will become visible against the general background or in bright light.
Using film you can create unique interior and decorative solutions.
If you purchased a self-adhesive film that sticks to the surface too quickly and is difficult to work with, use powder or talcum powder.
Sprinkle the surface with powder over the entire area and you will not experience any difficulties when adjusting the sheets.
How to repaint kitchen facades with a brush and roller
When choosing a tool, you should run your hand over it. If lint remains in your palm, it will stick to the surface of the panel. A foam roller will do. The paint container must be flat. It is better to take a special rectangular plastic tray.
Use a roller to cover the main area, and use a brush to cover only hard-to-reach areas. Tools should be washed with soap or another product. The door or panel is laid horizontally or positioned with a slight slope. If the workpiece is placed vertically, the drops will roll down, creating smudges.
Source
How to remove self-adhesive film from furniture
Sometimes the problem becomes removing old cladding from furniture. If the material is of high quality, then removing it will not be difficult. But, if you are unlucky and it is very difficult to remove, then heat the surface. Use the same hairdryer.
Warm up the material with it, and it will come off without much difficulty.
Self-adhesive film is an inexpensive modern material that will help update the appearance of furniture and protect it from moisture and ultraviolet radiation. It's not difficult to stick on. The main thing is to do everything carefully and follow the tips described in this article.
Now you know how to decorate and protect furniture and various surfaces with self-adhesive film.
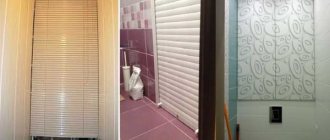
In what rooms can it be used?
As mentioned above, self-adhesive film is not afraid of moisture and high temperatures, and it is completely unpretentious in maintenance. Therefore, it can be used to decorate absolutely any premises and furniture in them, and even household appliances.
- In the kitchen, especially if you live in a private house, self-adhesive film will not only help you update the interior as often as you see fit and without special expenses, but will also serve to maintain cleanliness and neatness. As you know, it is kitchen surfaces that often become dirty and deteriorate during use. The easiest way to fix this is with self-adhesive film.
- For the bathroom and toilet, covering with self-adhesive film is also the best option. This material will protect the walls from excess moisture and splashes of soapy water, which can be very easily wiped off the surface.
- Do you have little things to do? Then you know how much trouble their love of drawing on any surface causes. It is much easier to erase traces of paint or felt-tip pens from self-adhesive film than from wallpaper or fabric upholstery. As a last resort, you can re-glue the film, which will cost you very little.
- In fact, self-adhesive film is an excellent material for a child's room. and it doesn’t matter how old the child is, whether he goes to kindergarten or graduates from school. A child will have fun in a room with bright colors, and a teenager will be able to independently work on the interior of the room.
- If you decide to use film for covering interior items, for example, chairs, tables, cabinets, chests of drawers, then the modern range of colors and patterns of this material will help you not only update the appearance of the rooms, but also completely change the style. In the photo you can see many options that can be used in your work.